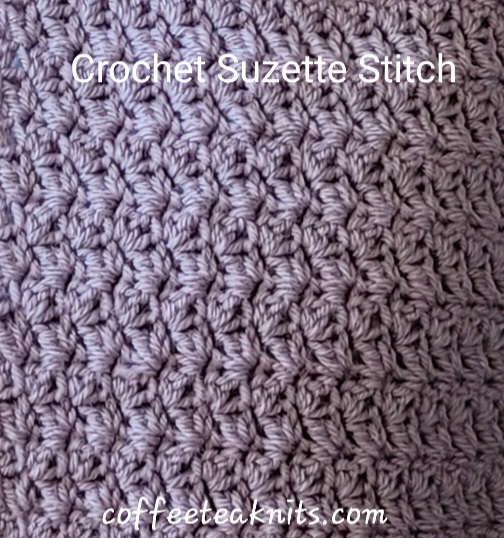
The Berry Bunches Scarf is a flat rectangular scarf in the crochet suzette stitch pattern. It’s a fun and quick project that is a combination of single and double crochet. Fringes are also added to the scarf. The yarn used for the project is Loops and Threads® Luxe Merino™ Wool Blend I purchased at Michaels. This soft and warm yarn is perfect for this time of year. The Berry Bunches Scarf, after washing, is about seven inches wide and eighty-three inches in length. The length and width can be customized, making the scarf more versatile.
The Berry Bunches Scarf Pattern (text and images for personal use only)
Materials Needed:
Yarn: Loops and Threads® Luxe Merino™ Wool Blend in the Raindrops colorway (2 skeins needed for this project)
Tapestry needle to weave in ends
Gauge: 5 stitches per inch in the crochet suzette stitch pattern
Crochet hook: US size G6 or 4.00 mm
Abbreviations:
sc: single crochet (Tutorial Series: How to Single Crochet)
dc: double crochet (Tutorial Series: How to Double Crochet)
RS: right side
WS: wrong side
[…]: pattern repeat
Crochet Skill Level: Basic level with chain stitches, single crochet and double crochet
With one strand of Loops and Threads® Luxe Merino™ Wool Blend in the Raindrops colorway and US size G6 or 4.00 mm crochet hook, make a slip knot and chain 34 stitches (Tutorial Series: How to Slip Knot; Tutorial Series: How to Crochet Chain)
Single Crochet in the back purl bump of the second chain from the hook


Row 1 (RS): sc in the purl bumps all across the row till the last stitch. In the last stitch sc, chain 1 and turn
Row 2 (WS): sc, chain 1, [skip a stitch, (sc and then dc in the next stitch)], repeat […] till last 2 stitches in the row, sc, chain 1 and turn
Repeat Row 2 for the crochet suzette stitch till desired length reached
Last Row (RS): sc all across the last row. In the last stitch, sc and cut six inches of working yarn and pull yarn the loop on the crochet hook
Adding Fringes (Optional):
Fringes were made with 4 strands (about 10 inches long) of Raindrops yarn colorway. There are several helpful video tutorials on YouTube on how to add fringes. For the Berry Bunches Scarf, nine fringes were added to each of two ends.
Trim the fringes to preferred length
Weave in the yarn, wash and block the Berry Bunches Scarf


~coffeeteaknits.com
© Coffee Tea Knits. All text and images for personal use only. All Rights Reserved.