2022

Although I had a slow start to the year in terms of my makes, there were a few projects besides the knit/crochet patterns published on this blog each month, I was able to complete.

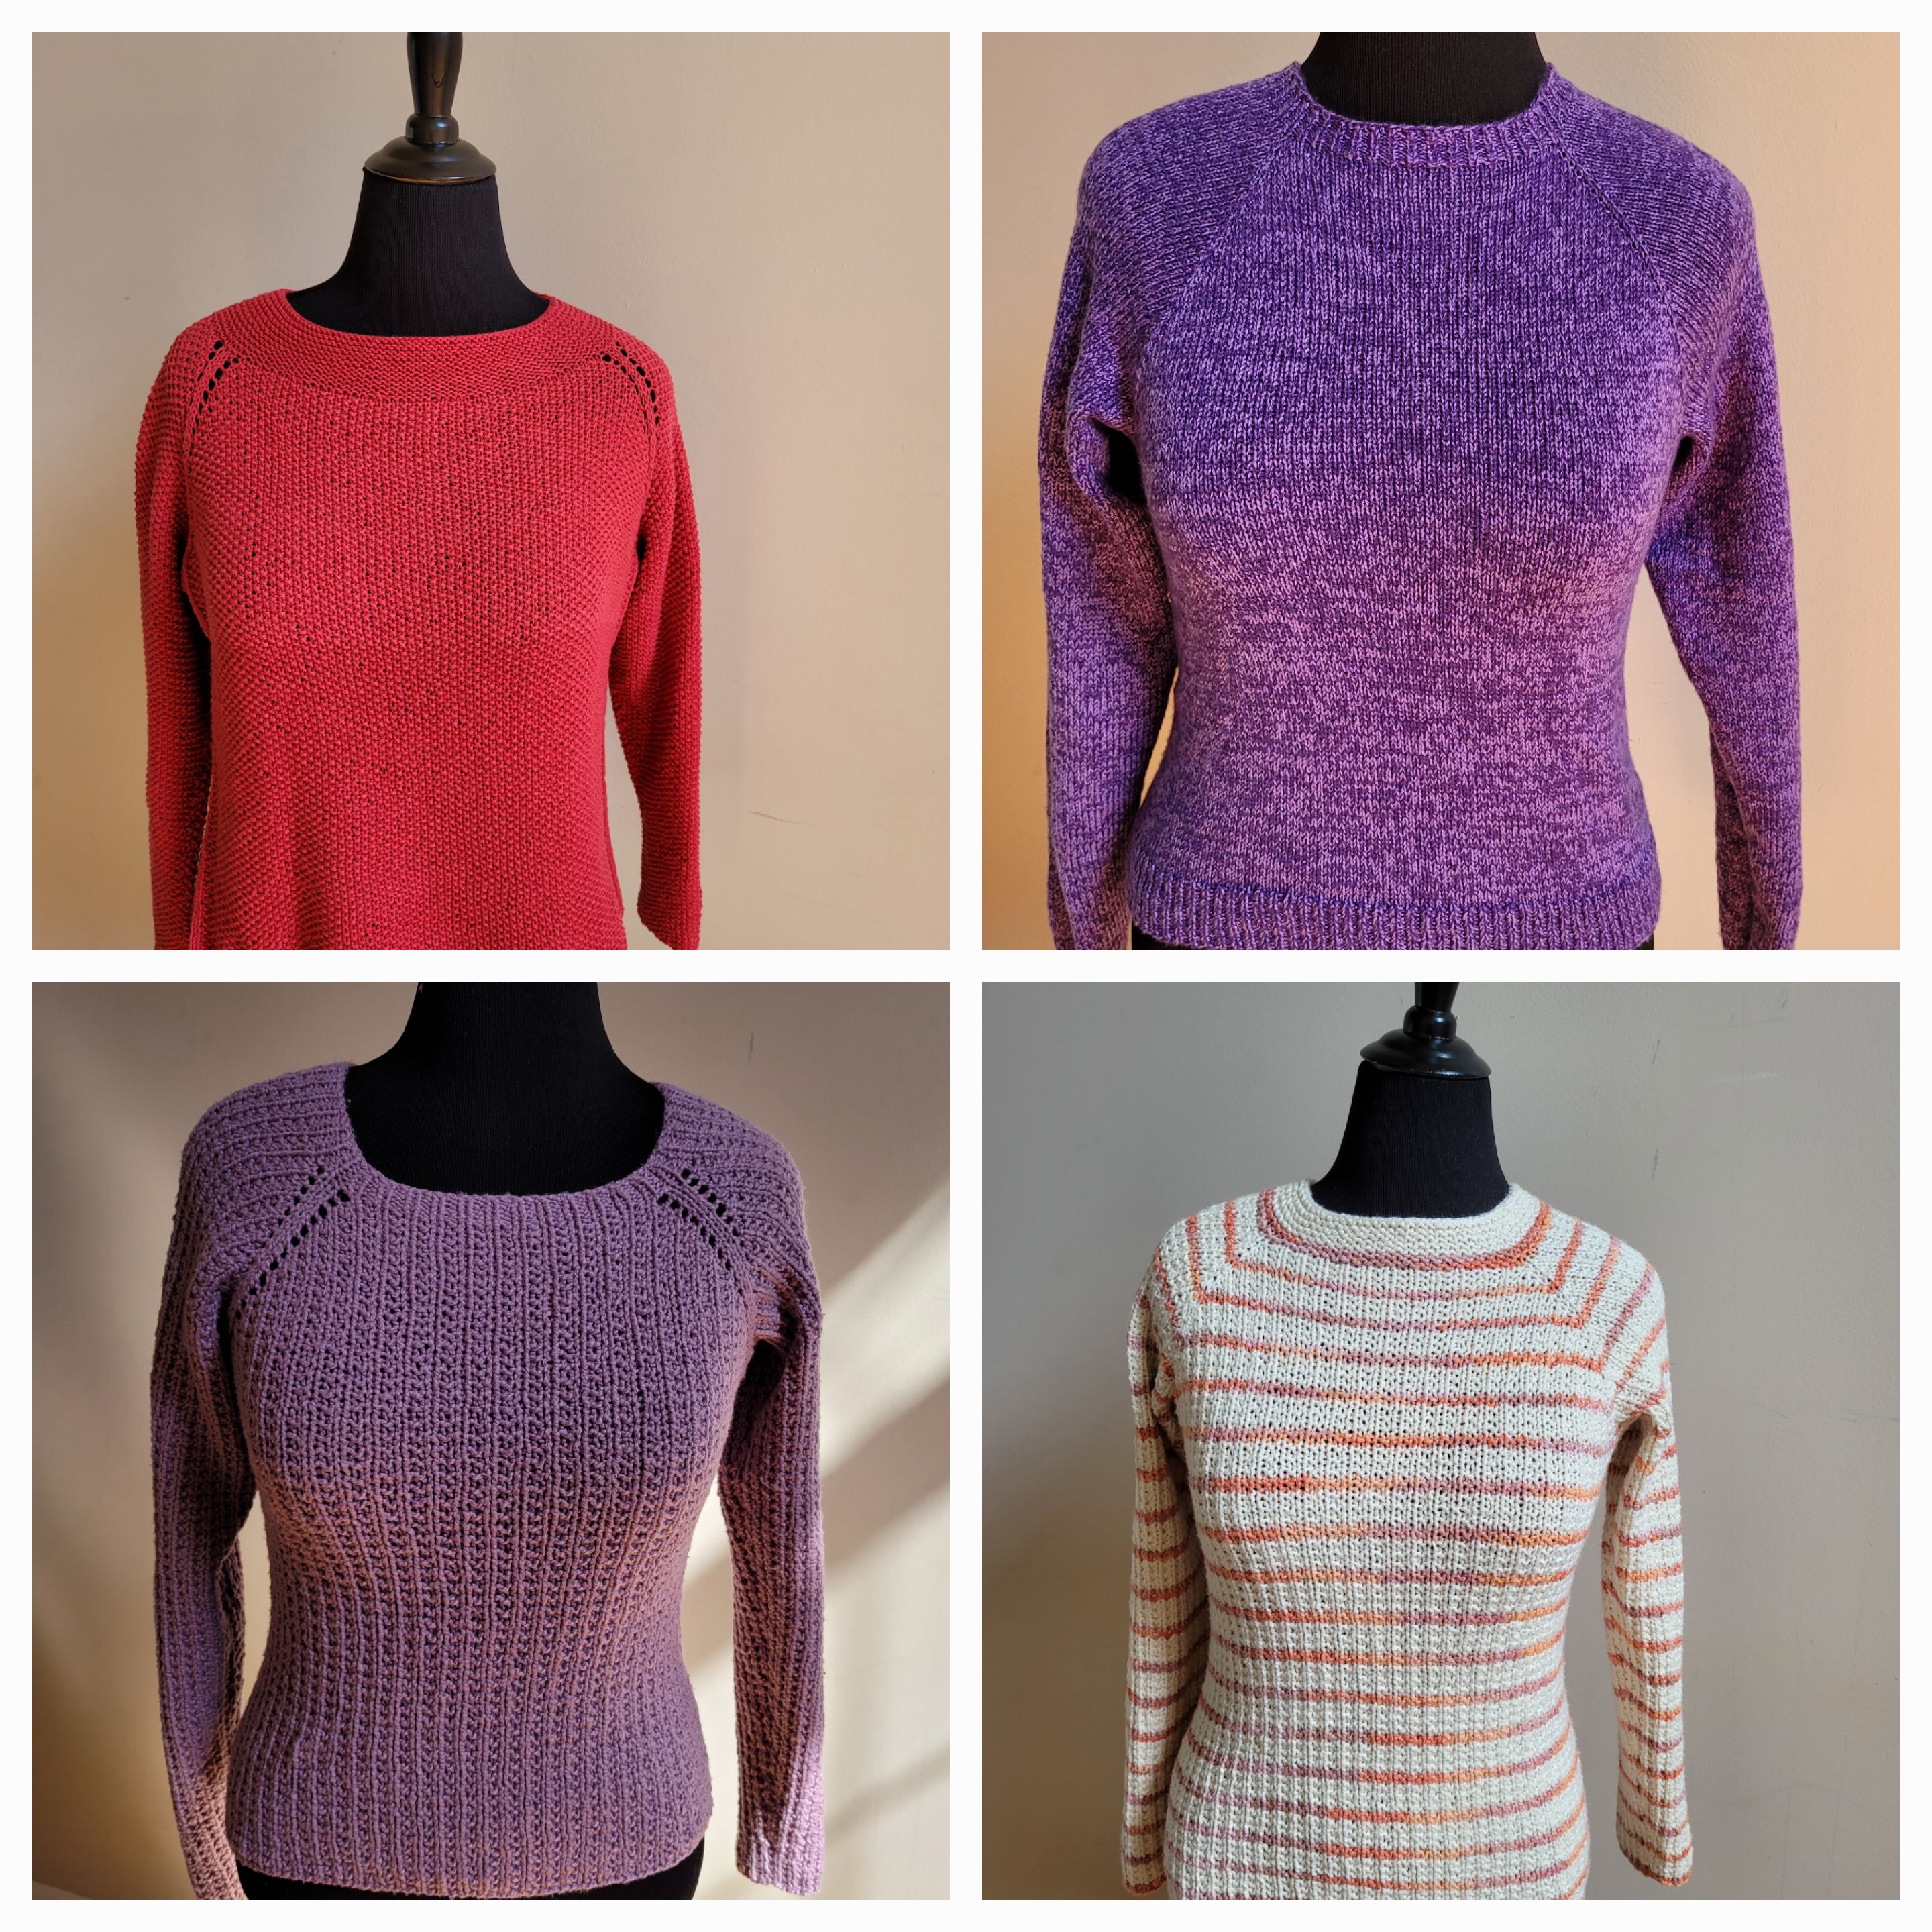
I knitted these four sweaters;

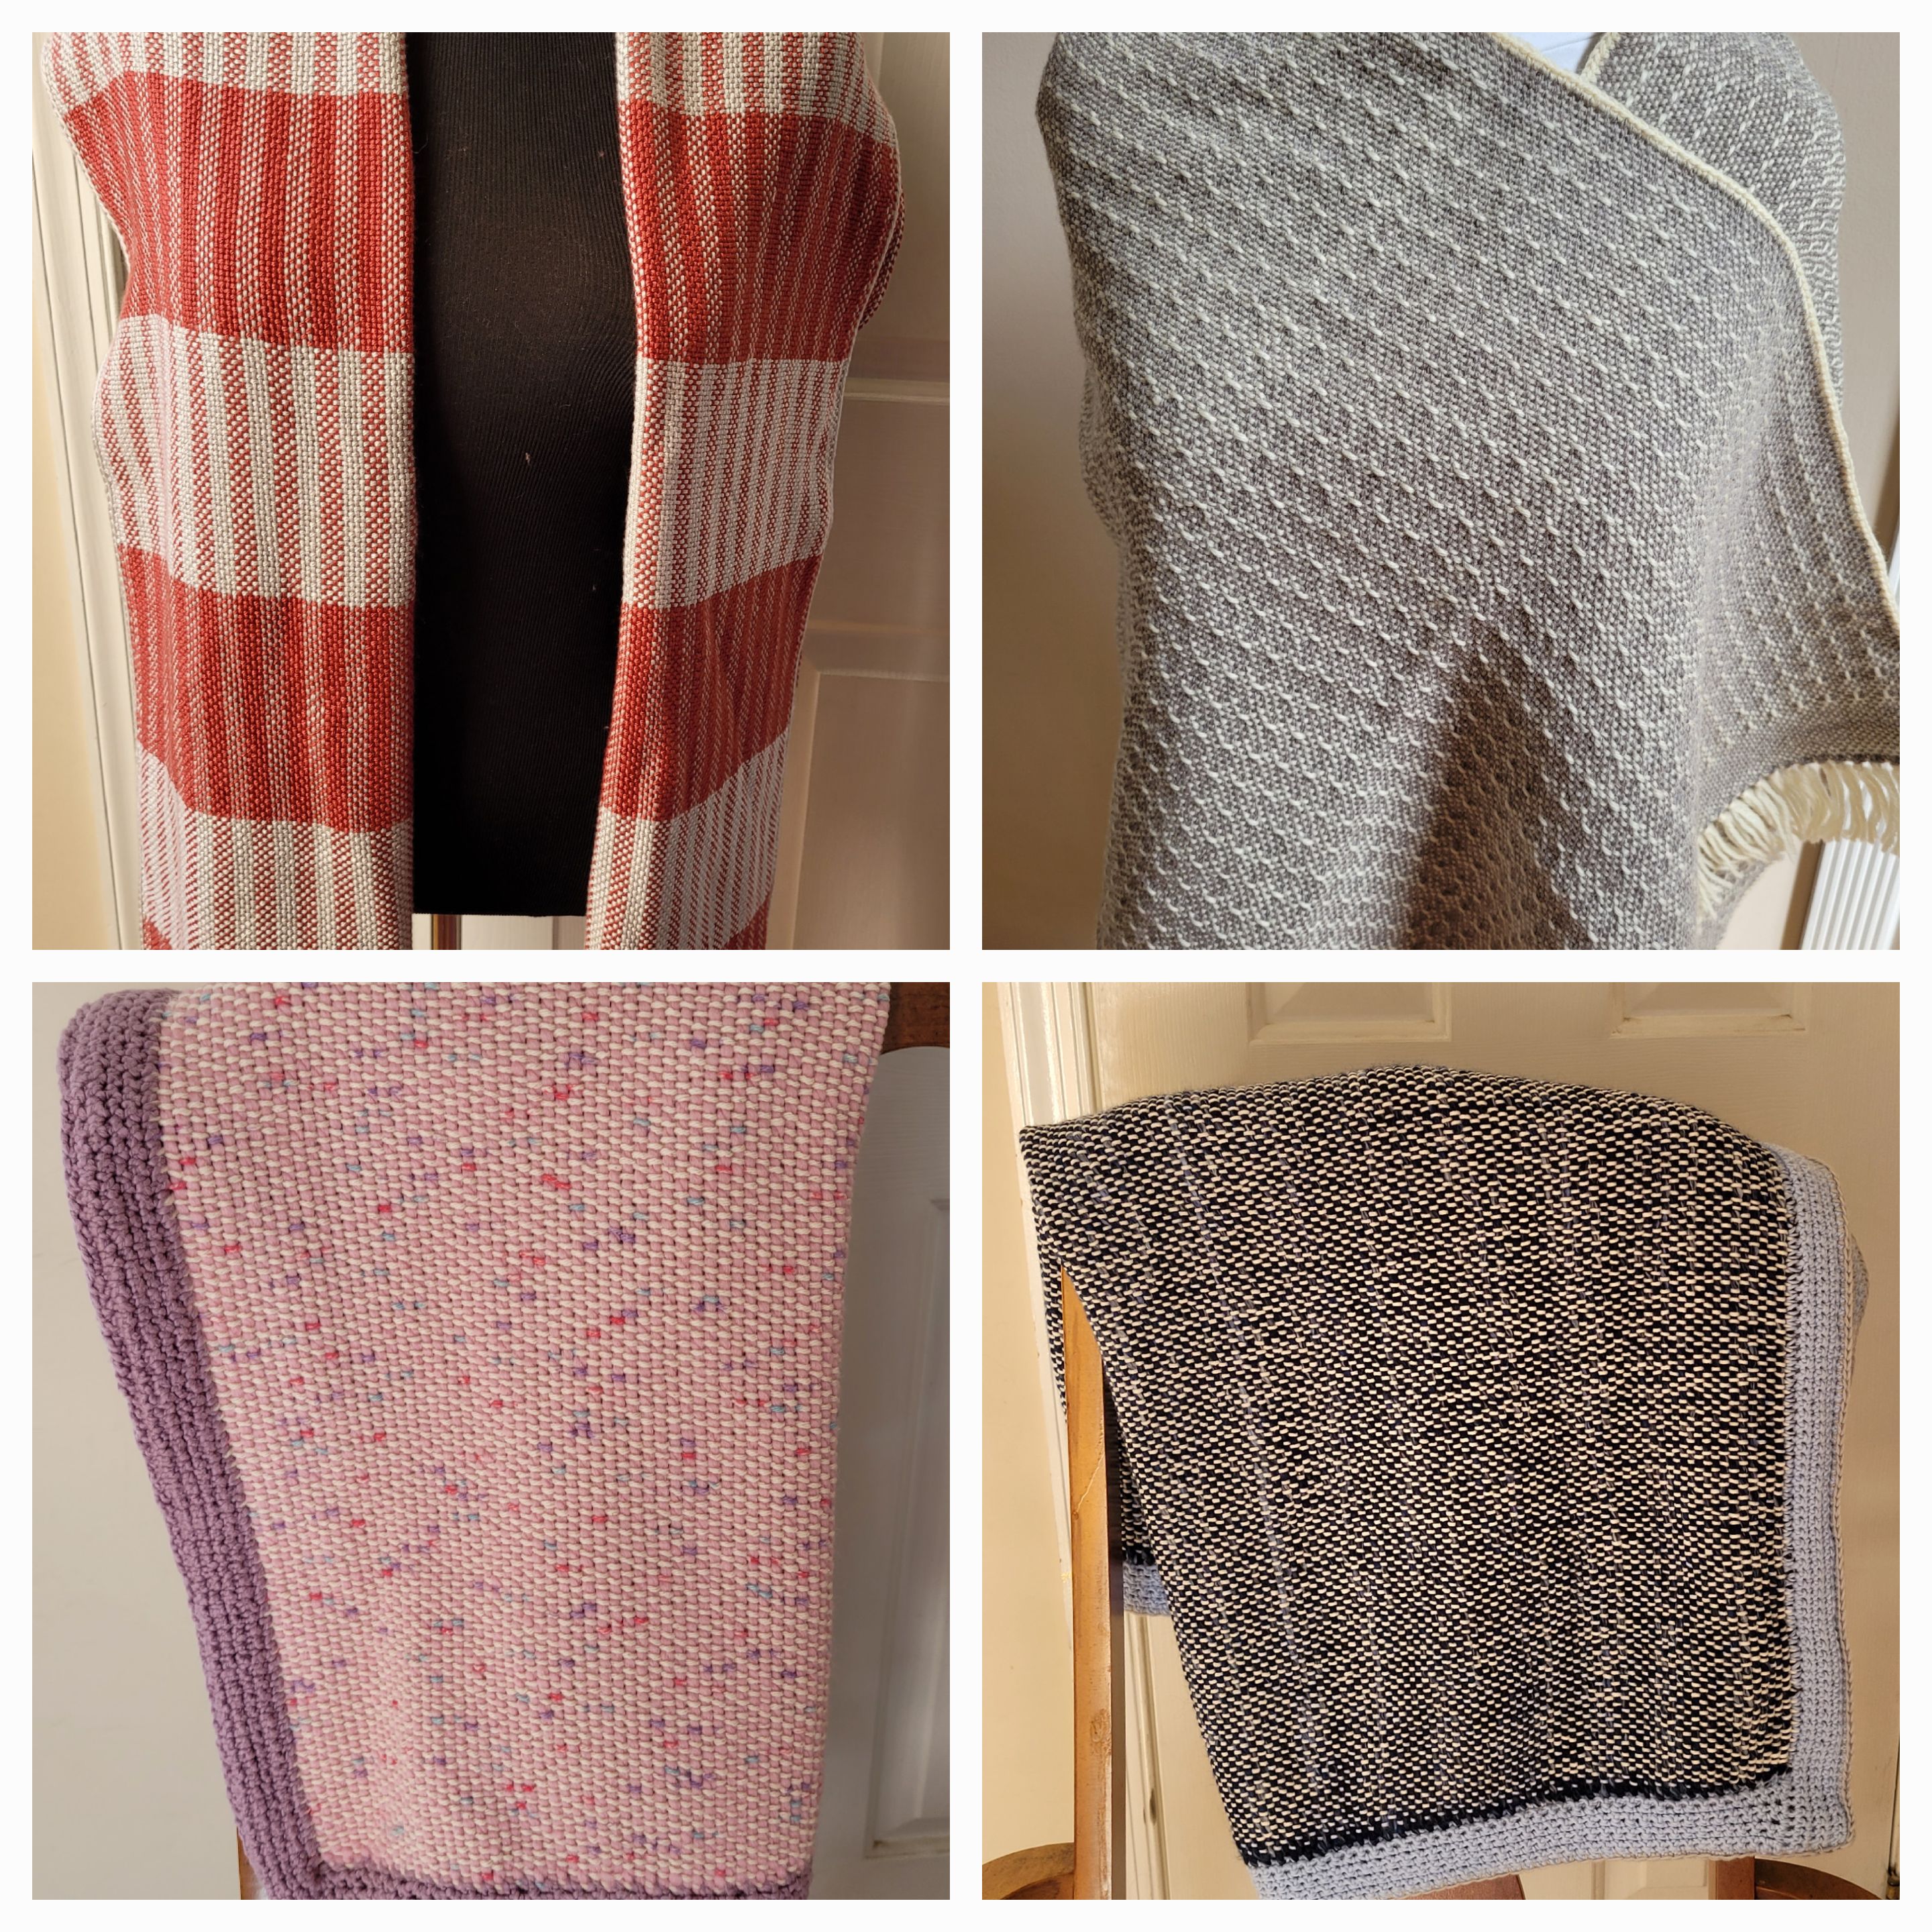
Tried some different techniques weaving these blankets and wraps on the rigid heddle loom;
And also learnt how to crochet a market bag and a pouf.

I’m grateful I was able to complete these projects despite the slow start and look forward to completing all the unfinished projects next year.


Thank you readers of this blog for all your comments and feedback. Warm greetings this holiday season.


~coffeeteaknits.com

The Daylilies Scarf Pattern

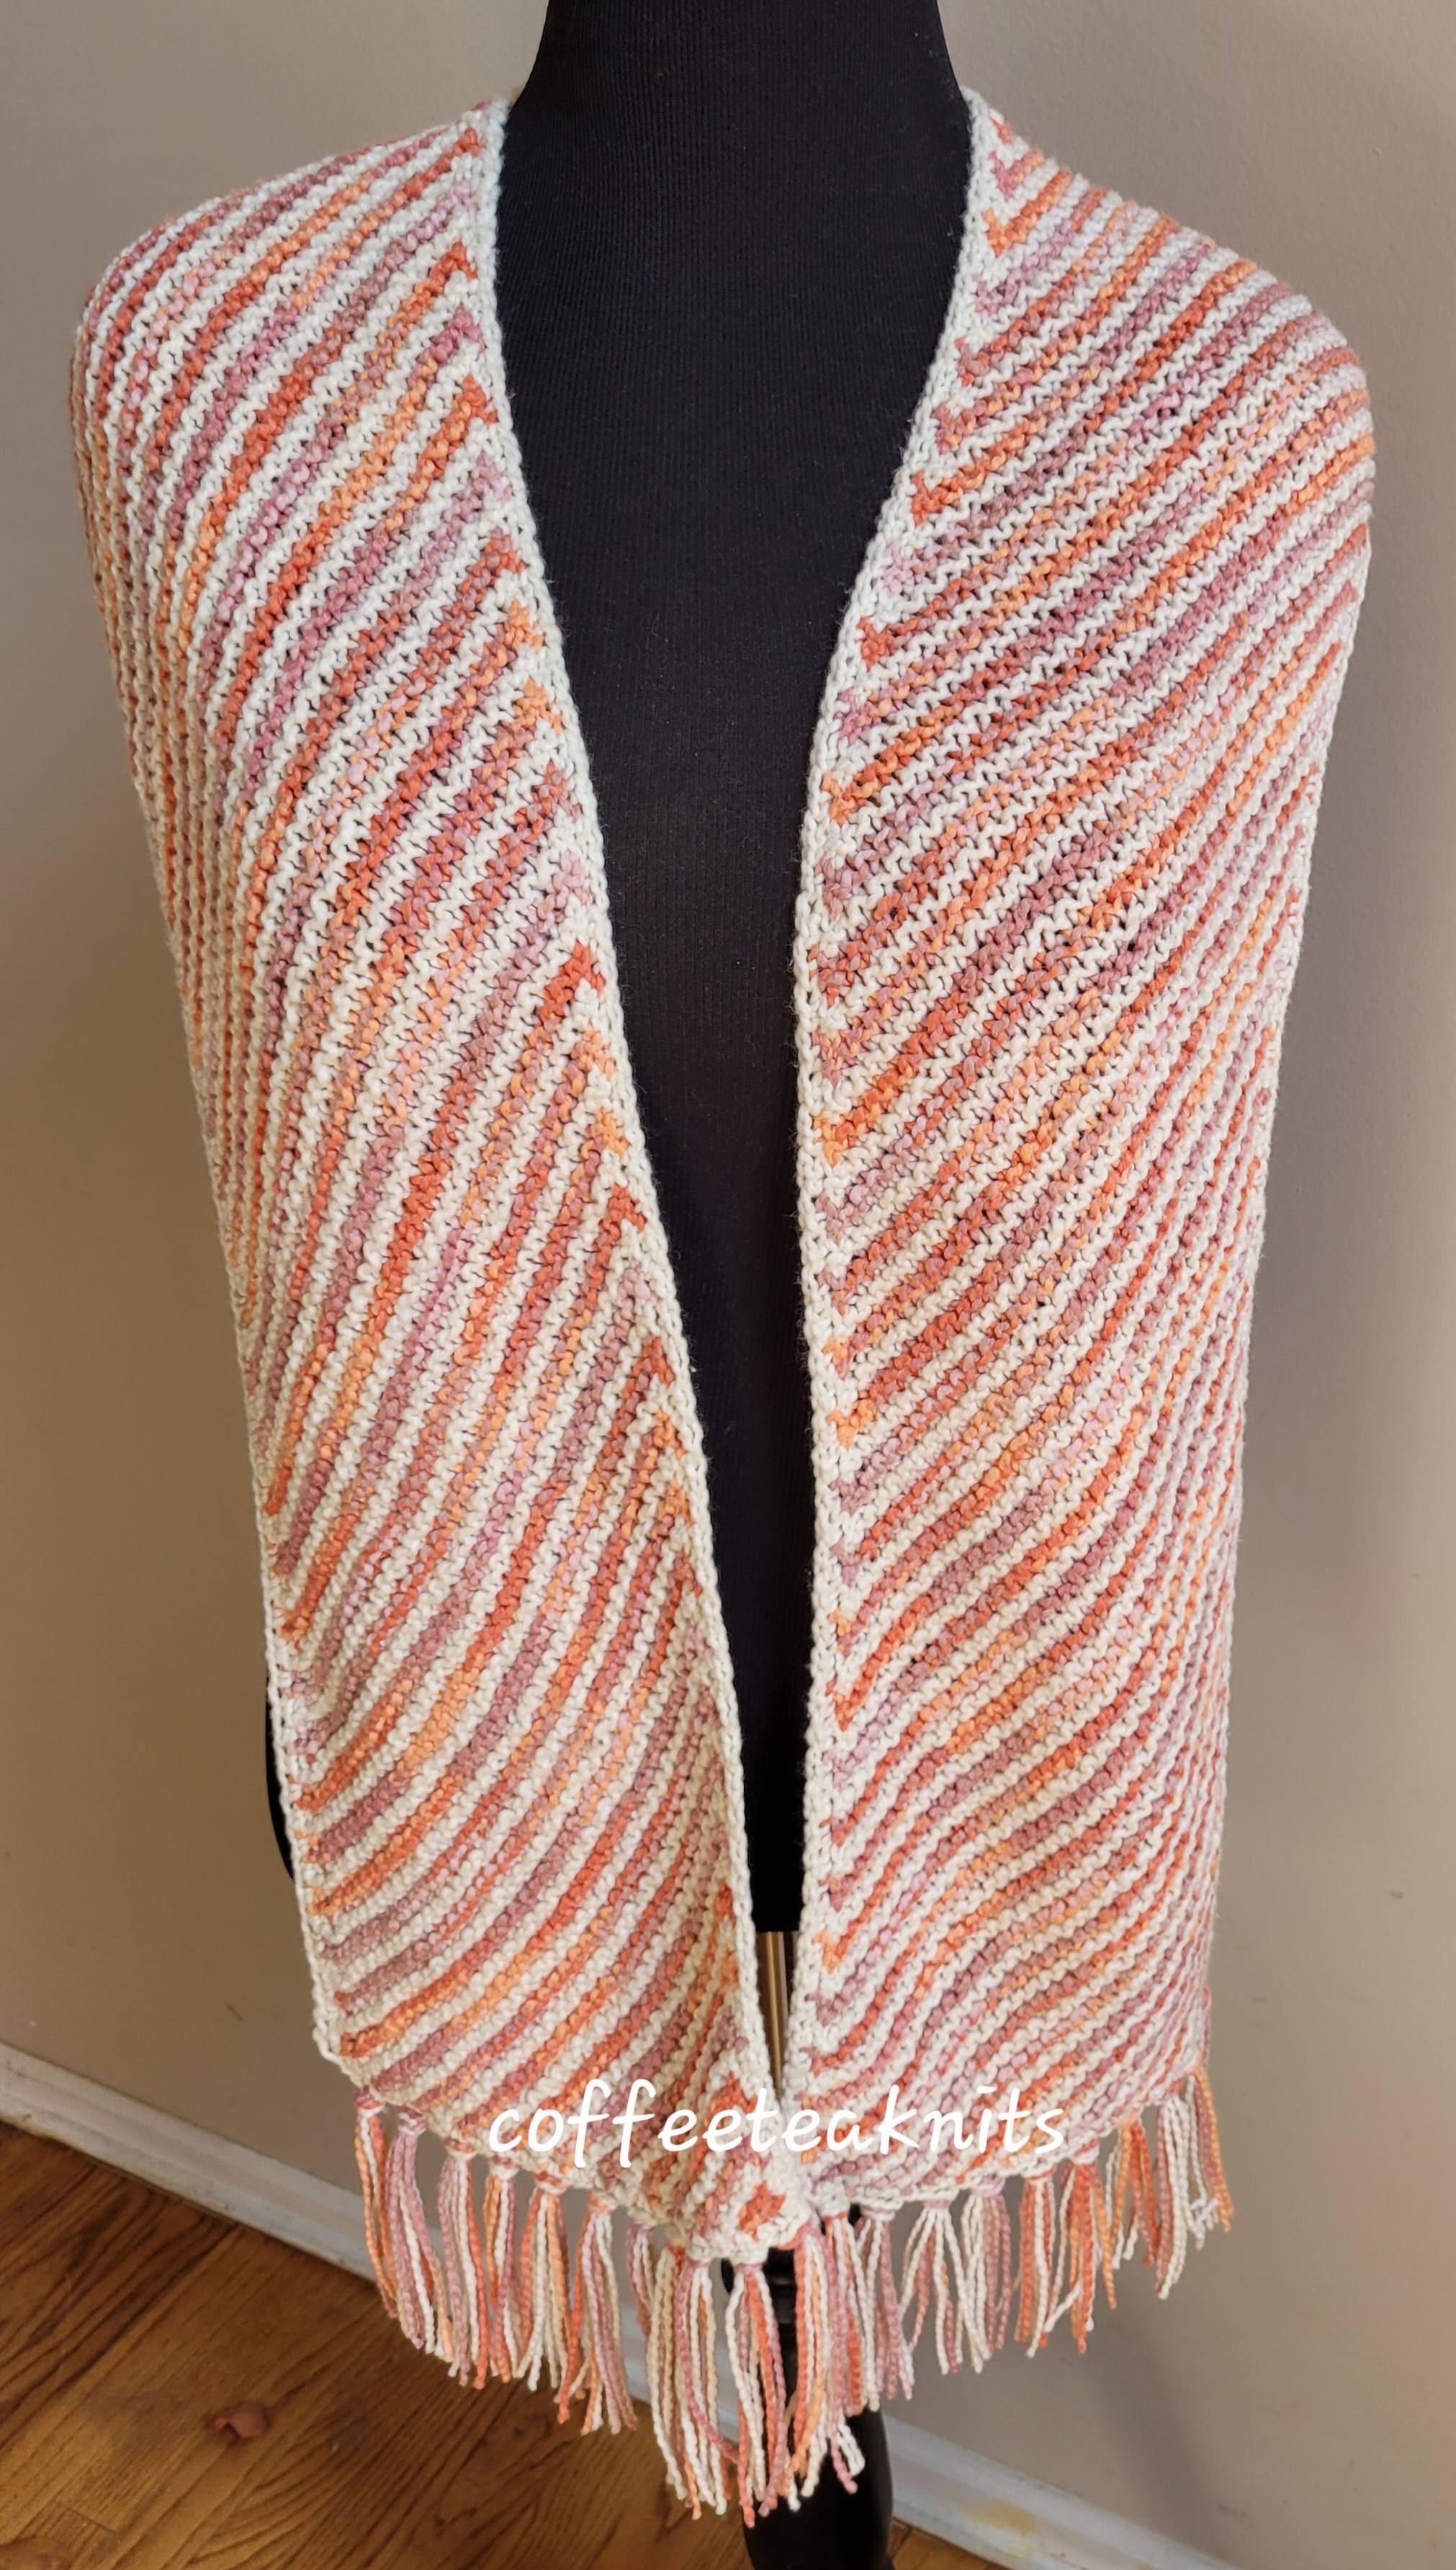
Daylilies Scarf is a rectangular scarf knit on the bias in garter stitch pattern. It is knit with 2 different colorways of Yarnspirations™ Caron® Cotton Funnel Cakes yarn I purchased this Spring at Michaels Arts and Crafts Store. I finished knitting this pullover (see below) late Spring and found the yarn soft and light and oh so enjoyable to knit with. I had enough yarn left over so I knit the Daylilies Scarf with it too. The colors of this yarn represent all things of Spring/Summer to me – the vibrant colors of daylilies and other flowers, the birds, the butterflies etc. The colors of the yarn also depict a season of much warmth and a time when nature is awake.

The Daylilies Scarf Pattern (text and images for personal use only)

Yarn: Caron® Cotton Funnel Cakes by Yarnspirations™ in Peaches and Cummulus colorways
 Knitting Needles: US #9 or 5.5 mm knitting needles
Crochet hook: US size H8 or 5.0 mm crochet hook
Gauge: 14 stitches/ 4 inches (this pattern is generic so gauge not so critical)
Abbreviations:

  • K: Knit
  • P: Purl
  • Kfb: Knit front and back (knit one stitch first in the front and then knit the same stitch in the back before slipping it off the left needle – 1 stitch increase)
  • K2tog: Knit the first two stitches together on the left needle (1 stitch decrease)
  • pm: place marker
  • rm: remove marker
  • sm: slip marker
  • wyif: with yarn in front
  • RS: right side
  • WS: wrong side
  • wyif S1: bring working yarn to the front before slipping the next stitch purlwise

Colorway1: Peaches
Colorway2: Cummulus

Cast on 1 stitch with US #9 needles and Colorway1 yarn

Increase Section:
Row 1 (RS): Colorway1 – Kfb
Row 2 (WS): Colorway1 –  K2
Row 3 (RS): Colorway2 – Kfb, Kfb
Row 4 (WS): Colorway2 – K1, pm, K2, pm, wyif S1
Row 5 (RS): Colorway1 – K1, sm, Kfb, Kfb, sm, wyif S1
Row 6 (WS): Colorway1 –  K1, sm, K4, sm, wyif S1
Row 7 (RS): Colorway2 – K1, sm, Kfb, K2, Kfb, sm, wyif S1
Row 8 (WS): Colorway2 – K1, sm, K6, sm, wyif S1
Row 9 (RS): Colorway1 – K1, sm, Kfb, knit to 1 stitch before marker, Kfb, sm, wyif S1
Row 10 (WS): Colorway1 –  K1, sm, knit to marker, sm, wyif S1
Row 11 (RS): Colorway2 – K1, sm, Kfb, knit to 1 stitch before marker, Kfb, sm, wyif S1
Row 12 (WS): Colorway2 – K1, sm, knit to marker, sm, wyif S1
Repeat Rows 9 – 12 and knit till 42 stitches ending with the WS row.

Length Increase Section:
Row 1 (RS): Colorway1 – K1, sm, Kfb, knit to 2 stitches before marker, K2tog, sm, wyif S1
Row 2 (WS): Colorway1 –  K1, sm, knit to marker, sm, wyif S1
Row 3 (RS): Colorway2 – K1, sm, Kfb, knit to 2 stitches before marker, K2tog, sm, wyif S1
Row 4 (WS): Colorway2 – K1, sm, knit to marker, sm, wyif S1
Repeat Rows 1 – 4 and knit till preferred length is reached. The Daylilies Scarf has 154 garter ridges or is about 62 inches long before blocking.

Decrease Section:
Row 1 (RS): Colorway1 – K1, sm, K2tog, knit to 2 stitches before marker, K2tog, sm, wyif S1
Row 2 (WS): Colorway1 –  K1, sm, knit to marker, sm, wyif S1
Row 3 (RS): Colorway2 – K1, sm, K2tog, knit to 2 stitches before marker, K2tog, sm, wyif S1
Row 4 (WS): Colorway2 – K1, sm, knit to marker, sm, wyif S1
Knit Rows 1 – 4 till 6 stitches left ending with WS row
Row 1 (RS): Colorway1 – K1, sm, K2tog, K2tog,sm, wyif S1
Row 2 (WS): Colorway1 –  K1, rm, K2, rm, wyif S1
Row 3 (RS): Colorway2 – K2tog, K2tog
Row 4 (WS): Colorway2 – K2
Row 5 (RS): Colorway 1 – K2tog and pull yarn through

Single Crochet Edging:
With US crochet hook H8 and yarn Colorway2 pick up and single crochet the slipped edge stitches, cast on and bind off stitches all around the the scarf.

Adding Fringes (Optional):
The fringes are evenly spaced with 2 strands of each yarn colorway. There’s a helpful video tutorial by Verypink on how to add fringes.

Weave in the ends, wash and block the Daylilies Scarf.


~coffeeteaknits.com

The Comfy Poncho Pattern

Comfy Poncho


The Comfy Poncho is knit using a cotton and nylon blend yarn making it light, drapey and comfortable to wear for those cool summer evenings, overly air conditioned places or rainy days. This poncho is child size but can easily be customized to smaller or larger sizes by increasing or decreasing the number of cast-on stitches and also by increasing or decreasing the length of the knitted pieces.

For the Comfy Poncho pattern, two identical pieces are knit flat using the seed stich pattern. These 2 knitted pieces are then joined using the zig zag crochet method. Next, the stitches are picked up for the neckband collar and knit in the garter stitch pattern. Lastly, a crocheted shell stitch border is added to the bottom edge of the Comfy Poncho.

Yarn: Crème Cotton™ Yarn by Loops & Threads™ in the Pastel Pink colorway (2 skeins or 648 yards needed for this pattern size)
Knitting Needles: US #7, US #9 (for cast on and bind off) and US #6 circular knitting needles for the neckband collar
Tapestry needle to weave in ends
Gauge: 4.25 stitches / 8 rows per inch in seed stitch pattern with US #7 knitting needles
Crochet hook: US size H8 or 5.0 mm crochet hook
Abbreviations:
K: Knit
P: Purl
RS: right side
WS: wrong side
pm: place marker
rm: remove marker
sm: slip marker
K2tog: Knit the two stitches on the left needle together
BOR marker: beginning of round marker
[…]: stitch pattern repeats
wyif S1: bring working yarn to the front before slipping the next stitch purlwise

The Comfy Poncho Pattern (text and images for personal use only)

Knitted Piece 1:
With US #9 knitting needles cast on 51 stitches.
With US #7 circular or straight needles knit the following:
Row 1 (RS): K1, pm, K1, [P1, K1] repeat […] till 1 stitch before last, pm, wyif S1
Row 2 (WS): K1, sm, K1, [P1, K1] repeat […] till the stitch marker, sm, wyif S1
Repeat Row 2 – 200 more times ending with the wrong side row.
Bind-off Row (RS row): Bind off in seed stitch pattern using US #9 knitting needles removing markers

Knitted Piece 2:
Knit another piece (Piece 2) similar to Piece 1. The Comfy Poncho knitted pieces measured 12 inches in width and a little over 25 inches in length.

Joining the 2 pieces together:
With the 2 pieces facing the right side and US size H8 crochet hook, join the cast on edge of Piece 1 to the slipped edge stitches on the left side of the cast on edge of Piece 2 using the zig zag crochet method (several tutorials on the zig zag crochet join are available on YouTube).

Join the bind off edge of Piece 2 to the slipped stitches on the right side below the bind off edge of Piece 1 using the crochet zig zag method (see image below).

Knitting the Neckband Collar:
With US #6 circular knitting needles pick up and knit 108 stitches, place a BOR stitch marker and join the round (see the image above).
Round 1: Purl all stitches, slip BOR marker
Round 2: K2, [K2tog, K19, K2tog, K4] repeat […] 2 more times, K2tog, K19, K2tog, K2, slip BOR marker – 100 stitches left on the needle
Round 3: Purl all stitches, slip BOR marker
Round 4: K8, [K2tog, K6, K2tog, K15] repeat […] 2 more times, K2tog, K6, K2tog, K7, slip BOR marker – 92 stitches left on the needle
Round 5: Purl all stitches, slip BOR marker
Round 6: K5, [K2tog, K9, K2tog, K10] repeat […] 2 more times, K2tog, K9, K2tog, K5, slip BOR marker – 84 stitches left on the needle
Round 7: Purl all stitches, slip BOR marker
Round 8: K2, [K2tog, K13, K2tog, K4] repeat […] 2 more times, K2tog, K13, K2tog, K2, slip BOR marker – 76 stitches left on the needle
Round 9: Purl all stitches, slip BOR marker
Round 10*: Bind off using the stretchy bind off method
(*Optional: Add more rounds with 8 stitch decreases as needed for a custom fit before the bind off round)

The Crochet Shell Stitch Border:
Starting at the beginning of the zig zag crochet method on the front side of the joined poncho (see image above), pick up and single crochet with US H8 crochet hook all the slipped edge stitches, cast on and bind off edge stitches at the bottom of the poncho.
At the 2 corners, do 4 single crochets in the same corner edge stitch
Next round (shell/scallop stitch border): Single crochet 5 times in the same stitch, skip 2 stitches then single crochet 5 times in the next stitch. Repeat this all throughout the bottom edge of the poncho. At the 2 corners do 7 single crochets in the same corner edge stitch. Slip stitch to the beginning stitch of the round.
Weave in the ends, wash and air dry the Comfy Poncho.


Happy Knitting!


~coffeeteaknits.com

The Reminisce Hat Pattern

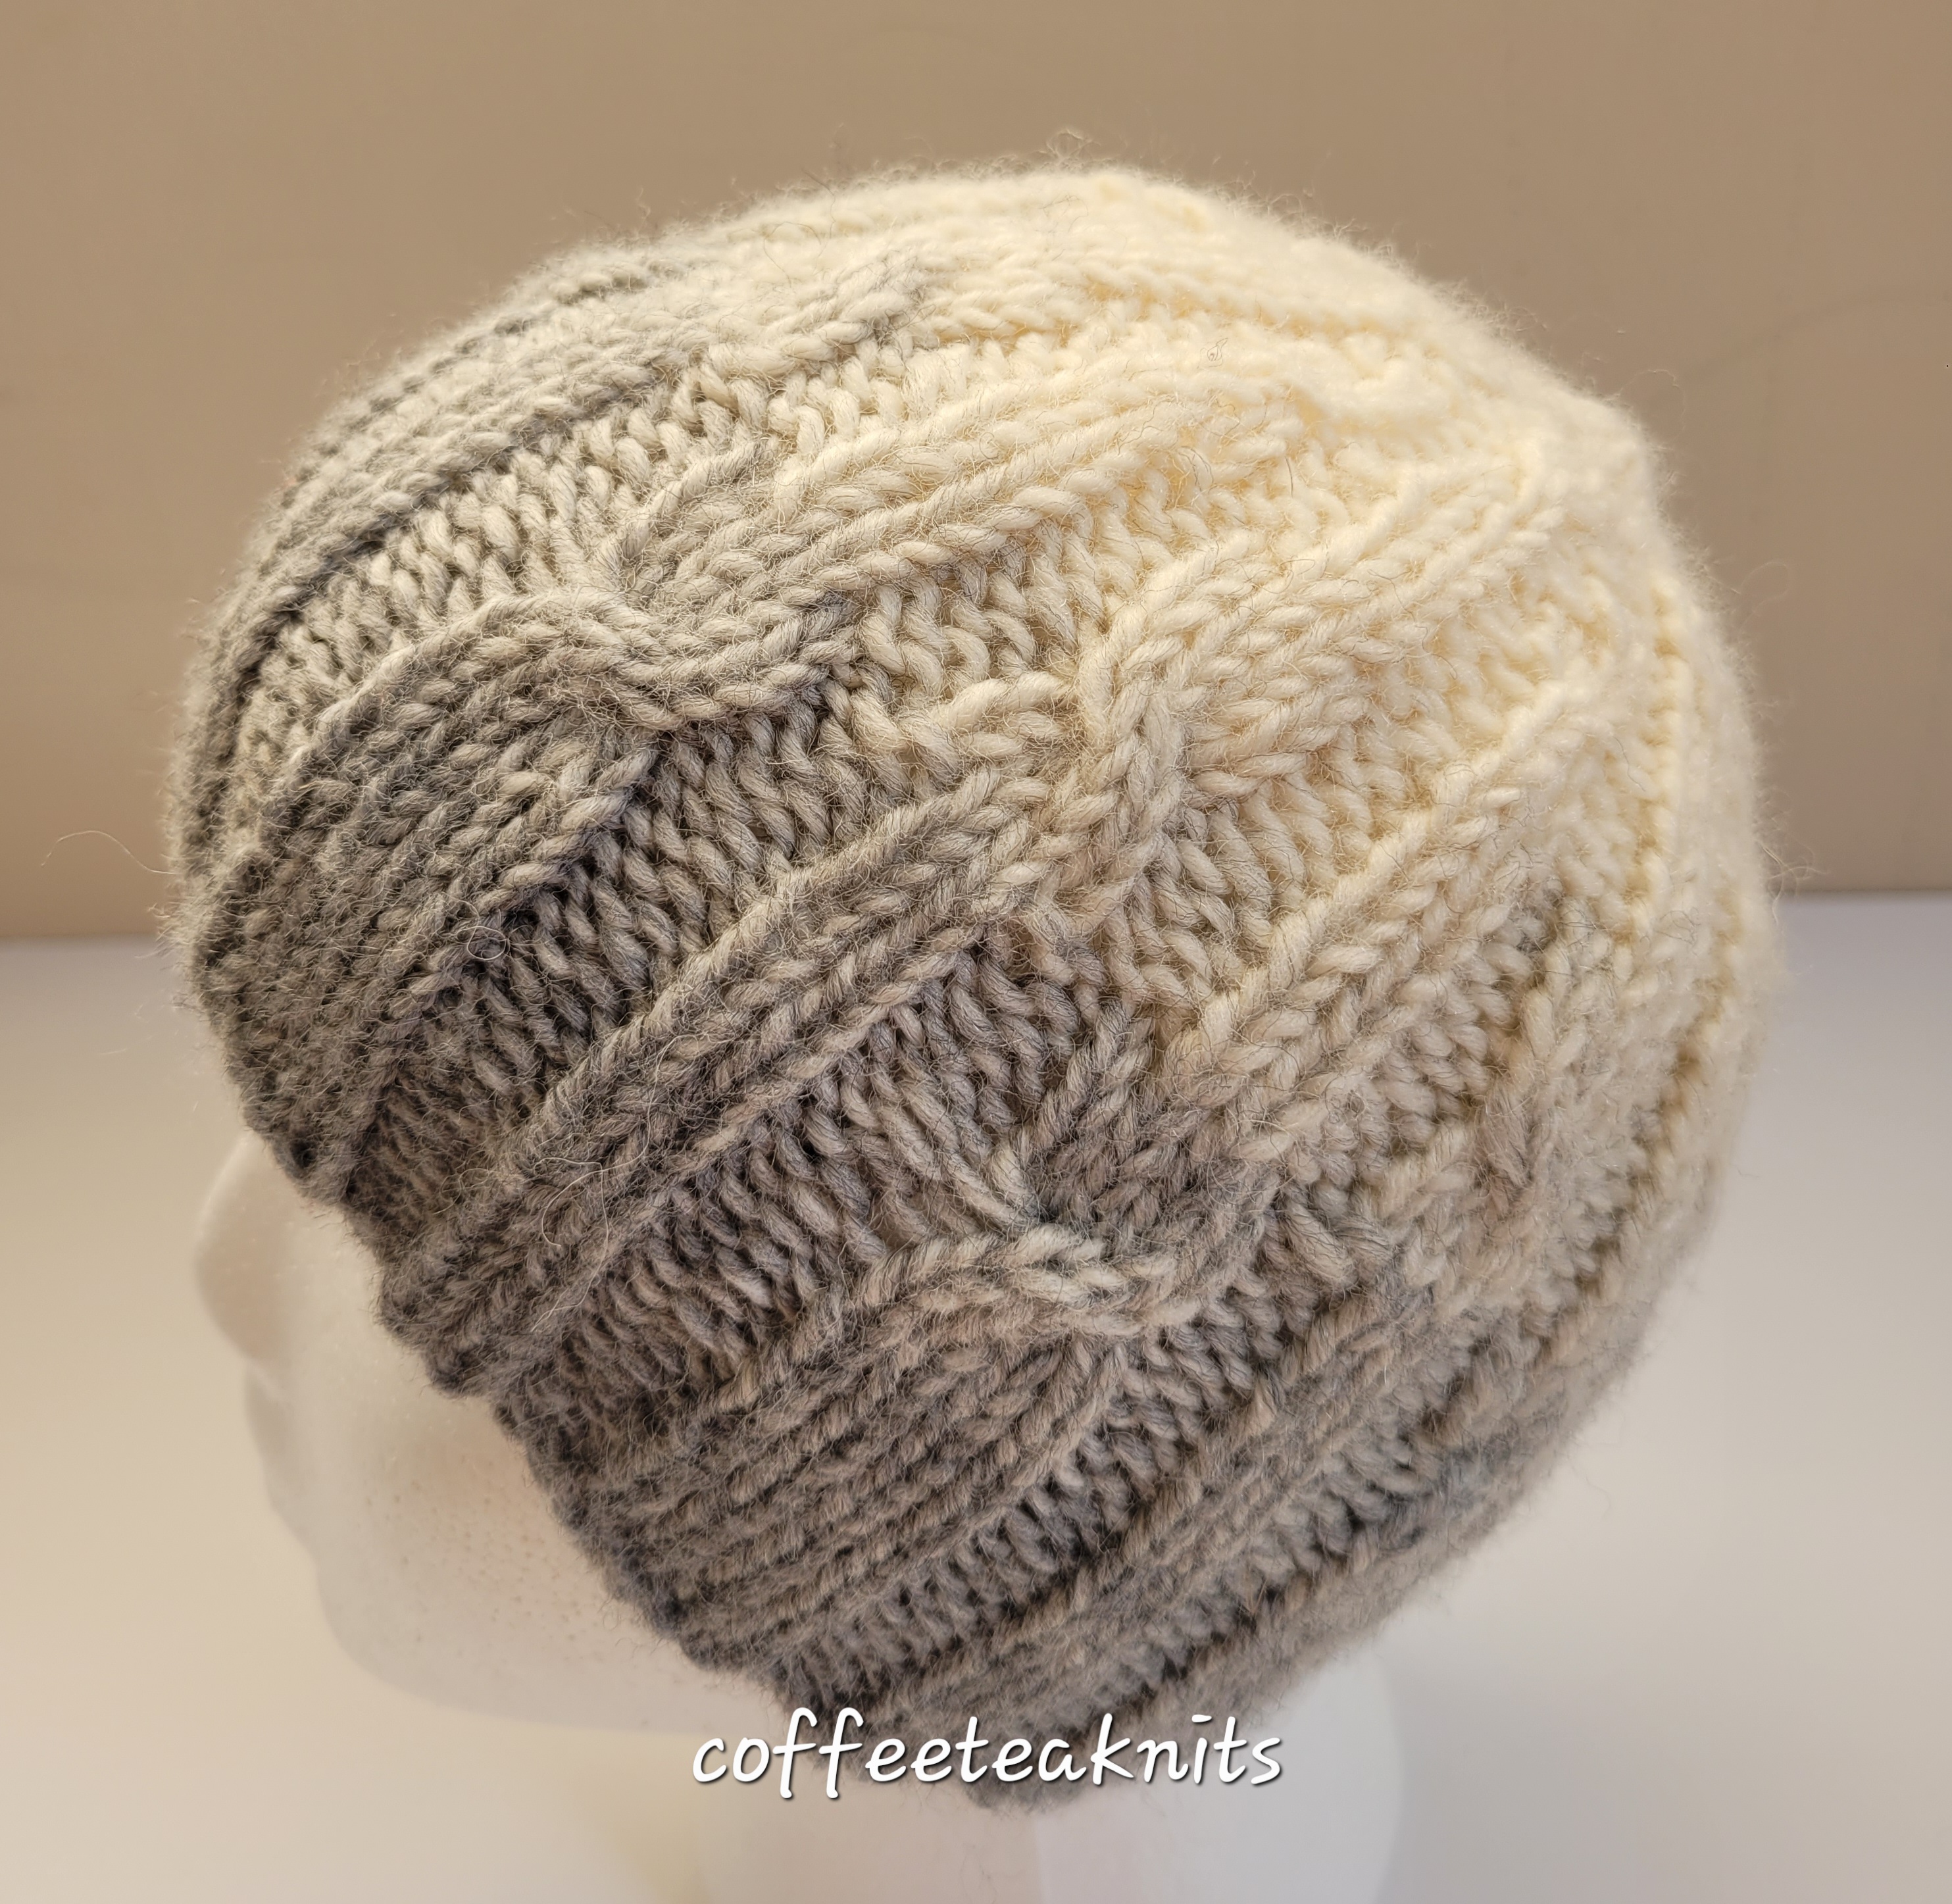
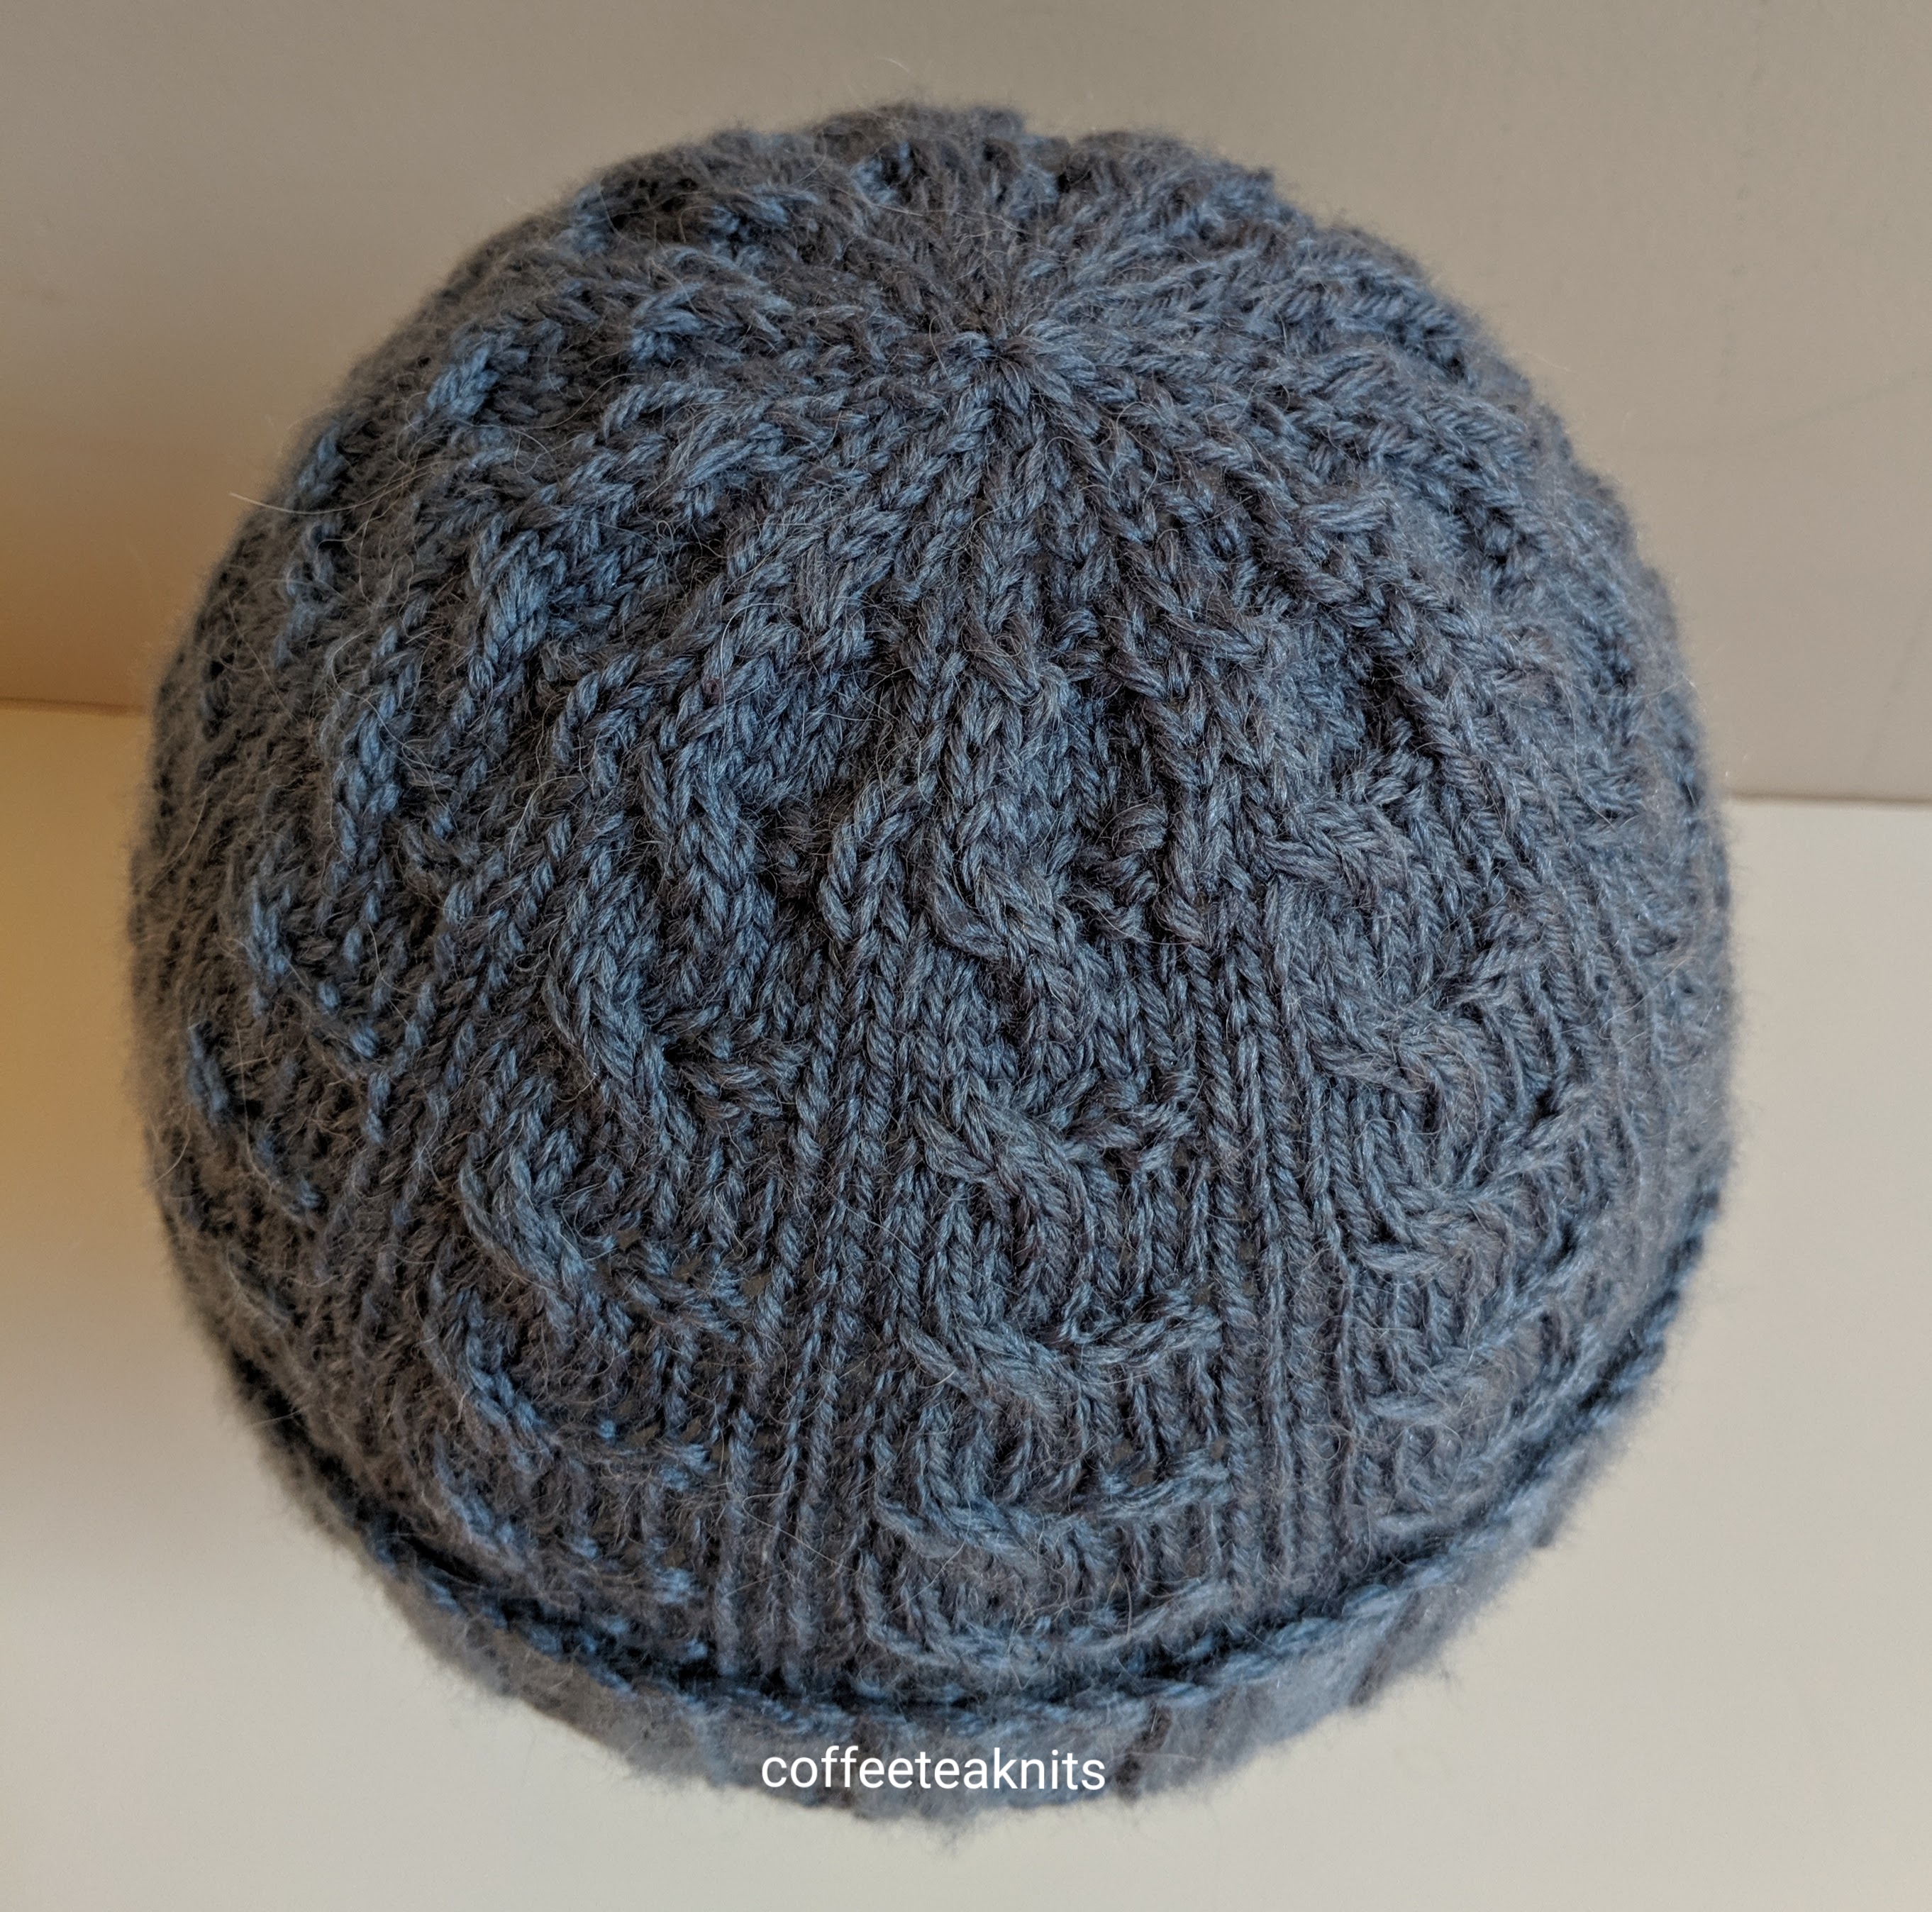
About six years ago was the first time I went to the New Jersey Sheep and Wool Festival. I remember the excitement I felt in anticipation of this event. I was a novice knitter who had not yet ventured into a yarn shop. I was amazed when I went to this festival and saw the many breeds of sheep, how their fleece is sheared, the process involved from raw fleece to yarn, alpacas, and a plethora of indie dyers, sheep farmers and yarn shop owners. It was such a wonderful experience. It was there that I purchased the fingering weight sock yarn used in the Reminisce Hat pattern. I remember I stopped at this stall because the owner was spinning fiber into yarn with a spinning wheel. She encouraged me to try spinning but I was hesitant to do so. I did however purchase her hand dyed superwash merino with nylon sock yarn. Regrettably, I have since lost the label and with it the name of the yarn shop. But I do remember her friendly personality and the lovely time I had meeting other indie dyers and crafters.

The Reminisce Hat is knit top down and in the round holding two strands of the same yarn together. Eight stitches are cast on and using the magic loop method the crown of the hat is increased to the preferred size. The body is knit in a simple stitch pattern. The hat is then completed by a double brim in stockinette stitch pattern. The first few rounds of the hat is a bit fiddly but the rest of the hat is mainly in stockinette stitch pattern with a few repeating purl stripes.

The Reminisce Hat Pattern: (text and images for personal use only)

Yarn: Fingering Weight Sock Yarn (Super wash Merino and Nylon) 100g about 400 yards
Circular Knitting Needles: US #4 (16 and 32 inches cable length)
Gauge: 5.5 stitches x 8 rows per inch
Size: Adult (23 – 24″ head circumference and about 8″ hat length)
Abbreviations:

  • K: Knit
  • P: Purl
  • Kfb: Knit front and back (knit one stitch first in the front and then knit the same stitch in the back before slipping it off the left needle – 1 stitch increase)
  • pm: place marker
  • sm: slip marker
  • BOR: beginning of round marker

With two strands of the same yarn held together, cast-on 8 stitches using the magic loop cast-on method (several tutorials available on Youtube). Divide the stitches equally (4 stitches) between the left and right sides of the US #4 circular needle (32 inches cable length)

Hat Crown Increases:

  • Round 1: Kfb all stitches
  • Round 2: Knit all stitches (16 stitches)
  • Round 3: Kfb, K2, Kfb, pm, Kfb, K2, Kfb, turn to work on stitches on the next needle, Kfb, K2, Kfb, pm, Kfb, K2, Kfb, place BOR marker
  • Round 4: Knit all stitches (24 stitches)
  • Round 5: Kfb, knit to 1 stitch before marker, Kfb, sm, Kfb, knit to 1 stitch before last, Kfb, turn to work on stitches on the next needle, Kfb, knit to 1 stitch before marker, Kfb, sm, Kfb, knit to 1 stitch before BOR marker, Kfb, slip BOR marker
  • Round 6: Knit all stitches (32 stitches)

Repeat Rounds 5 and 6 till there are 128 stitches on the knitting needle (to knit to another size just increase or decrease the number of rounds and stitches)

Change to US#4 16 inch circular knitting needles and purl one round removing all markers except the BOR marker

Hat Body:

  • Knit all stitches the next 5 rounds and then purl all stitches in the sixth round.

Repeat these 6 rounds 4 more times.

Hat Brim:

  • Round 1: Knit all stitches wrapping the waste yarn around the working yarn in the wrong side of the hat before knitting the stitches with the working yarn, slip BOR marker (see image above)
  • Knit all stitches for the next 20 rounds (or more if preferred).

Hat Double Brim Bind Off:

  • Fold the brim inside the wrong side of the hat and pick up the back of the stitch from Round 1 with the waste yarn and place it on the left needle. Remove the waste yarn and knit this Round 1 stitch together with the first stitch on the left needle. Repeat this with the next stitch and then bind off the first stitch on the right needle.
  • Repeat this till 1 stitch left on the needle. Cut the working yarn and pull through the stitch. Remove BOR marker and weave in the ends (see below)

To tighten the gap in the center, insert yarn tail with a tapestry needle through the first eight stitches and pull them tight to close the gap. 

Weave in the ends, wash and block hat


Happy Knitting!


~coffeeteaknits.com

The Knotted Dishcloth Pattern

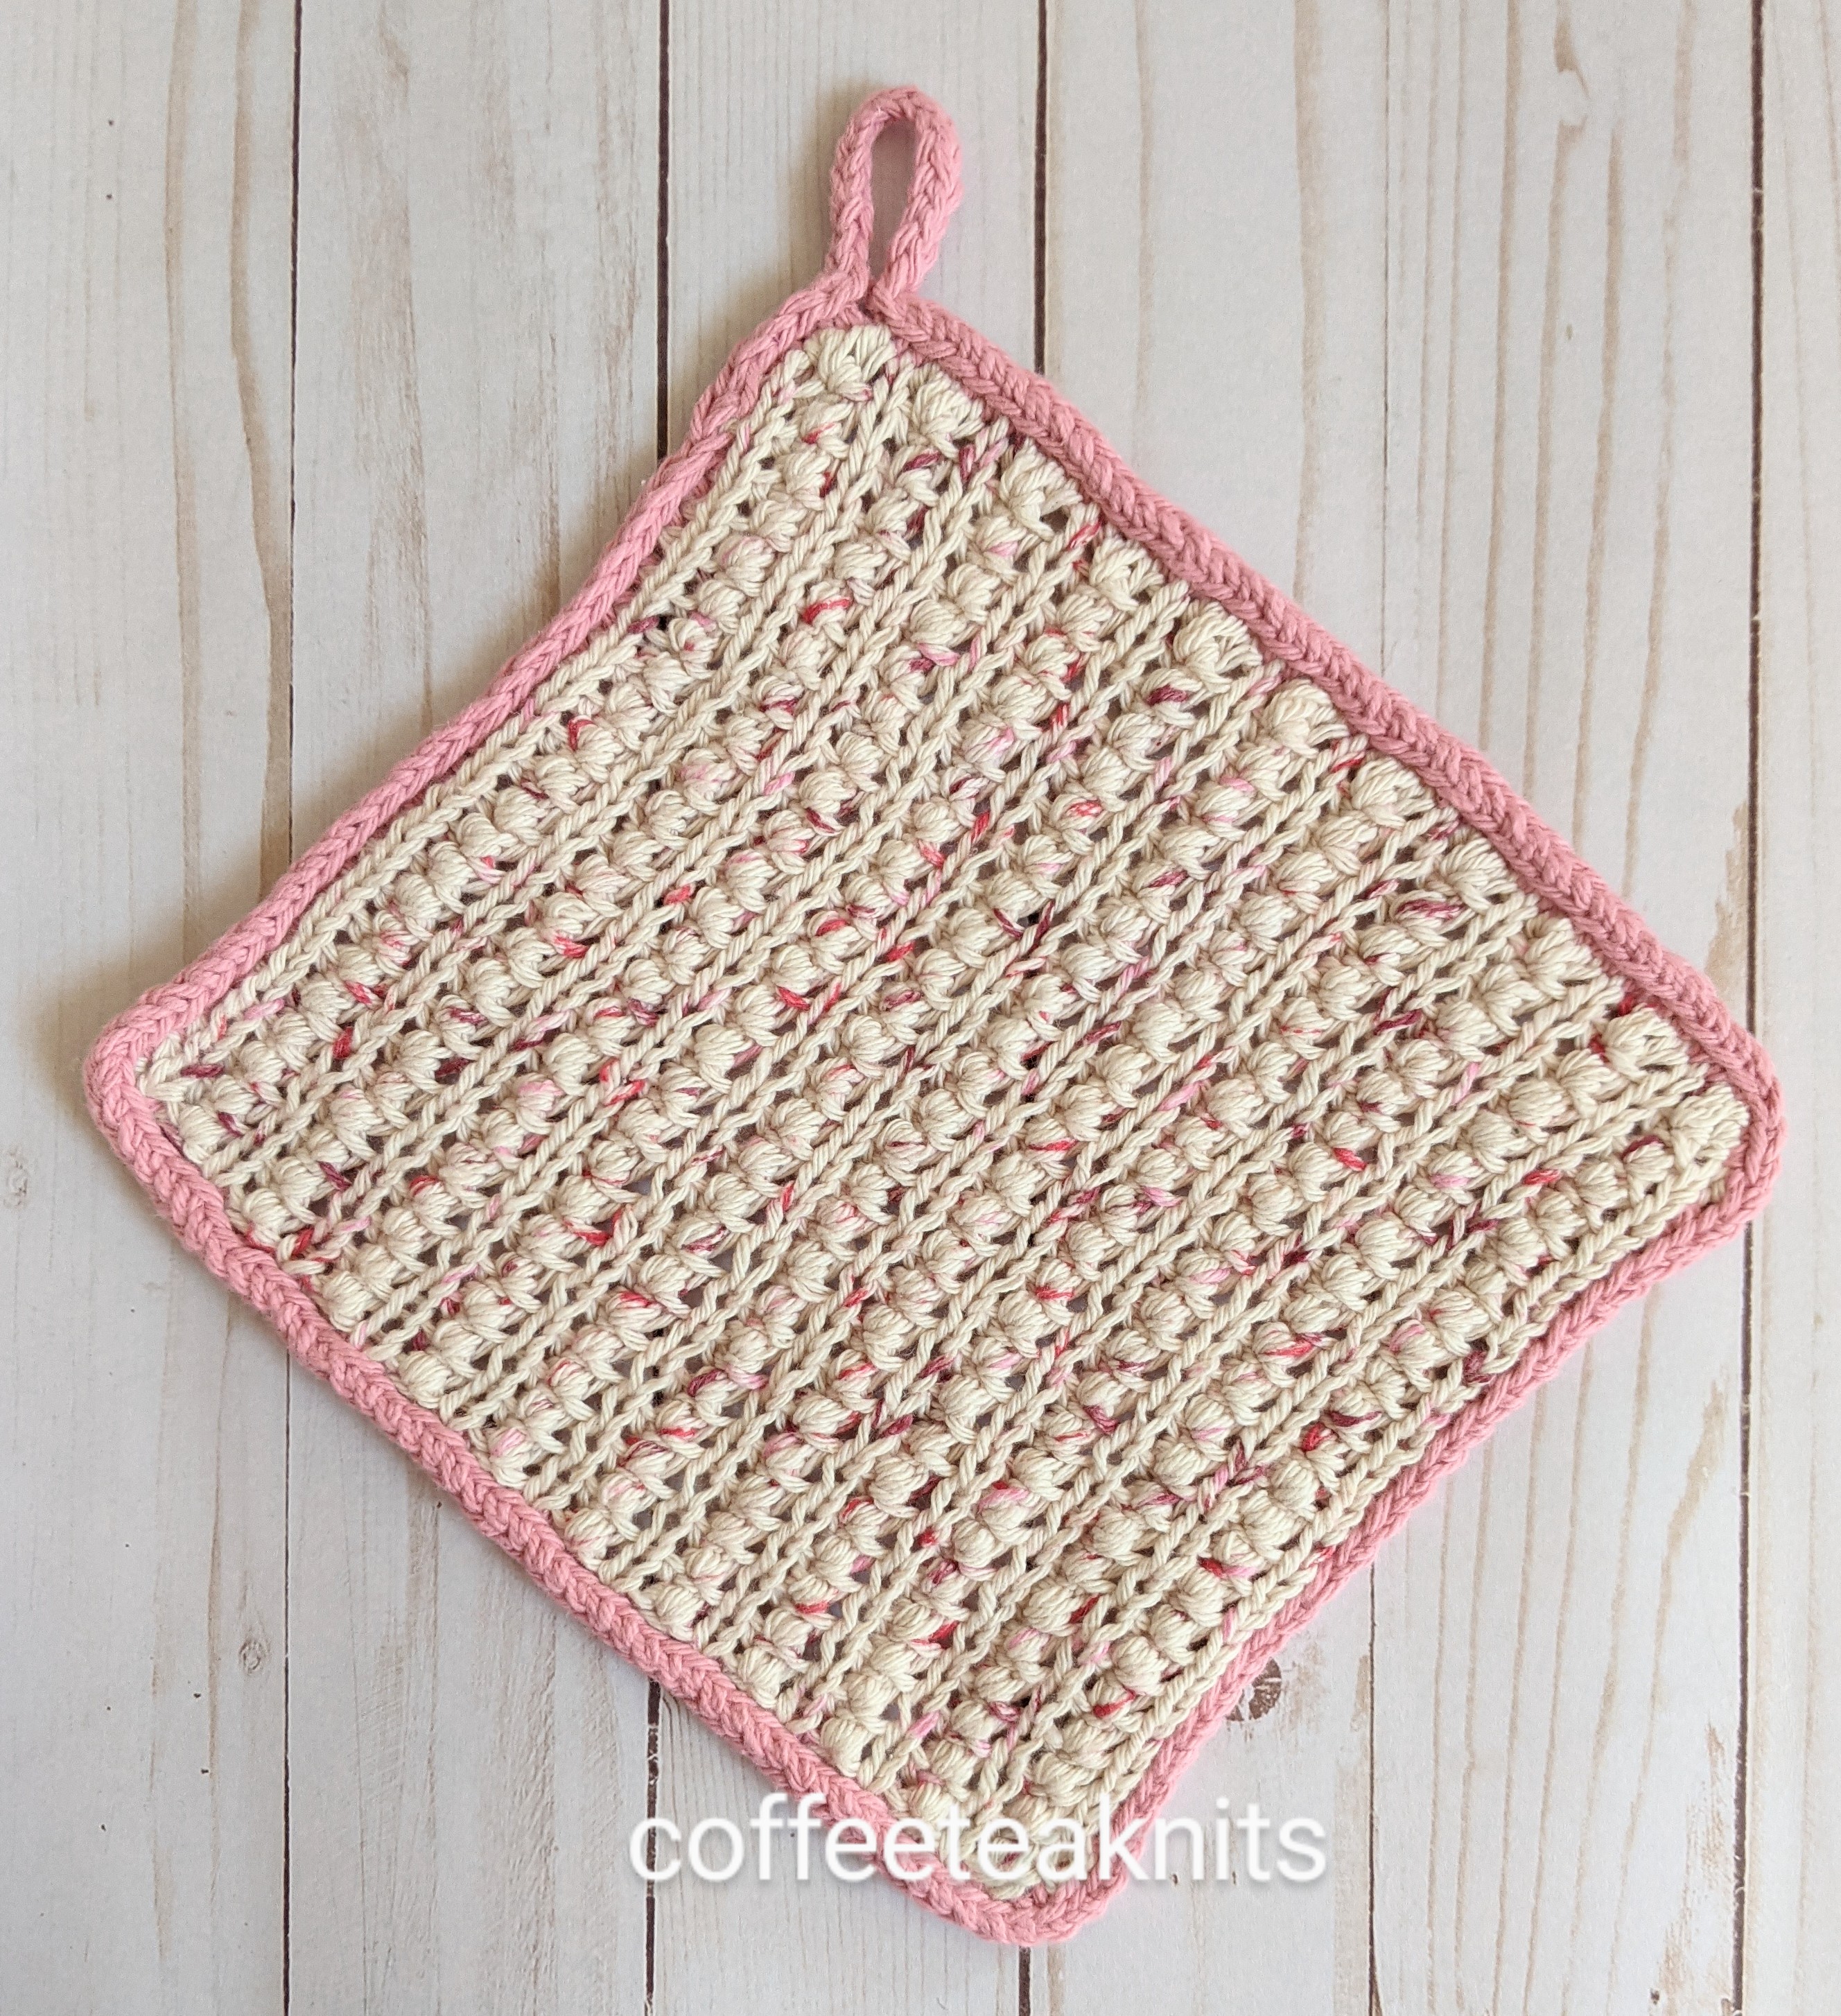
The Knotted Dishcloth
KnottedDishcloth

I have wanted to knit the knot stitch pattern ever since I came across it and also because the first post in my previous blogsite was titled “To knit or to knot”. Although this knot stitch pattern is not nålbinding/nålebinding, it is a lovely pattern that I’ve wanted to knit. Being more of a product knitter, a dishcloth with this stitch pattern seemed a perfect project for me to learn more about this knot stitch pattern.

The Knotted Dishcloth Pattern is knit flat with a two row pillared knot stitch pattern. The knots are made by purling, knitting, and then purling the same three stitches together. The edge stitches around the Knotted Dishcloth are picked up with another yarn colorway and bound off using a two stitch I-cord bind off in the round method (several tutorials available on YouTube). I like the crochet look of this stitch pattern and the dense or open lacelike fabric it creates depending on the knitting needle size. Making these knots may cause some hand fatigue if the yarn is held too tightly. By pulling out more yarn while making these knots seemed to reduce some hand fatigue for me.

Yarn: Any cotton worsted yarn. I used Premier Home® Cotton Cone Yarn Colorway: Jelly Dots and a solid color for the I-cord edging
Knitting Needles: US #7 and US #9 (for cast on and bind off only)
Gauge: Not needed for this project
Abbreviations:

  • K: Knit
  • P: Purl
  • *makeknot: Purl three stitches together, then knit the same three stitches together and then purl the three stitches together again
  • ssk: slip slip knit (slip 2 stitches to right hand needle then insert the left needle in front of the two slipped stitches and knit them together
  • pm: place marker
  • sm: slip marker
  • wyif S1: with yarn in front slip one stitch purlwise
  • RS: right side
  • WS: wrong side
  • […]: stitch pattern repeats
  •  

The Knotted Dishcloth Pattern (text and images for personal use only):

Loosely cast on 47 stitches using the long tail cast on with US #9 knitting needles

With US #7 knitting needles knit the following pillared knot stich pattern

  • Row 1 (RS): K1, pm, K1, [*makeknot, K1] repeat […] till 1 stitch before last, pm, wyif S1
  • Row 2 (WS): K1, sm, purl to marker, sm, wyif S1
  • Row 3 (RS): K1, sm, K1, [*makeknot, K1] repeat […] till 1 stitch before last, sm, wyif S1
  • Row 4 (WS): K1, sm, purl to marker, sm, wyif S1

Repeat rows 3 and 4 twenty more times and then bind off loosely in pattern with US #9 knitting needles in the last row (WS)

2 stitch I-cord in the round bind off edging:

  • Starting from top left corner of the dishcloth, pick up stitches all around the dishcloth with US #7 knitting needles. Yarn over at each corner for a rounded corner edge.
  • Knit the first two stitches, return the two stitches to the left hand needle knitwise.
  • Knit the first stitch on the left needle, then ssk the next two stitches. Return the two stitches back to the left hand needle. Repeat this till 4 stitches remain on the left hand needle. This will be around the top left corner of the knitted piece.
  • For the hanging loop (optional) knit a 2 stitch I-cord fifteen times then ssk to the same bottom stitch and continue with I-cord in the round till last 2 stitches on the right hand needle.
  • Graft the two stitches to the beginning two I-cord stitches (several tutorials on this are available on YouTube)

Weave in ends, wash and block the dishcloth


Enjoy knitting this knot stitch pattern!


~coffeeteaknits.com