The Berry Bunches Scarf is a flat rectangular scarf in the crochet suzette stitch pattern. It’s a fun and quick project that is a combination of single and double crochet. Fringes are also added to the scarf. The yarn used for the project is Loops and Threads® Luxe Merino™ Wool Blend I purchased at Michaels. This soft and warm yarn is perfect for this time of year. The Berry Bunches Scarf, after washing, is about seven inches wide and eighty-three inches in length. The length and width can be customized, making the scarf more versatile.
Advertisements
The Berry Bunches Scarf Pattern (text and images for personal use only)
Materials Needed: Yarn: Loops and Threads® Luxe Merino™ Wool Blend in the Raindrops colorway (2 skeins needed for this project) Tapestry needle to weave in ends Gauge: 5 stitches per inch in the crochet suzette stitch pattern Crochet hook: US size G6 or 4.00 mm
Advertisements
PLEASE SUBSCRIBE FOR THE FREE PATTERN. THANK YOU
Subscribe to continue reading
Subscribe to get access to the rest of this post and other subscriber-only content.
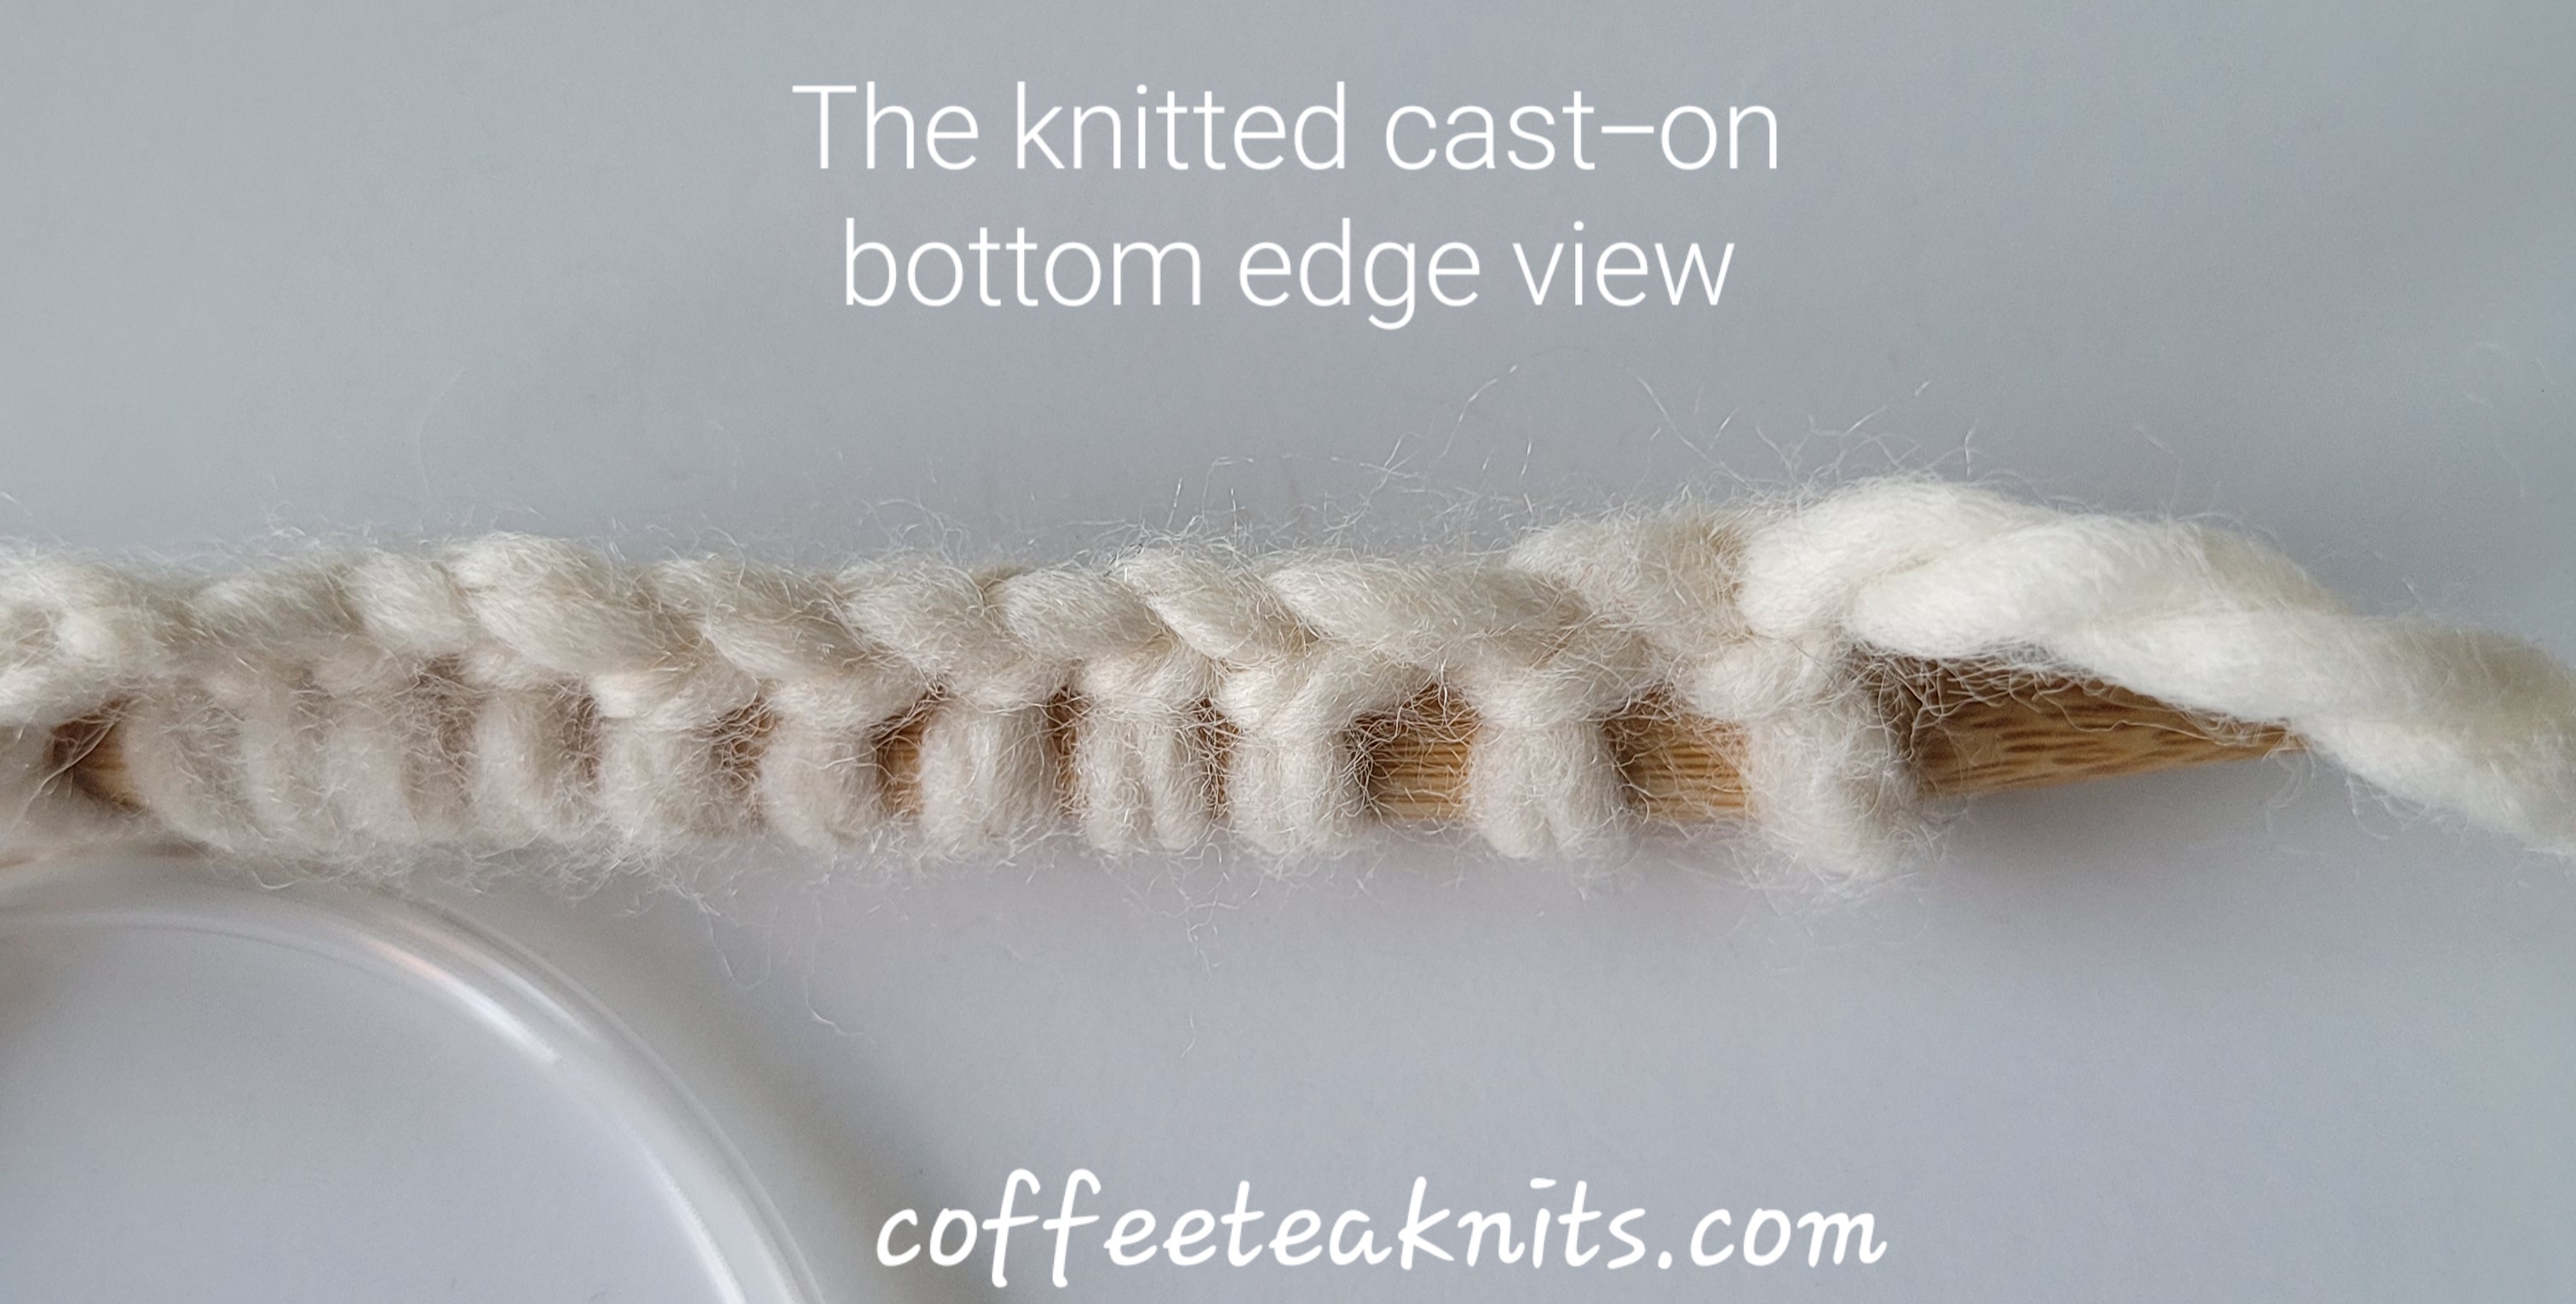
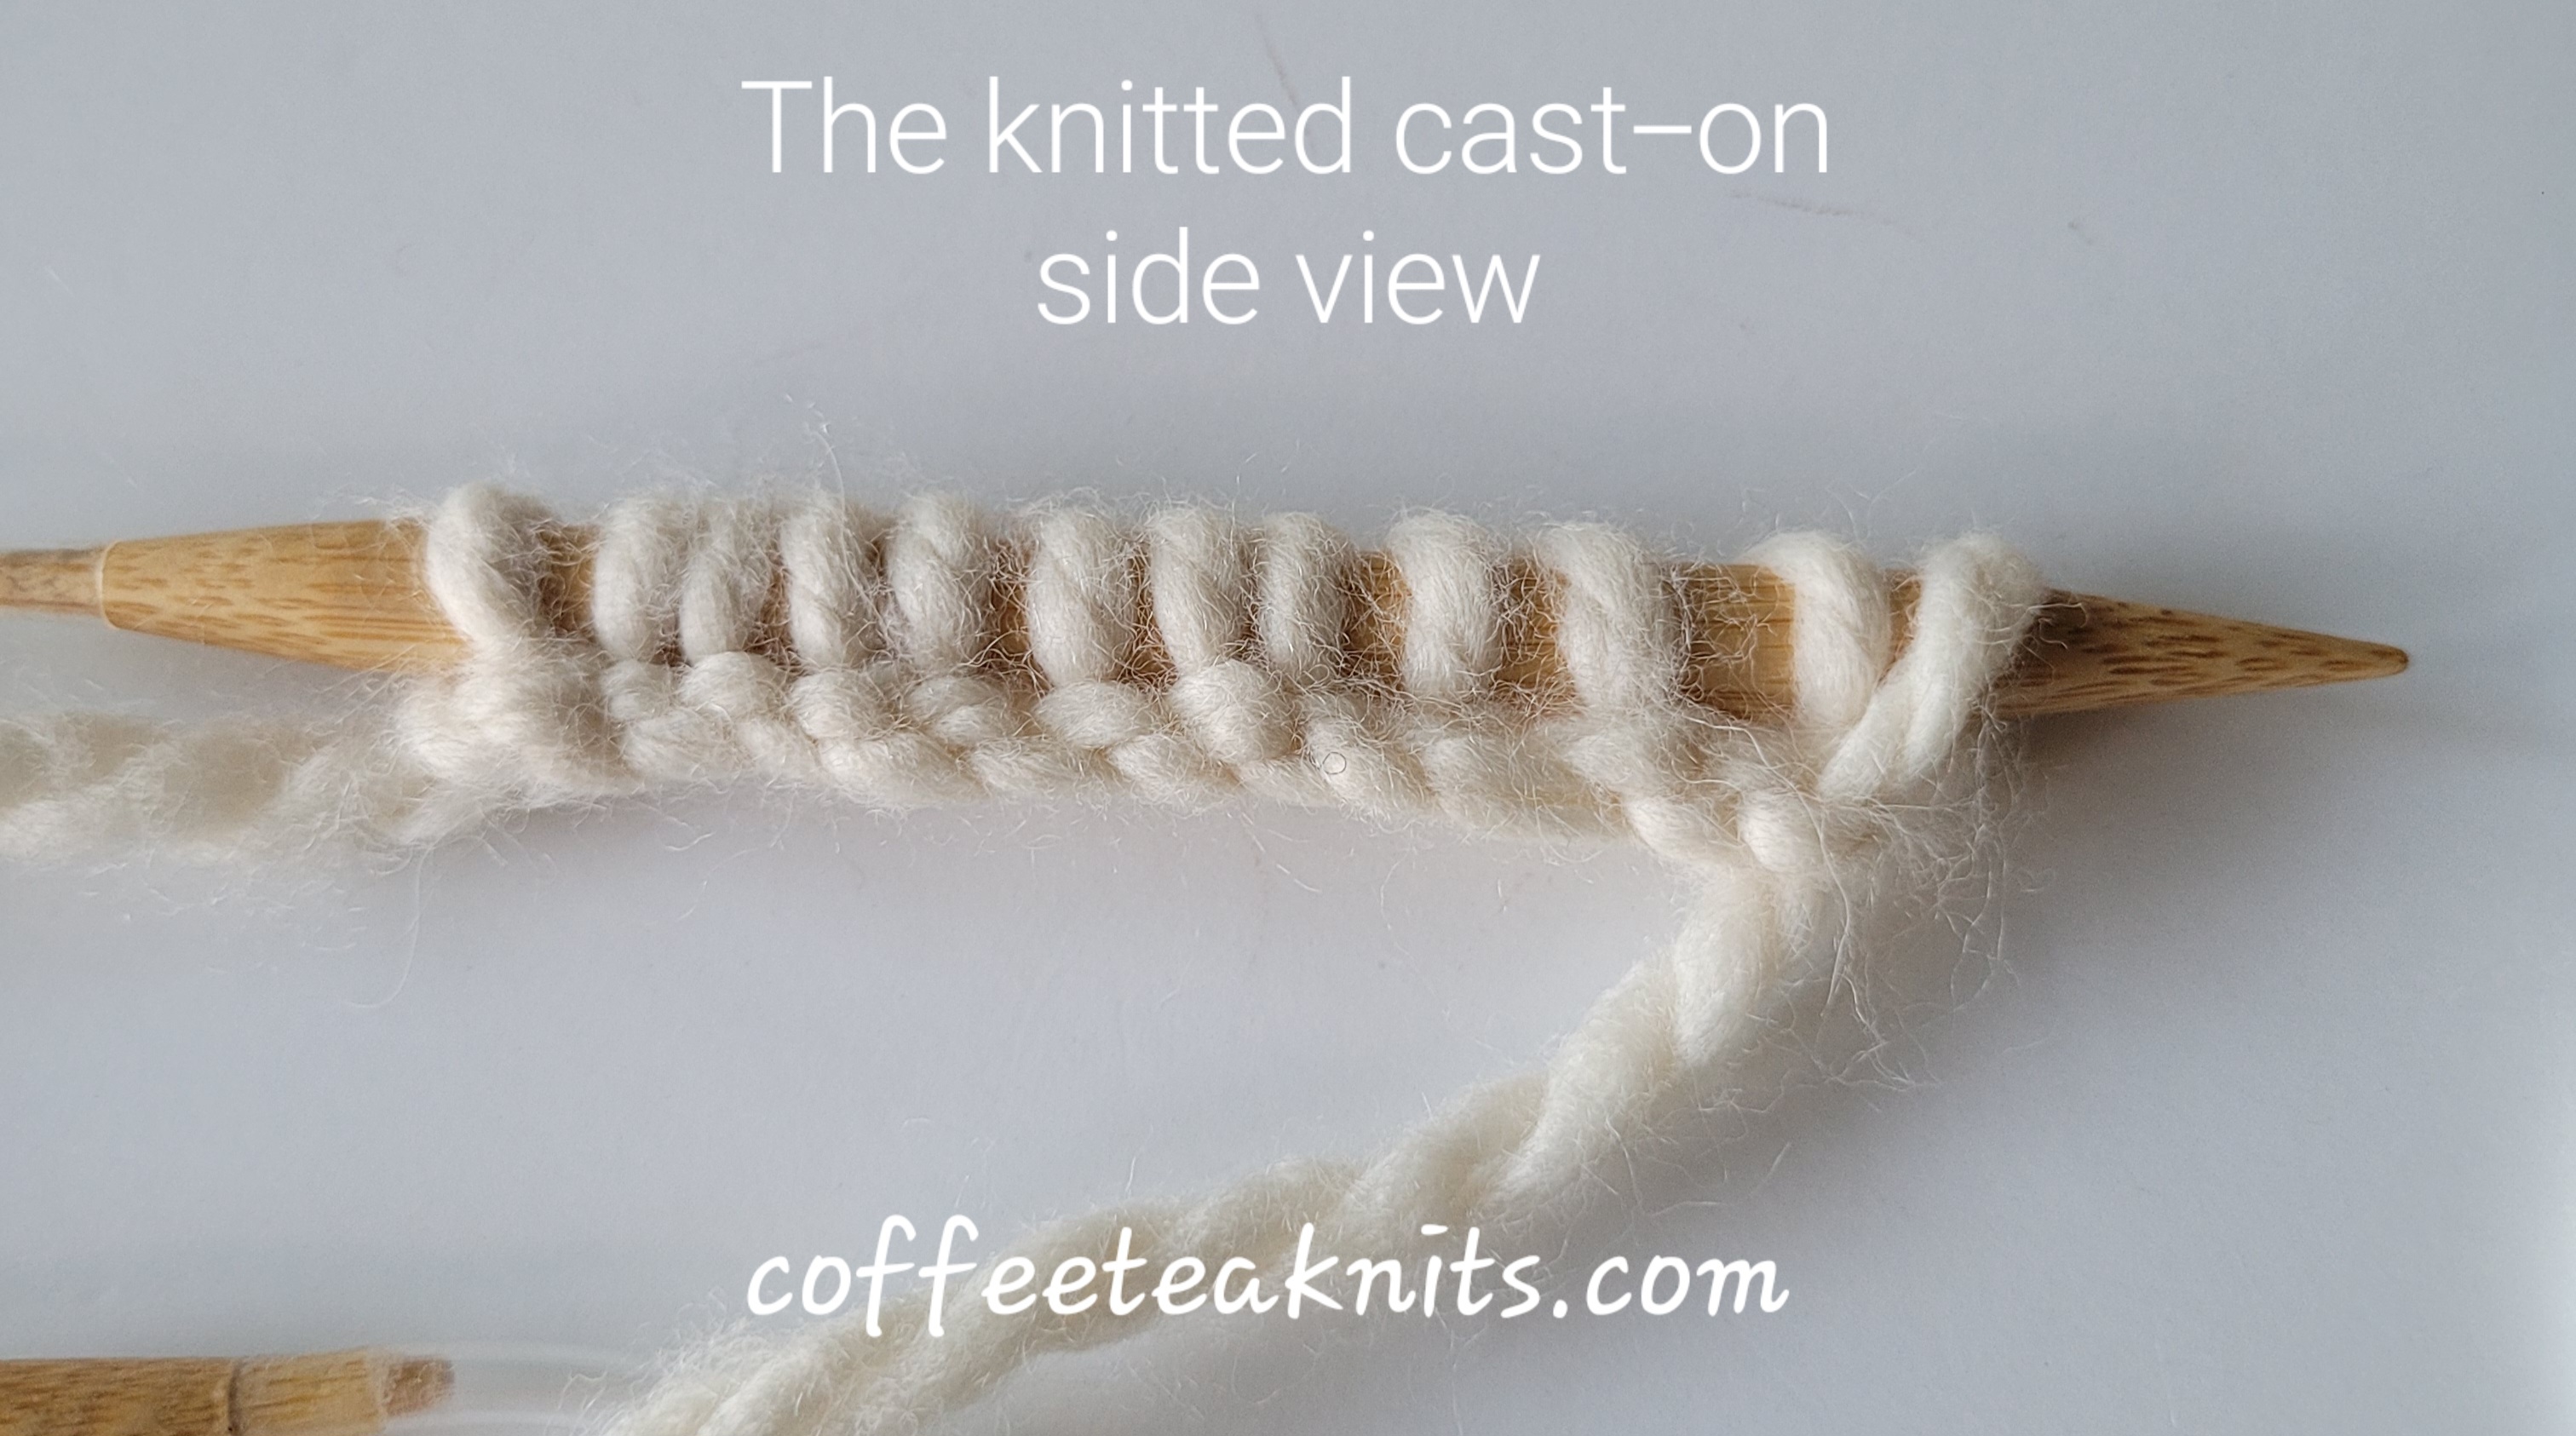
The Knitted Cast-On is one of many cast-on techniques in knitting. Other cast-on methods include the long tail cast-on, cable cast-on, provisional cast-on, the thumb method, picot cast-on, stretchy cast-on etc. The Knitted cast-on method is ideal for large projects. Use it when a large number of stitches are required for cast-on. This is typical for a blanket or shawl pattern. This method like the cable cast-on does not need a long yarn tail. The Knitted Cast-On is also a great beginner friendly cast-on method since it is basically the knit stitch. I usually use the knitted cast-on for knitting projects where all the edge stitches are later picked up for a more decorative border. The knitted cast-on begins with a slip knot and each additional stitch is then knitted on. The written instructions and video below on how to do the knitted cast-on is shown for right-handed knitting.
Transfer the slip knot loop onto the left knitting needle
Insert the right knitting needle into the slip knot and bring working yarn around and in between the two needles as if to knit (Knit and Tink)
Catch and pull the working yarn loop onto the right knitting needle
Transfer the new stitch loop from the right knitting needle onto the left knitting needle by inserting the left knitting needle under the front strand of the new stitch loop
Tug the working yarn to tighten the new stitch loop on the left knitting needle
Insert the right knitting needle into the first stitch on the left knitting needle
Catch and pull the working yarn loop with the right knitting needle
Move the new stitch loop from the right knitting needle to the left knitting needle by inserting the left knitting needle under the front strand of the new stitch loop
Tug the working yarn to tighten the new stitch loop on the left knitting needle
Repeat steps 7 – 10 till the desired number of stitch count is reached for a knitting project