The Dotted Dishcloth Pattern


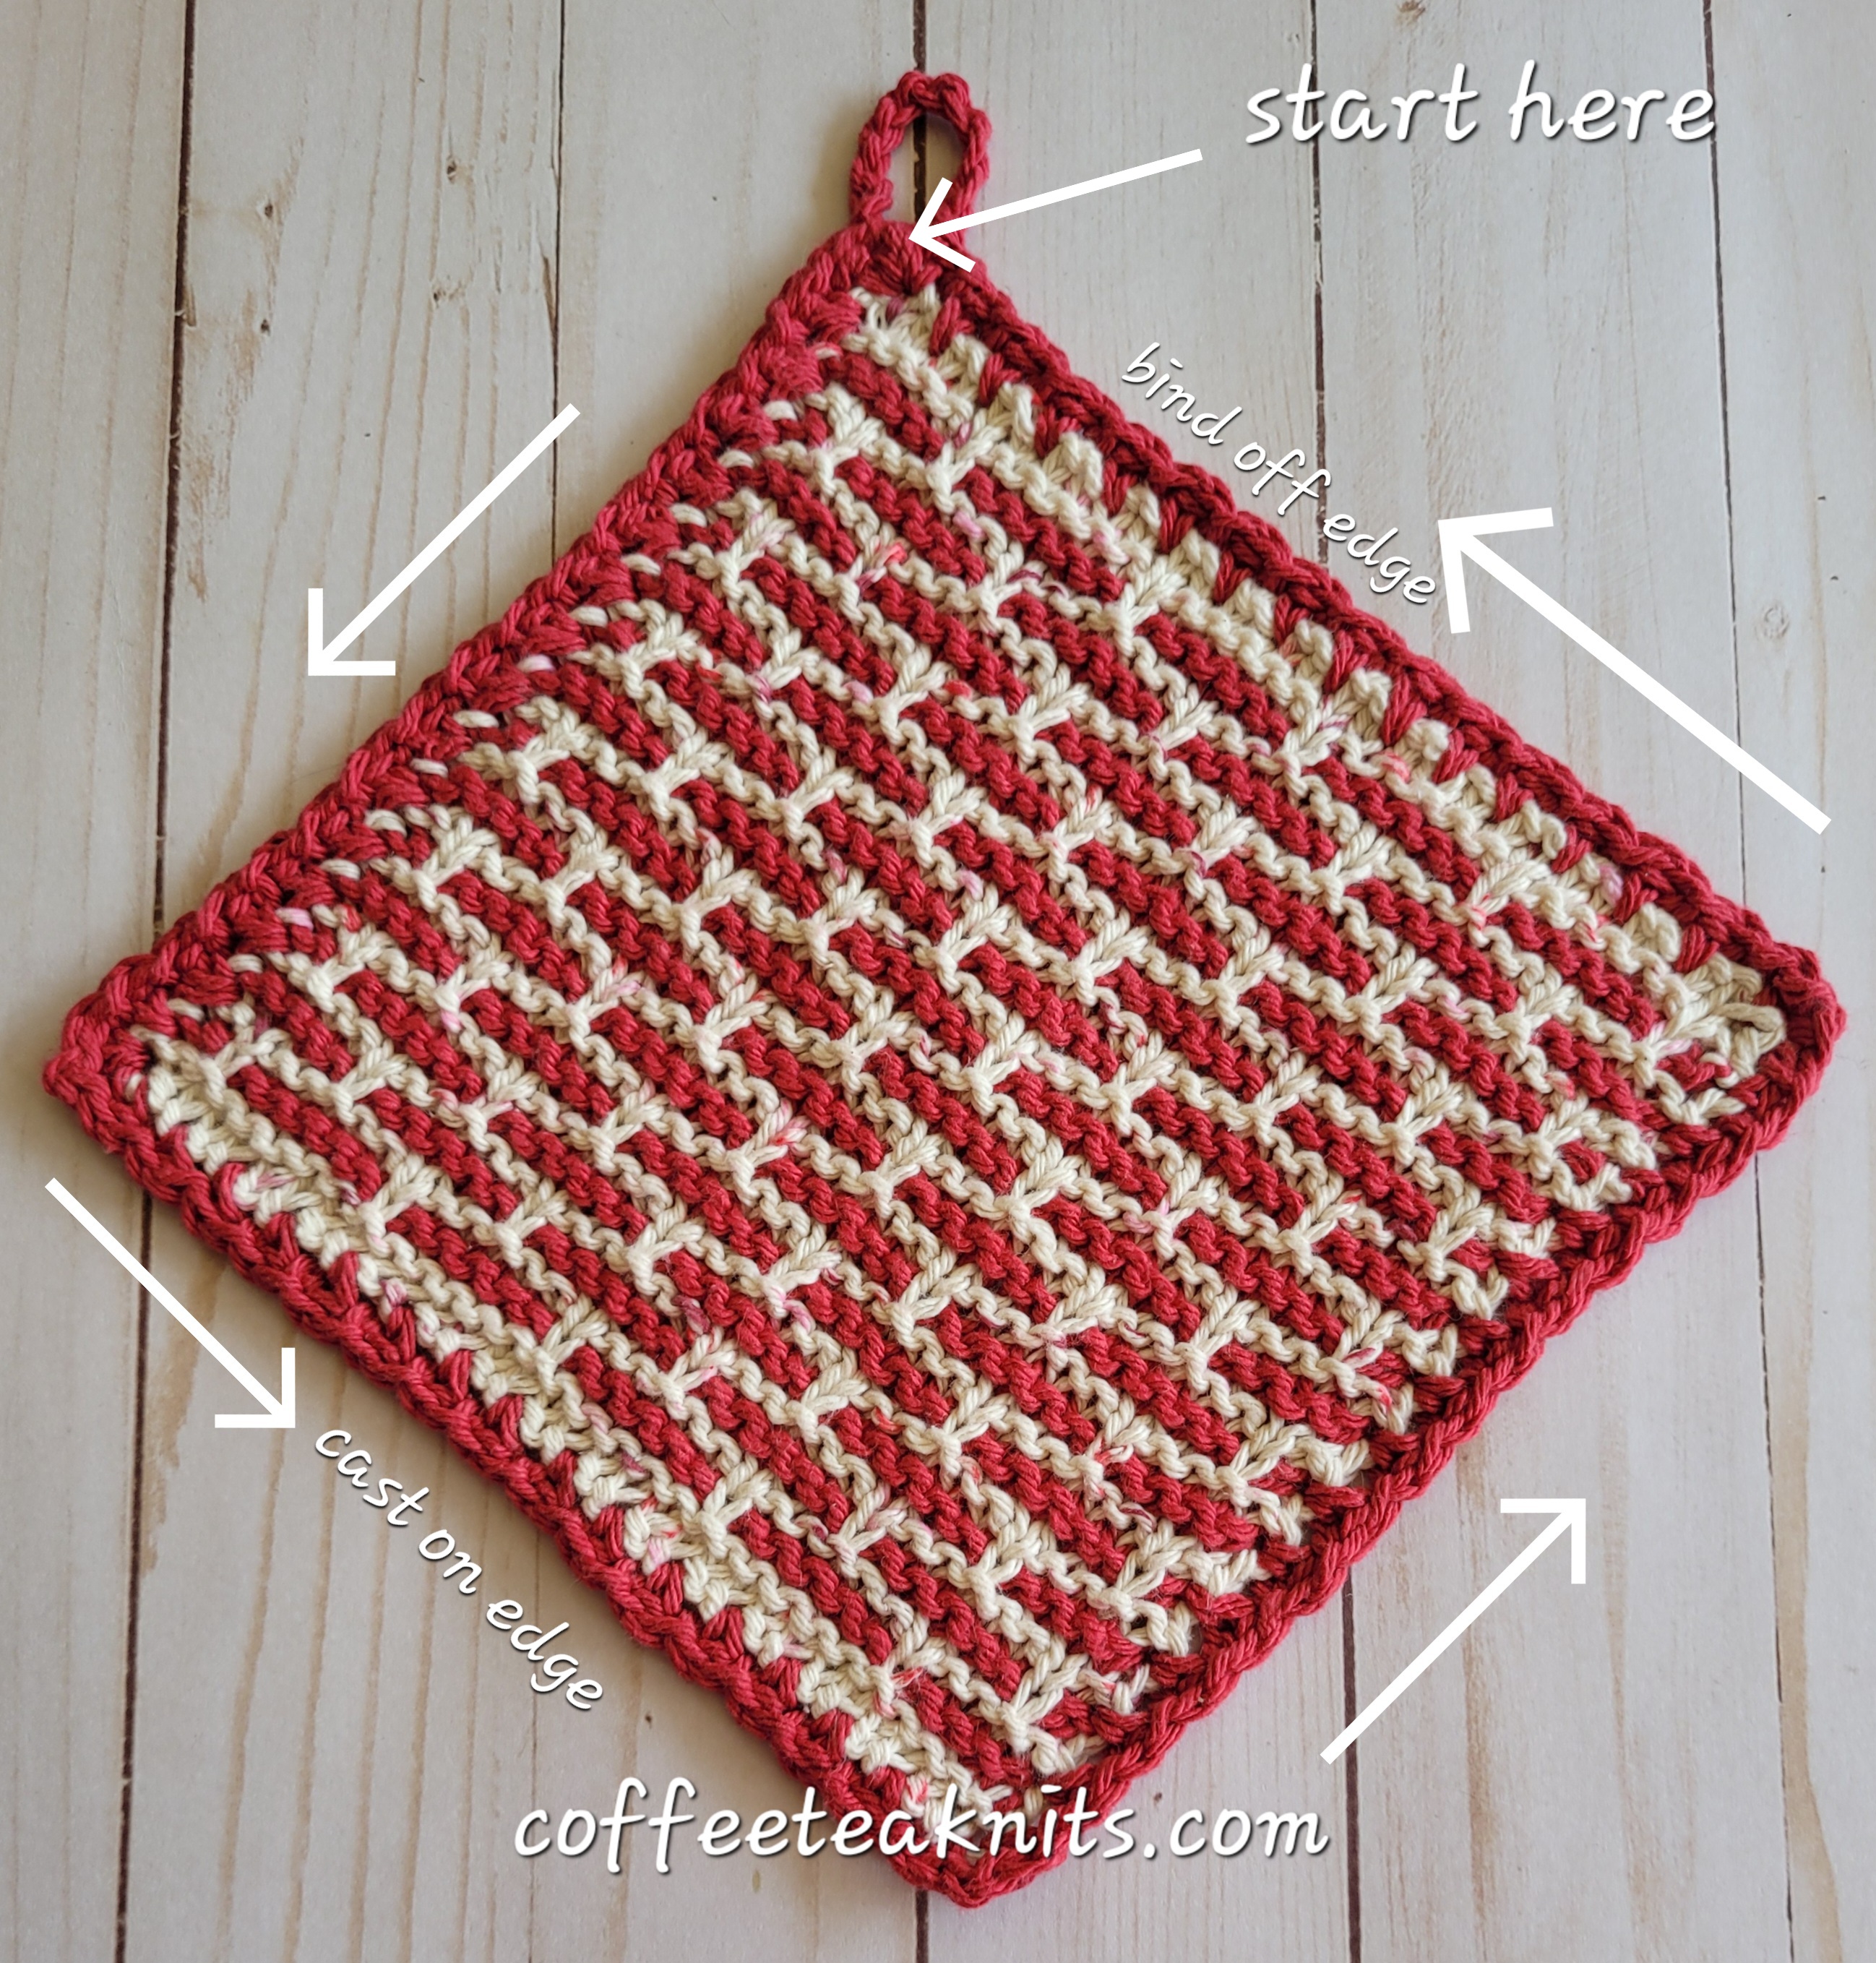
During a heatwave, knitting dishcloths with cotton yarn is practical both for personal use as well as for gifting. I knit dishcloths so I can explore and learn the different knit stitch patterns. Knitting dishcloths is also very therapeutic and calming amidst the chaos that sometimes happens in our personal lives. The Dotted Dishcloth is knit flat in the woven transverse herringbone stitch pattern with slip stitches for the herringbone shape. The dishcloth is finished with a slip stitch, chain one border edge.

An ad-free Dotted Dishcloth Pattern PDF is now available for download on Ravelry and Etsy

Materials Needed for the Dotted Dishcloth:
Yarn: Premier Home Cotton® Cone yarn in Jelly Dots (Colorway 1) and Colorway 2 – any solid color worsted weight cotton yarn for the border (I used a pink color cotton yarn that I had) 
Tapestry needle to weave in ends
Gauge: 4.5 stitches per inch in woven transverse herringbone stitch pattern
Knitting Needles: US #7 (4.5 mm) for knitting the dishcloth and US #9 (5.0 mm) for cast on and bind off.
Crochet hook: US size 7 (4.5 mm) for the border edge

Knitting Skill Level: Advanced beginner level – knit, purl and slip stitches
Crochet Skill Level: Basic level with chain one and slip stitch 

Abbreviations:

  • K: Knit
  • P: Purl
  • wyib S2: with yarn held back slip two stitches purlwise
  • wyif S2: with yarn in front slip two stitches purlwise
  • sm: slip marker
  • wyif S1: with yarn in front slip one stitch purlwise
  • wyib S1: with yarn held back slip one stitch purlwise
  • RS: right side
  • WS: wrong side
  • […]: stitch pattern repeats

The Dotted Dishcloth Pattern (text and images for personal use only)

Cast on 40 stitches with Colorway 1 yarn using US #9 knitting needles using any long tail cast on method. Transfer a stitch on a US #7 knitting needle, place a marker and transfer the rest of the stitches till the last one, place marker and transfer the last stitch onto the US #7 needle and begin knitting the Dotted Dishcloth

  • Row 1 (RS): K1, sm, [K2, wyif S2], repeat […] till last 2 stitches before marker, K2, sm, wyif S1
  • Row 2 (WS): K1, sm, P1, [wyib S2, P2], repeat […] till 1 stitch before marker, wyib S1, sm, wyif S1
  • Row 3: K1, sm, [wyif S2, K2], repeat […] till 2 stitches before marker, wyif S2, sm, wyif S1
  • Row 4: K1, sm, wyib S1, [P2, wyib S2], repeat […] till 1 stitch before marker, P1, sm, wyif S1
  • Row 5: Repeat Row 1
  • Row 6: Repeat Row 2
  • Row 7: Repeat Row 3
  • Row 8: Repeat Row 4
  • Row 9 (RS): K1, sm, [wyif S2, K2], repeat […] till 2 stitches before marker, wyif S2, sm, wyif S1
  • Row 10 (WS): K1, sm, P1, [wyib S2, P2], repeat […] till 1 stitch before marker, wyib S1, sm, wyif S1
  • Row 11: K1, sm, [K2, wyif S2], repeat […] till last 2 stitches before marker, K2, sm, wyif S1
  • Row 12: K1, sm, wyib S1, [P2, wyib S2], repeat […] till 1 stitch before marker, P1, sm, wyif S1
  • Row 13: Repeat Row 9
  • Row 14: Repeat Row 10
  • Row 15: Repeat Row 11
  • Row 16: Repeat Row 12

Repeat Rows 1 to 16 three more times

Repeat Rows 1 to 8 once more

Bind off row (RS): With US #9 knitting needles bind off all the stitches and pull working yarn through the last stitch

Slip Stitch, Chain One Border Edge:

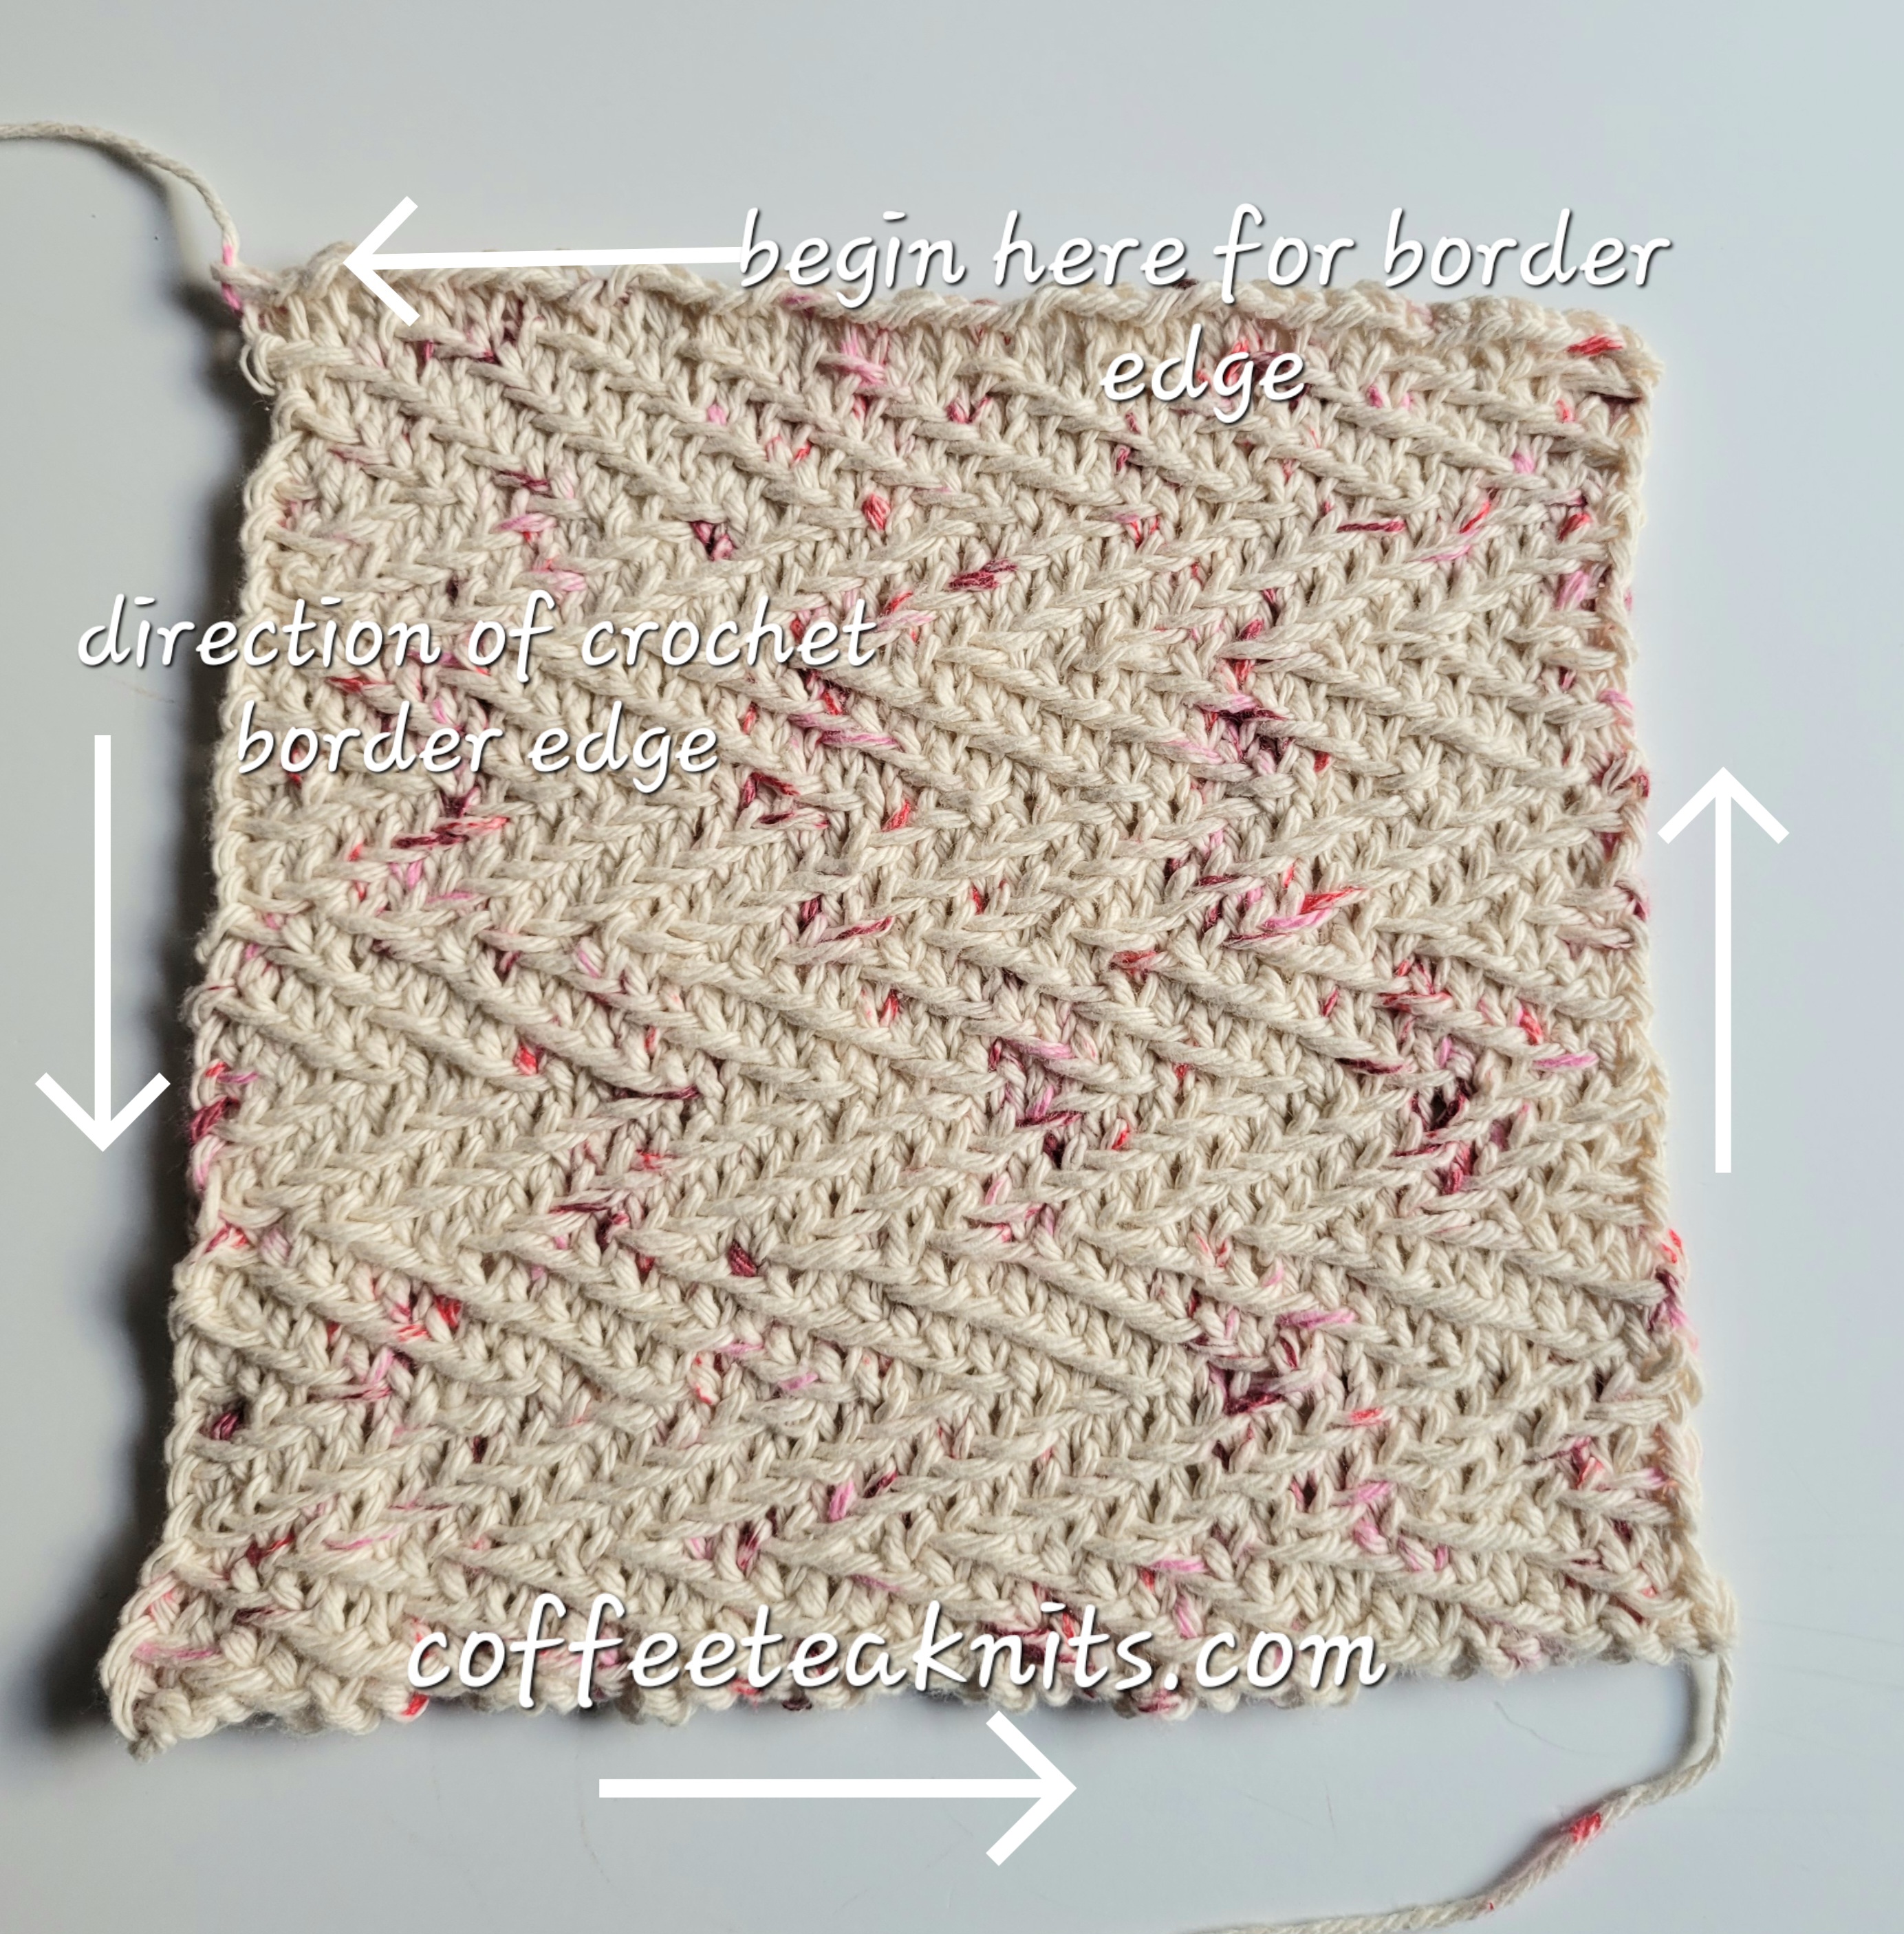
With Colorway 2 yarn and US #7 (4.5 mm) crochet hook,

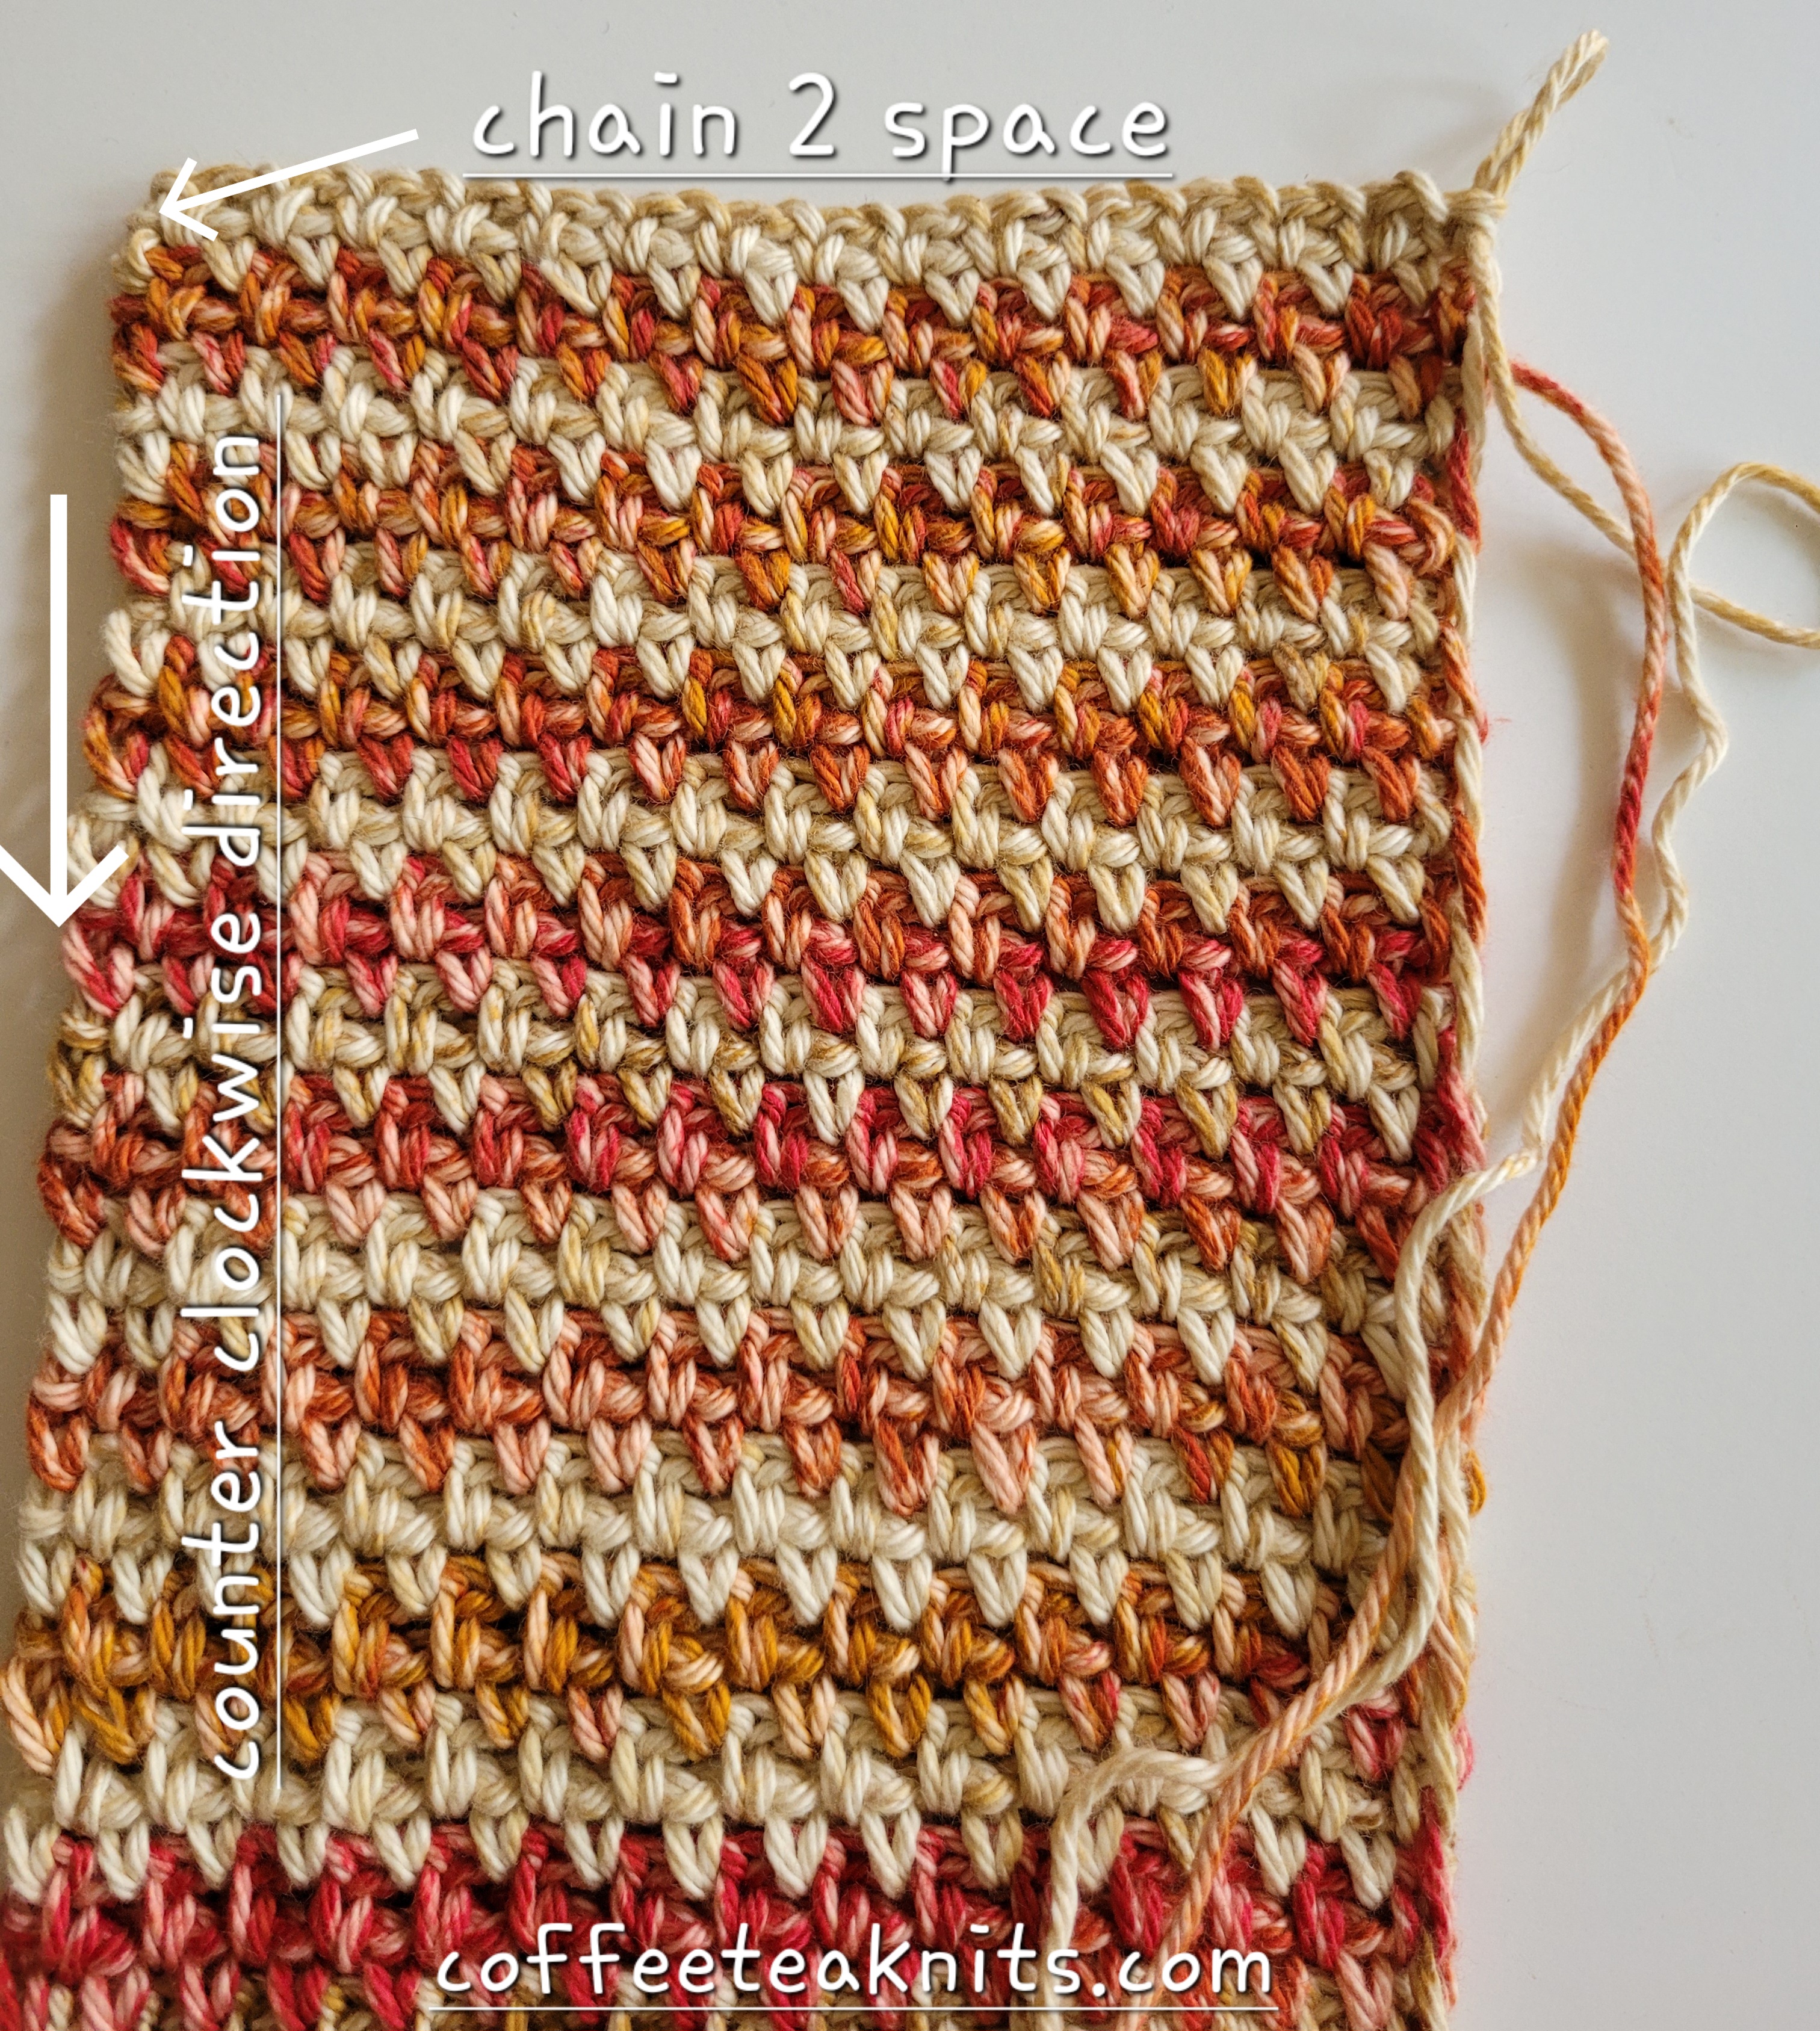
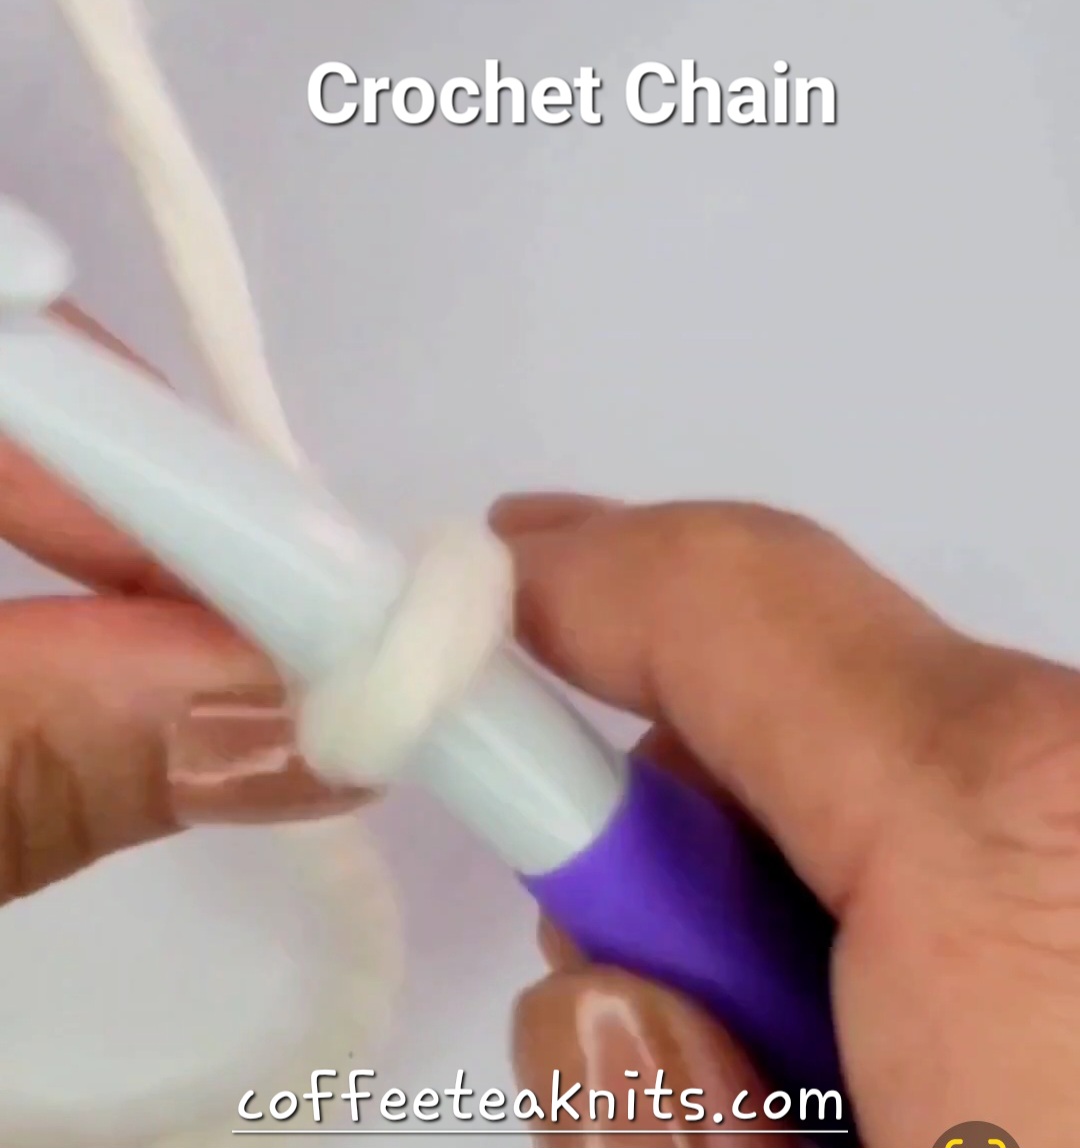
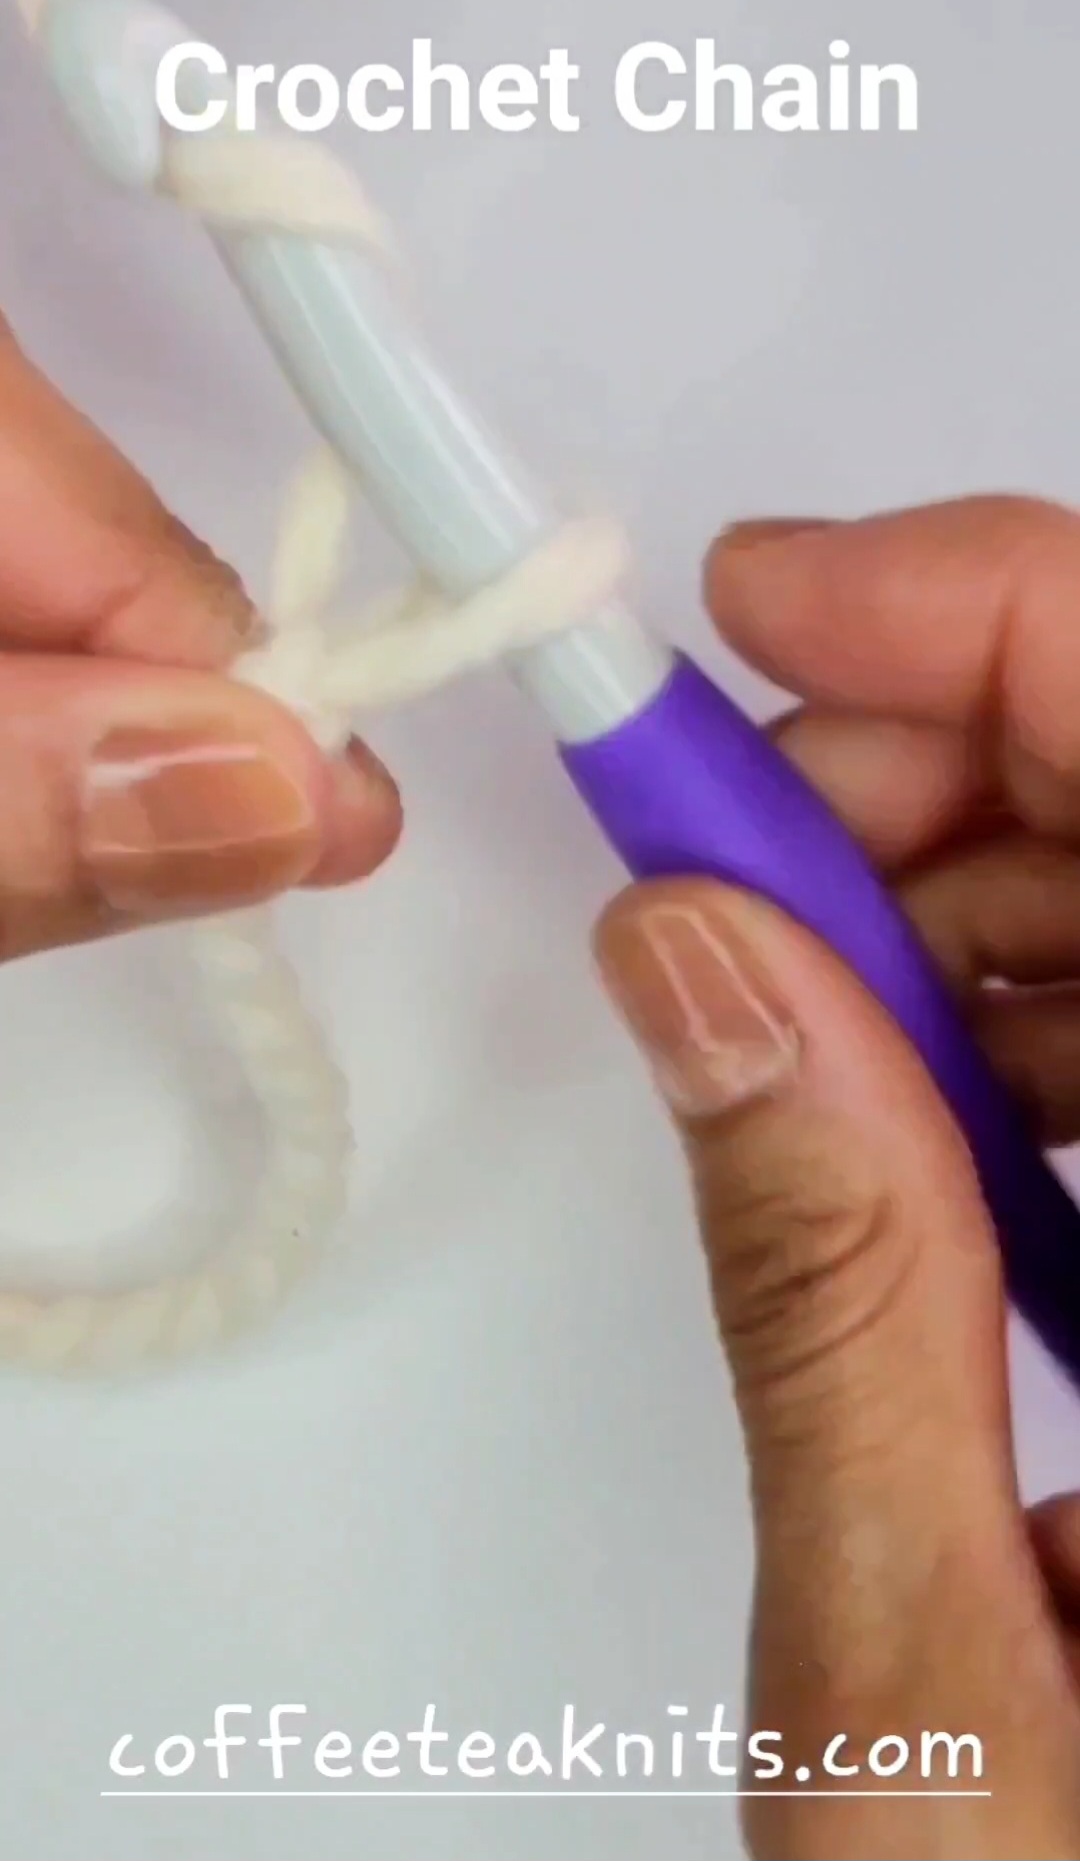
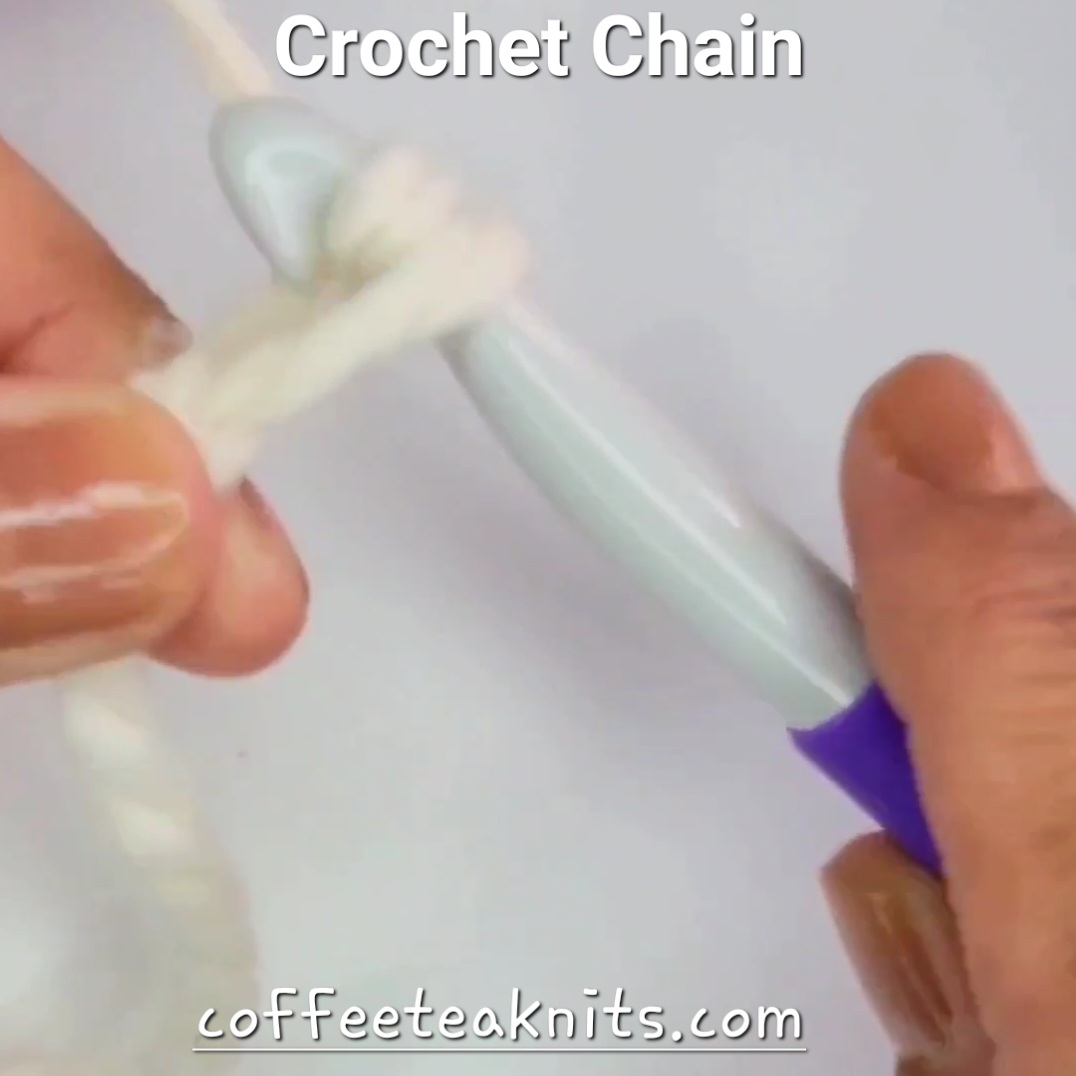
  • Make a slip knot (video tutorial) and insert the hook under the sideway V (>) of the second to last stitch of the bind off row (see image above), chain one 
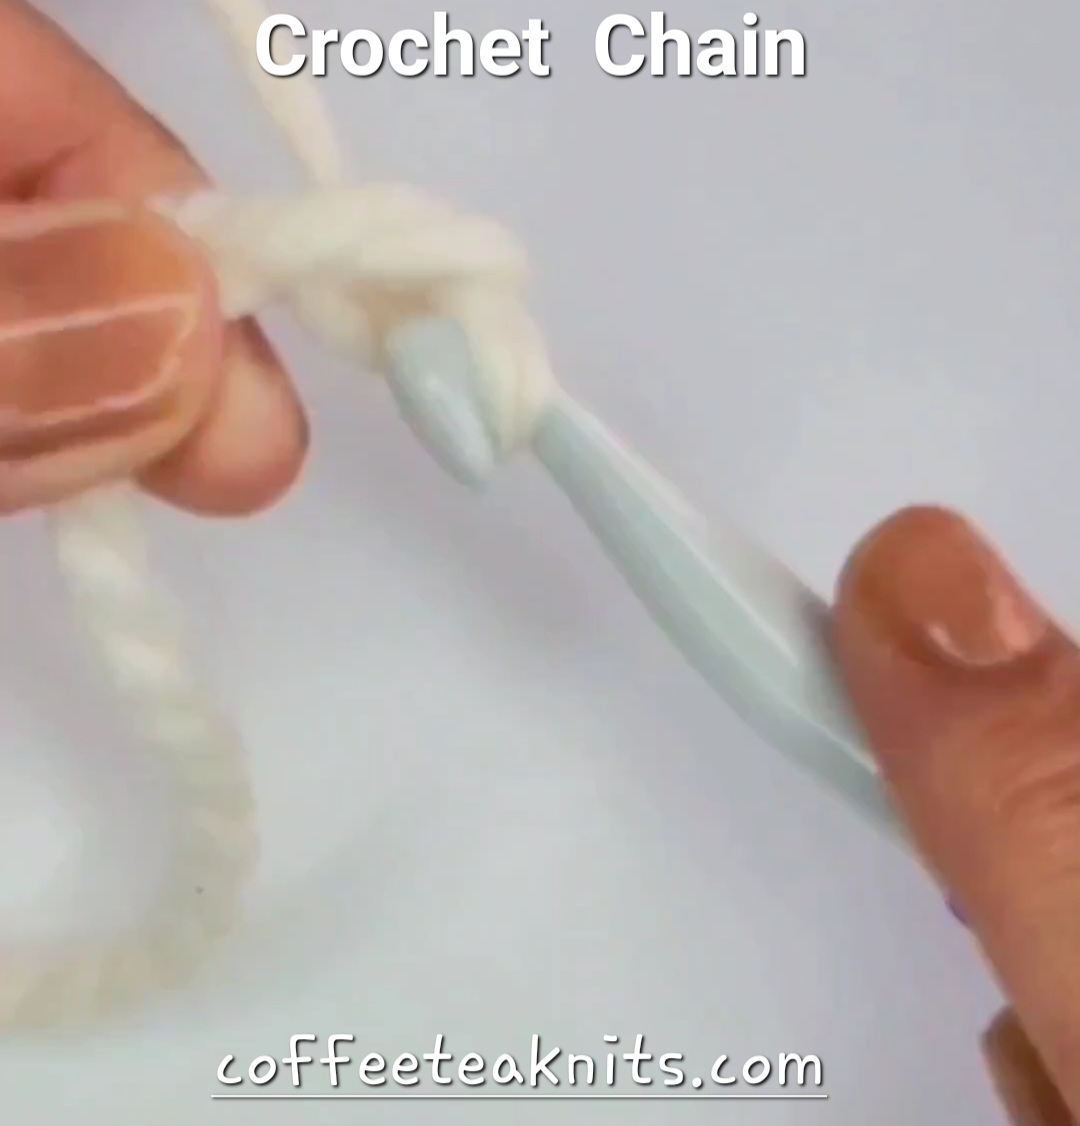
  • [Insert hook into the bind off corner stitch, yarn over, pull yarn under the stitch and slip stitch into the loop on the hook, chain one], repeat […] once more
  • Turn counterclockwise, [skip one edge stitch and insert the hook under both the strands of the V of the next edge stitch on the left side of the dishcloth, yarn over, pull yarn through and slip stitch into the loop on the hook, chain one], repeat […] till the corner edge stitch
  • At the bottom left corner edge stitch, [insert hook into the left corner edge stitch, yarn over, pull yarn through and slip stitch into the loop on the hook, chain one], repeat […] once more
  • Turn counterclockwise, [skip one cast on edge stitch and insert the hook under both the strands of the V of the next cast on edge stitch, yarn over, pull yarn through and slip stitch into the loop on the hook, chain one], repeat […] till the corner cast on edge stitch
  • At the bottom right corner cast on edge stitch, [insert hook into the corner cast on edge stitch, yarn over, pull yarn through and slip stitch into the loop on the hook, chain one], repeat […] once more
  • Turn counterclockwise, [skip one edge stitch and insert the hook under both the strands of the V of the next edge stitch on the right side of the dishcloth, yarn over, pull yarn through and slip stitch into the loop on the hook, chain one], repeat […] till the top right side corner edge stitch
  • At the top right corner edge stitch, [insert hook into the corner edge stitch, yarn over, pull yarn through and slip stitch into the loop on the hook, chain one], repeat […] once more
  • Turn counterclockwise, [skip one bind off row edge stitch and insert the hook under both the strands of the V of the next bind off row edge stitch of the dishcloth, yarn over, pull yarn through and slip stitch into the loop on the hook, chain one], repeat […] till the beginning stitch of the first crochet edge stitch
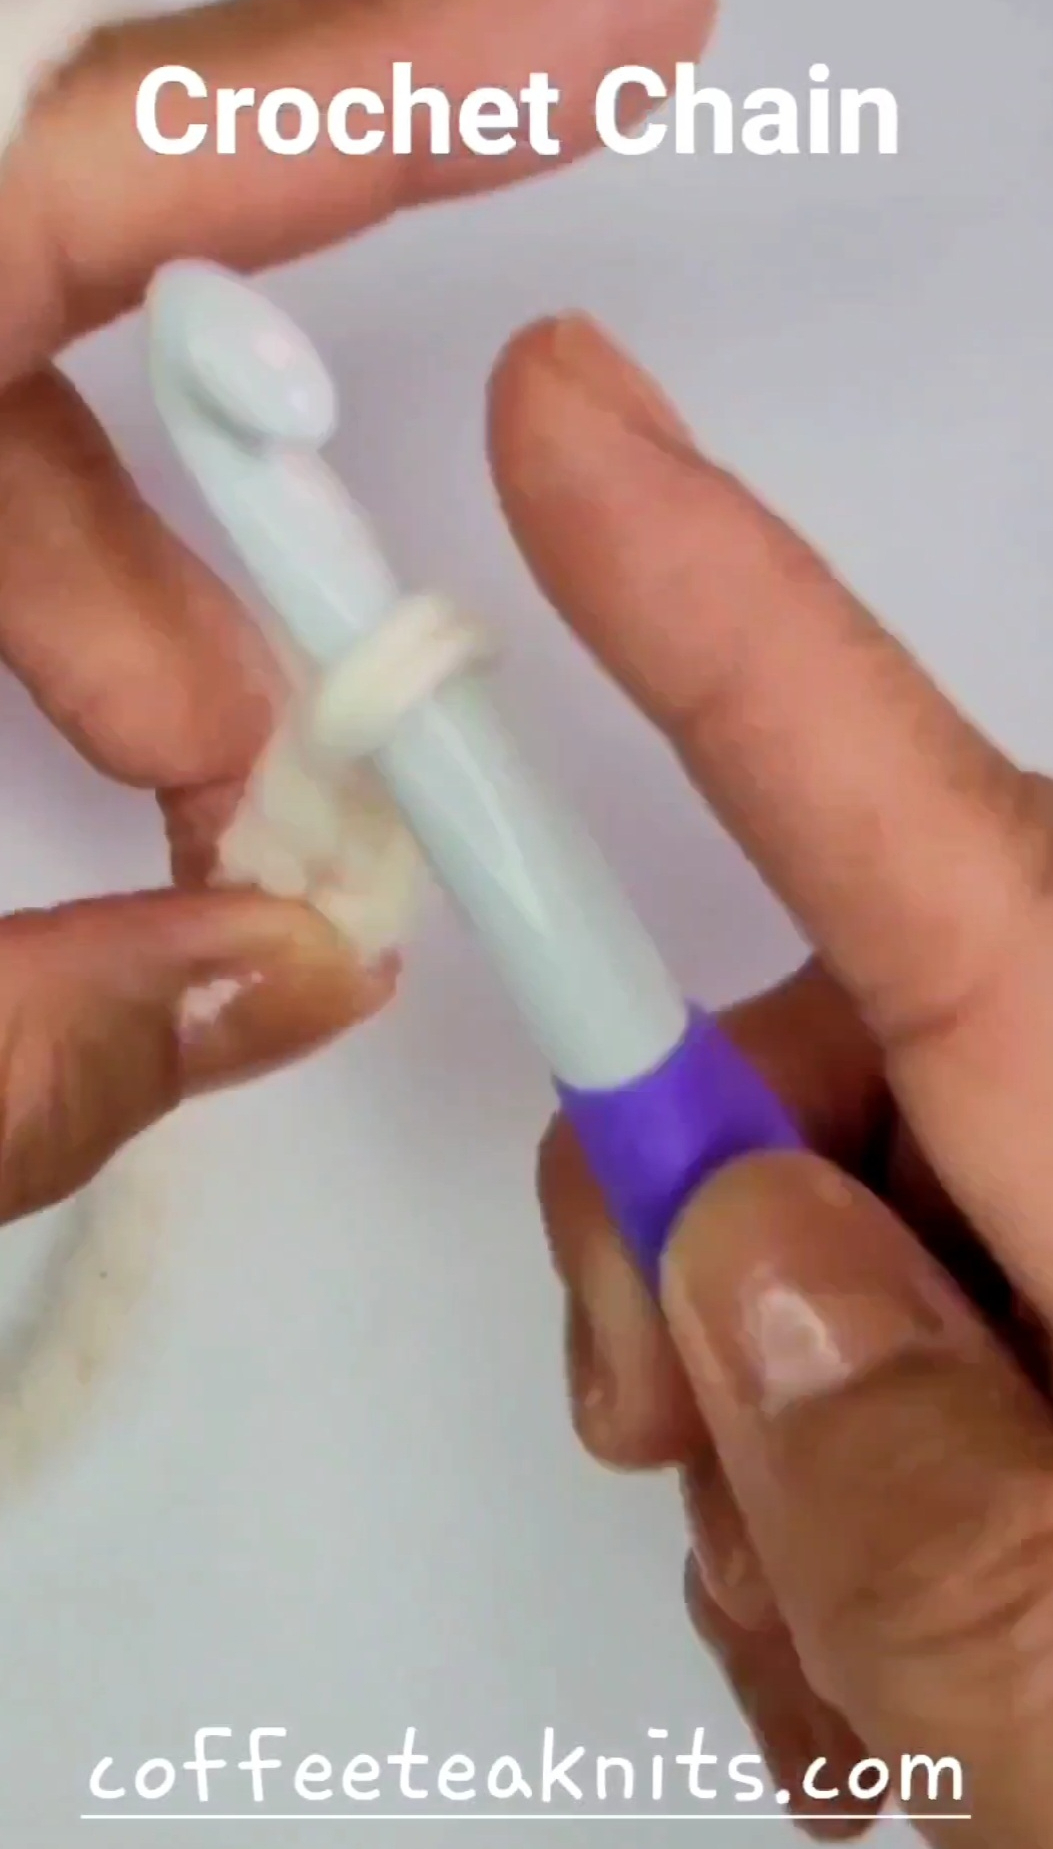
  • Slip stitch into the beginning stitch and chain 12 for the hanging loop
  • Insert hook into the bind off corner edge crochet stitch, yarn over, pull through and slip stitch into the loop on the hook and pull the working yarn through the loop on the hook

Weave in the ends, wash and block the Dotted Dishcloth.


~coffeeteaknits.com

Tutorial Series: How to Single Crochet

Once a foundation chain (How to Crochet Chain) is made, a new crochet project with any crochet stitch pattern can begin. A single crochet stitch pattern is the shortest in length/height and creates a denser fabric compared to double and triple crochet stitch patterns. The video and written instructions below show how to make a single crochet from a foundation chain and all the rows for right handed crocheting.

Video in slow motion: Single Crochet from a Foundation Chain

Written Instructions for How to Single Crochet from a Foundation Chain:

  1. Skip the first chain stitch from the loop on the crochet hook.
  2. Insert the crochet hook into the top strand of the second chain stitch
  3. Wrap working yarn counterclockwise around hook (yarn over), catch and pull the loop through the top strand of the second chain stitch
  4. There are two loops on the crochet hook
  5. Wrap working yarn counterclockwise around hook (yarn over), catch and pull loop through the two loops on the crochet hook
  6. Repeat Steps 2 to 5 for the rest of the foundation chain stitches till the slip knot end
  7. Chain one and turn to single crochet the next row

How to Single Crochet:

Written Instructions for a Single Crochet:

  1. Skip the first stitch from the loop on the crochet hook
  2. Insert the crochet hook under both the strands of the next stitch
  3. Wrap working yarn counterclockwise around hook (yarn over), catch and pull the loop through both the strands of the next stitch
  4. There are two loops on the crochet hook
  5. Wrap working yarn counterclockwise around hook (yarn over), catch and pull loop through the two loops on the crochet hook
  6. Repeat Steps 2 to 5 till the last stitch in the row
  7. For the last stitch of the row, repeat Steps 2 to 5, chain one and turn
  8. Repeat Steps 1 to 7 with single crochet stitch pattern for all the subsequent rows

~coffeeteaknits.com

The Long Striped Crochet Scarf Pattern

The Long Striped Crochet Scarf Pattern (images and text for personal use only)

Materials Needed:
Yarn: K+C Essential Cotton Yarn Colorway Yarn 1 – White Sands and Colorway Yarn 2 – Zion. There are other yarn colorways available at JoAnn.
Tapestry needle to weave in ends
Gauge: 5.5 stitches/inch in crochet moss stitch pattern. The scarf can be modified for any preferred width or length so gauge not really that important. The Long Striped Crochet Scarf is about 6.5 inches wide and 87.5 inches long.
Crochet hook: US size G-6 or 4.0 mm
Skill Level: Beginner – know how to slip stitch crochet, single crochet, chain 1 and chain 2
Abbreviation:
[…]: pattern repeat

With Size G-6 (4.0 mm) crochet hook, chain 32 stitches (video tutorial on how to make a crochet chain) with Colorway Yarn 1 (White Sands).

  • Row 1 (RS): With Colorway Yarn 1 – Single crochet into the 4th chain stitch from the hook, chain 1, [skip one stitch, single crochet into the next chain stitch, chain 1] repeat […] till the last chain stitch with the slip knot, single crochet in the last stitch, chain 2 and turn (15 single crochets in the row with chain ones)
  • Row 2 (WS): With Colorway Yarn 1 – Single crochet in the chain 1 space, chain 1, [single crochet in the next chain 1 space, chain 1] repeat […] till the last stitch, single crochet in the last stitch, attach Colorway Yarn 2 and pull that loop through the single crochet, chain 2 and turn. 
  • Row 3: With Colorway Yarn 2 – Single crochet in the chain 1 space, chain 1, [single crochet in the next chain 1 space, chain 1] repeat […] till the last stitch, single crochet in the last stitch, chain 2 and turn.
  • Row 4: With Colorway Yarn 2 – Single crochet in the chain 1 space, chain 1, [single crochet in the next chain 1 space, chain 1] repeat […] till the last stitch, single crochet in the last stitch, pull through the Colorway Yarn 1 loop through the single crochet, chain 2 with Colorway Yarn 1 and turn. 
  • Row 5: With Colorway Yarn 1 – Single crochet in the chain 1 space, chain 1, [single crochet in the next chain 1 space, chain 1] repeat […] till the last stitch, single crochet in the last stitch, chain 2 and turn.
  • Row 6: With Colorway Yarn 1 – Single crochet in the chain 1 space, chain 1, [single crochet in the next chain 1 space, chain 1] repeat […] till the last stitch, single crochet in the last stitch, pull through the Colorway Yarn 2 loop through the single crochet, chain 2 with Colorway Yarn 2 and turn. 

Repeat Rows 3 to 6, seventy-eight more times (increase or decrease the number of repeats for preferred length)

  • With Colorway Yarn 2 – Repeat Rows 3 and 4 once more
  • Break and secure Colorway Yarn 2
  • With Colorway Yarn 1 – Repeat Row 5 once
  • Last Row: With Colorway Yarn 1 – Single crochet in the chain 1 space, chain 1, [single crochet in the next chain 1 space, chain 1] repeat […] till the last stitch, single crochet in the last stitch, and pull through the Colorway Yarn 1 loop through the single crochet and break yarn.

Scarf Border:

Round 1 (Crochet Moss Stitch):

  • With G-6 (4.0 mm) crochet hook and Colorway Yarn 1, make a slip knot (watch video tutorial) and bring it under and through the chain 2 space of the last stitch on the front top left side corner of the scarf, chain 2, single crochet into the same corner stitch once more and chain one. Turn in counter clockwise direction (see image below)

May2024_scarfborder

  • [Single crochet, chain 1, skip the next stitch], and repeat […] all down the front left side of the scarf till the last corner stitch
  • Single crochet in the corner stitch, chain 2, single crochet, chain one all in the same corner stitch, turn in counter clockwise direction
  • [Single crochet, chain 1 in the next stitch of the foundation crochet chain edge, skip the next stitch], repeat […] all along the foundation crochet chain edge till the last corner stitch
  • Single crochet in the corner stitch, chain 2, single crochet, chain one all in the same corner stitch, turn in counter clockwise direction
  • [Single crochet, chain 1, skip the next stitch], and repeat […] up all along the front right side of the scarf till the last corner stitch
  • Single crochet in the corner stitch, chain 2, single crochet, chain one all in the same corner stitch, turn in counter clockwise direction
  • [Single crochet, chain 1, skip the next stitch], and repeat […] all along the last row of the scarf till the chain 2 space of the beginning of the round 

Round 2 (Slip stitch, chain 1):

  1. In the corner stitch chain 2 space of the beginning of round, [slip stitch in the chain 2 space, chain 1], repeat […] once more . Turn in counter clockwise direction
  2. [In the chain 1 space of the crochet moss stitch, slip one, chain one], repeat […] all down the front left side of the scarf
  3. At the corner stitch, [slip one, chain one] twice in the chain 2 space of the crochet moss stitch. Turn in counter clockwise direction
  4. Repeat step 2 all along the foundation crochet chain edge of the scarf
  5. At the corner stitch, [slip one, chain one] twice in the chain 2 space of the crochet moss stitch, turn in counter clockwise direction
  6. Repeat step 2 up all along the front right side of the scarf
  7. At the corner stitch, [slip one, chain one] twice in the chain 2 space of the crochet moss stitch, turn in counter clockwise direction
  8. Repeat step 2 all along the last row of the scarf
  9. At the beginning of round corner, slip stitch into the chain 2 space and pull yarn through

Weave in the ends, wash and block the Long Striped Scarf


~coffeeteaknits.com

Tutorial Series: How to Crochet Chain

The slip knot (How to Slip Knot) in crochet is the fist loop of a foundation chain. After the slip knot loop, the first foundation chain stitch can be made. A foundation chain is the basis for the beginning a crochet project. The video and written instructions below show how to make a crochet foundation chain for right handed crocheting.

How to Crochet Chain: Slip knot and Chain 10


Written Instructions for How to Crochet Chain:

  1. Make a slip knot (How to Slip Knot) and insert the crochet hook into the loop
  2. Take the crochet hook under and around the working yarn counter clockwise (see image below)

    May2024_image1

  3. Wrap the working yarn around the hook

    May2024_image2

  4. Catch and pull the wrapped working yarn through the loop on the crochet hook (chain 1)

    May2024_image3
    May2024_image4

  5. Repeat Steps 2 to 4 of pulling the working yarn through the loop on the crochet hook maintaining even tension till the required number for the foundation chain of a crochet project has been reached

    May2024_image5

~coffeeteaknits.com

The Brick and Mortar Dishcloth Pattern


The Brick and Mortar Dishcloth is knit using the mosaic colorwork technique with slip stitches and two different colors of yarn. In mosaic knitting only one color of yarn is needed per row. The mosaic pattern in the Bricks and Mortar Dishcloth is formed with garter slip stitches and by switching the two different colors of yarn back and forth every two rows. The Brick and Mortar Dishcloth is knit flat and measures about 7.5 x 7.5 inches after washing. The dishcloth is finished with a round of crochet moss stitch and a round of slip stitch, chain one border edge with a hanging loop.


The Brick and Mortar Dishcloth Pattern (text and images for personal use only)

Materials Needed:
Yarn: Premier Home Cotton® Cone yarn in Jelly Dots (Colorway 1) and Lily Sugar’n Cream yarn in Country Red (Colorway 2) 
Tapestry needle to weave in ends
Gauge: 4.5 stitches per inch in garter stitch pattern
Knitting Needles: US #7 (4.5 mm) for knitting the dishcloth and US#8 (5.0 mm) for cast on.
Crochet hook: US size G-6 or 4.0 mm for the border edge

Knitting Skill Level: Advanced beginner to Intermediate level with  2 color mosaic knitting and slip stitches
Crochet Skill Level: Basic level with single crochet, chain one, and slip stitch 

Abbreviations:

  • K: Knit
  • P: Purl
  • wyib S1: with yarn held back slip one stitch purlwise
  • pm: place marker
  • sm: slip marker
  • wyif S1: with yarn in front slip one stitch purlwise
  • RS: right side
  • WS: wrong side
  • sc: single crochet
  • […]: stitch pattern repeats

Cast on:

With US #8 knitting needles and Colorway 1 yarn, cast on 32 stitches using the thumb or any other long tail cast on method of choice

Dishcloth Stitch Pattern:

With US #7 knitting needles, knit the following:

  • Row 1 (RS): With Colorway 1 yarn – K1, pm, knit to 1 stitch before last, pm, wyif S1
  • Row 2 (WS): K1, sm, knit to marker, sm, wyif S1
  • Row 3: With Colorway 2 yarn – K1, sm, K4, [wyib S1 purlwise, K5], repeat […] three more times, wyib S1 purlwise, K1, sm, wyif S1 purlwise
  • Row 4: K1, sm, K1, [wyif S1 purlwise, bring yarn to the back, K5], repeat […] three more times, wyif S1 purlwise, yarn back, K4, sm, wyif S1 purlwise
  • Row 5: With Colorway 1 yarn – K1, sm, knit to marker, sm, wyif S1 purlwise
  • Row 6: K1, sm, K1, [P1, K5], repeat […] three more times, K4, sm, wyif S1 purlwise
  • Row 7: With Colorway 2 yarn – K1, sm, K1, [wyib S1 purlwise, K5], repeat […] three more times, wyib S1 purlwise, K4, sm, wyif S1 purlwise
  • Row 8: K1, sm, K4, [wyif S1 purlwise, bring yarn to the back, K5], repeat […] three more times, wyif S1 purlwise, yarn back, K1, sm, wyif S1 purlwise
  • Row 9: With Colorway 1 yarn – K1, sm, knit to marker, sm, wyif S1 purlwise
  • Row 10: K1, sm, K4, [P1, K5], repeat […] three more times, K1, sm, wyif S1 purlwise

Repeat Rows 3 – 10, six more times
Break Colorway 2 yarn and secure the yarn tail to Colorway 1 yarn

Bind Off:

Bind off Row 1 (RS): Colorway 1 yarn, K1, sm, knit to marker, sm, wyif S1
Bind off Row 2 (WS): With US #8 knitting needles, bind off purlwise removing the markers

Dishcloth Border Edge (see image below):

Round 1 (Crochet Moss Stitch):

  1. With G-6 (4.0 mm) crochet hook and Colorway 2 yarn, make a slip knot (watch video tutorial) and bring it under and through the V of the last stitch of Bind off Row 1 (RS), chain 2, sc, chain 1 in the same stitch. Turn in counter clockwise direction (see image below)
  2. [Sc in the slipped row edge stitch, chain 1, skip the next stitch], and repeat […] all along the front left side of the dishcloth till the last corner stitch
  3. Sc in the corner stitch, chain 2, sc chain one all in the same corner stitch, turn in counter clockwise direction
  4. [Sc, chain 1 in the next stitch of the cast on edge, skip the next stitch], repeat […] all along the cast on edge till the last corner stitch
  5. Repeat step 3 at the corner stitch
  6. Repeat step 4 going up along the front right side of the dishcloth
  7. Repeat step 3 at the corner stitch. 
  8. Repeat step 4 all along the bind off edge of the dishcloth till the stitch at beginning of round 

Round 2 (Slip stitch, chain 1):

  1. In the corner stitch chain 2 space, [slip stitch in the chain 2 space, chain 1], repeat […] once more . Turn in counter clockwise direction
  2. [In the chain 1 space of the crochet moss stitch, slip one, chain one], repeat […] all along the front left side of the dishcloth
  3. At the corner stitch, [slip one, chain one] twice in the chain 2 space of the crochet moss stitch. Turn in counter clockwise direction
  4. Repeat step 2 all along the front cast on edge of the dishcloth
  5. At the corner stitch, [slip one, chain one] twice in the chain 2 space of the crochet moss stitch, turn in counter clockwise direction
  6. Repeat step 2 all along the front right side of the dishcloth
  7. At the corner stitch, [slip one, chain one] twice in the chain 2 space of the crochet moss stitch, turn in counter clockwise direction
  8. Repeat step 2 all along the bind off edge till the last stitch in that row.
  9. Chain 10 for the hanging loop 
  10. Slip stitch into the chain 2 space of the crochet moss stitch corner edge and pull yarn through

BrickandMortarDishcloth_direction

Break Colorway 1 yarn and weave in the ends
Wash and block the Brick and Mortar Dishcloth


~coffeeteaknits.com