Tutorial Series: The Knitted Cast-On Method

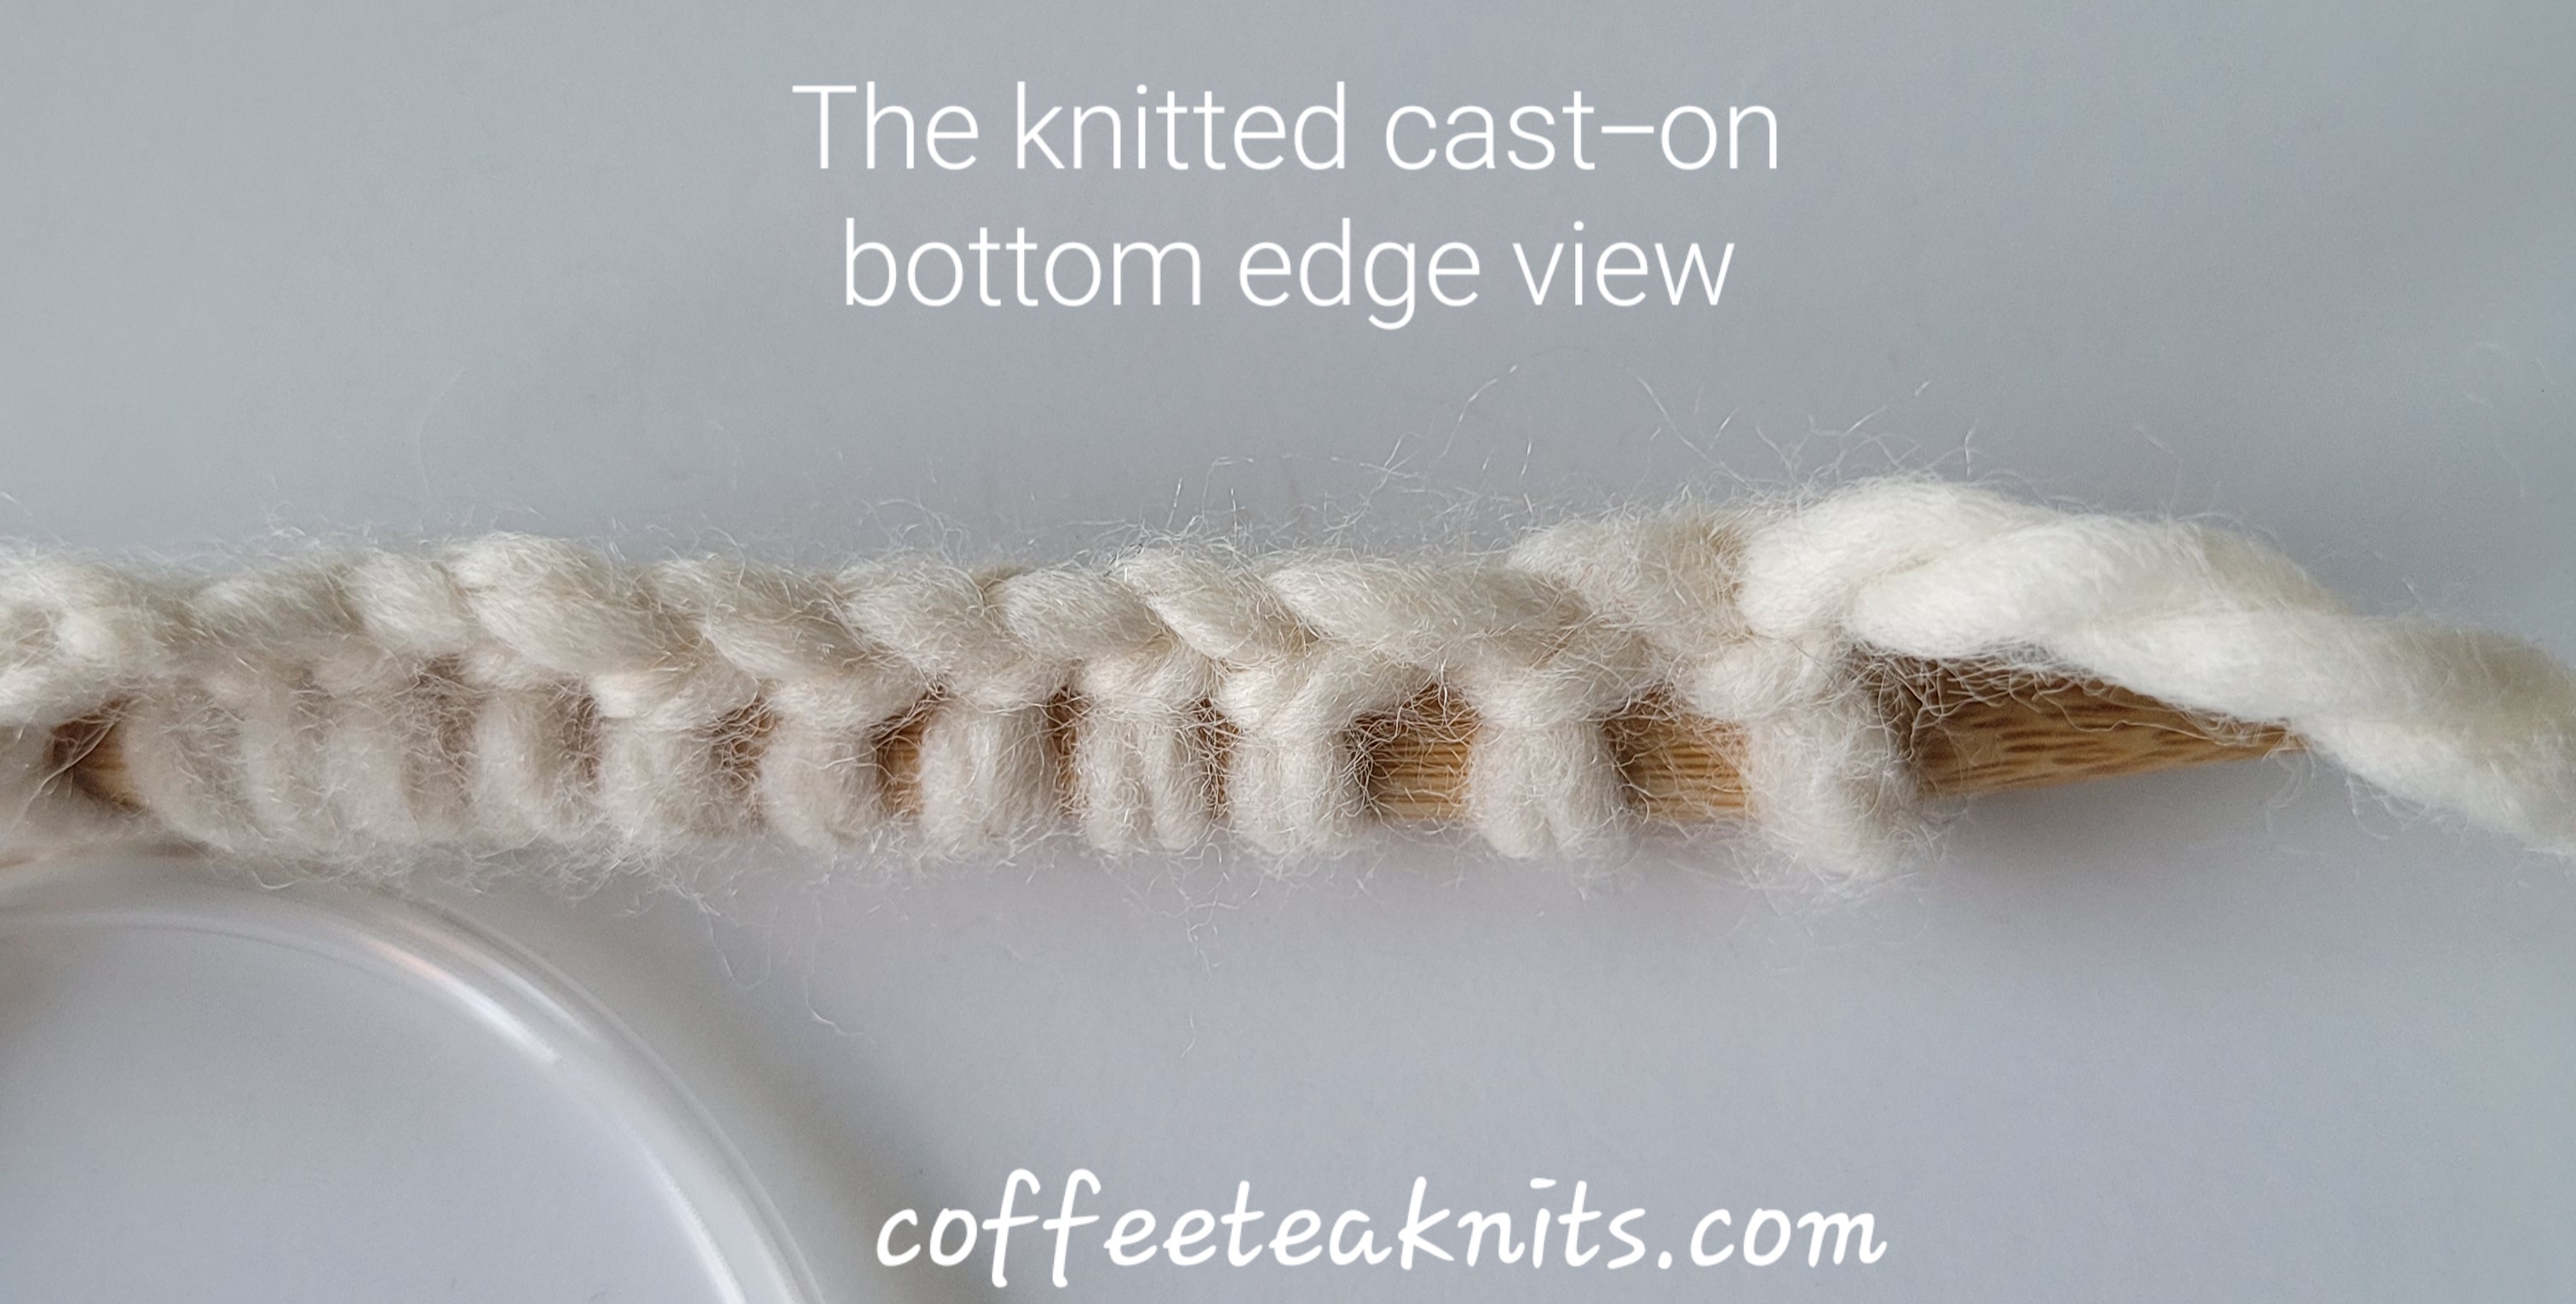
The Knitted Cast-On is one of many cast-on techniques in knitting. Other cast-on methods include the long tail cast-on, cable cast-on, provisional cast-on, the thumb method, picot cast-on, stretchy cast-on etc. The Knitted cast-on method is ideal for large projects. Use it when a large number of stitches are required for cast-on. This is typical for a blanket or shawl pattern. This method like the cable cast-on does not need a long yarn tail. The Knitted Cast-On is also a great beginner friendly cast-on method since it is basically the knit stitch. I usually use the knitted cast-on for knitting projects where all the edge stitches are later picked up for a more decorative border. The knitted cast-on begins with a slip knot and each additional stitch is then knitted on. The written instructions and video below on how to do the knitted cast-on is shown for right-handed knitting.

The Knitted Cast-On:


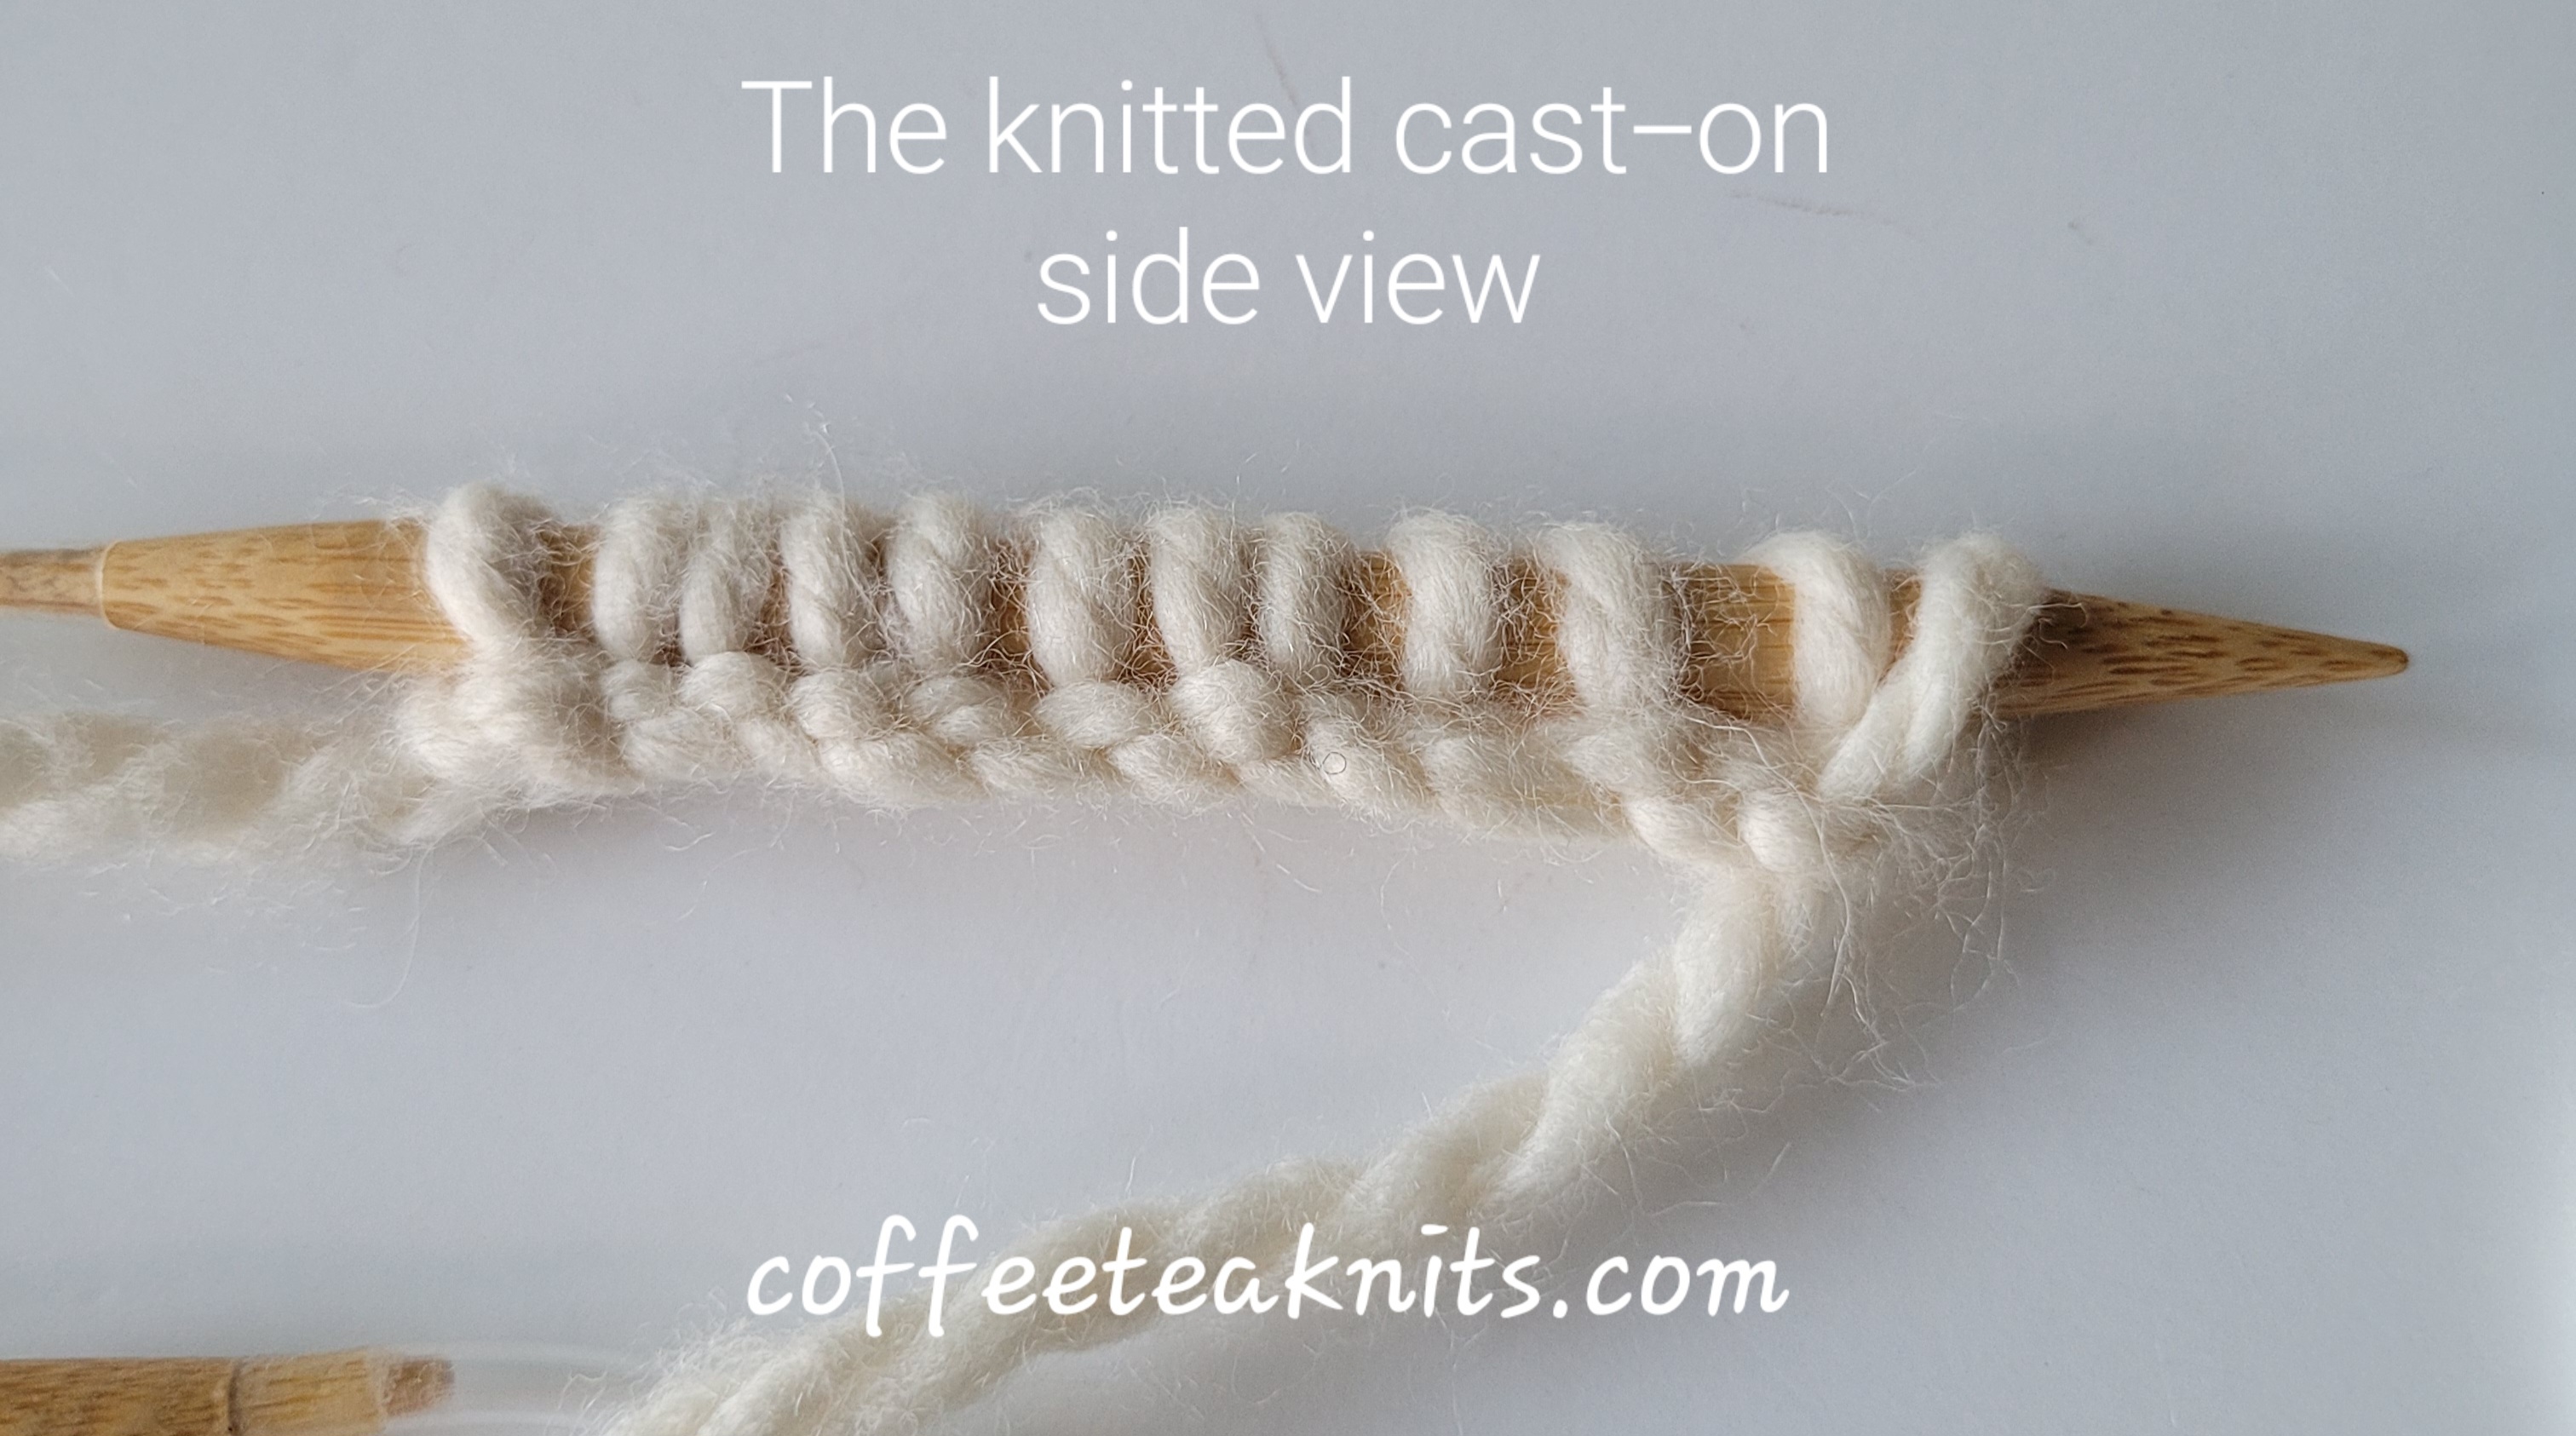
The Knitted Cast-on Steps:

  1. Make a slip knot (How To Slip Knot)
  2. Transfer the slip knot loop onto the left knitting needle
  3. Insert the right knitting needle into the slip knot and bring working yarn around and in between the two needles as if to knit (Knit and Tink)
  4. Catch and pull the working yarn loop onto the right knitting needle
  5. Transfer the new stitch loop from the right knitting needle onto the left knitting needle by inserting the left knitting needle under the front strand of the new stitch loop
  6. Tug the working yarn to tighten the new stitch loop on the left knitting needle
  7. Insert the right knitting needle into the first stitch on the left knitting needle
  8. Catch and pull the working yarn loop with the right knitting needle
  9. Move the new stitch loop from the right knitting needle to the left knitting needle by inserting the left knitting needle under the front strand of the new stitch loop
  10. Tug the working yarn to tighten the new stitch loop on the left knitting needle
  11. Repeat steps 7 – 10 till the desired number of stitch count is reached for a knitting project

~coffeeteaknits.com

Tutorial Series: How to Half Double Crochet

Another basic stitch after a single crochet (How to Single Crochet) is the half double crochet. The half double crochet stitch is taller than a single crochet stitch but shorter than a double crochet stitch. The fabric made with the half double crochet stitch is also less dense than the fabric made with a single crochet stitch. The video and written instructions below demonstrate how to make a half double crochet from a foundation chain and for the following rows when crocheting with your right hand.

Half Double Crochet from a Foundation Chain:


Written Instructions on How to Half Double Crochet from a Foundation Chain:

  1. With a loop on the crochet hook, wrap working yarn around the hook (counterclockwise)
  2. Skip the first two chains stitch from the loop on the crochet hook and insert the crochet hook into the top strand of the third chain stitch
  3. Wrap working yarn around hook (counterclockwise), catch and pull yarn through the top strand of the third chain stitch
  4. There are three loops on the crochet hook
  5. Wrap the working yarn around the hook (counterclockwise), catch and pull yarn through all three loops on the crochet hook
  6. There is one loop on the crochet hook
  7. Wrap working yarn around the hook (counterclockwise), insert crochet hook into the top strand of the next foundation chain stitch
  8. Wrap working yarn around hook (counterclockwise), catch and pull yarn through the top strand of the next foundation chain stitch
  9. Repeat steps 4 to 6
  10. Repeat steps 7 to 9 for the rest of the foundation chain stitches including the last slip knot end stitch
  11. Chain 2 and turn to half double crochet the next row

How to Half Double Crochet:

Written Instructions on How to Half Double Crochet:

  1. Wrap working yarn around the hook (counterclockwise), skip the first two stitches from the loop on the crochet hook and insert the crochet hook under both the strands of the next stitch
  2. Wrap working yarn around hook (counterclockwise), catch and pull yarn under and through both the strands of the next stitch in the row
  3. There are three loops on the crochet hook
  4. Wrap the working yarn around the hook (counterclockwise), catch and pull yarn through all the three loops on the crochet hook. There is one loop left on the crochet hook
  5. Wrap working yarn around the hook (counterclockwise) and insert the crochet hook under both the strands of the next stitch in the row
  6. Repeat steps 2 to 4
  7. Repeat steps 5 and 6 till the last stitch in the row
  8. For the last stitch of the row, repeat steps 5 and 6, chain two and turn
  9. Repeat Steps 5 to 8 to half double crochet all the following rows

~coffeeteaknits.com

Tutorial Series: How To Slip Knot

Cast on for knitting or a foundation chain for crochet all start with a slip knot. The first stitch in knitting is the slip knot. The slip knot in crochet is the loop for the first foundation chain. Therefore, how to make a slip knot is the first step in learning how to knit or crochet. There are many ways to make a slip knot. How to slip knot differs for knitters and crocheters. The video below shows how I make a slip knot to start a crochet foundation chain.

How to Slip Knot (slow motion):


Written Instructions for How to Slip Knot:

  • Wrap the yarn around index and middle finger of the left hand going from top to bottom (clockwise)
  • Bring the yarn across and between the two fingers
  • With the right hand, bring the strand of yarn in and through the ring formed by the wrapped yarn
  • Pull and tighten the ring holding the strand of yarn to form the slip knot
  • Insert a crochet hook into the slip knot and tighten it around the hook

~coffeeteaknits.com