Tutorial Series: K2tog vs K2tog tbl

Knit 2 together (K2tog) and Knit 2 together through the back loop (K2tog tbl) are knitting techniques used for decreasing one stitch. Decreasing stitches are used for garment shaping and in lace knitting patterns. How to K2tog is shown below for right handed knitting.

K2tog (Tutorial Series: K2tog and P2tog):

Advertisements


K2tog tbl:

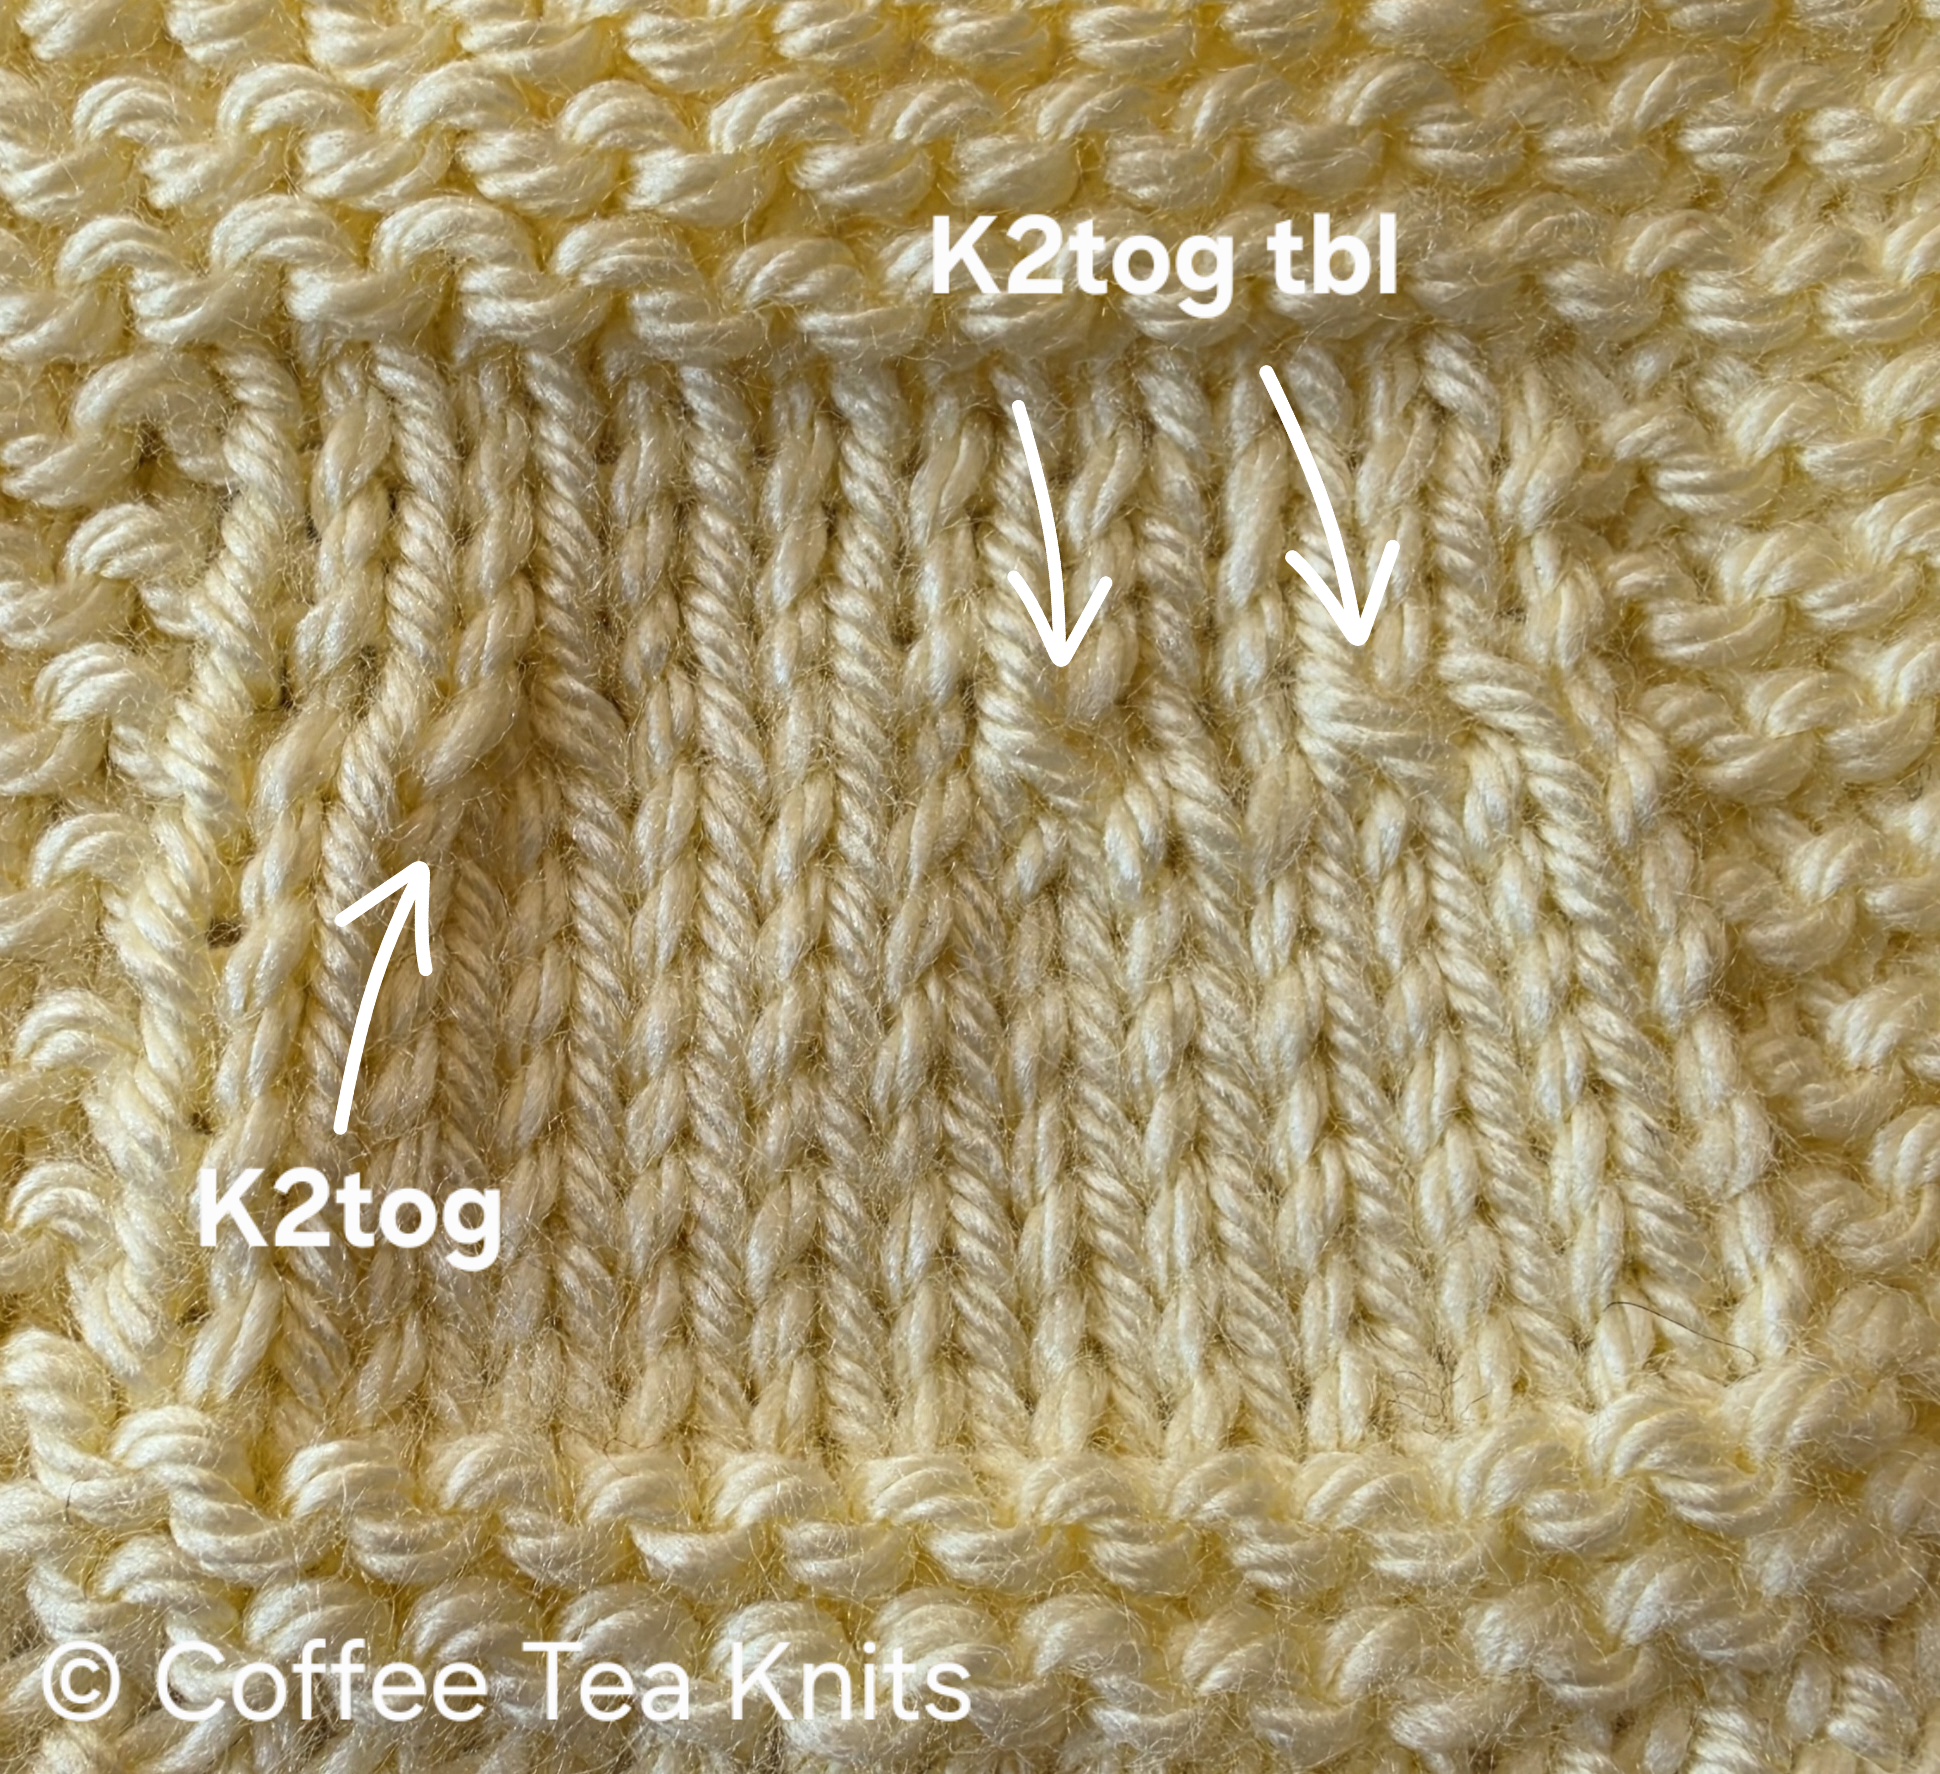
Knit 2 together in the back loop (K2tog tbl) is also used for stitch decrease and but differs from K2tog. It is also used for garment shaping and in lace patterns. There is, however, a visual and directional difference between the two techniques. K2tog is a right leaning decrease while K2tog tbl is a left leaning decrease. K2tog tbl adds more texture to the knitted piece and is commonly used in twisted stockinette or twisted rib stitch patterns. Sometimes it may be used as an alternative to the SSK technique (Tutorial Series: Slip Slip Knit SSK) Shown below in stockinette stitch pattern K2tog vs K2tog tbl

Advertisements


K2tog vs K2tog tbl:

Advertisements


Knit 2 together in the back loop (K2tog tbl) for right handed knitting:

Advertisements


Written Steps for K2togt tbl:

  • Turn the left knitting needle to the back of the work
  • Insert right needle into the back loops of the first stitch and then the second stitch on the left knitting needle
  • Wrap the working yarn around the inserted right needle
  • Pull the right knitting needle and working yarn loop into and through the 2 stitches on the left needle
  • Keep the working yarn loop (the new stitch) on the right needle and slide the 2 stitches off the left needle

Advertisements

~coffeeteaknits.com

The Everyday Occasion Cowl Pattern Pdf

The Everyday Occasion Cowl Pattern Pdf is now available for purchase on Ravelry and Etsy


The yarn used for this pattern is KnitPro® Symfonie Luna yarn in Pink Pearl (DK weight 75% Merino and 25% Silk – 200 yards in 100 g) although any DK weight yarn of choice can be substituted for this cowl


Advertisements

The Everyday Occasion Cowl Pattern Pdf includes:

  • A list of the abbreviations used in the pattern and the materials needed
  • A summary of all the sections of the pattern
  • Photos and links to video clips as visual aid
  • Step by step written instructions on how to knit the cowl
  • Specific areas in the pattern where size of the cowl can be modified

Buy the beginner-friendly Everyday Occasion Cowl pattern pdf and customize to any size of choice for a more personal and enjoyable knitting and crochet experience


*The Everyday Occasion Cowl is based on Goes with Everything Cowl posted January 2021 on this site,

Advertisements

~coffeeteaknits.com

Tutorial Series: The Crochet Zig Zag Braid Edging

A crochet border edging on crochet or knit blankets, dishcloths, and various other projects is frequently employed to enhance their aesthetic appeal, providing a more finished or decorative look that transforms simple items into something more. There are numerous crochet border edgings available, each offering a unique texture and style. For instance, a single crochet border adds a subtle, clean finish, whereas a crochet moss stitch border introduces a more textured feel. Another edging is the crochet zig zag braid edging, which is accomplished by alternating between slip stitches and chain stitches, creating a braid-like pattern that adds both texture and visual interest. Incorporating the various border edging adds more visual interest and elevates the overall design of a knitted or crocheted item.

Advertisements

I have used the crochet zig zag braid edging in several dishcloth patterns, including the Dotted Dishcloth, With a Twist Dishcloth, and a few other dishcloths that I have created over time. This straightforward edging technique gives the finished product a textured and decorative look.


The video and written instructions below show how to crochet zig zag braid edging for right-handed crochet

Advertisements

The Crochet Zig Zag Braid Edging:

Advertisements


Written steps to crochet the Zig Zag Edging:

  • Insert crochet hook under both strands of the edge stitch or a crochet stitch
  • Yarn over and pull the yarn loop under and through both stands of the edge stitch.
  • Slip stitch (Tutorial Series: How to Crochet Slip Stitch) the loop with the loop on the crochet hook
  • Chain one
  • Repeat the steps above for the crochet zig zag edging
Advertisements

~coffeeteaknits.com