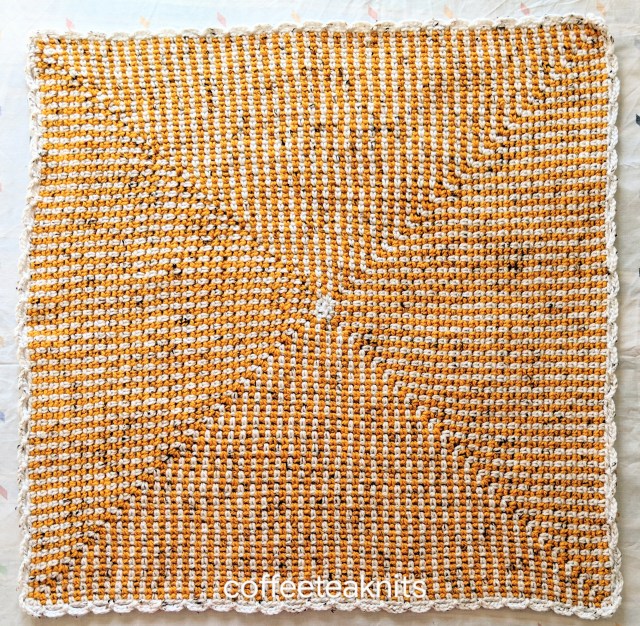
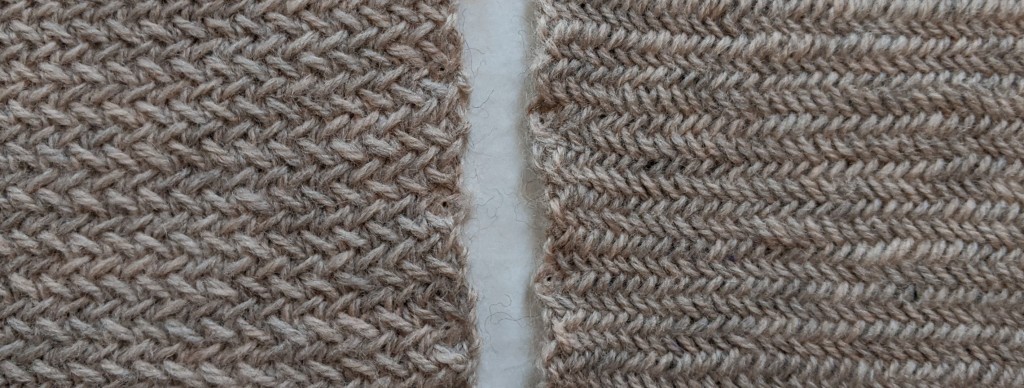
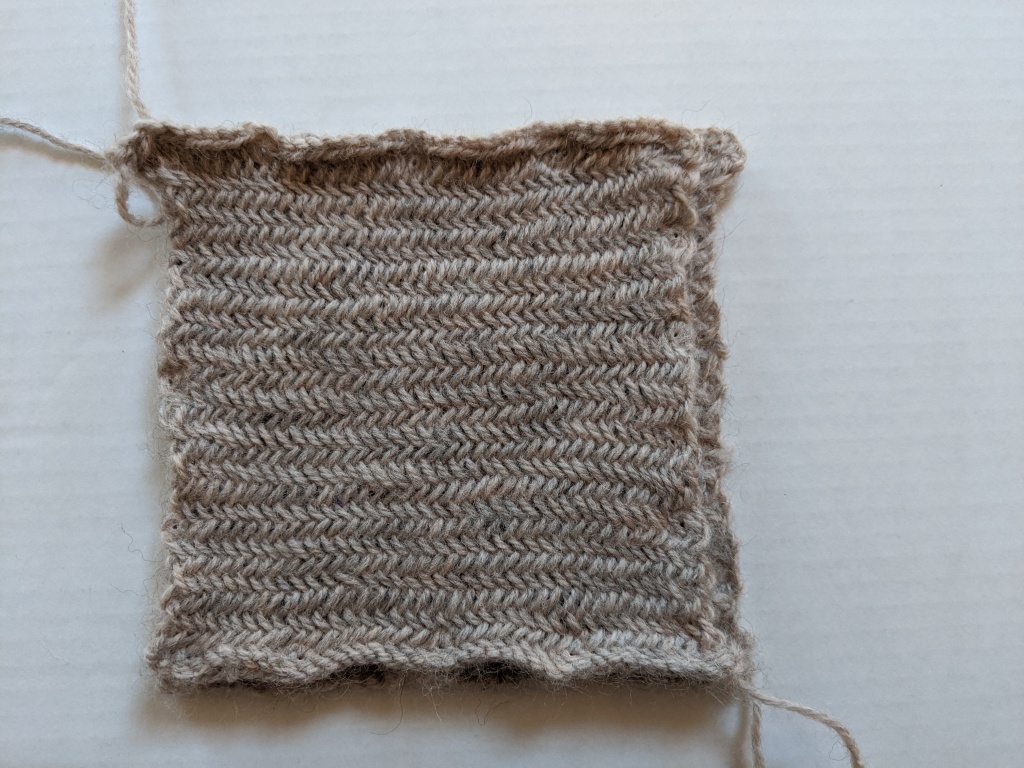
The crochet moss stitch and bulky yarn

Since my post “To crochet or knit center out” I’ve crocheted several dishcloths and a worsted weight baby blanket using the center out technique. A baby blanket with bulky yarn (yarn weight: 5) and the center out moss stitch pattern can be crocheted in a matter of days.

Crochet Moss Stitch Baby Blanket with bulky yarn

I also started knitting a center out garter stitch baby blanket. Knitting a center out baby blanket in one piece with worsted weight or bulky yarn is a bit more challenging in terms of hand fatigue. This is because the growing blanket with the increasing number of stitches gets heavier since the weight of the whole blanket rests on the circular needle and your hands. Needless to say that the center out knitted baby blanket is still a work in progress.

Not so with a crocheted center out baby blanket. There is only one stitch on the crochet hook and the weight of the growing blanket rests on your lap or sofa/chair etc. By using bulky yarn or holding two strands of lighter weight yarn together a blanket can be crocheted very quickly with varying combinations.

This makes center out crocheting more appealing and versatile to me than center out knitting – at least for large seamless projects made in one piece.


~coffeeteaknits.com

The Horizontal Herringbone Stitch

I saw the horizontal herringbone stitch pattern in the book, “750 Knitting Stitches: The Ultimate Knit Stitch Bible,” and I wanted to use this stitch pattern for a knitting project. I looked online for a tutorial for this stitch pattern and saw a similar yet different stitch pattern with the same name.

The two Horizontal Herringbone stitches [Swatch 1 (left) from the book and Swatch 2 (right) found online]

Puzzled I decided to knit up two swatches and compare these two stitch patterns.
Yarn used: Yarnspiration™ Patons Classic Wool
For both the swatches I cast on 40 stitches with US #8 knitting needles and knit the two stitch pattern for 28 rows. On the 29th row, I bound off using the knit stitch.

Swatch 1Swatch 2
Stitch PatternRow 1: Knit 1, * slip one, knit 1 then pass the slipped stitch over but before dropping the stitch off the needle knit through the back of the slipped stitch; repeat from * to last stitch, knit 1
Row 2: *Purl 2 together but purl the first stitch again before dropping it off the needle; repeat from* to end of the row. (1)
Row 1:*Knit 2 together through the back loop but drop only the first stitch off the left hand needle; repeat from * to the last stitch, knit 1 through the back loop,
Row 2: *Purl 2 together dropping only the first stitch; repeat from * to last stitch, purl 1. (2)
Stitch typeSlipped and twisted stitchTwisted stitch
The knitting experienceThe twisted and slipped stitch caused more hand fatigue and I had to take breaks before continuing to knit this stitch pattern.
The twisted stitch caused some hand fatigue but not as much as Swatch 1. (I have mentioned the problem of hand fatigue with twisted stitches in a previous blog post)
The Knitted ItemThe knitted swatch is not as dense as Swatch 2, it’s has more drape and lays flat. Blocked it’s slightly larger than the Swatch 2. (see images below)

Very dense fabric with compact stitches. It curls up a lot compared to Swatch 1 when unblocked. A bit smaller than Swatch 1. The reverse side looks very different from the Swatch 1. (see images below)

Comparison of the two swatches
(1): Stitch pattern from the book “750 Knitting Stitches: The Ultimate Knit Stitch Bible” page 48
(2): Tutorial by Very pink: Fancy Stitch Combos – Sideways/Horizontal Herringbone
The swatches unblocked
The swatches blocked
Reverse side of the swatches (swatch 1 on the left and swatch 2 on the right)
Swatch 1 slightly larger than Swatch 2

The names for these two stitch patterns are used interchangeably. Swatch 1 is sometimes called an alternate Herringbone stitch and Swatch 2 the Sideways Herringbone stitch. I like both stitch patterns and after comparing the two swatches I know what types of knitting projects I can knit using these stitch patterns. As for the swatches, I added a single crochet edging and will be using them as potholders.

Potholders

~coffeeteaknits.com

My yarn crafts in 2019

This year has been a year full of different yarn related crafts for me. From knitting and crocheting several items (hats, blankets etc. – see my 2019 blog posts) to learning how to weave using a rigid heddle loom has kept me quite busy. Realizing the many potential of yarn has been an interesting and enjoyable process. Next year I will continue to explore and learn more about weaving and crocheting.

woven towel


December hat for the WNHyearofhatsKAL2019


Here’s to all the yarn related crafts!


~coffeeteaknits.com

To crochet or knit center out

Knitting or crocheting from the center out has many pros. You start with a few stitches in the center and knit or crochet out in a square, a rectangle or a circle. Once the first few rounds are knitted or crocheted, the rest of the rounds are quite straightforward and easy to do. This technique is a great way to use up leftover yarn from previous knitting or crocheting projects.

I crocheted these dishcloths using the center out crochet moss stitch.

Crochet Moss Stitch Dishcloth


November 2019 hat for the WNHyearofhats2019KAL

November 2019 Hat

More details for this hat can be found on my Ravelry project page.


A stranded colorwork hat

October 2019 Hat for the WNHyearofhatsKAL

Of all the colorwork knitting methods (intarsia, mosaic, or duplicate stitch to name a few), I’ve been most hesitant to knit the stranded colorwork method. After knitting a headband/earwarmer (posted here) to learn this method of colorwork knitting, the idea of knitting a hat or a sweater with this method didn’t appeal to me much. This is because stranded colorwork requires holding two or more strands of yarn per row or round, working mostly with fingering or sport weight yarn, spending some time keeping the different strands of yarn untangled, and managing the floats in the back.

So this month I decided to get past this reluctance and knit a hat using the stranded colorwork method. I was pleasantly surprised at how much I enjoyed the experience of knitting this hat. Not having long floats and finding my own way of comfortably holding the strands of yarn helped in this process. I may now try knitting a more complex stranded colorwork hat this winter.

Keep warm and happy knitting