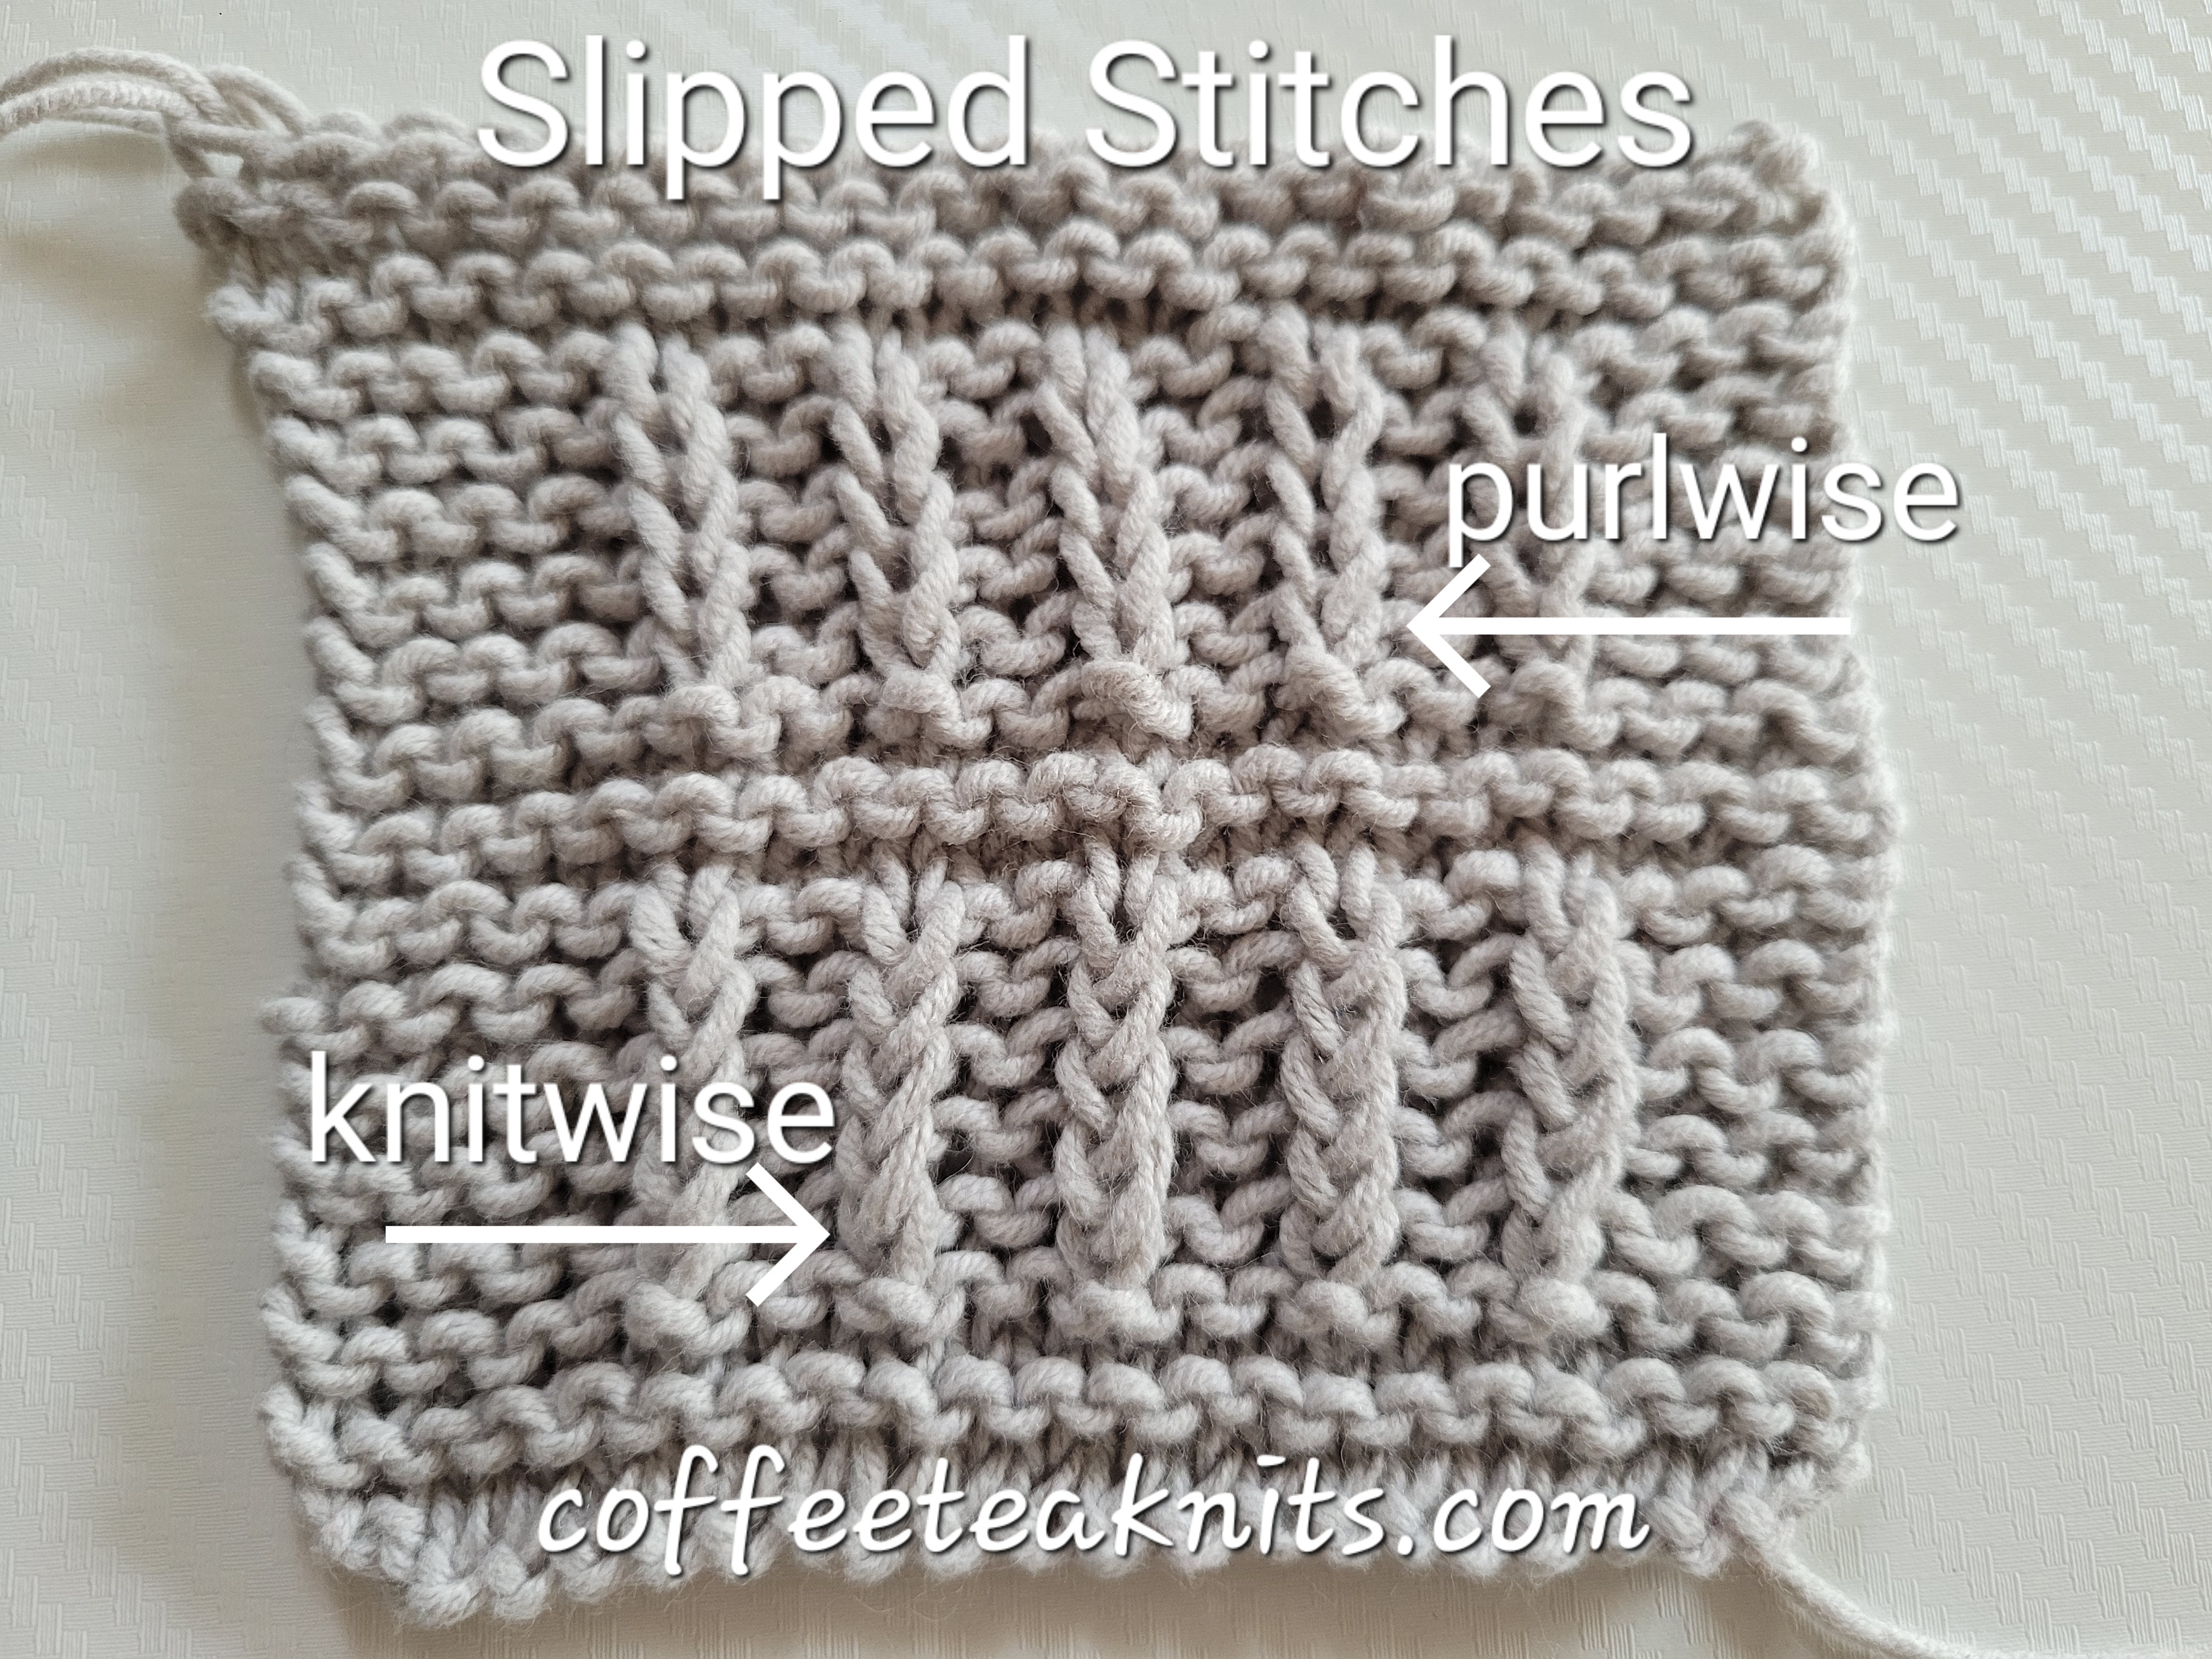
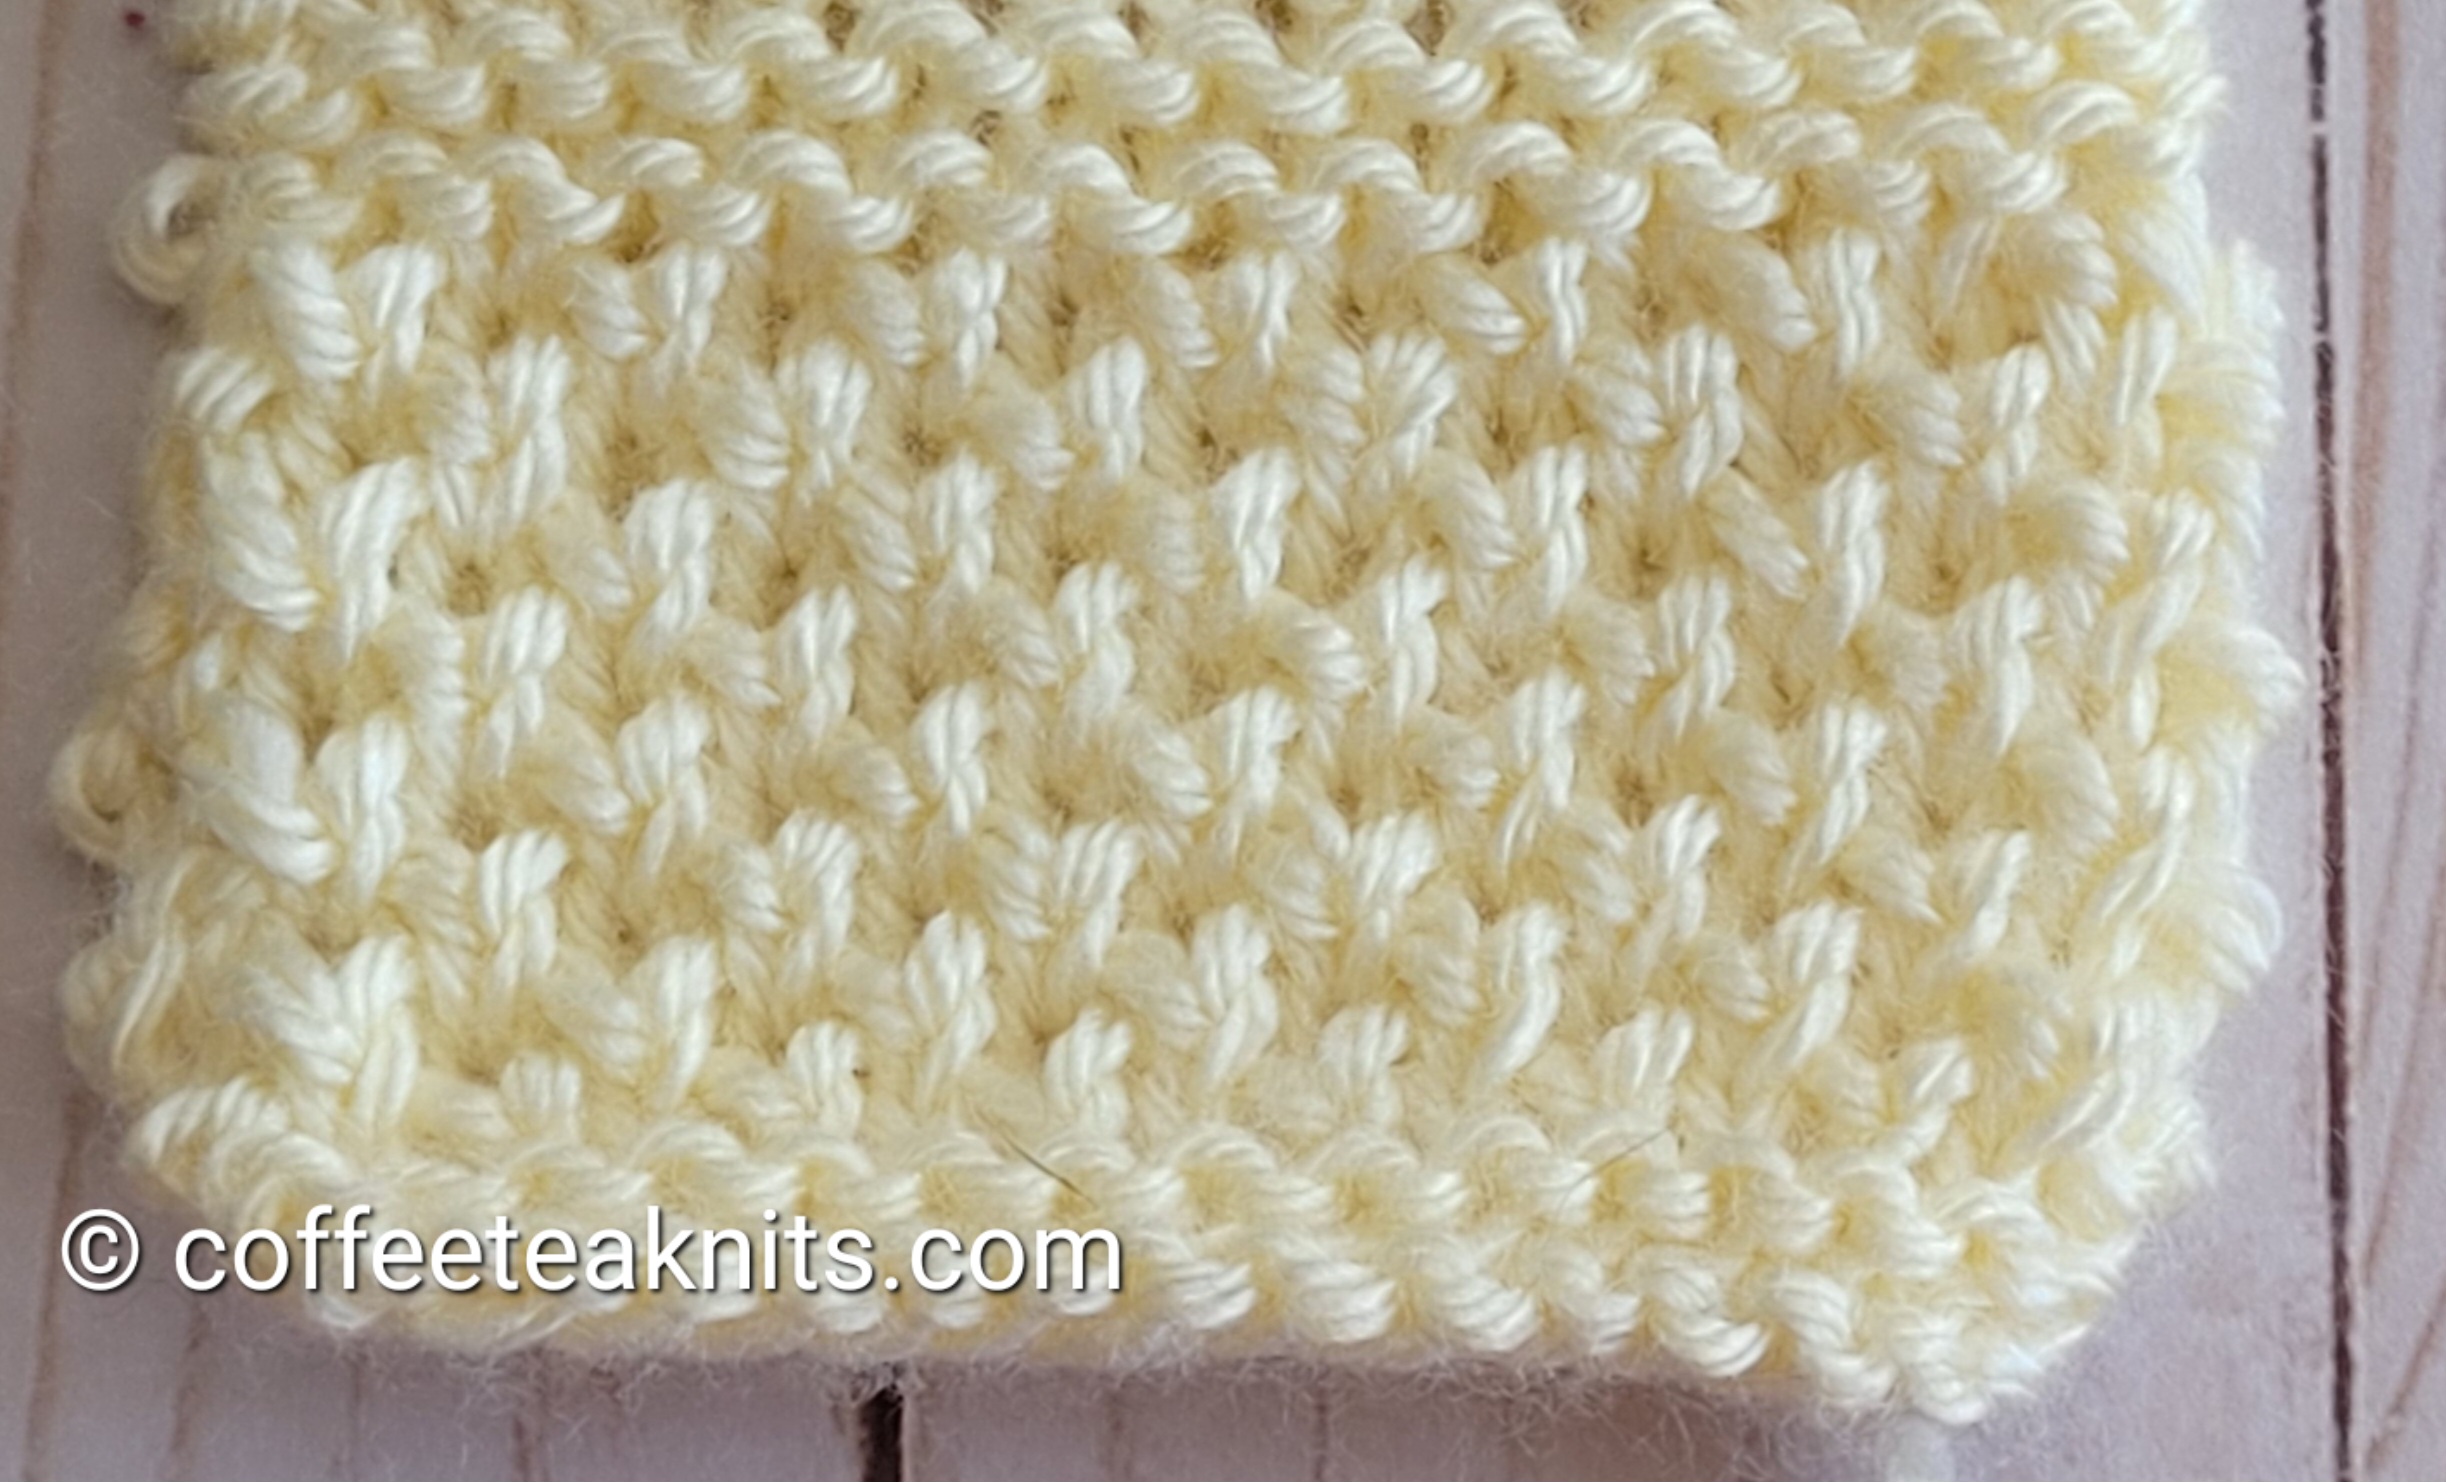
Knit one below (K1b) is a technique where the stitch on the knitting needle is not worked or knit. Instead the knit stitch right below is worked or knit. Examples of stitch patterns where K1b is used include the twisted seed stitch pattern, fisherman’s rib stitch pattern, some half brioche stitch patterns, honeycomb and textured rib patterns. Knit one below forms a fluffy and textured fabric. I have used K1b technique in the twisted seed stitch pattern for the Summertime Dishcloths and The Comfy Hat 1 patterns.
The twisted seed stitch pattern looks similar to the half brioche stitch pattern but differs in the techniques used to create the textured fabric (see image below)
The video and written instructions below show how to use the K1b technique for right-hand knitting
Knit One Below (K1b):
Written instructions for Knit one Below (K1b):
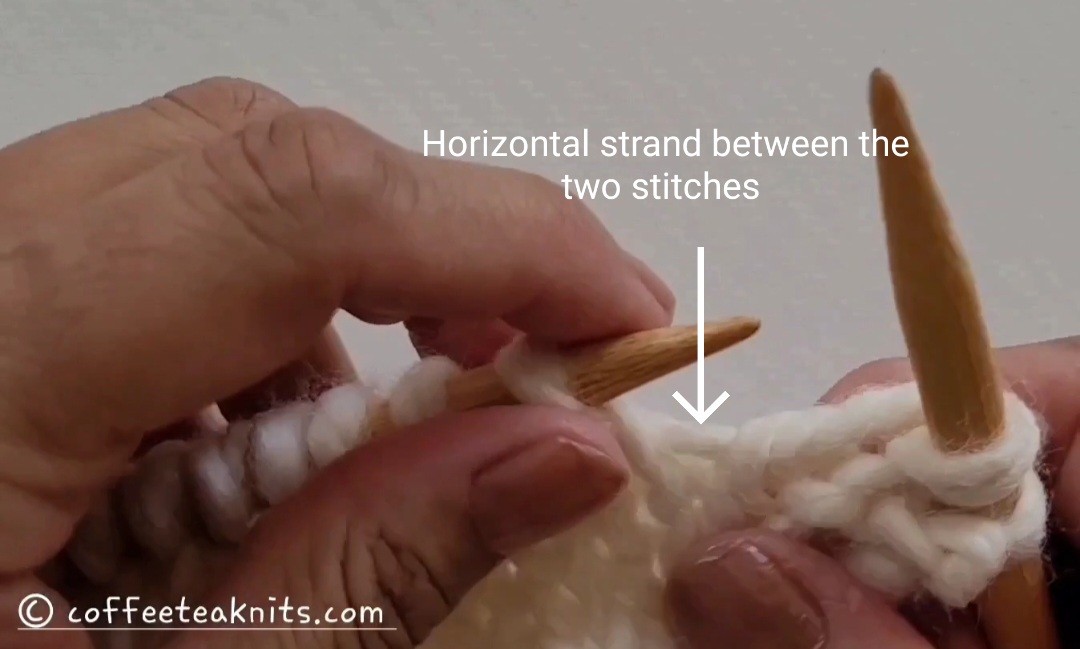
- Insert the right knitting needle from front to back into the center of the stitch below the first stitch on the left knitting needle
- Wrap the working yarn around the top of the right knitting needle to form a new loop (Tutorial Series: Knit and Tink)
- Pull the loop through the center of the stitch below the stitch on the left knitting needle
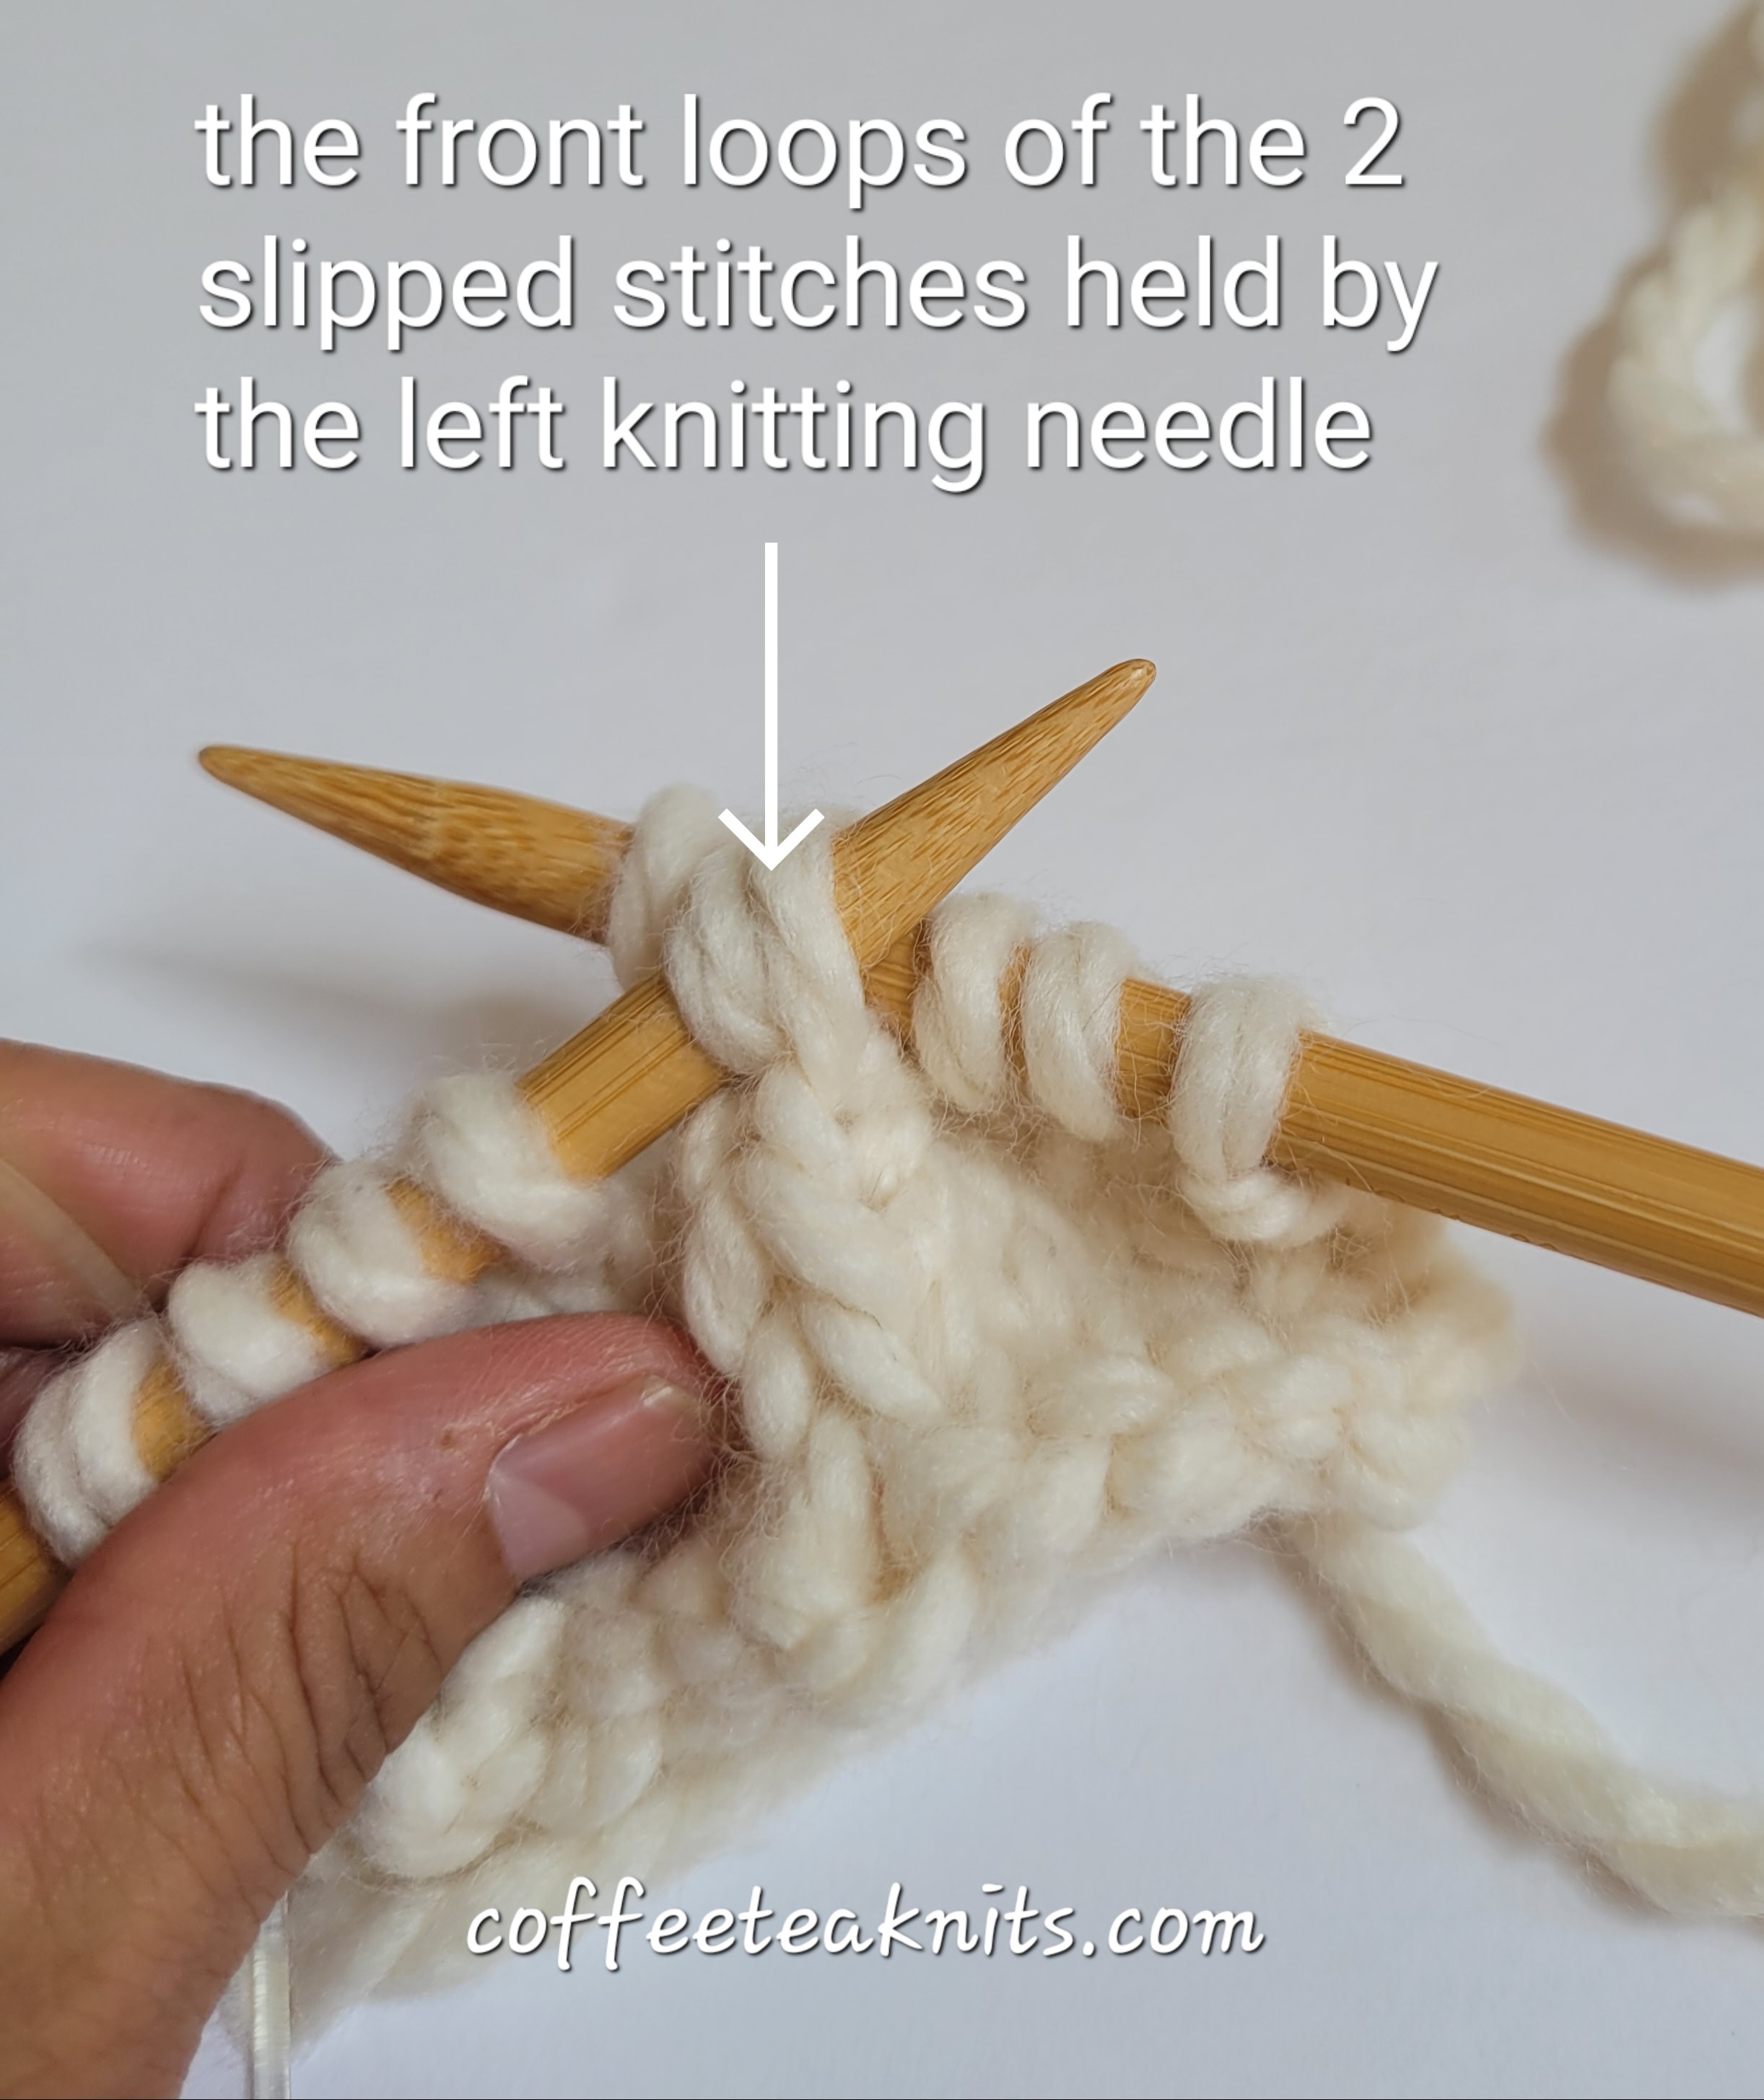
- The new knitted stitch is now on the right knitting needle
- Slip the un-worked first stitch off the left knitting needle
~coffeeteaknits.com
© Coffee Tea Knits. All text and images for personal use only. All Rights Reserved.