
Knitting this gradient harmony wrap was soothing, quieting, comforting, and calming for me when it was most needed.
~coffeeteaknits.com
© Coffee Tea Knits. All text and images for personal use only. All Rights Reserved.
Knitting this gradient harmony wrap was soothing, quieting, comforting, and calming for me when it was most needed.
~coffeeteaknits.com
© Coffee Tea Knits. All text and images for personal use only. All Rights Reserved.
Toward Center Mitered Dishcloth
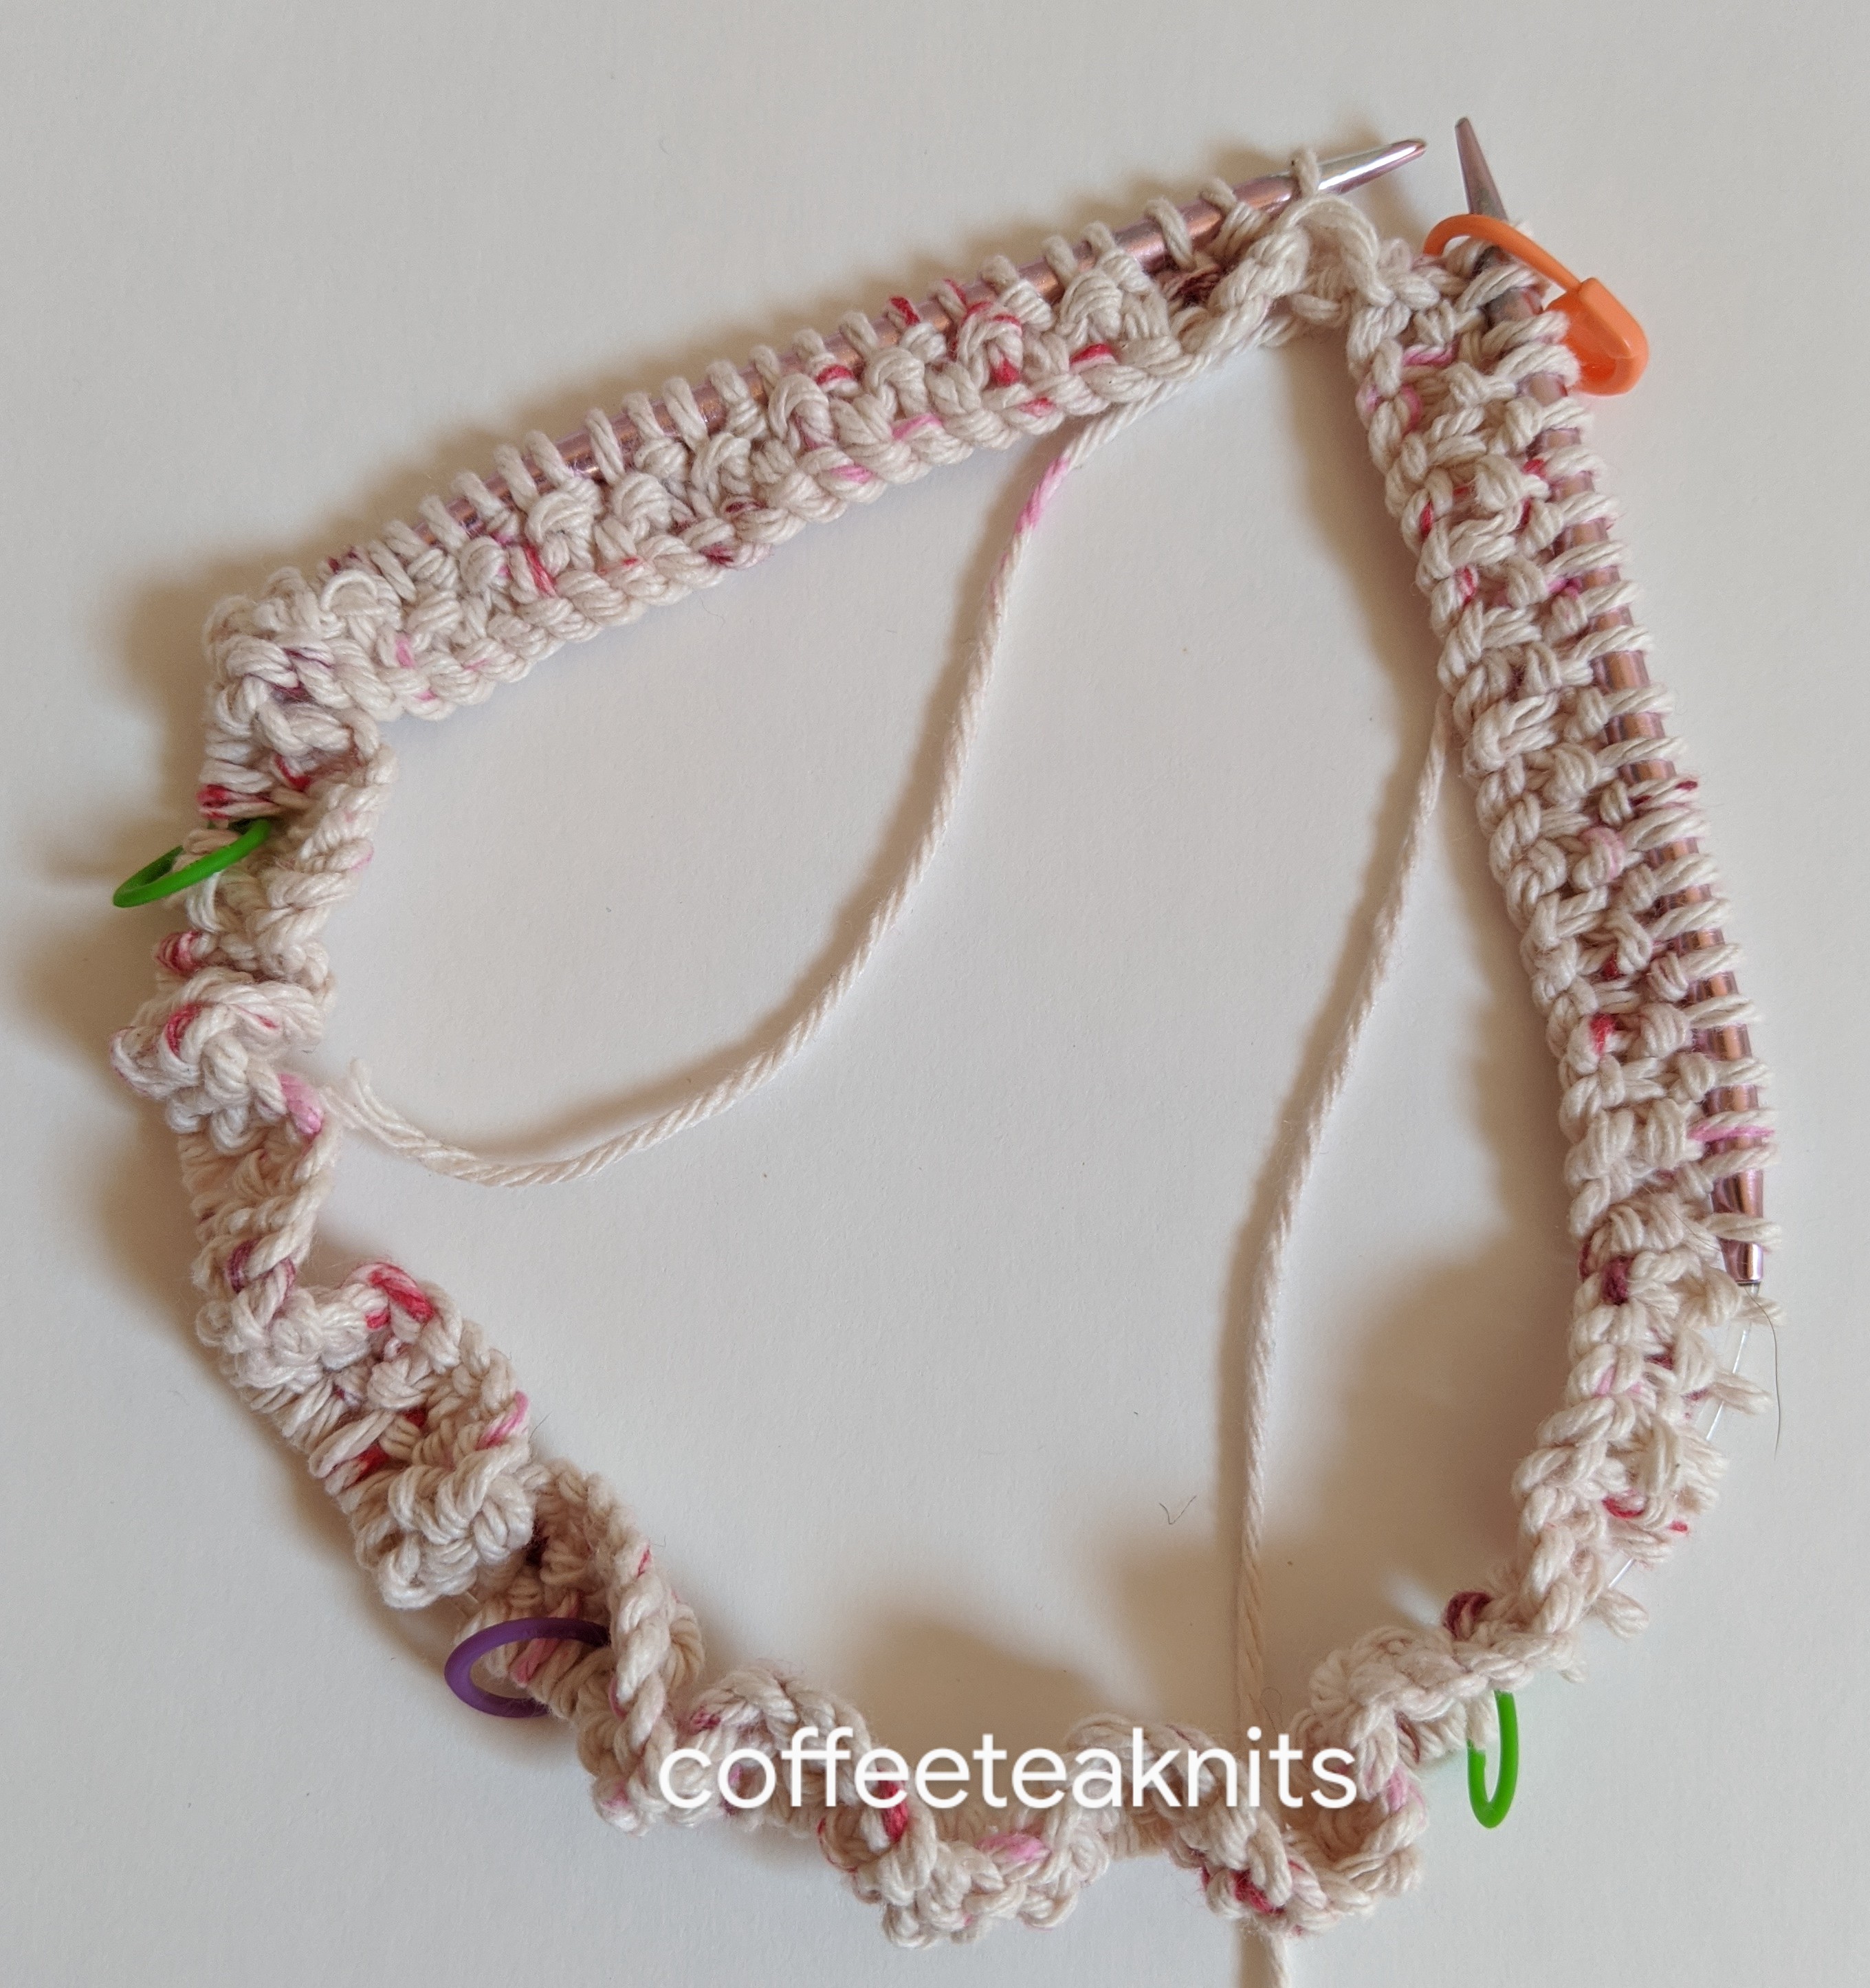
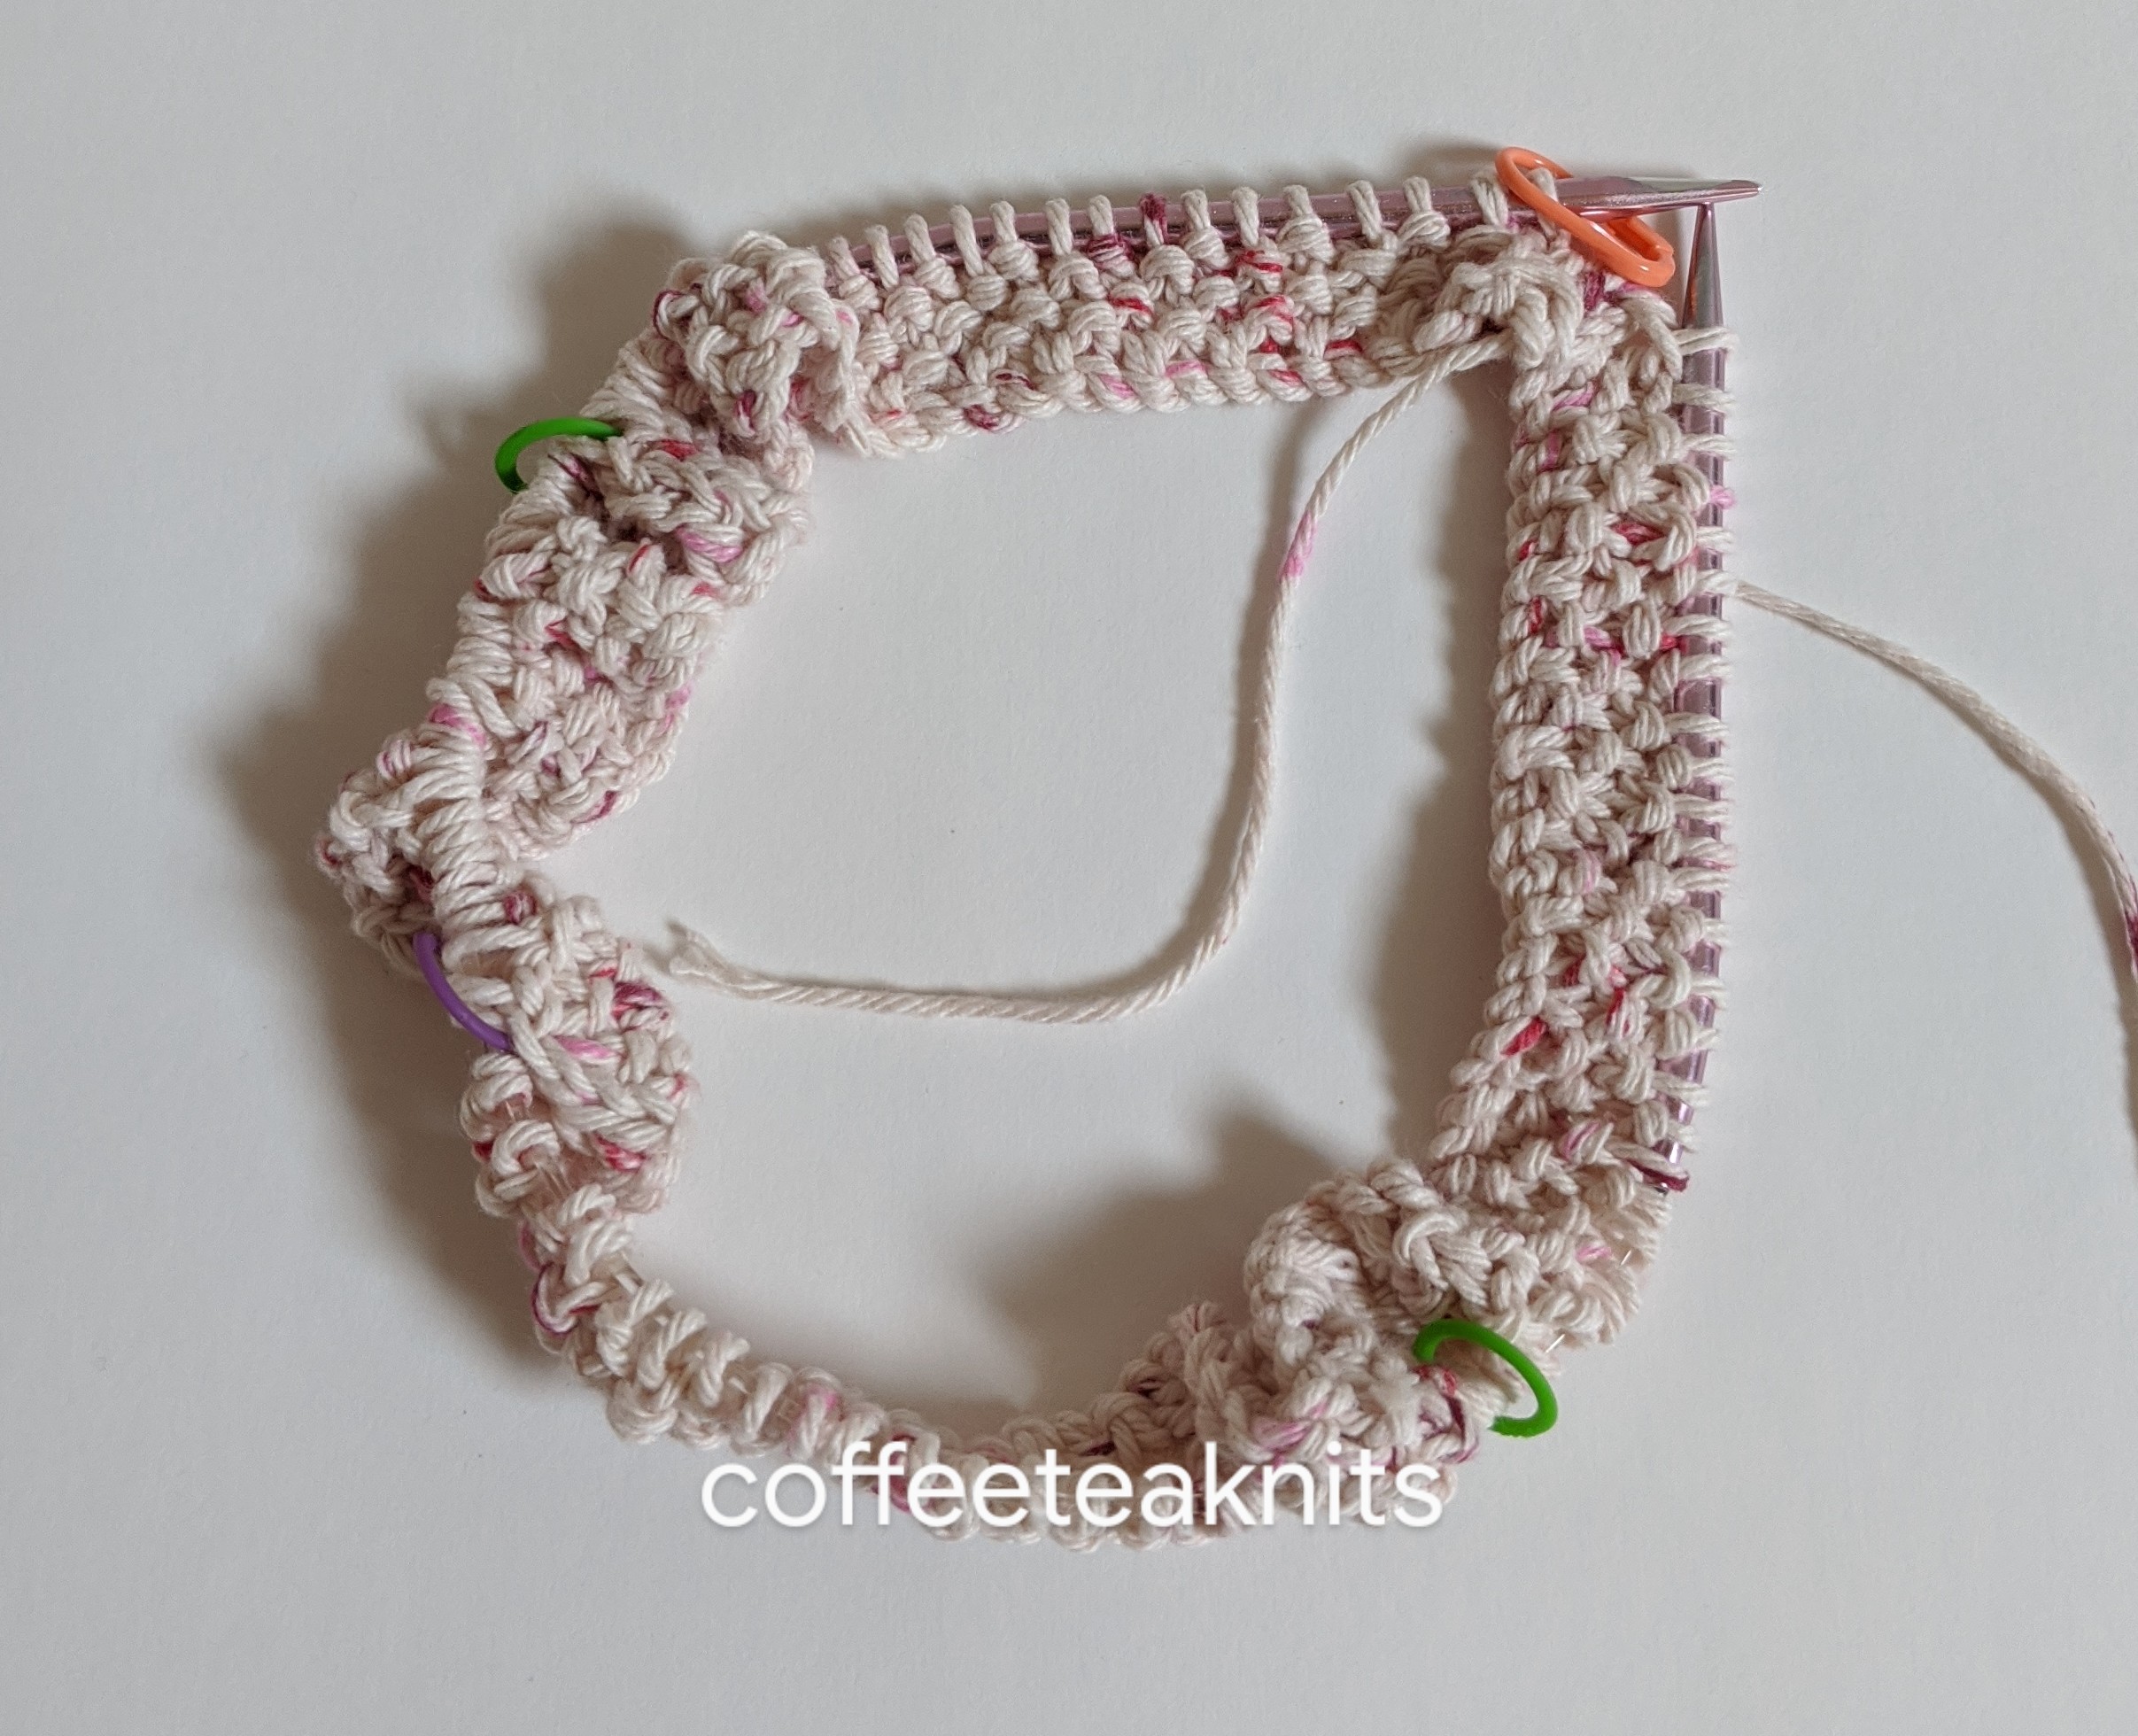
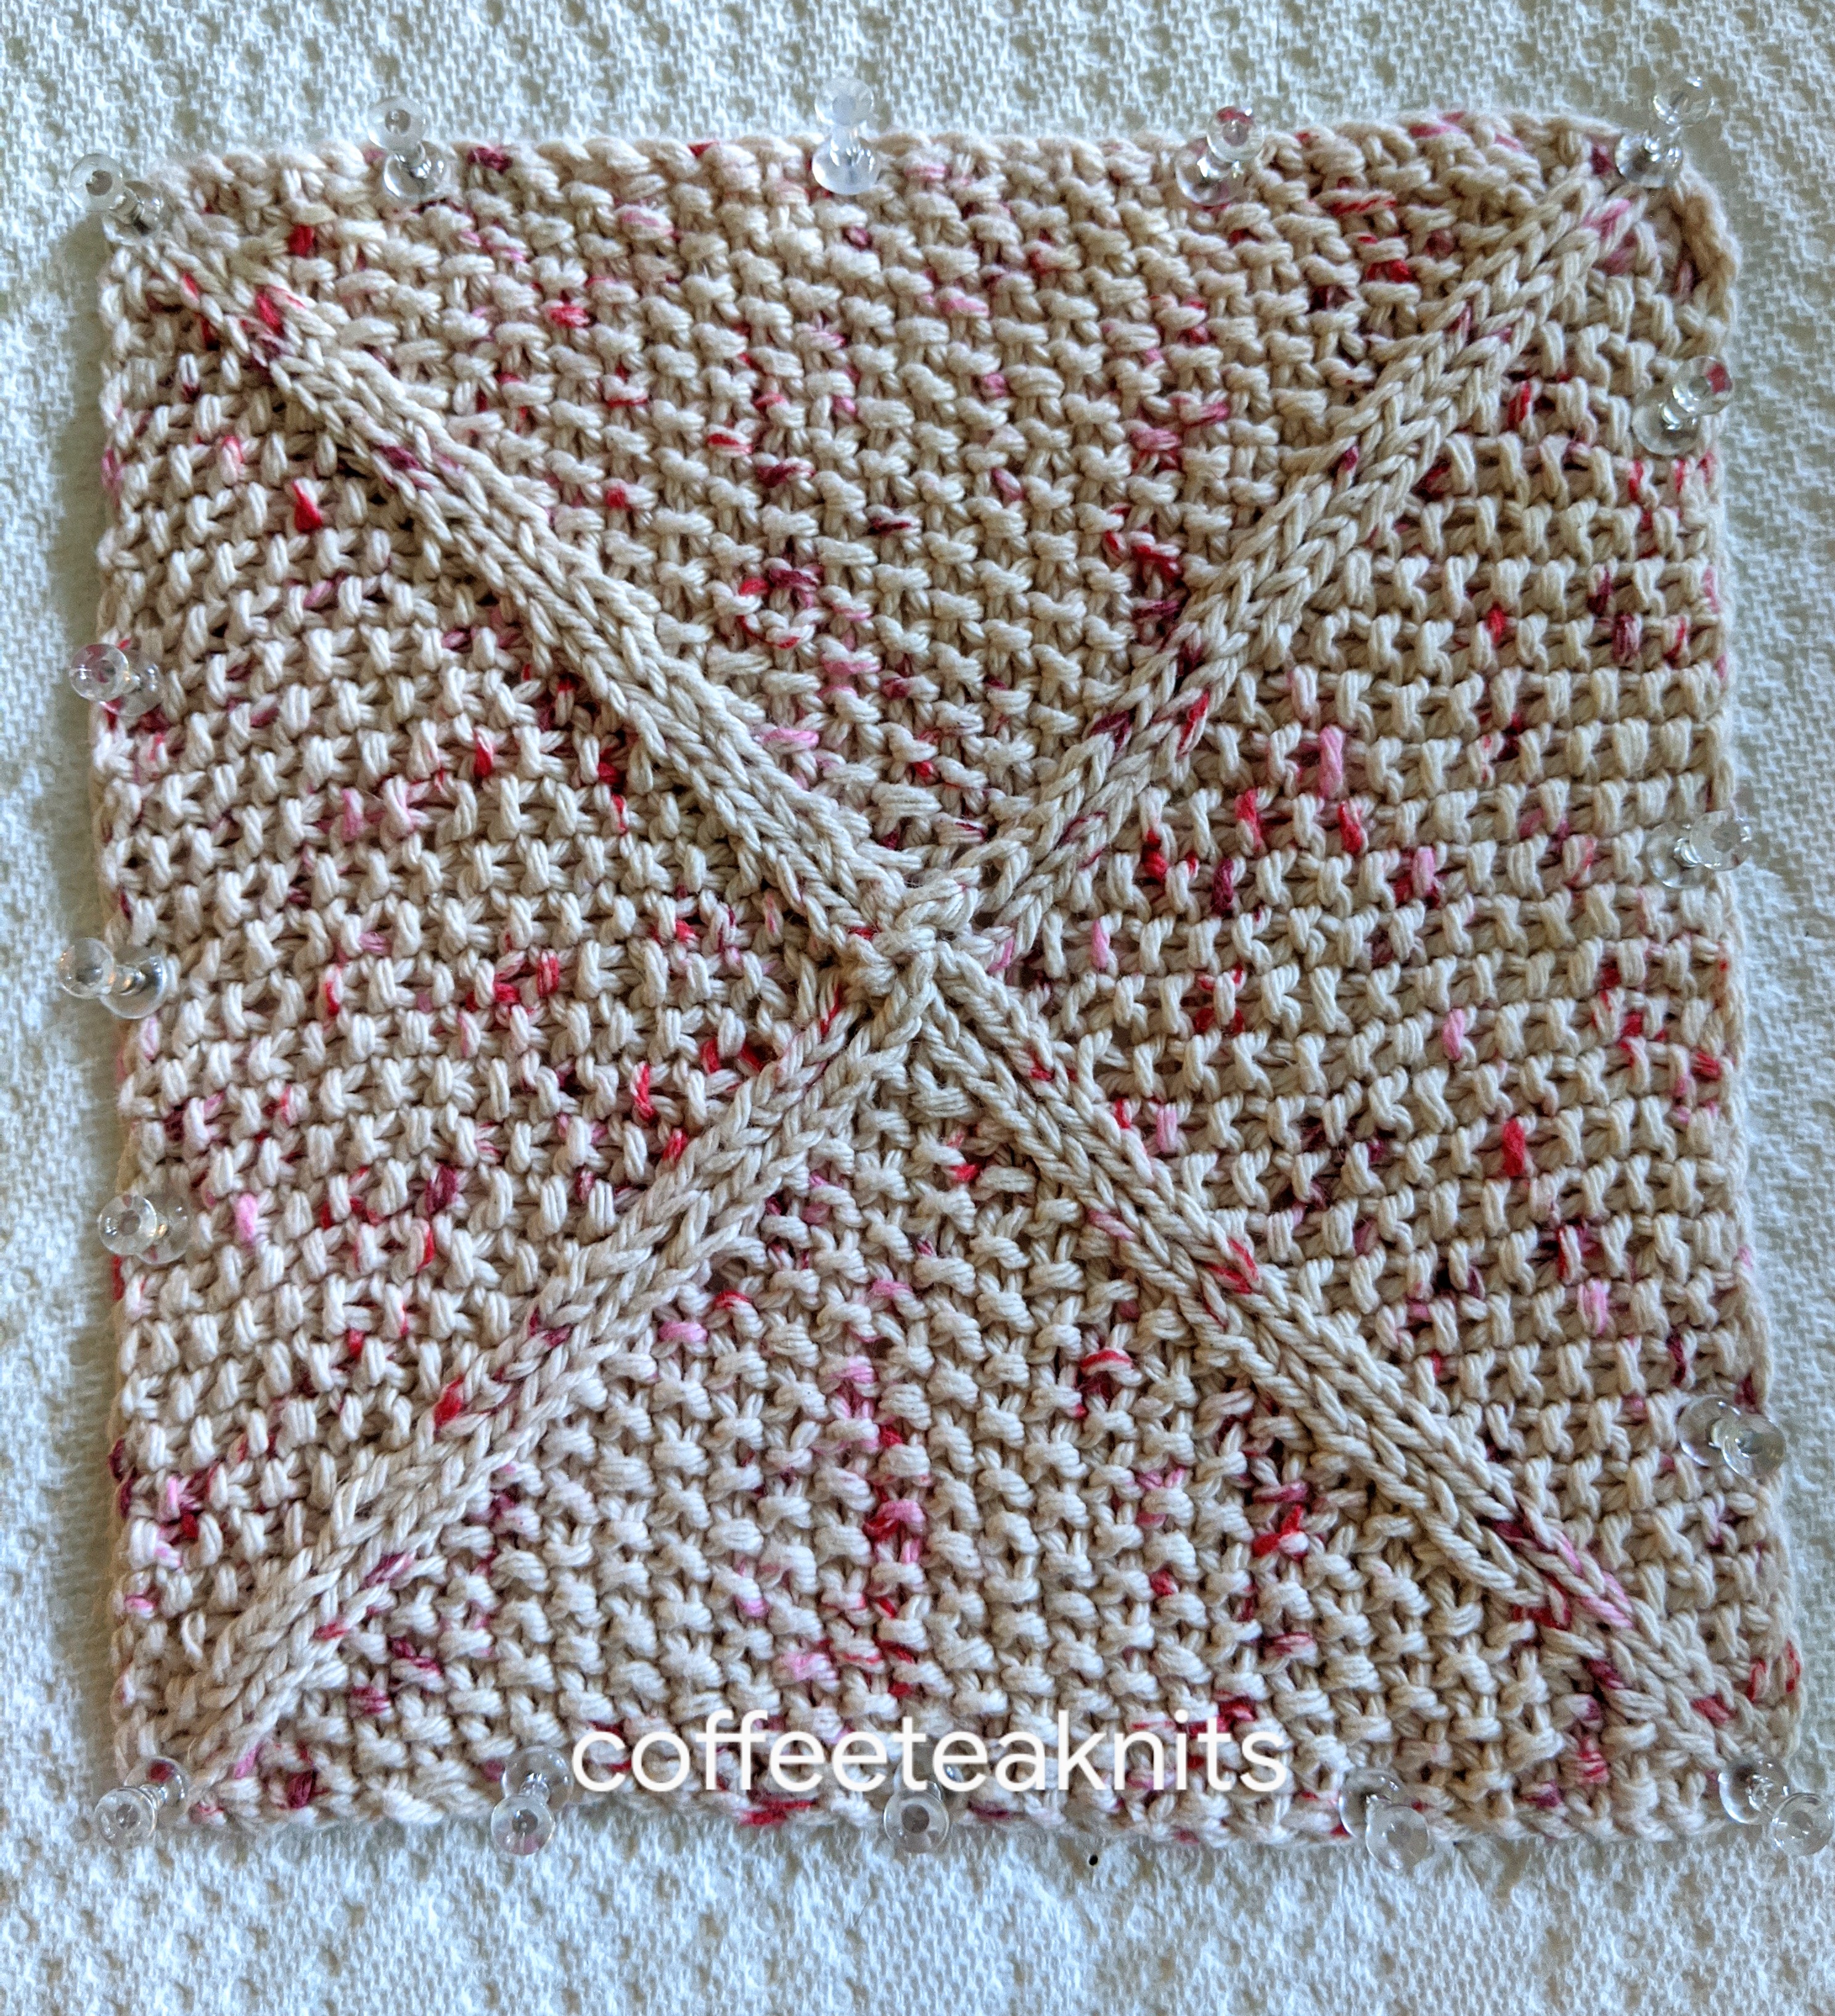
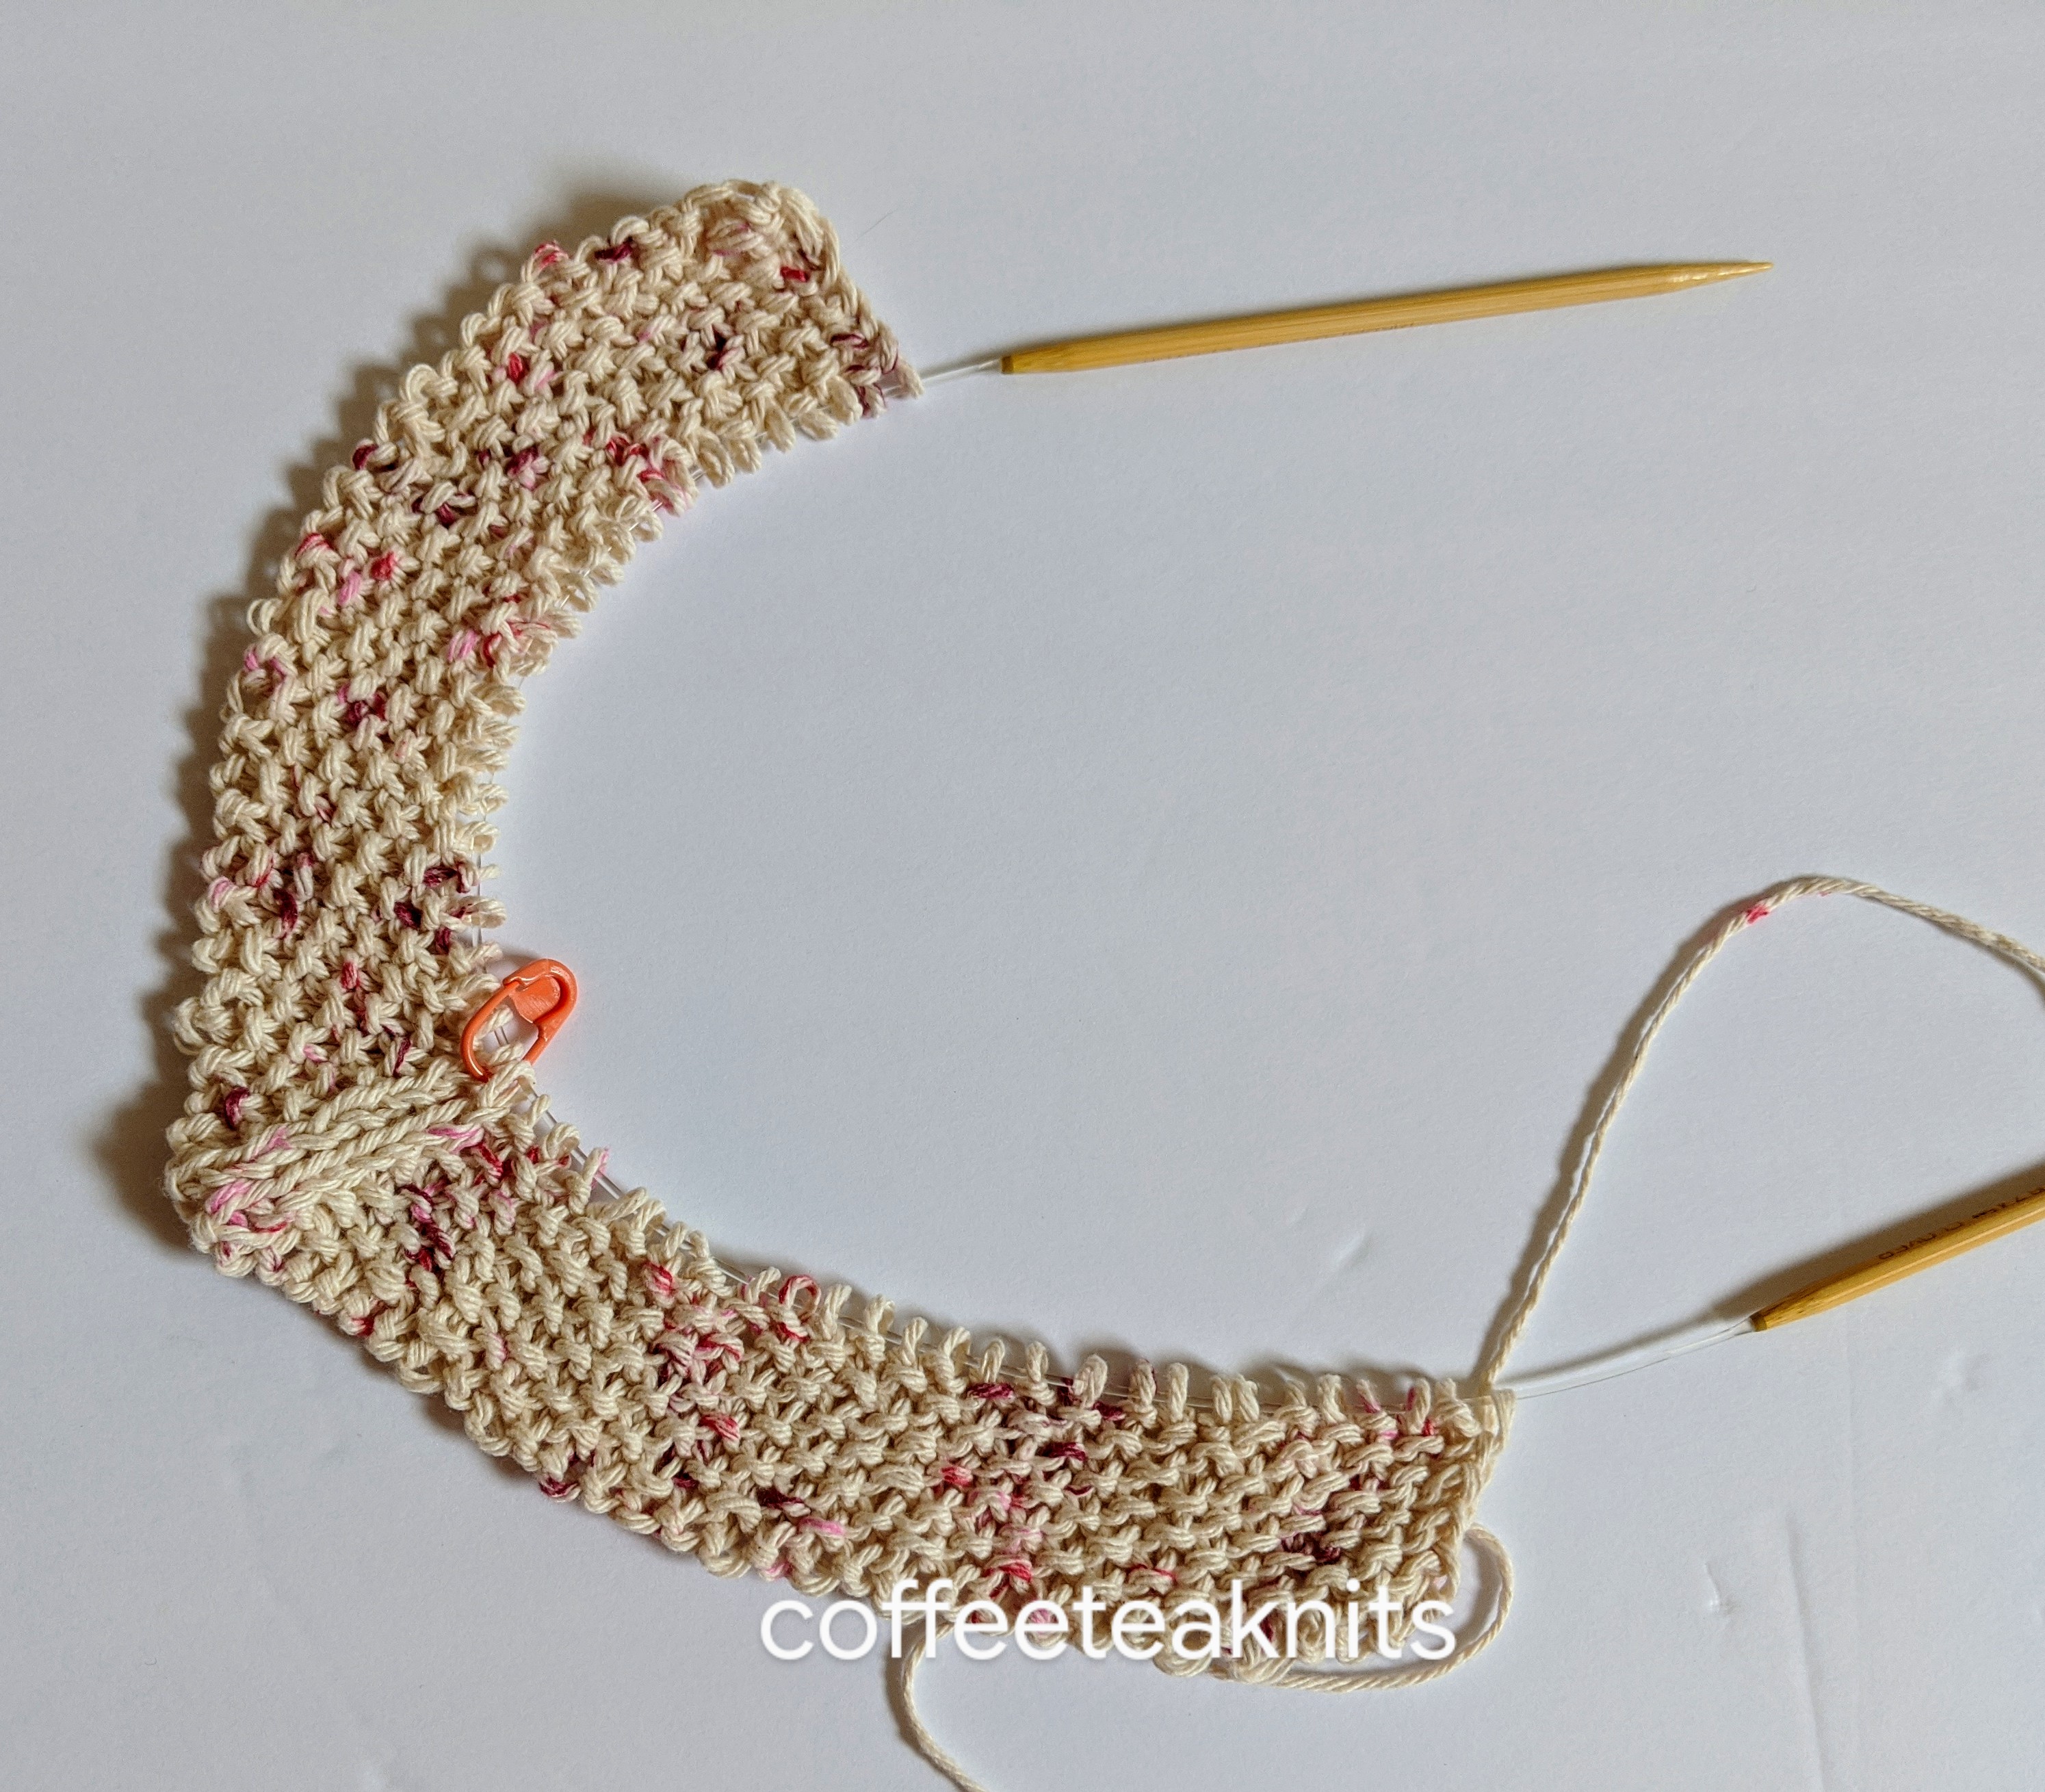
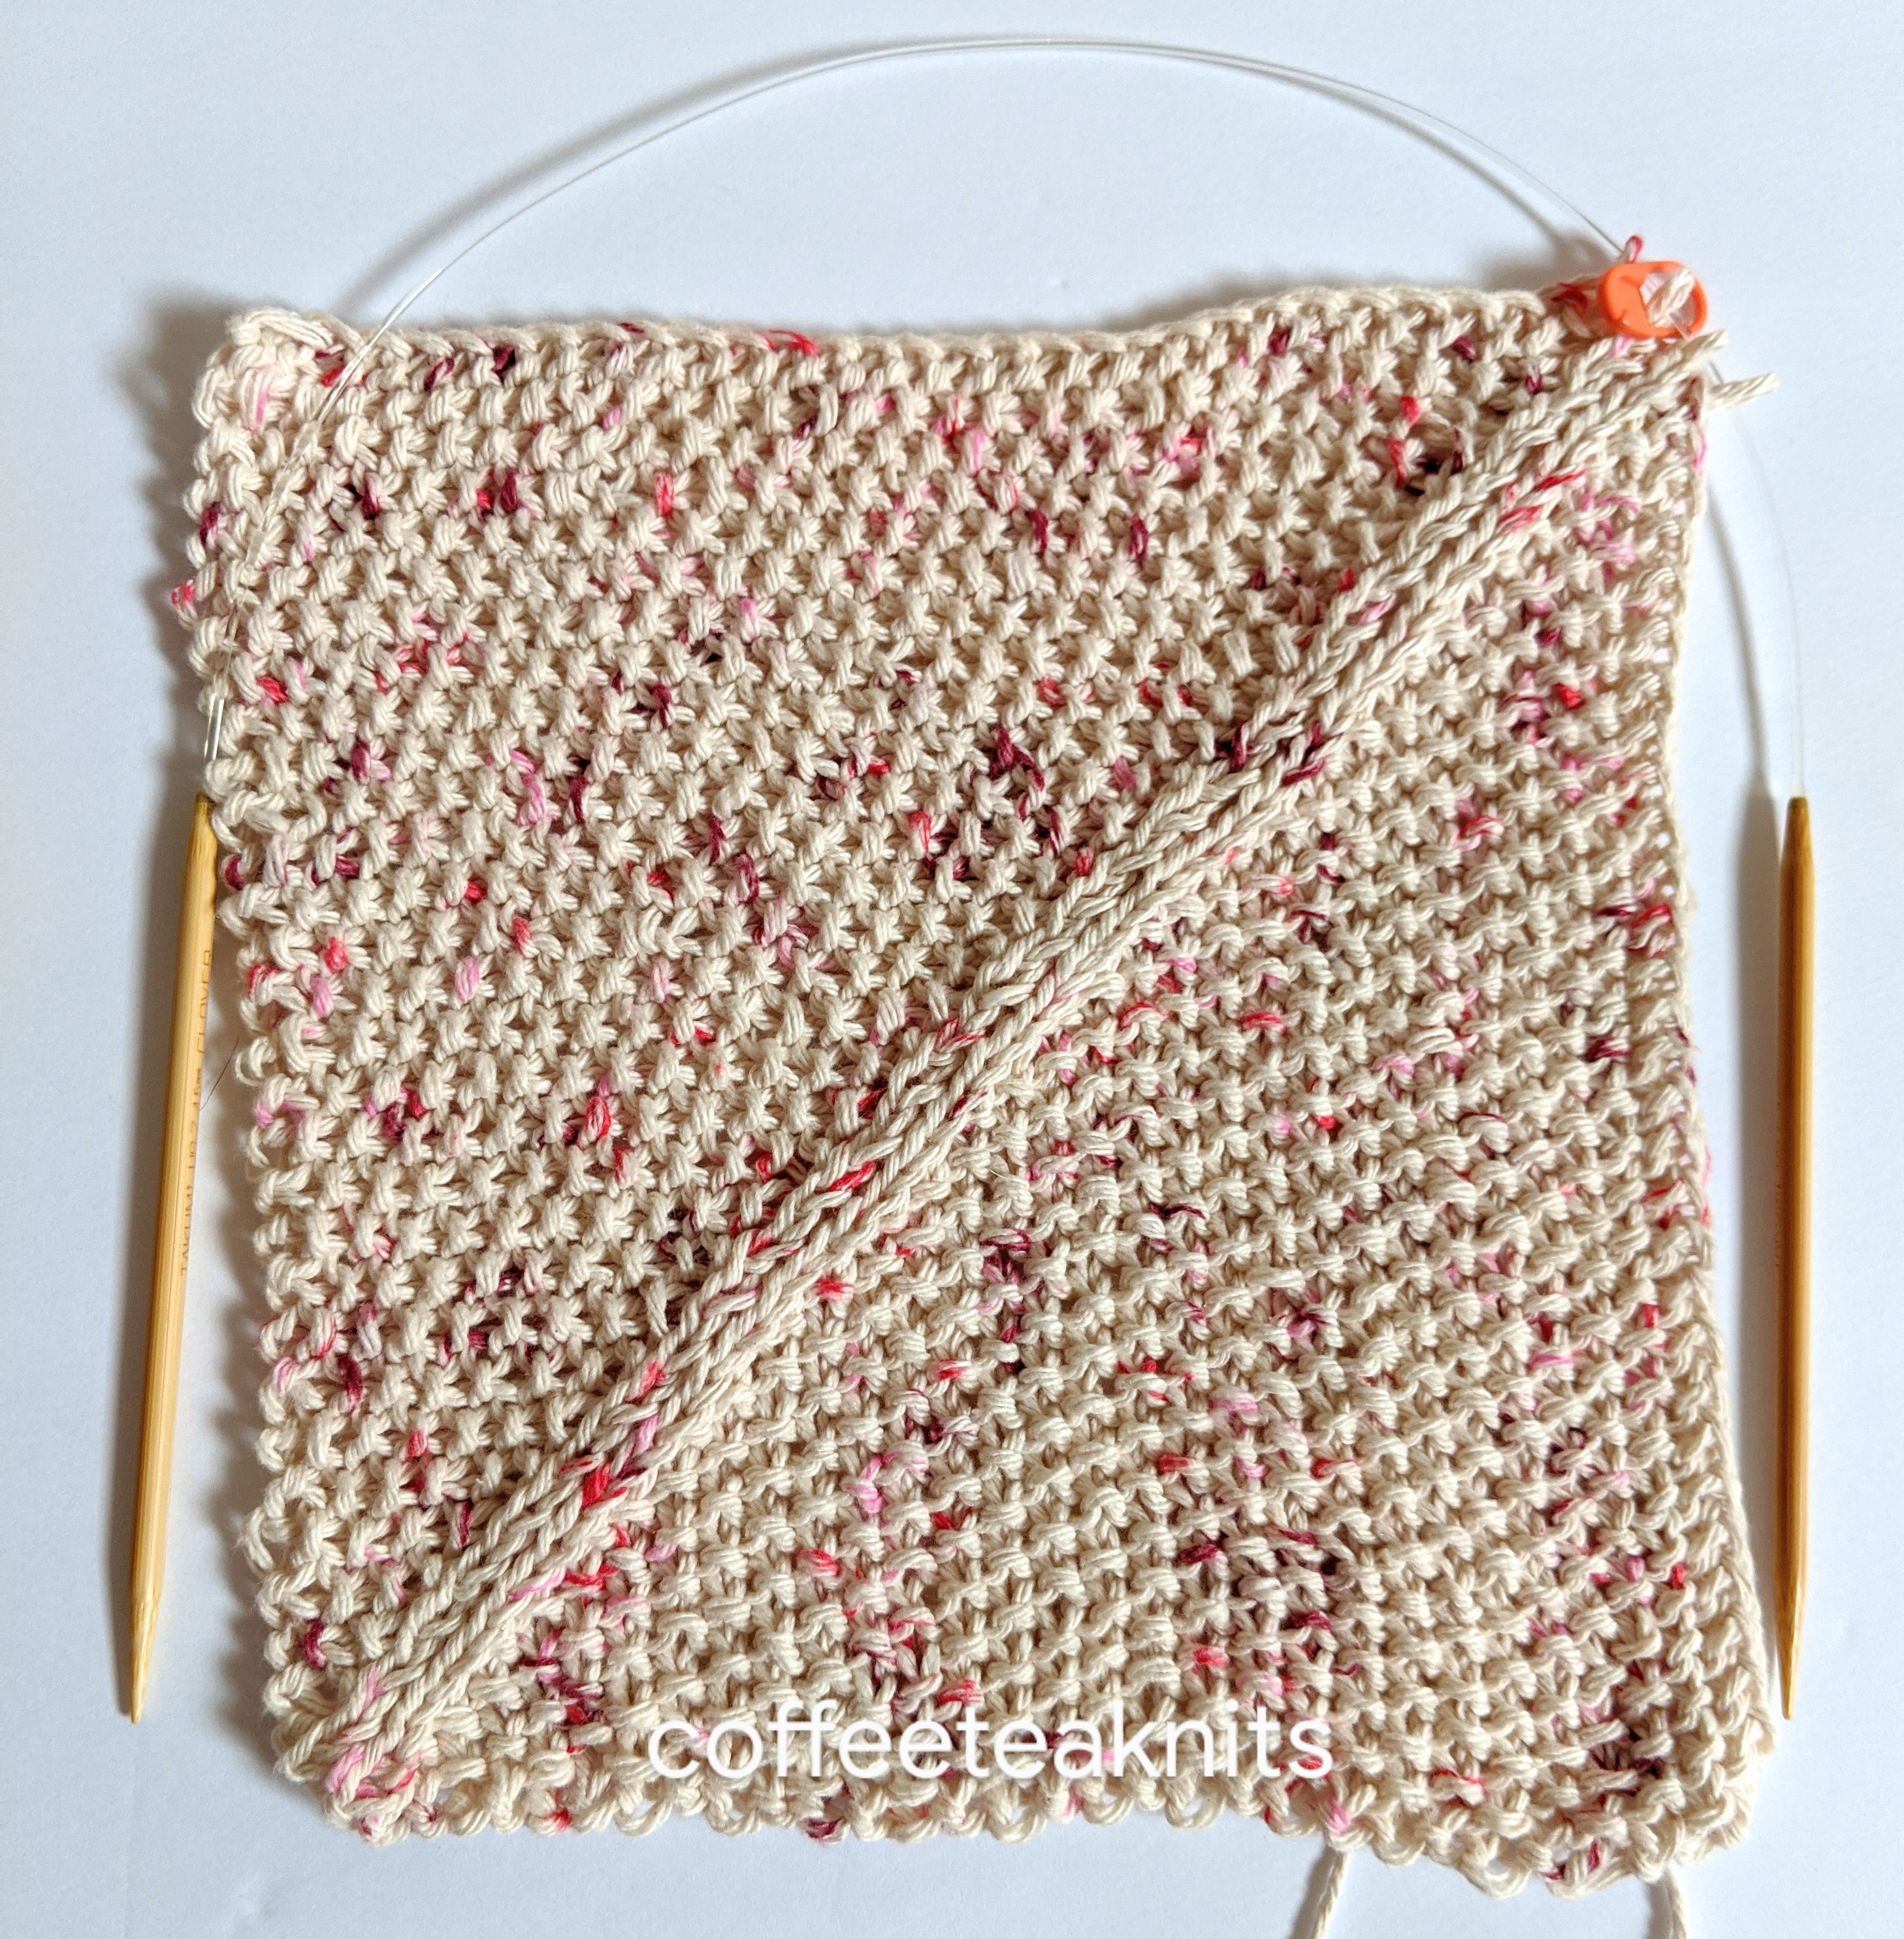
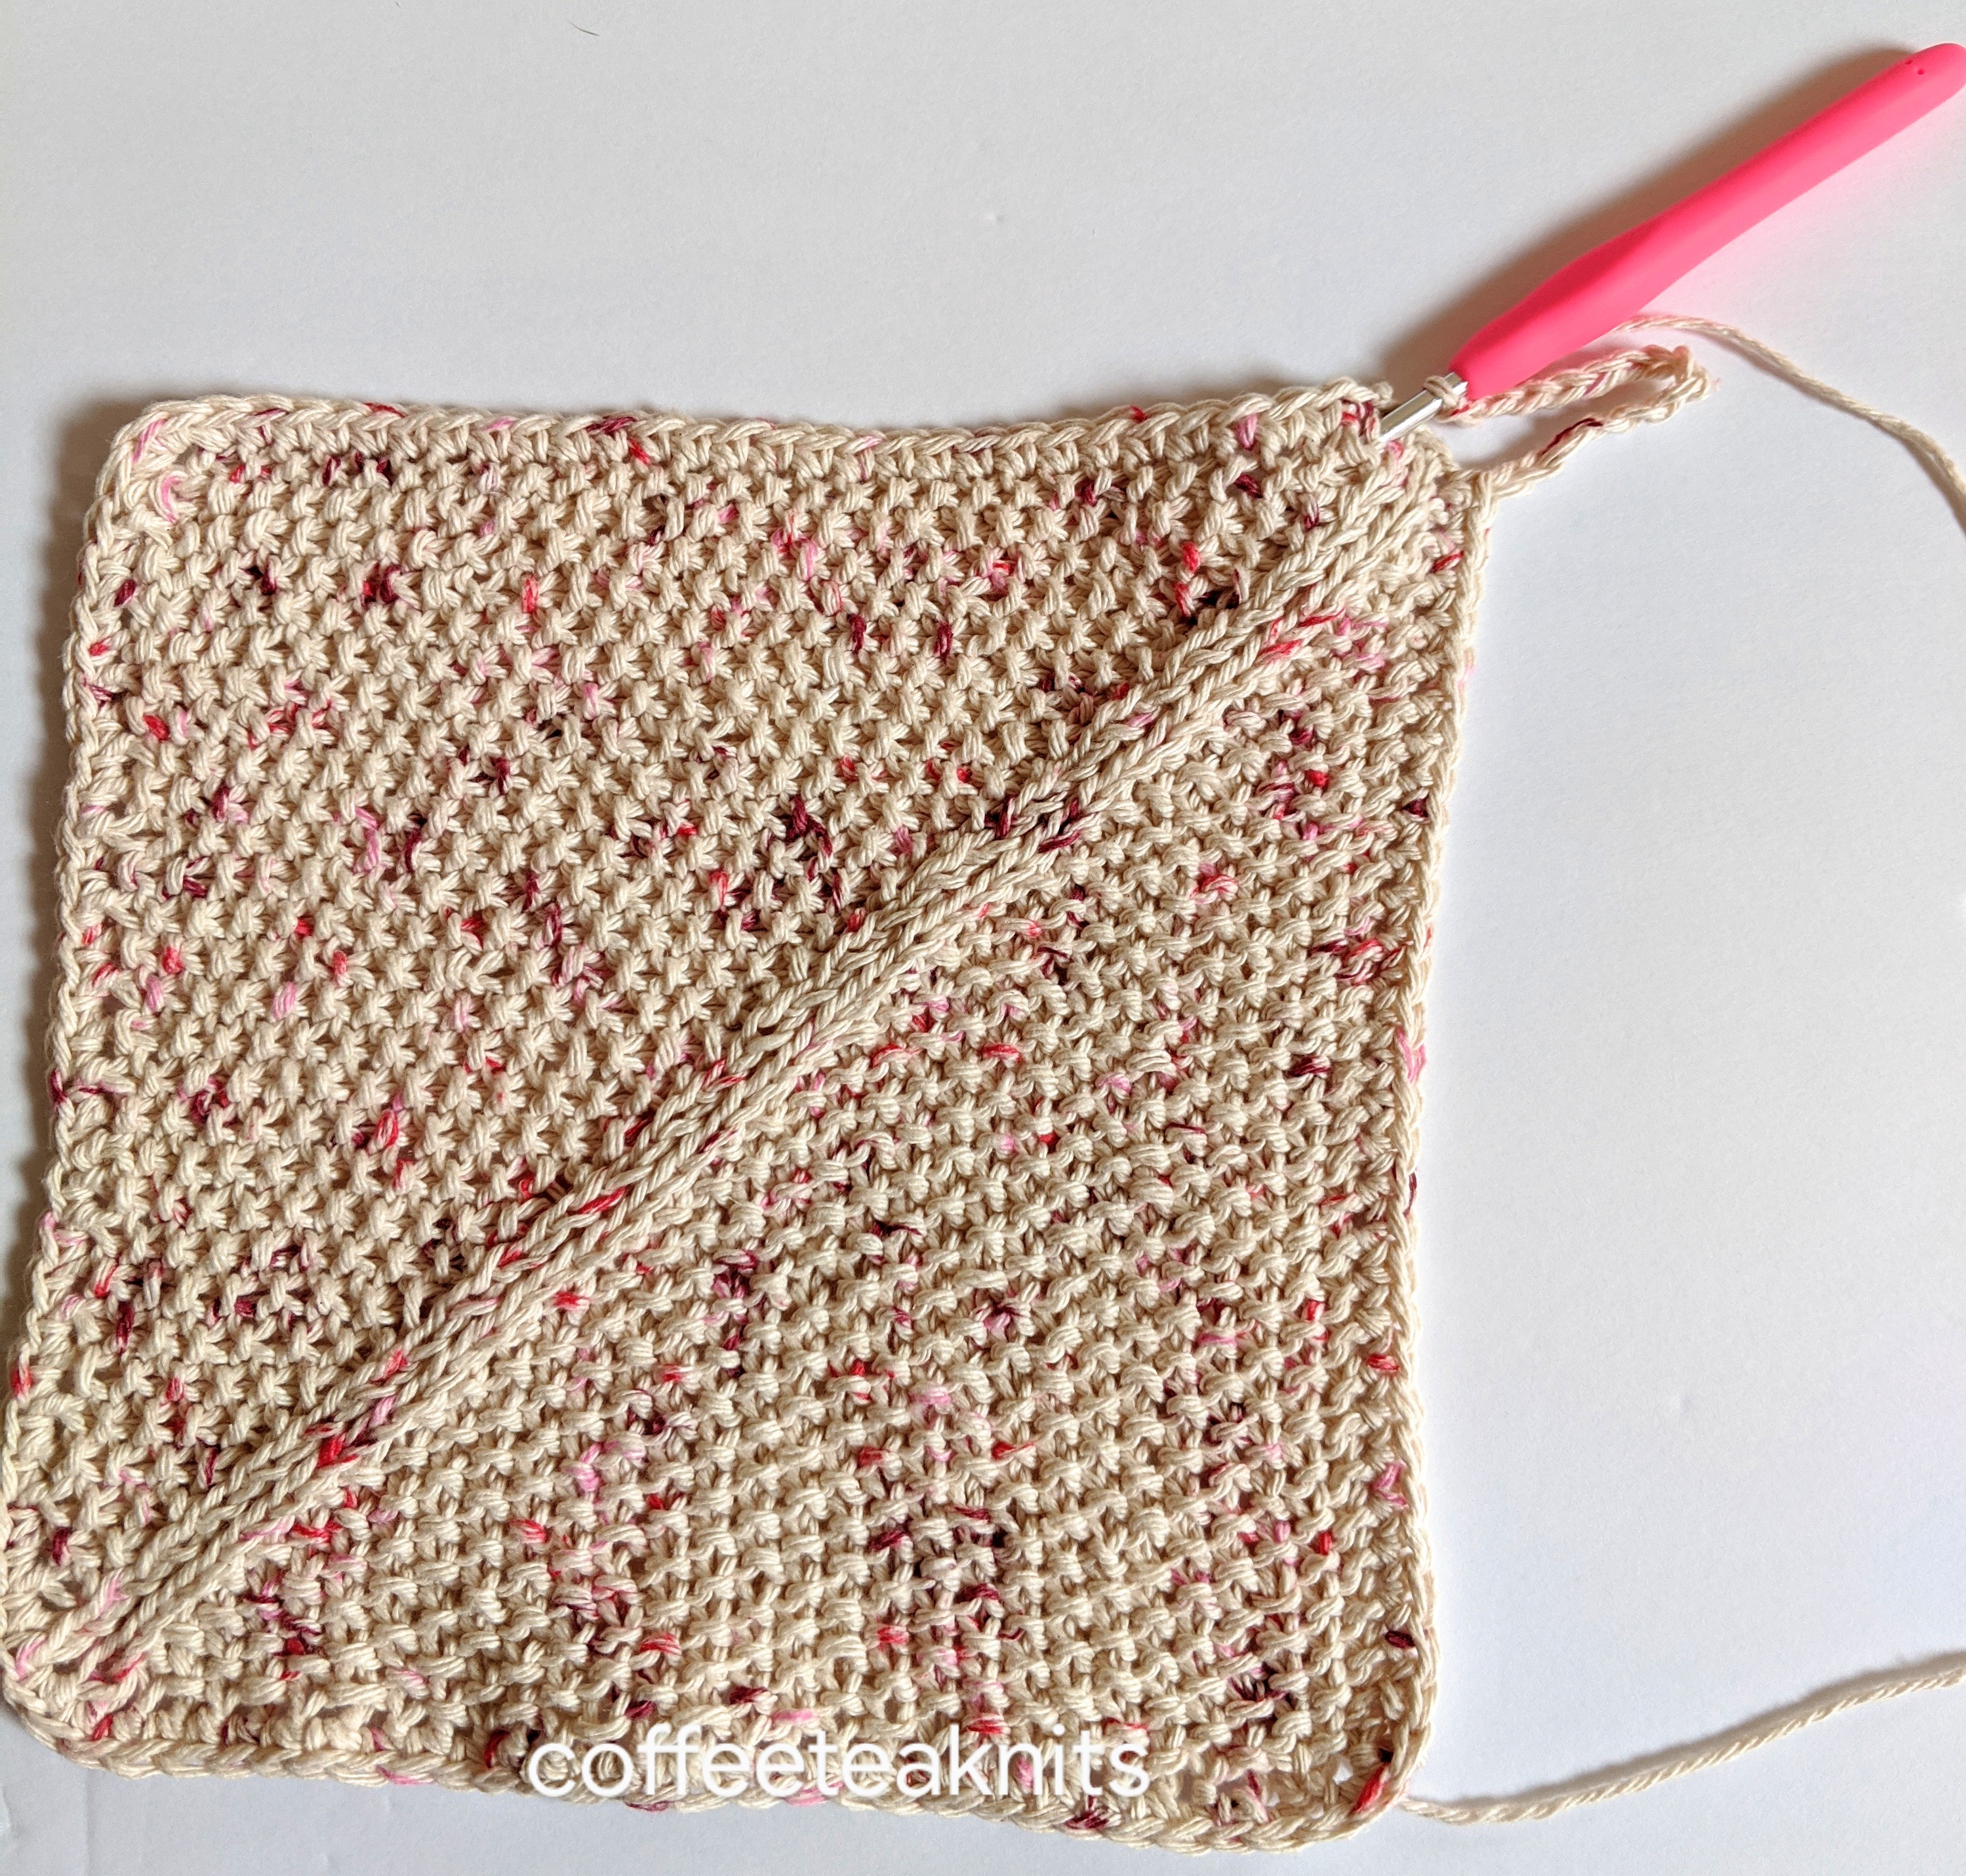
This mitered dishcloth is knitted in the round from the cast on edge, and then through a series of decreases moves towards the center. The seed stitch pattern is similar to the previous dishcloth pattern (July 2020 post) except that this one is knitted in the round and has four smaller mitered squares that merge in the center.
Toward Center Mitered Dishcloth Pattern*
The seed stitch pattern:
Round 1: *K1, P1*; repeat from *…* to end of the row
Round 2: *P1, K1*; repeat from *…* to end of the row
Knit in seed stitch pattern: Knit the purl stitches and purl the knit stitches
Yarn: PREMIER HOME® COTTON CONE YARN Colorway: Jelly Dots
Knitting Needles: US #7 circular needles
Crochet hook: US size 7 or 4.5 mm crochet hook
Gauge: Not needed for this project
Abbreviations:
1. Cast on 128 stitches using the cable cast on method (several tutorials available on Youtube) with US #7 size knitting needles placing stitch markers after every 32 stitches till all 128 stitches are cast on. Place a BOR marker at the end of the row.

2. Join the round making sure the stitches are not twisted and knit the following:


*Pattern text and photo for personal use only.
~coffeeteaknits
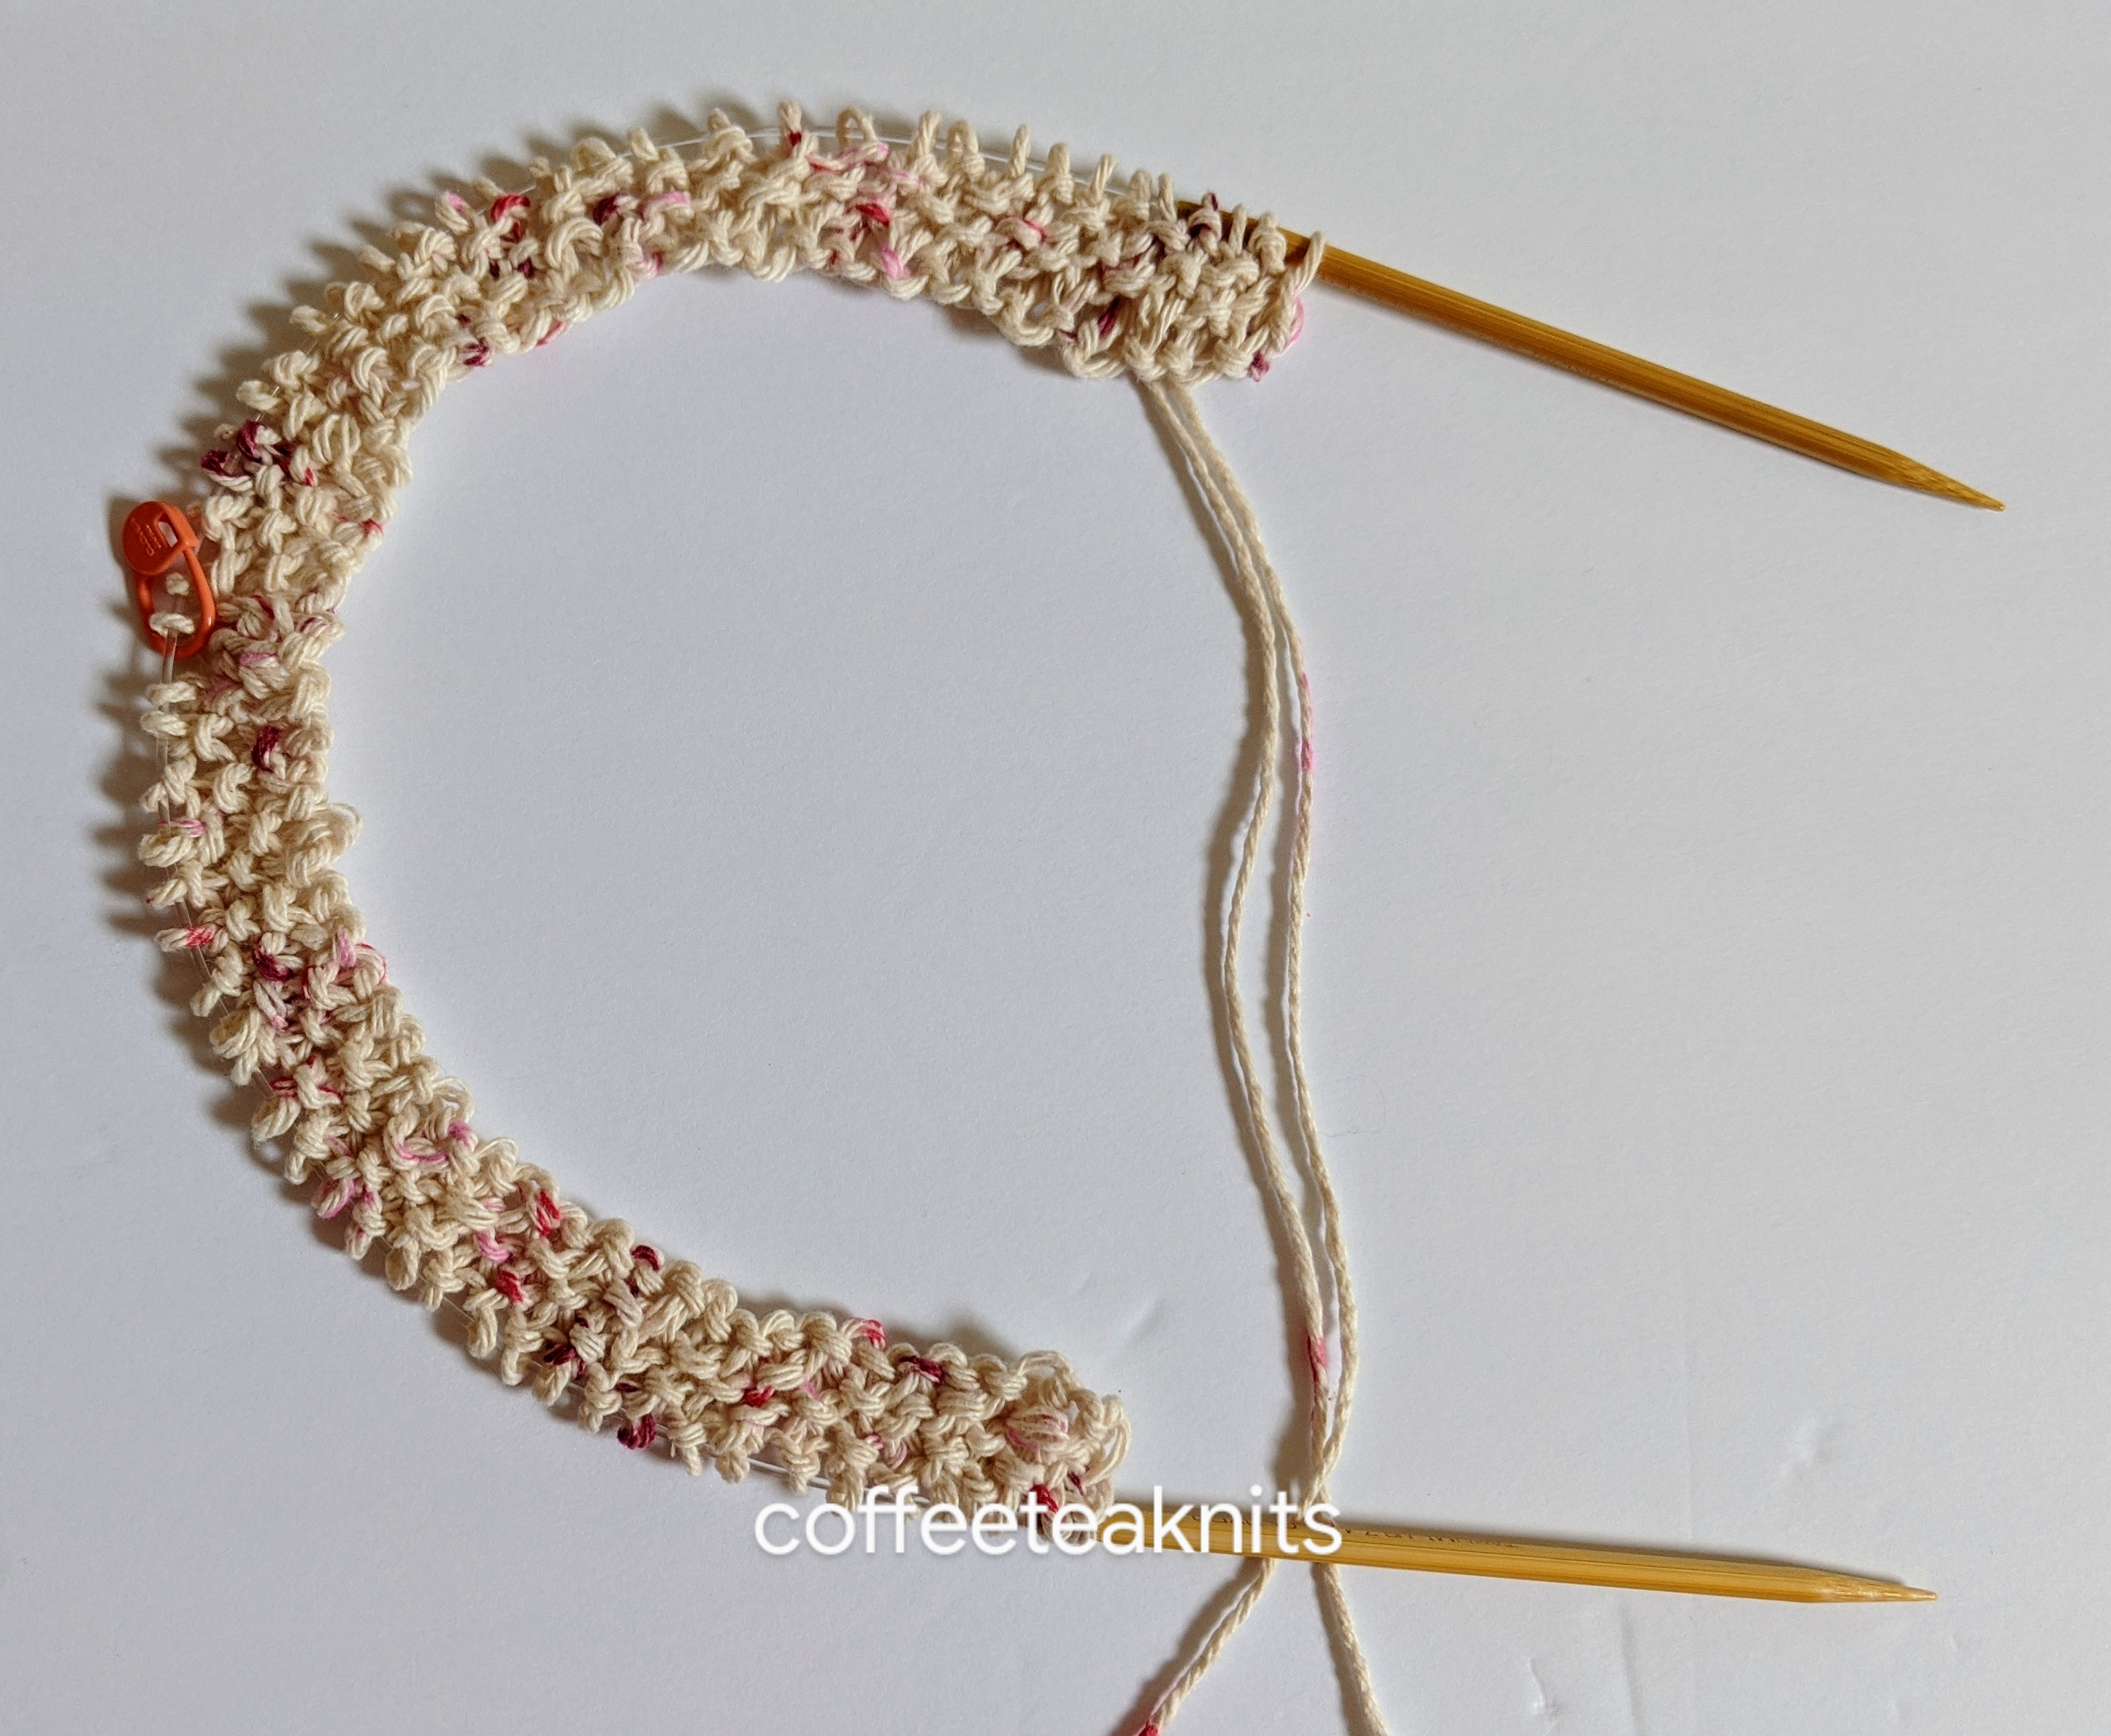
A Seed Stitch Mitered Dishcloth

In between large and lingering knitting projects (blankets, sweaters etc.), I find knitting dishcloths both appealing and interesting. I can explore and learn different stitch patterns using a particular knitting technique without spending too much time to finish the project. Dishcloths, of course, are useful to have around the kitchen and they also make great gifts. During one such in between period I knit this seed stitch mitered dishcloth (see a previous blog post “To knit a mitered square” for more information about this knitting technique). Below with photos and text (for personal use only), is the knitting progression of this mitered dishcloth in a seed stitch pattern.
The seed stitch pattern:
Row 1 (RS): *K1, P1*; repeat from *…* to end of the row
Row 2 (WS): *P1, K1*; repeat from *…* to end of the row
Knit in seed stitch pattern: Knit the purl stitches and purl the knit stitches
Yarn: PREMIER HOME® COTTON CONE YARN Colorway: Jelly Dots
Knitting Needles: US #10 and US #7
Crochet hook: US size 7 or 4.5 mm crochet hook
Gauge: Not needed for this project
Abbreviations:
1. Cast on 64 stitches with US #10 size knitting needles and place a removable stitch marker after 32 stitches.

2. Switch to a US #7 needle and start knitting the dishcloth as follows:


Enjoy!
~coffeeteaknits.com
© Coffee Tea Knits. All text and images for personal use only. All Rights Reserved.

Yarn used: Lion Brand Pound of Love® Yarn
This garter stitch blanket is knit center out with two different colors of yarn I already had. Compared to the center out crochet blanket I posted about in February 2020 which was completed within two months, knitting this blanket has taken me longer than six months to complete. This is because as the blanket grew larger, I could only knit a few rounds in one sitting due to issues with hand fatigue. There were close to 800 stitches on the needle at bind off.
The number of garter ridge stripes for are based on the Fibonacci sequence till the last stripe for both yarn colors. I did not have enough yarn left so the number of garter ridges for the last stripes are shorter than the next Fibonacci number in the sequence. The blanket was finished with a single crochet border and diagonal crochet duplicate stitches for the four corners. Although I like how the center out seamless knit blanket looks, I still find the process of crocheting a center out seamless blanket more appealing.
~coffeeteaknits.com
© Coffee Tea Knits. All text and images for personal use only. All Rights Reserved.
Four years ago my May 2016 blog post was about “The Simple Elegance of the Garter Stitch” and how with this stitch pattern we can create several beautiful and elegant knits. This year amidst the stay-at-home order due to the coronavirus pandemic, I would like to add that I’ve also found knitting with the garter stitch pattern both meditative and comforting.


I used the Zaden Spring Shawl pattern by Staci Perry of Very Pink Knits as inspiration and also to learn the bias knitting technique for a wrap. I modified the pattern by using a different stitch count, sock yarn, and knit the wrap using just the garter stitch pattern.
May knitting bring you comfort!
~coffeeteaknits.com
© Coffee Tea Knits. All text and images for personal use only. All Rights Reserved.
