The Unexpected Find Wrap

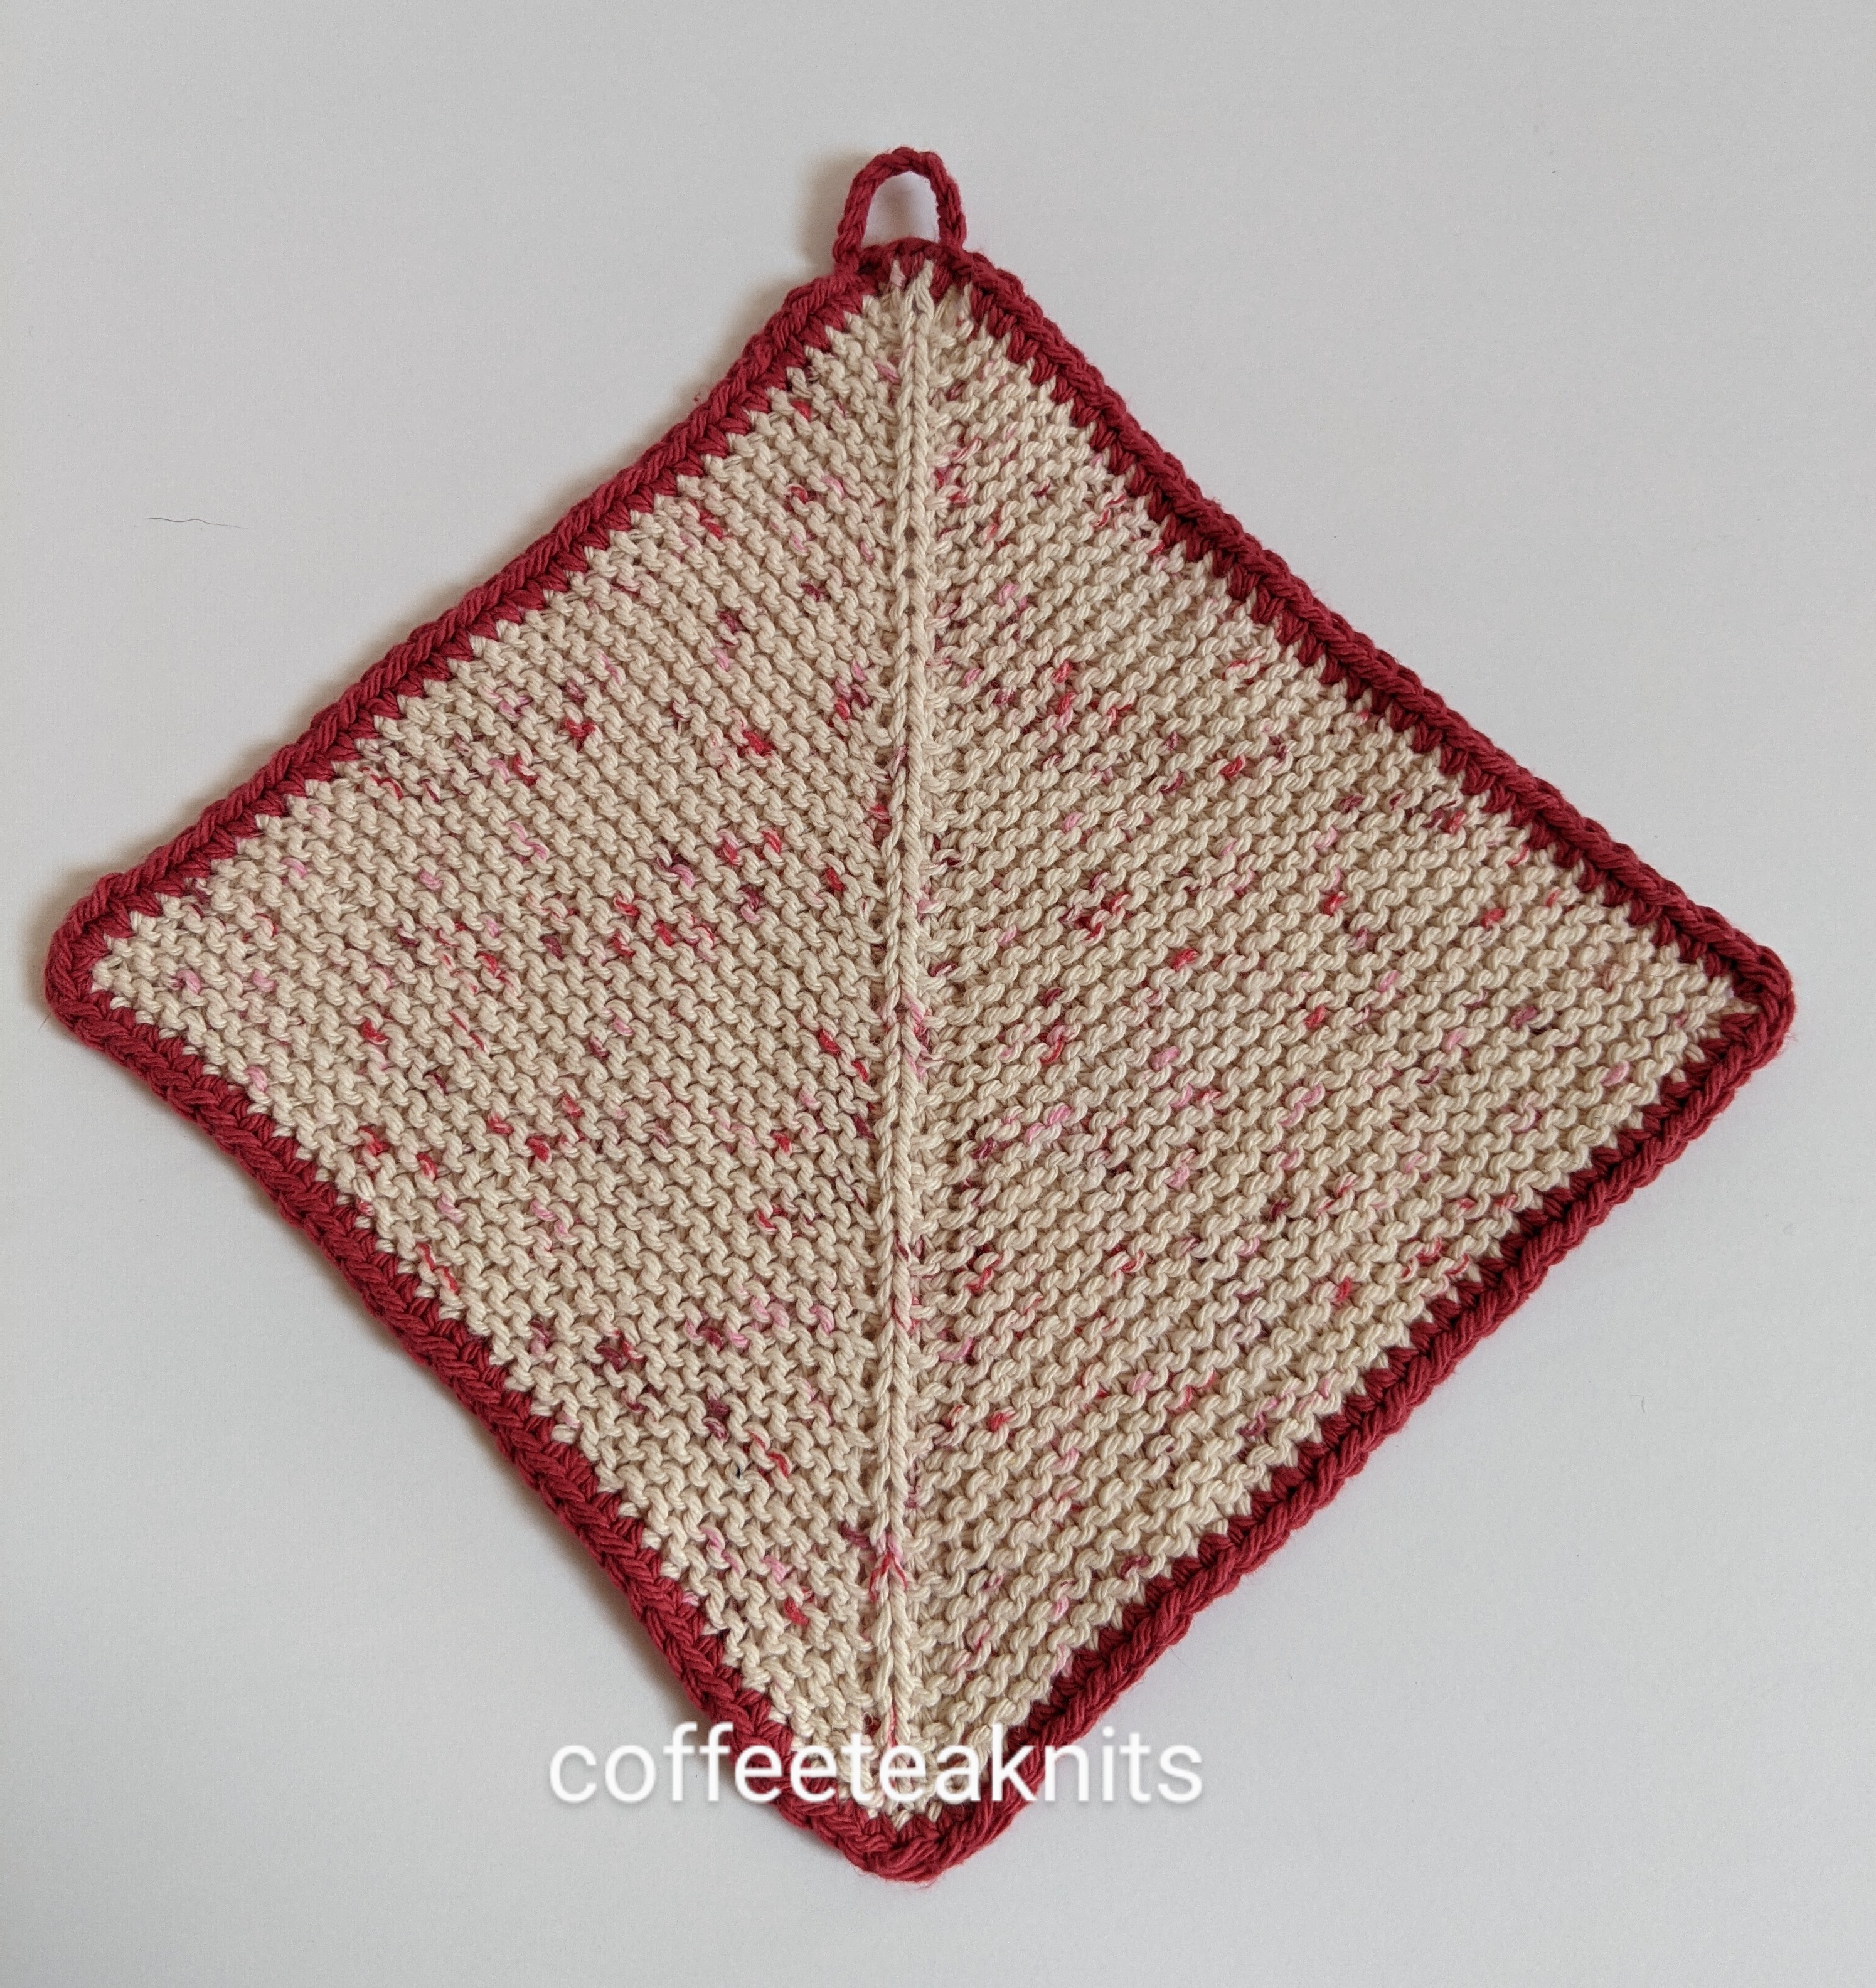
The many different shapes in which shawls or wraps are knitted can be a lesson in geometry. Shawls can be rectangular, squares, circular, triangular or several combinations and variations of these shapes. So, it was inevitable that after knitting several rectangle wraps, square blankets and dishcloths I would dabble in triangular shaped shawl design. Triangular shawls, similar to other shaped shawls, can be knit in several different ways. They can be knit sideways, top down (like the The Sheltering Tree Shawlette), or bottom up like this Unexpected Find Wrap.

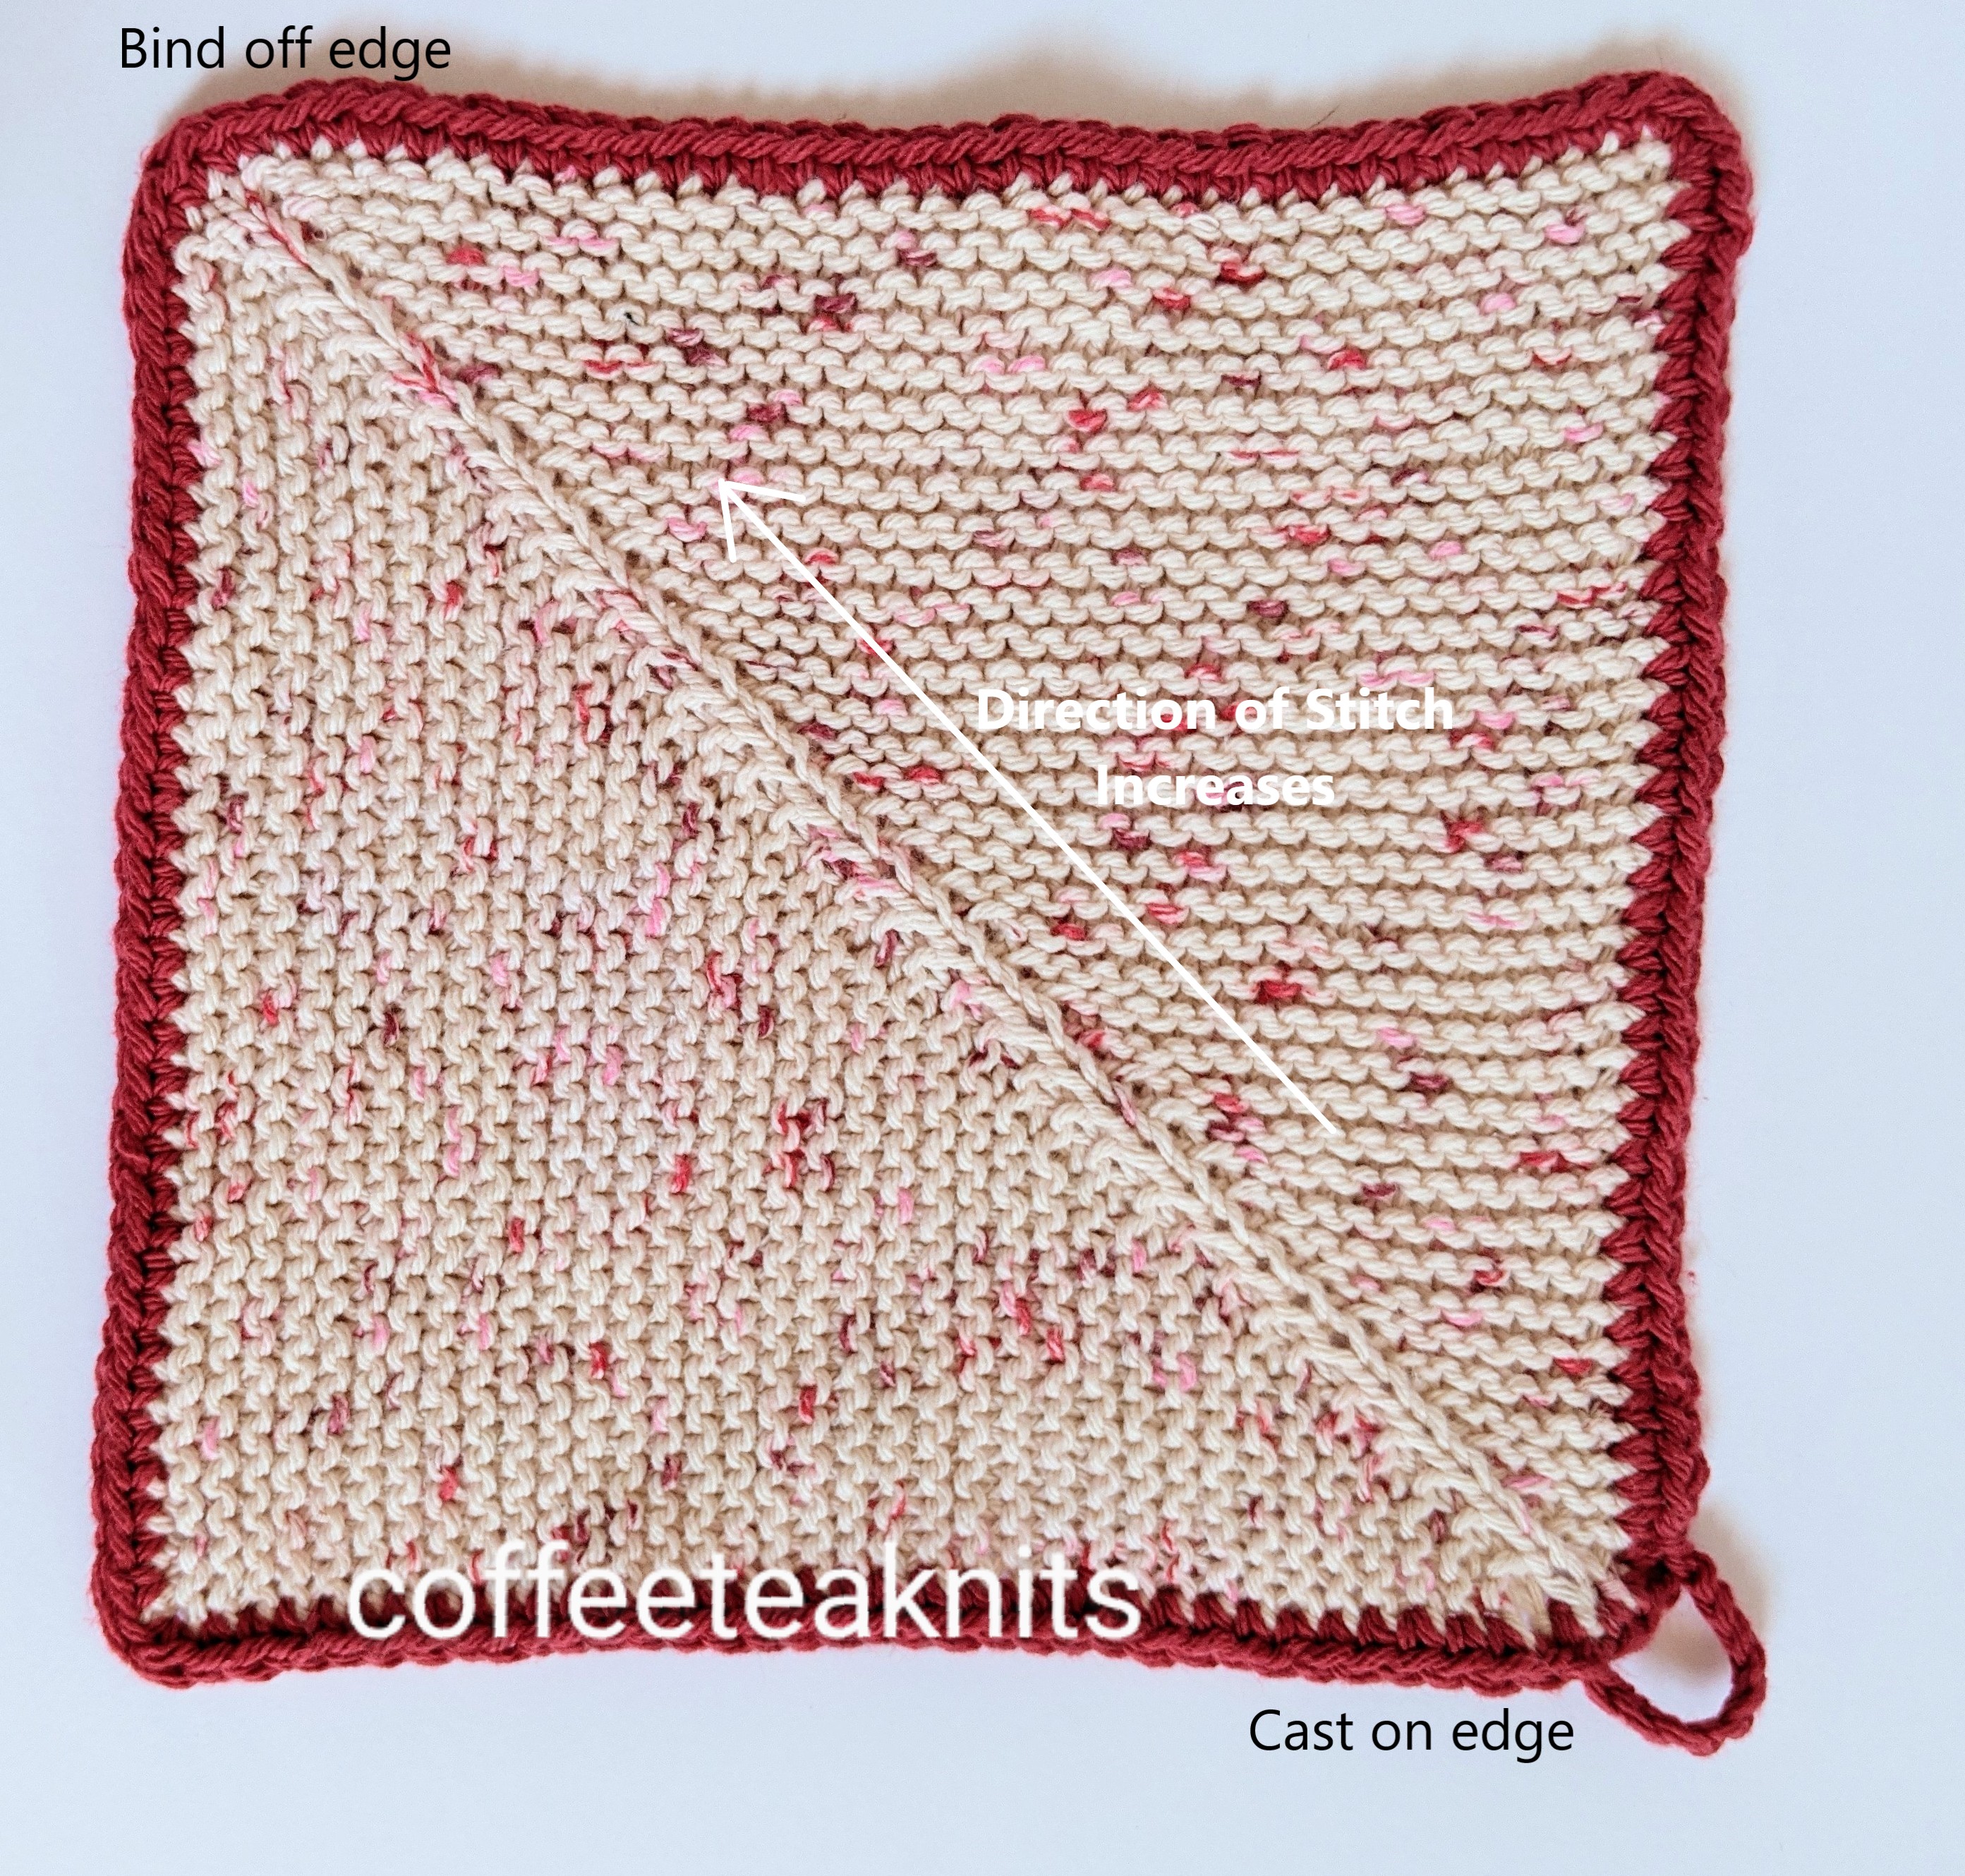
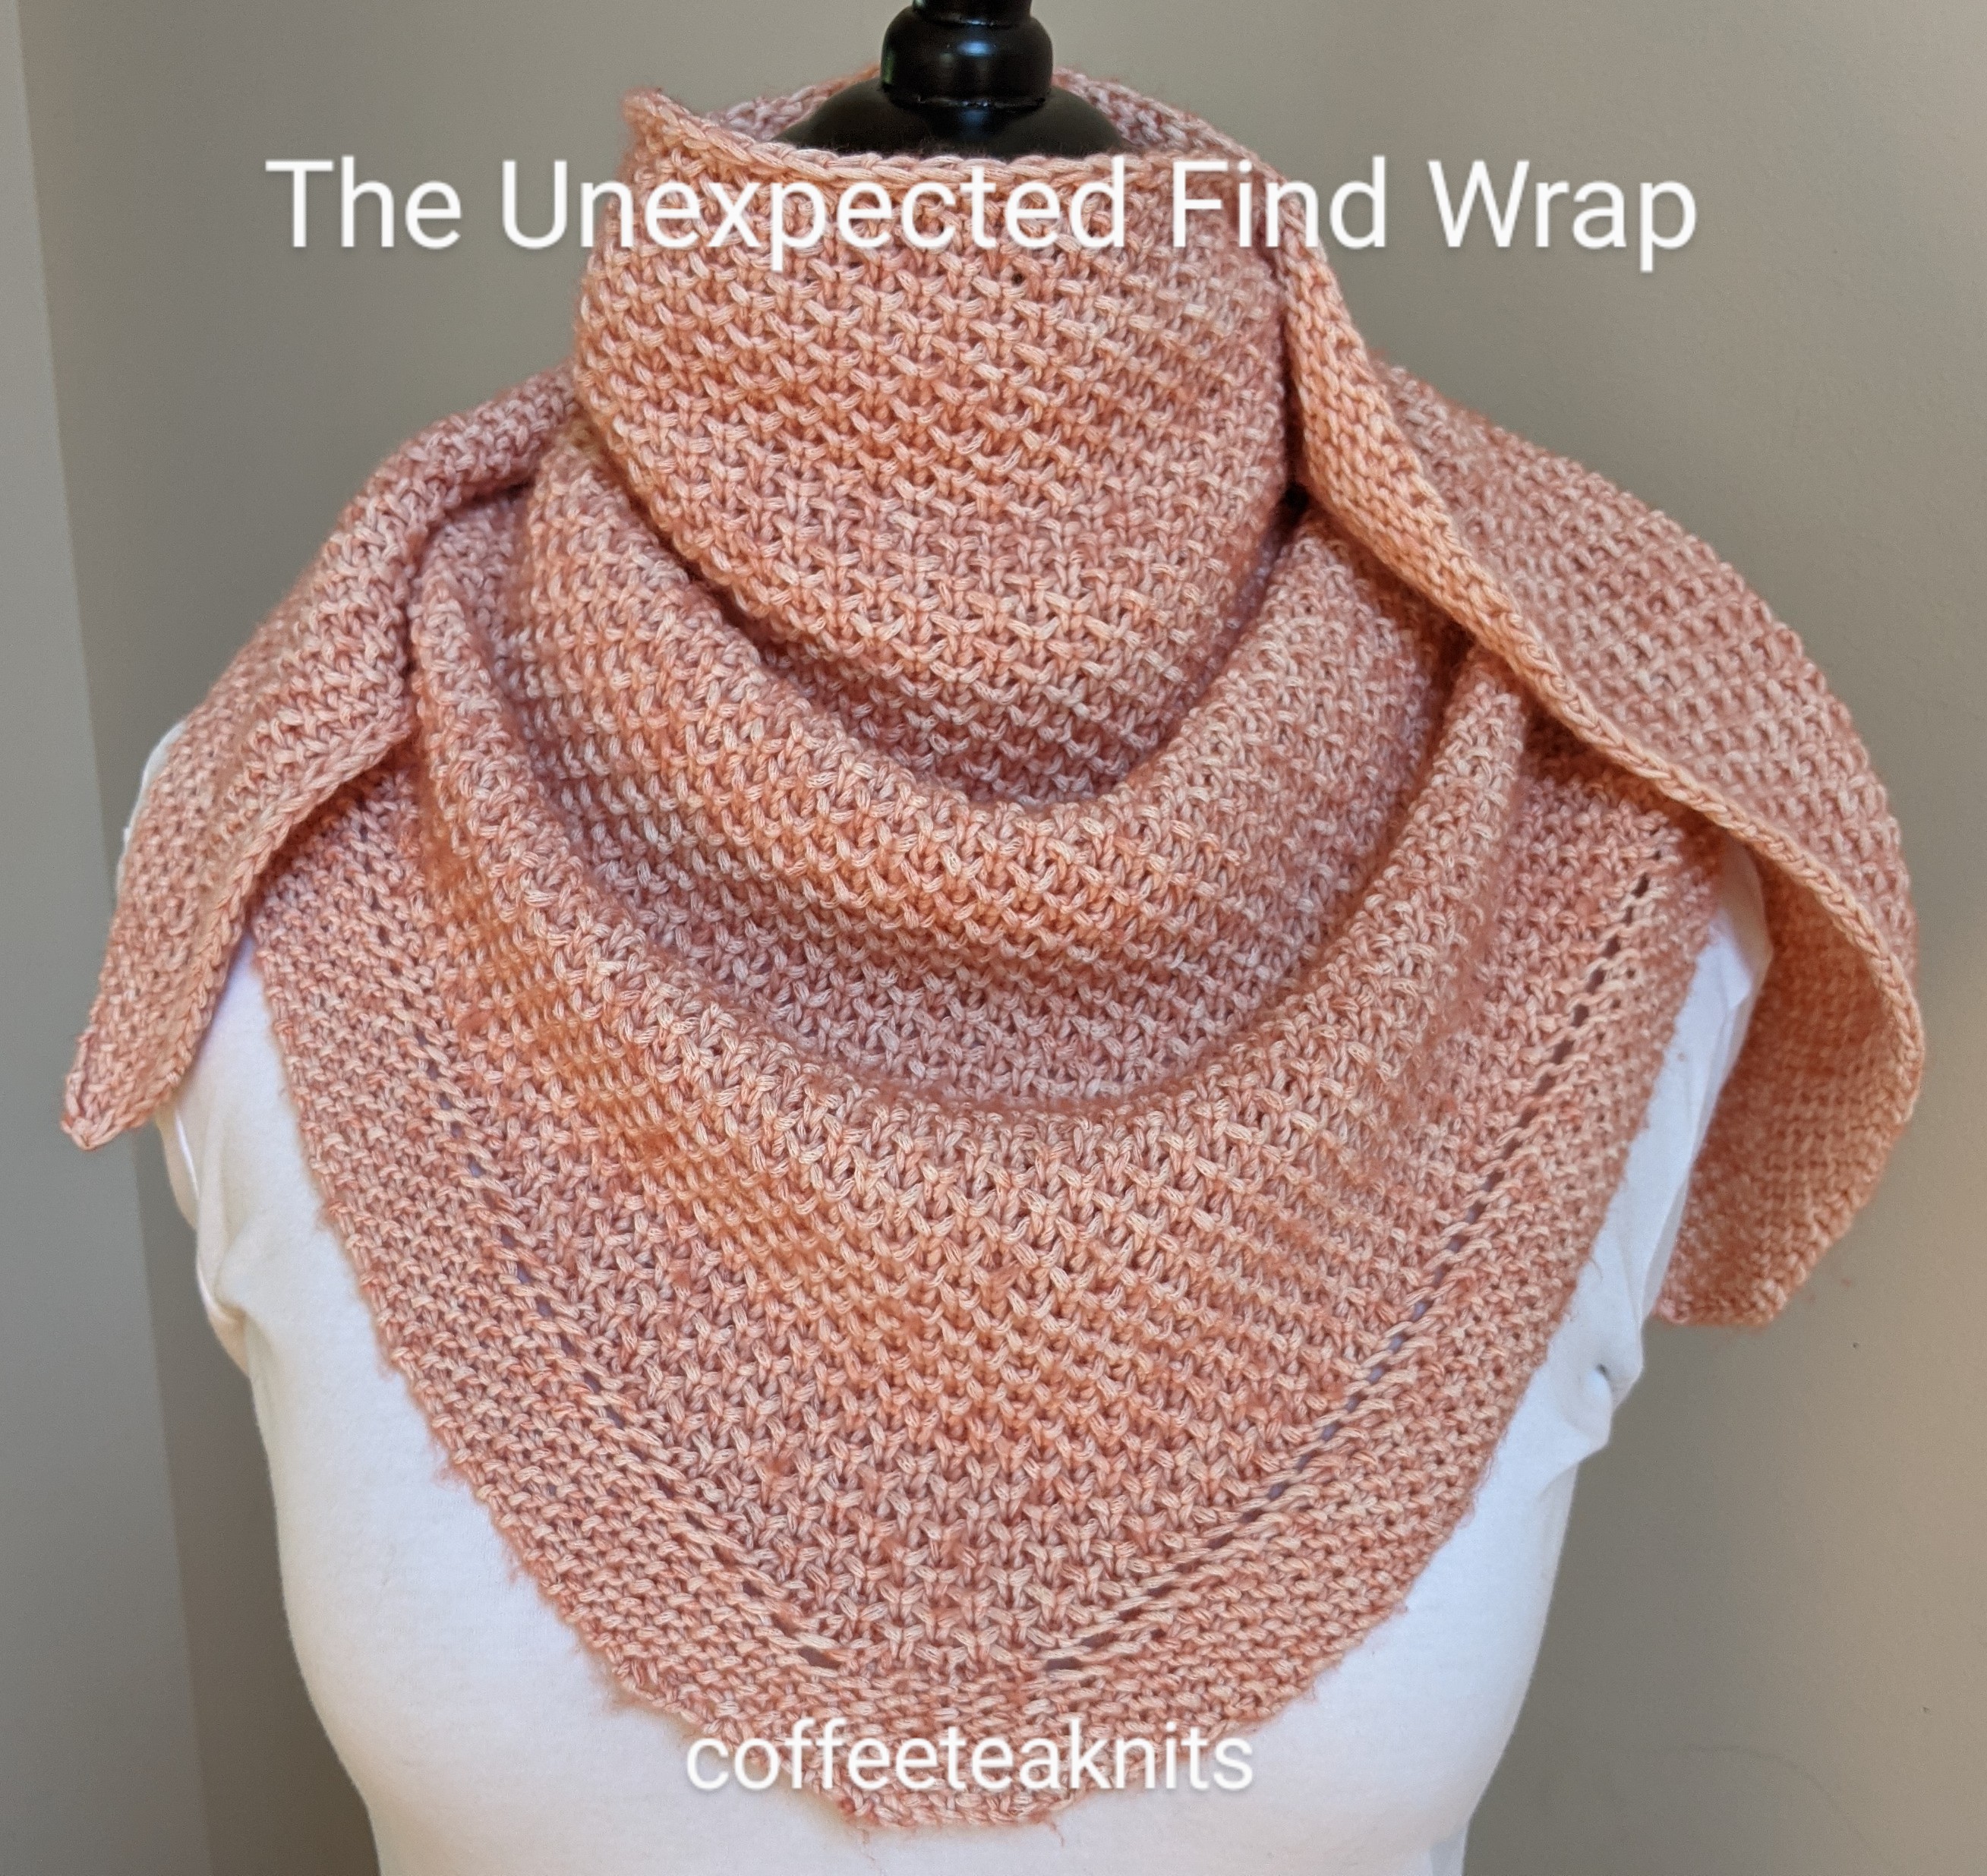
The Unexpected Find Wrap pattern is a simple triangular shaped shawl knit bottom up with a two row repeat brioche honeycomb stitch pattern. I happened upon the yarn for this wrap at Joann Fabric and Craft Store. I wasn’t looking for this yarn but once I saw it, I just couldn’t walk away without purchasing it. After casting on a few stitches, the wrap is increased two stitches every other row till the preferred length is reached. This cotton blend wrap is great for those cool summer evenings and also for those overly air conditioned places.

Yarn: K + C  Element Yarn (50 grams each) in Colorway: Pink (Any other worsted weight cotton or cotton blend yarn can be substituted for this yarn)
Knitting Needles: US #8 circular needle
Gauge: 14 stitches/ 4 inches after blocking
Abbreviations:

  • K: Knit
  • P: Purl
  • RS: right side
  • WS: wrong side
  • Kfb: Knit front and back (knit one stitch first in the front and then knit the same stitch in the back before slipping it off the left needle) 
  • K2tog: Knit two stitches together on the left needle 
  • K tbl: knit through the back loop
  • pm: place marker
  • rm: remove marker
  • sm: slip marker
  • S1: slip yarn purlwise
  • yo: yarn over – bring the working yarn under and over the right needle clockwise and to the back before knitting the next stitch
  • yo backward: for bind off only – knit one stitch then wrap the working yarn anticlockwise over and under the right hand knitting needle bringing the yarn to the back before knitting the next stitch
  • BE: abbreviation for the Seed Stitch Border Edge Pattern* (see below)

The Unexpected Find Wrap Pattern (text and image for personal use only)

*Seed Stitch Border Edge Pattern (BE):
Row 1 (RS): K1, P1, K1, P1, K1, P1, K1 (7 stitches)
Row 2 (WS): K1, P1, K1, P1, K1, P1, K1 (7 stitches)

Cast on 7 stitches with US #8 circular knitting needles

  • Row 1 (RS): Kfb, [P1,K1] 2x, P1, Kfb
  • Row 2 (WS): [P1,K1] 4x, P1    
  • Row 3: Kfb, [K1,P1] 3x, K1, Kfb
  • Row 4: [K1,P1] 5x, K1     
  • Row 5: Kfb, [P1,K1] 4x, P1, Kfb
  • Row 6: [P1,K1] 6x, P1 
  • Row 7: Kfb, [K1,P1] 5x, K1, Kfb
  • Row 8: [K1,P1] 7x, K1 
  • Row 9: Kfb, [P1,K1] 6x, P1, Kfb
  • Row 10: [P1,K1] 8x, P1 
  • Row 11: Kfb, [K1,P1] 7x, K1, Kfb
  • Row 12: [K1,P1] 9x, K1 
  • Row 13 (RS): BE, pm, yo, K5, yo, pm, BE
  • Row 14 (WS): BE, sm, K1, K tbl, [yo, S1, K1] 2x, K1, sm, BE
  • Row 15 (RS): BE, sm, yo, K1, [K1, K2tog] 2x, K2, yo, sm, BE 
  • Row 16 (WS): BE, sm, K1, K tbl, [yo, S1, K1] till 1 stitch before marker, K1, sm, BE
  • Row 17 (RS): BE, sm, yo, K1, [K1, K2tog] till 2 stitches before marker, K2, yo, sm, BE

[Repeat Rows 16 and 17] till there is a total of 215 stitches on the needle ending with the RS side row.

Bind Off Row (WS): K1, yo backward, K1, pass the yo and first knit stitch on the right hand needle over the second knit stitch on the right hand needle. (Several video tutorials for other stretchy bind off are available on YouTube). I used Jeny’s Surprisingly Stretchy Bind-Off method in knit stitch pattern for binding off this wrap.

This wrap used about 250 grams of yarn.

Weave in ends, wash and block the wrap.

The Yarn Over Washcloth

The Yarn Over Washcloth

The Yarn Over Washcloth is knit corner to corner with a two row slip stitch pattern. Two stitches are increased every other row and then two stitches are decreased every other row. The washcloth has yarn overs all around between the stitch pattern and the border edge stitches. One stitch is cast on and through a series of increases and decreases this washcloth is worked in one piece ending with a two stitch I-cord hanging loop.

Yarn: Lily Sugar’n Cream in Colorways: Soft Ecru and Butter Cream Ombre
Knitting Needles: US #7 circular needle
Gauge: Not needed for this project
Abbreviations:

  • K: Knit
  • P: Purl
  • RS: right side
  • WS: wrong side
  • Kfb: Knit front and back (knit one stitch first in the front and then knit the same stitch in the back before slipping it off the left needle) – 1 stitch increase 
  • K2tog: Knit two stitches together on the left needle – 1 stitch decrease
  • ssk (left-slanting decrease): slip slip knit (slip 2 stitches to right hand needle then insert the left needle in front of the two slipped stitches and knit them together) – 1 stitch increase
  • rsd (right-slanting decrease): knit 1 stitch, slip one stitch knitwise, return the slipped stitch and the knitted stitch back to the left needle, pass the slipped stitch over the knitted stitch and then return the knitted stitch back to the right needle – 1 stitch decrease
  • sk2p (left-slanting double decrease): slip the next stitch knitwise, k2tog the next two stitches, then pass the slipped stitch over the decreased stitch – 2 stitch decrease
  • rsdd (right-slanting double decrease): slip one stitch knitwise and knit the next stitch. Pass the slipped stitch over the knit stitch. Return this decreased knit stitch back to the left needle and pass the second stitch on the left needle over the decreased stitch. Transfer the decreased stitch back to the right needle – 2 stitch decrease
  • pm: place marker
  • rm: remove marker
  • sm: slip marker
  • wyif S1: with yarn in front slip one stitch purlwise, wrap the working yarn around the front of the slipped stitch and move the yarn to the back
  • yo: yarn over – knit one stitch and then bring the working yarn over the right needle before knitting the next stitch (1 stitch increase)

The Yarn Over Washcloth (text and images for personal use)

Cast on 1 stitch with US #7 circular needle

  • Row 1 (RS): Kfb
  • Row 2 (WS): K2
  • Row 3: Kfb, Kfb
  • Row 4: K4
  • Row 5: Kfb, K2, Kfb
  • Row 6: K6
  • Row 7: Kfb, K4, Kfb
  • Row 8: K8
  • Row 9: Kfb, K6, Kfb
  • Row 10: K4, pm, K2, pm, K4
  • Row 11: K4, sm, yo, K2, yo, sm, K4
  • Row 12: K4, sm, K1, p2, K1, sm, K4
  • Row 13: K4, sm, yo, K1, [K1, wyif S1 then move yarn to the back] to 1 stitch before marker, K1, yo, sm, K4
  • Row 14: K4, sm, K1, purl till 1 stitch before marker, K1, sm, K4

Repeat rows 13 and 14 [repeat section] till 48 stitches on the needle.

Double Decreases:

  • Row 1 (RS): K4, sm, yo, sk2p, [K1, wyif S1 then move yarn to the back] till 3 stitches before marker, rsdd, yo, sm, K4
  • Row 2 (WS): K4, sm, K1, purl till 1 stitch before marker, K1, sm, K4

Repeat these two rows till 14 stitches left on the needle.

  • Row (RS): K4, sm, yo, sk2p, rsdd, yo, sm, K4
  • Row (WS): K4, sm, K1, p2, K1, sm, K4          (12 stitches)

Single decreases:

  • Row 1 (RS):  ssk, knit to 2 stiches before end of the row removing markers, rsd
  • Row 2 (WS): K10

Repeat Rows 1 and 2 till 4 stitches left on the needle.

  • Row (RS): ssk, rsd     (2 stitches left on the needle)

Make an I-cord hanging loop (about 10 to 12 rows) with the 2 stitches on the needle (several tutorials on knitting I-cord are available on YouTube) and bind off.

Attach the I-cord bind off end to the wrong side of the washcloth and weave in ends.

Wash and block the washcloth


Enjoy!


~coffeeteaknits.com

The Sheltering Tree Shawlette

The Sheltering Tree Shawlette is knit with Urth Yarns that I purchased a few years back. Urth Yarns have partnered with Trees for the Future to plant trees for a positive impact as stated in their label below:

The Sheltering Tree Shawlette (text and images for personal use only)

The Sheltering Tree Shawlette is knitted flat from the top to bottom and is triangular in shape.

Yarn: Urth Yarns Merino Sock (75% Extrafine Superwash Merino and 25% Nylon Yards: 440 Grams:100)
Knitting Needles: Circular US #6 knitting needles
Gauge: 24 stitches/ 4 inches (blocked and in stitch pattern)
Abbreviations:

  • K: Knit
  • P: Purl
  • Kfb: Knit front and back (knit one stitch first in the front and then knit the same stitch in the back before slipping it off the left needle – 1 stitch increase) 
  • K2tog: Knit the first two stitches together on the left needle (1 stitch decrease)
  • pm: place marker (4 markers needed)
  • sm: slip marker
  • RS: right side
  • wyif S1: with yarn in front slip one stitch purlwise
  • WS: wrong side
  • yo: yarn over

With a size US #6 knitting needle cast on 4 stitches with this yarn

  • Row 1 (RS): K1, pm, Kfb, Kfb, pm, K1
  • Row 2 (WS): K1, sm, K4, sm, K1
  • Row 3 (RS): K1, sm, Kfb, pm, K2, pm, Kfb, sm, K1
  • Row 4 (WS): K1, sm, K2, sm, P2, sm, K2, sm, K1
  • Row 5 (RS): K1, sm, Kfb, Kfb, sm, K2, sm, Kfb, Kfb, sm, K1 
  • Row 6 (WS): K1, sm, K1, P2, K1, sm, P2, sm, K1, P2, K1, sm, K1

Shawlette Stitch Pattern [Repeats] and Stitch Increases:

  • Row 7 (RS): K1, sm, Kfb, [K1, wyif S1] once, Kfb, sm, K2, sm, Kfb, [K1, wyif S1] once, Kfb, sm, K1
  • Row 8 (WS): K1, sm, K1, P4, K1, sm, P2, sm, K1, P4, K1, sm, K1
  • Row 9 (RS): K1, sm, Kfb, [wyif S1, K1] twice, Kfb, sm, K2, sm, Kfb, [wyif S1, K1] twice, Kfb, sm, K1
  • Row 10 (WS): K1, sm, K1, P6, K1, sm, P2, sm, K1, P6, K1, sm, K1
  • Row 11 (RS): K1, sm, Kfb, [K1, wyif S1] till 1 stitch before marker, Kfb, sm, K2, sm, Kfb, [K1, wyif S1] till 1 stitch before marker, Kfb, sm, K1
  • Row 12 (WS): K1, sm, K1, Purl till 1 stitch before marker, K1, sm, P2, sm, K1, Purl till 1 stitch before marker, K1, sm, K1
  • Row 13 (RS): K1, sm, Kfb, [wyif S1, K1] till 1 stitch before marker, Kfb, sm, K2, sm, Kfb, [wyif S1, K1] till 1 stitch before marker, Kfb, sm, K1
  • Row 14 (WS): K1, sm, K1, Purl till 1 stitch before marker, K1, sm, P2, sm, K1, Purl till 1 stitch before marker, K1, sm, K1

Repeat rows 11 – 14 till the desired length for the shawlette is reached. Make sure there’s enough yarn for 6 rows of garter stitch and eyelet border.

Garter Stitch rows:

  • Row 1 (RS): K1, sm, Kfb, Knit to 1 stitch before marker, Kfb, sm, K2, sm, Kfb, Knit to 1 stitch before marker, Kfb, sm, K1
  • Row 2 (WS): K1, sm, knit to marker, sm, P2, sm, knit to marker, sm, K1
  • Repeat these two rows one more time (you can repeat these more times if you have enough yarn)

Eyelet Row (RS): K1, sm, Kfb, [K2tog, yo] till 1 stitch before marker, Kfb, sm, K2, sm, Kfb, [yo, K2tog] till 1 stitch before marker, Kfb, sm, K1

Bind off Row (WS): Bind off using a stretchy bind off method.

Weave in the ends. Wash and block the shawlette.


Happy Earth Day 2021!


~coffeeteaknits.com

The Upside Down Dishcloth

The Upside Down Dishcloth

     I’ve made mitered square dishcloths (July 2020 post ) by casting on a specific number of stitches and then knitting the double decreases every other row to create the mitered square. The Upside Down Dishcloth is a garter stitch mitered square dishcloth knit flat and in reverse. The advantages of knitting a reverse mitered square include fewer stitches to cast on and an avoidance of playing yarn chicken. With this reverse mitered technique dishcloths can be knit as large or as small depending on the yardage of yarn available. It’s also a great way to use up leftover over yarn from other projects. For the Upside Down Dishcloth, a few stitches were cast on and the mitered square dishcloth was knitted with double increases every other row.

Yarn: PREMIER HOME® COTTON CONE YARN Colorway: Jelly Dots 
Yarn: Lily Sugar’n Cream in Colorways: Country Red (for the single crochet border)
Knitting Needles: US #8 and US #7
Crochet hook: US size 7 or 4.5 mm crochet hook
Gauge: Not needed for this project
Abbreviations:

  • K: Knit
  • P: Purl
  • Kfb: Knit front and back (knit one stitch first in the front and then knit the same stitch in the back before slipping it off the left needle – 1 stitch increase) 
  • rm: remove marker
  • sm: slip marker
  • wyif S1: with yarn in front slip one stitch purlwise
  • RS: right side
  • WS: wrong side

The Upside Down Dishcloth (text and images for personal use only):

  • Cast on 5 stitches with US #8 needles
  • With US #7 knit
    • Row 1 (RS): K1, pm, Kfb, pm, K1, pm, Kfb, pm, wyif S1
    • Row 2 (WS): K1, sm, K2, sm, P1, sm, K2, sm, wyif S1
    • Row 3: K1, sm, knit to 1 stitch before marker, Kfb, sm, K1, sm, Kfb, knit to marker, sm, wyif S1
    • Row 4: K1, sm, knit to marker, sm, P1, sm, knit to the marker, sm, wyif S1
  • Repeat Rows 3 and 4 till the desired dishcloth length is reached. 
  • Bind off stitches loosely with US #8 knitting needles.
  • Crochet edging: Starting at the cast on edge to the right of the center knit stitch, pick up and single crochet around the dishcloth edge. At the two non-mitered corner single crochet twice into the same corner edge stitch. Slip stitch into the first single crochet border stitch and crochet 10 chain stitches. Slip stitch into the single crochet stitch on the other side of the center knit stitch.
  • Weave in the ends.
  • Wash and block the dishcloth.

Enjoy!


~coffeeteaknits.com

Goes with Everything Earwarmer

Goes with Everything Earwarmer

     This month has been quite overwhelming in terms of snow and icy temperatures. I’ve spent most of the month staying indoors bundled up in sweaters and other knitwear for warmth and of course keeping busy with knitting, weaving or crocheting. I had some of Malabrigo Rios yarn left over from knitting the “Goes with Everything Cowl” last month. There was just enough yarn leftover (about 27 – 28 grams) to knit the Goes with Everything Earwarmer.

            The earwarmers I’ve knit in the past have been knit in the round. I wear them but I’ve found that they tend to curl up in the back when my hair is tied up in a ponytail or a bun. To avoid the earwarmer from curling up in the back, I knit Goes with Everything Earwarmer flat from one side to the other with a series of increases and decreases.

It is first knit in garter stitch pattern for a couple of inches, then increased by 2 stitches every other row for another inch or so (customizable) in seed stitch pattern. The earwarmer is knit straight in seed stitch pattern with no increases or decreases for a specific (customizable) length, and then decreased every other row to the original number of stitches. It is knit again in garter stitch for a couple of inches and then bound off. The two garter stitch sides are joined using the zig zag crochet method.

Goes with Everything Earwarmer Pattern (text and images for personal use only):

Yarn: Malabrigo Yarn – Rios in the RIO877 (Queguay) colorway
Knitting Needles: US #6 and #7 for knitting the earwarmer. US #8 for casting on and binding off.
Crochet hook: US size 7 or 4.5 mm crochet hook
Gauge: 16 stitches/ 4 inches (this pattern is generic so gauge not so critical)
Abbreviations:

  • K: Knit
  • P: Purl
  • Kfb: Knit front and back (knit one stitch first in the front and then knit the same stitch in the back before slipping it off the left needle – 1 stitch increase)
  • K2tog: Knit the first two stitches together on the left needle (1 stitch decrease)
  • pm: place marker
  • rm: remove marker
  • sm: slip marker
  • wyif S1: with yarn in front slip 1 stitch purlwise
  • RS: right side
  • WS: wrong side

The seed stitch pattern:
Row 1 (RS): *K1, P1*; repeat from *…* to end of the row
Row 2 (WS): *P1, K1*; repeat  from *…* to end of the row
*Knit in seed stitch pattern: Knit the purl stitches and purl the knit stitches

With a size US #8 knitting needle cast on 9 stitches start knitting with US #6 knitting needle the following garter stitch pattern:

  • Row1 – Setup row (RS): K1, pm, K7, pm, wyif S1
  • Row2 (WS): K1, sm, K7, sm, wyif S1

Repeat Row 2 – 18 more times (about 2 inches in length)

Increase section (2 stitches increased every other row):
With US #7 needles knit this section in seed stitch pattern

  • Row 1 (RS): K1, sm, Kfb, *knit in seed stitch pattern till 1 stitch before marker, Kfb, sm, wyif S1
  • Row 2 (WS): K1, sm, K1, *knit in seed stitch pattern till 1 stitch before marker, K1, sm, wyif S1

Repeat these two rows 5 more times for a total of 19 stitches (customize to your size by adding or subtracting these row repeats to the length that will cover your ears)

Straight knitting with no increases or decreases section (customize to your size by measuring the number of stitches from one ear to the other and knit about 2 to 4 inches less for negative ease):
Continue in knitting with US #7 knitting needle and seed stitch pattern

  • Row 1 (RS): K1, sm, *K1, P1*; repeat from *…* to 1 stitch before marker, K1, sm, wyif S1
  • Row 2 (WS): K1, sm, K1, *P1, K1*; repeat from *…* till marker, sm, wyif S1

Repeat these two rows till the knitted piece measures about 15 inches from cast on edge (add or subtract row repeats to your specific size)

Decrease section (2 stitches decreased every other row):
With US #7 knitting needle and seed stitch pattern

  • Row 1 (RS): K1, sm, K2tog, *knit in seed stitch pattern till 1 stitch before marker, K2tog, sm, wyif S1
  • Row 2 (WS): K1, sm, K1, *knit in seed stitch pattern till 1 stitch before marker, K1, sm, wyif S1

Repeat these two rows 5 more times decreasing the number of stitches to 9 (if your stitch count was more or less than 19 stitches, add or subtract these row repeats till 9 stitches)

With US #6 knitting needle knit the following garter stitch pattern:

  • Row1(RS): K1, sm, K7, sm, wyif S1
  • Row2 (WS): K1, sm, K7, sm, wyif S1

Repeat these two rows 9 more times (about 2 inches in length). Bind off with US #8 knitting needle and hold the remaining stitch with a removable stitch marker.

Crochet join (optional):

Insert a size 7 or 4.5 mm crochet hook in the remaining stitch, chain one, and align the two sides facing RS of the knitted piece together on the RS. Use the zig zag slip stitch crochet join method to join the two sides together (several online video tutorials are available on YouTube for this crochet join method).

Alternately, the two sides can be joined with any other join method of choice.

Weave in the ends, wash and block the earwarmer.

Stay warm


~coffeeteaknits.com