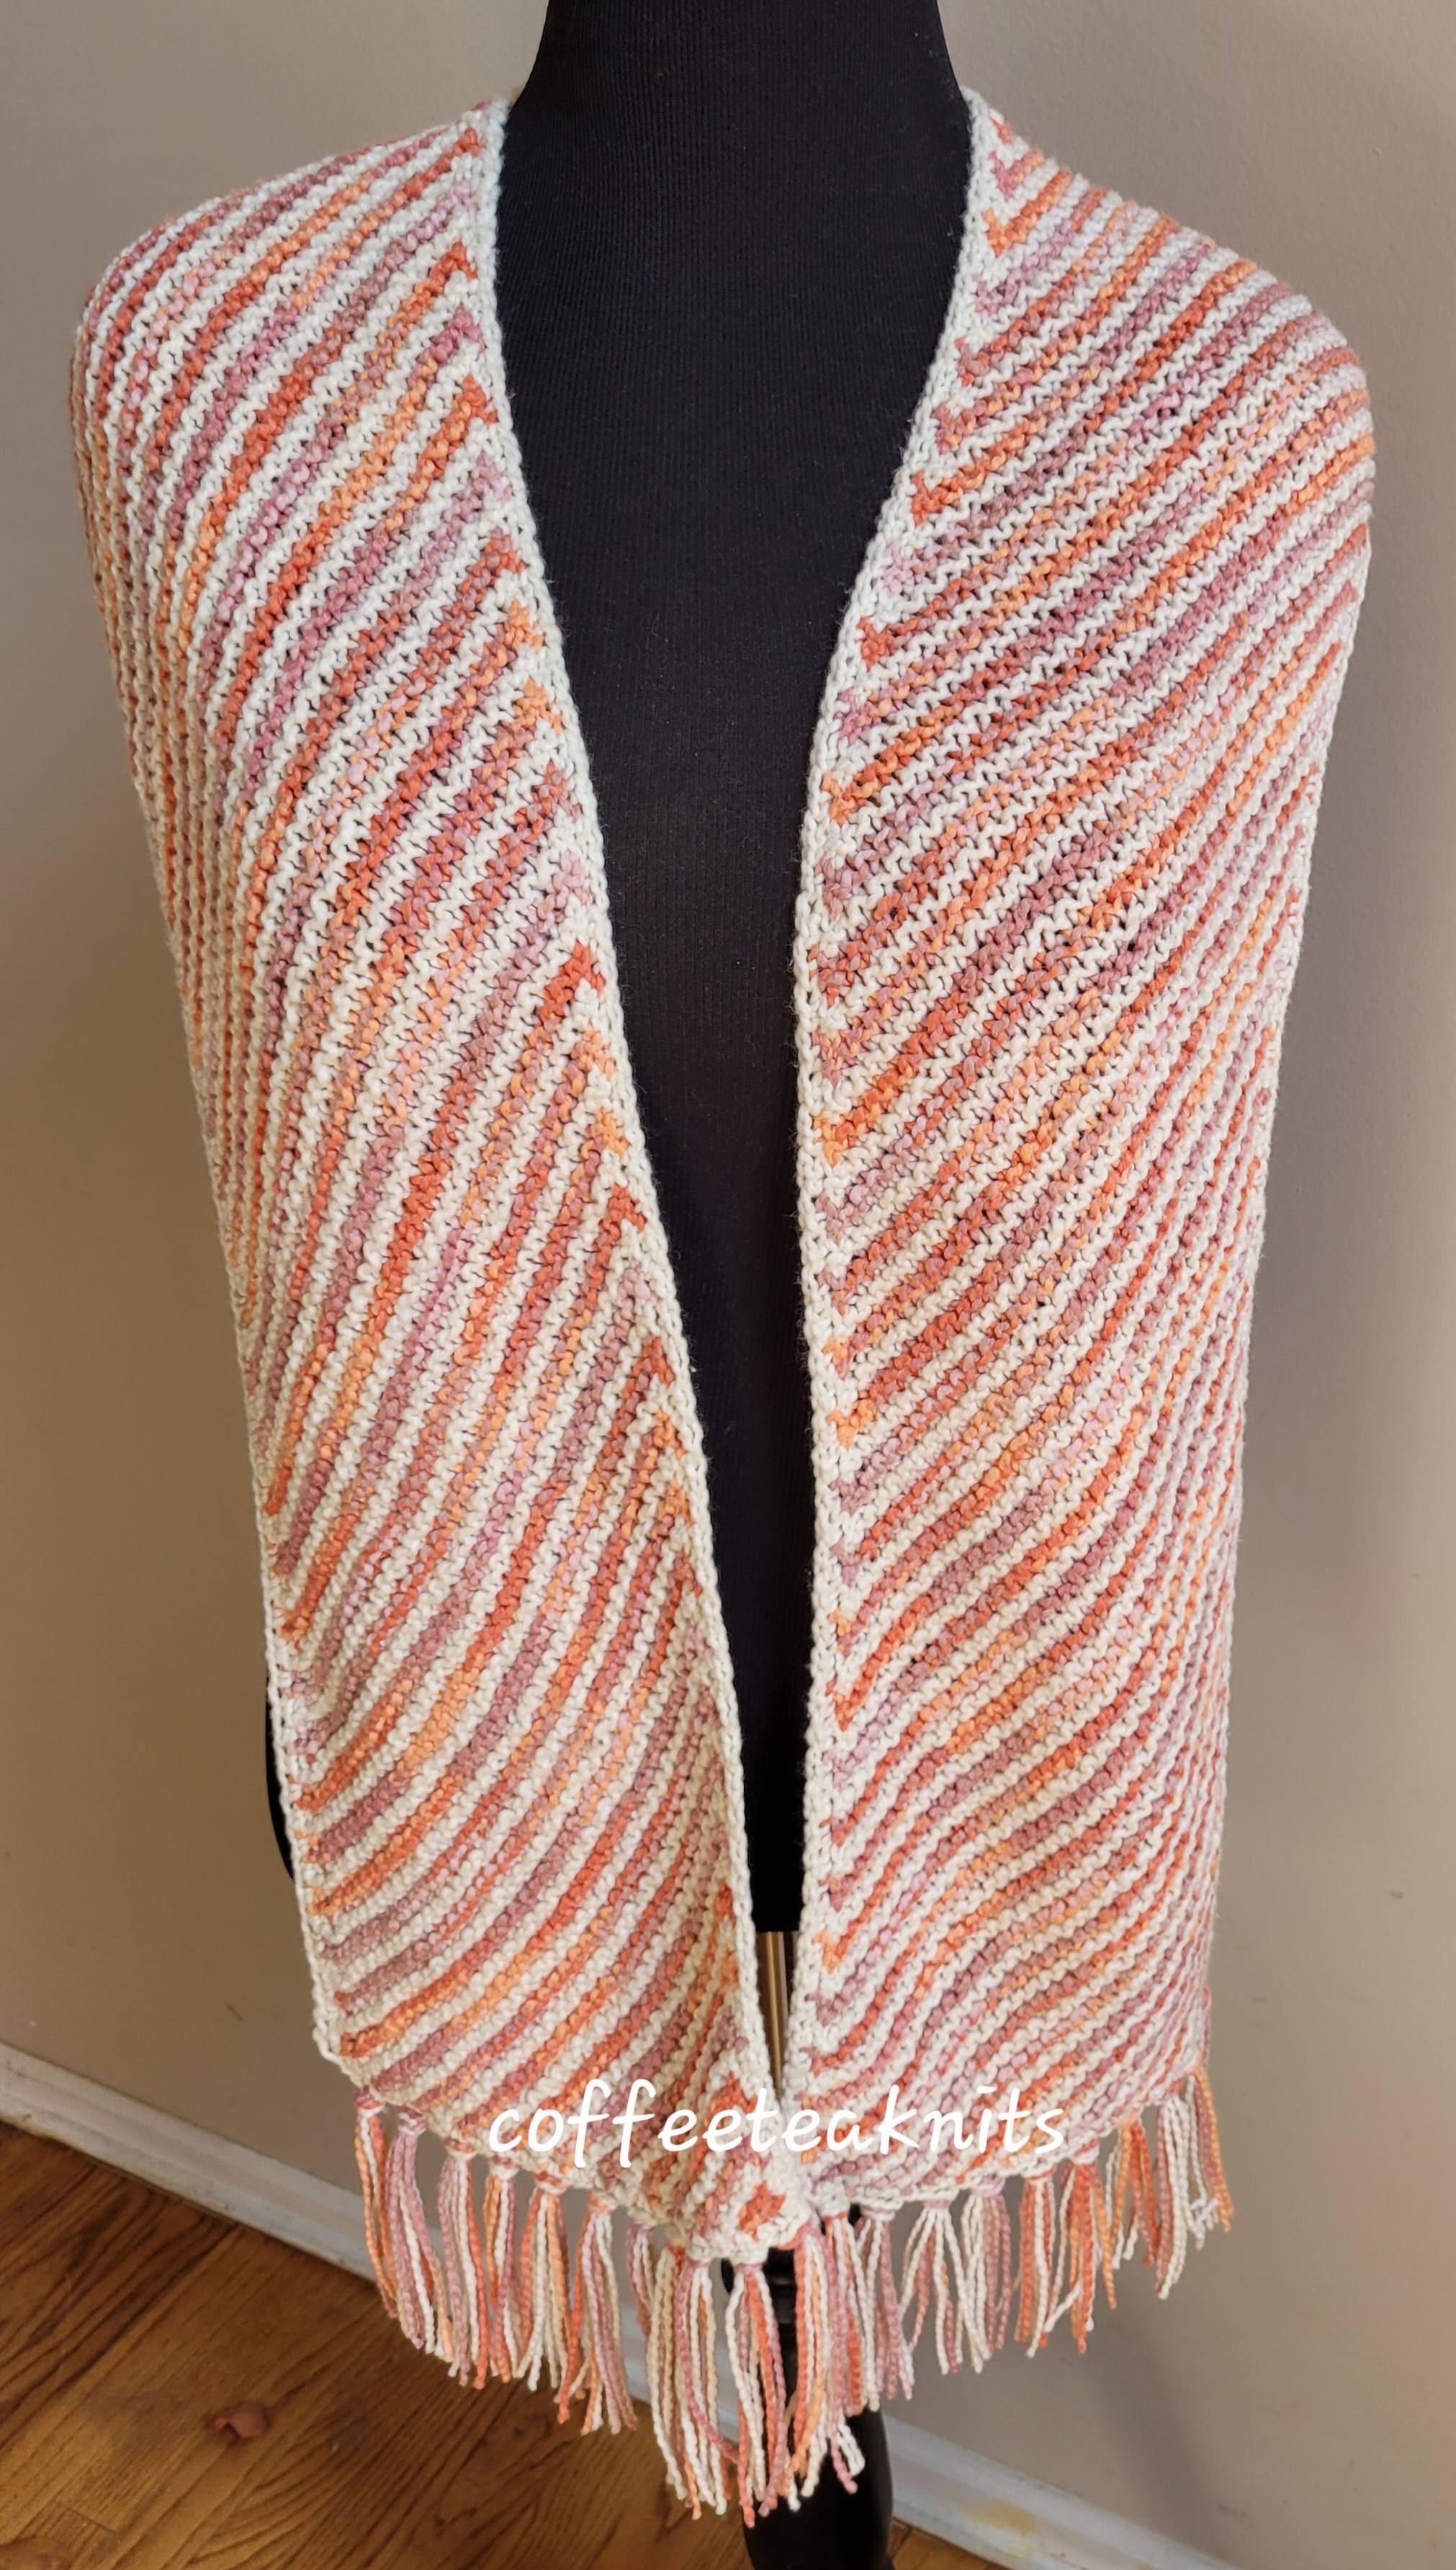
Daylilies Scarf is a rectangular scarf knit on the bias in garter stitch pattern. It is knit with 2 different colorways of Yarnspirations™Caron® Cotton Funnel Cakes yarn I purchased this Spring at Michaels Arts and Crafts Store. I finished knitting this pullover (see below) late Spring and found the yarn soft and light and oh so enjoyable to knit with. I had enough yarn left over so I knit the Daylilies Scarf with it too. The colors of this yarn represent all things of Spring/Summer to me – the vibrant colors of daylilies and other flowers, the birds, the butterflies etc. The colors of the yarn also depict a season of much warmth and a time when nature is awake.
Advertisements
The Daylilies Scarf Pattern (text and images for personal use only)
Yarn: Caron® Cotton Funnel Cakes by Yarnspirations™ in Peaches and Cummulus colorways Knitting Needles: US #9 or 5.5 mm knitting needles Crochet hook: US size H8 or 5.0 mm crochet hook Gauge: 14 stitches/ 4 inches (this pattern is generic so gauge not so critical)
Advertisements
PLEASE SUBSCRIBE FOR THE FREE PATTERN. THANK YOU
Subscribe to continue reading
Subscribe to get access to the rest of this post and other subscriber-only content.
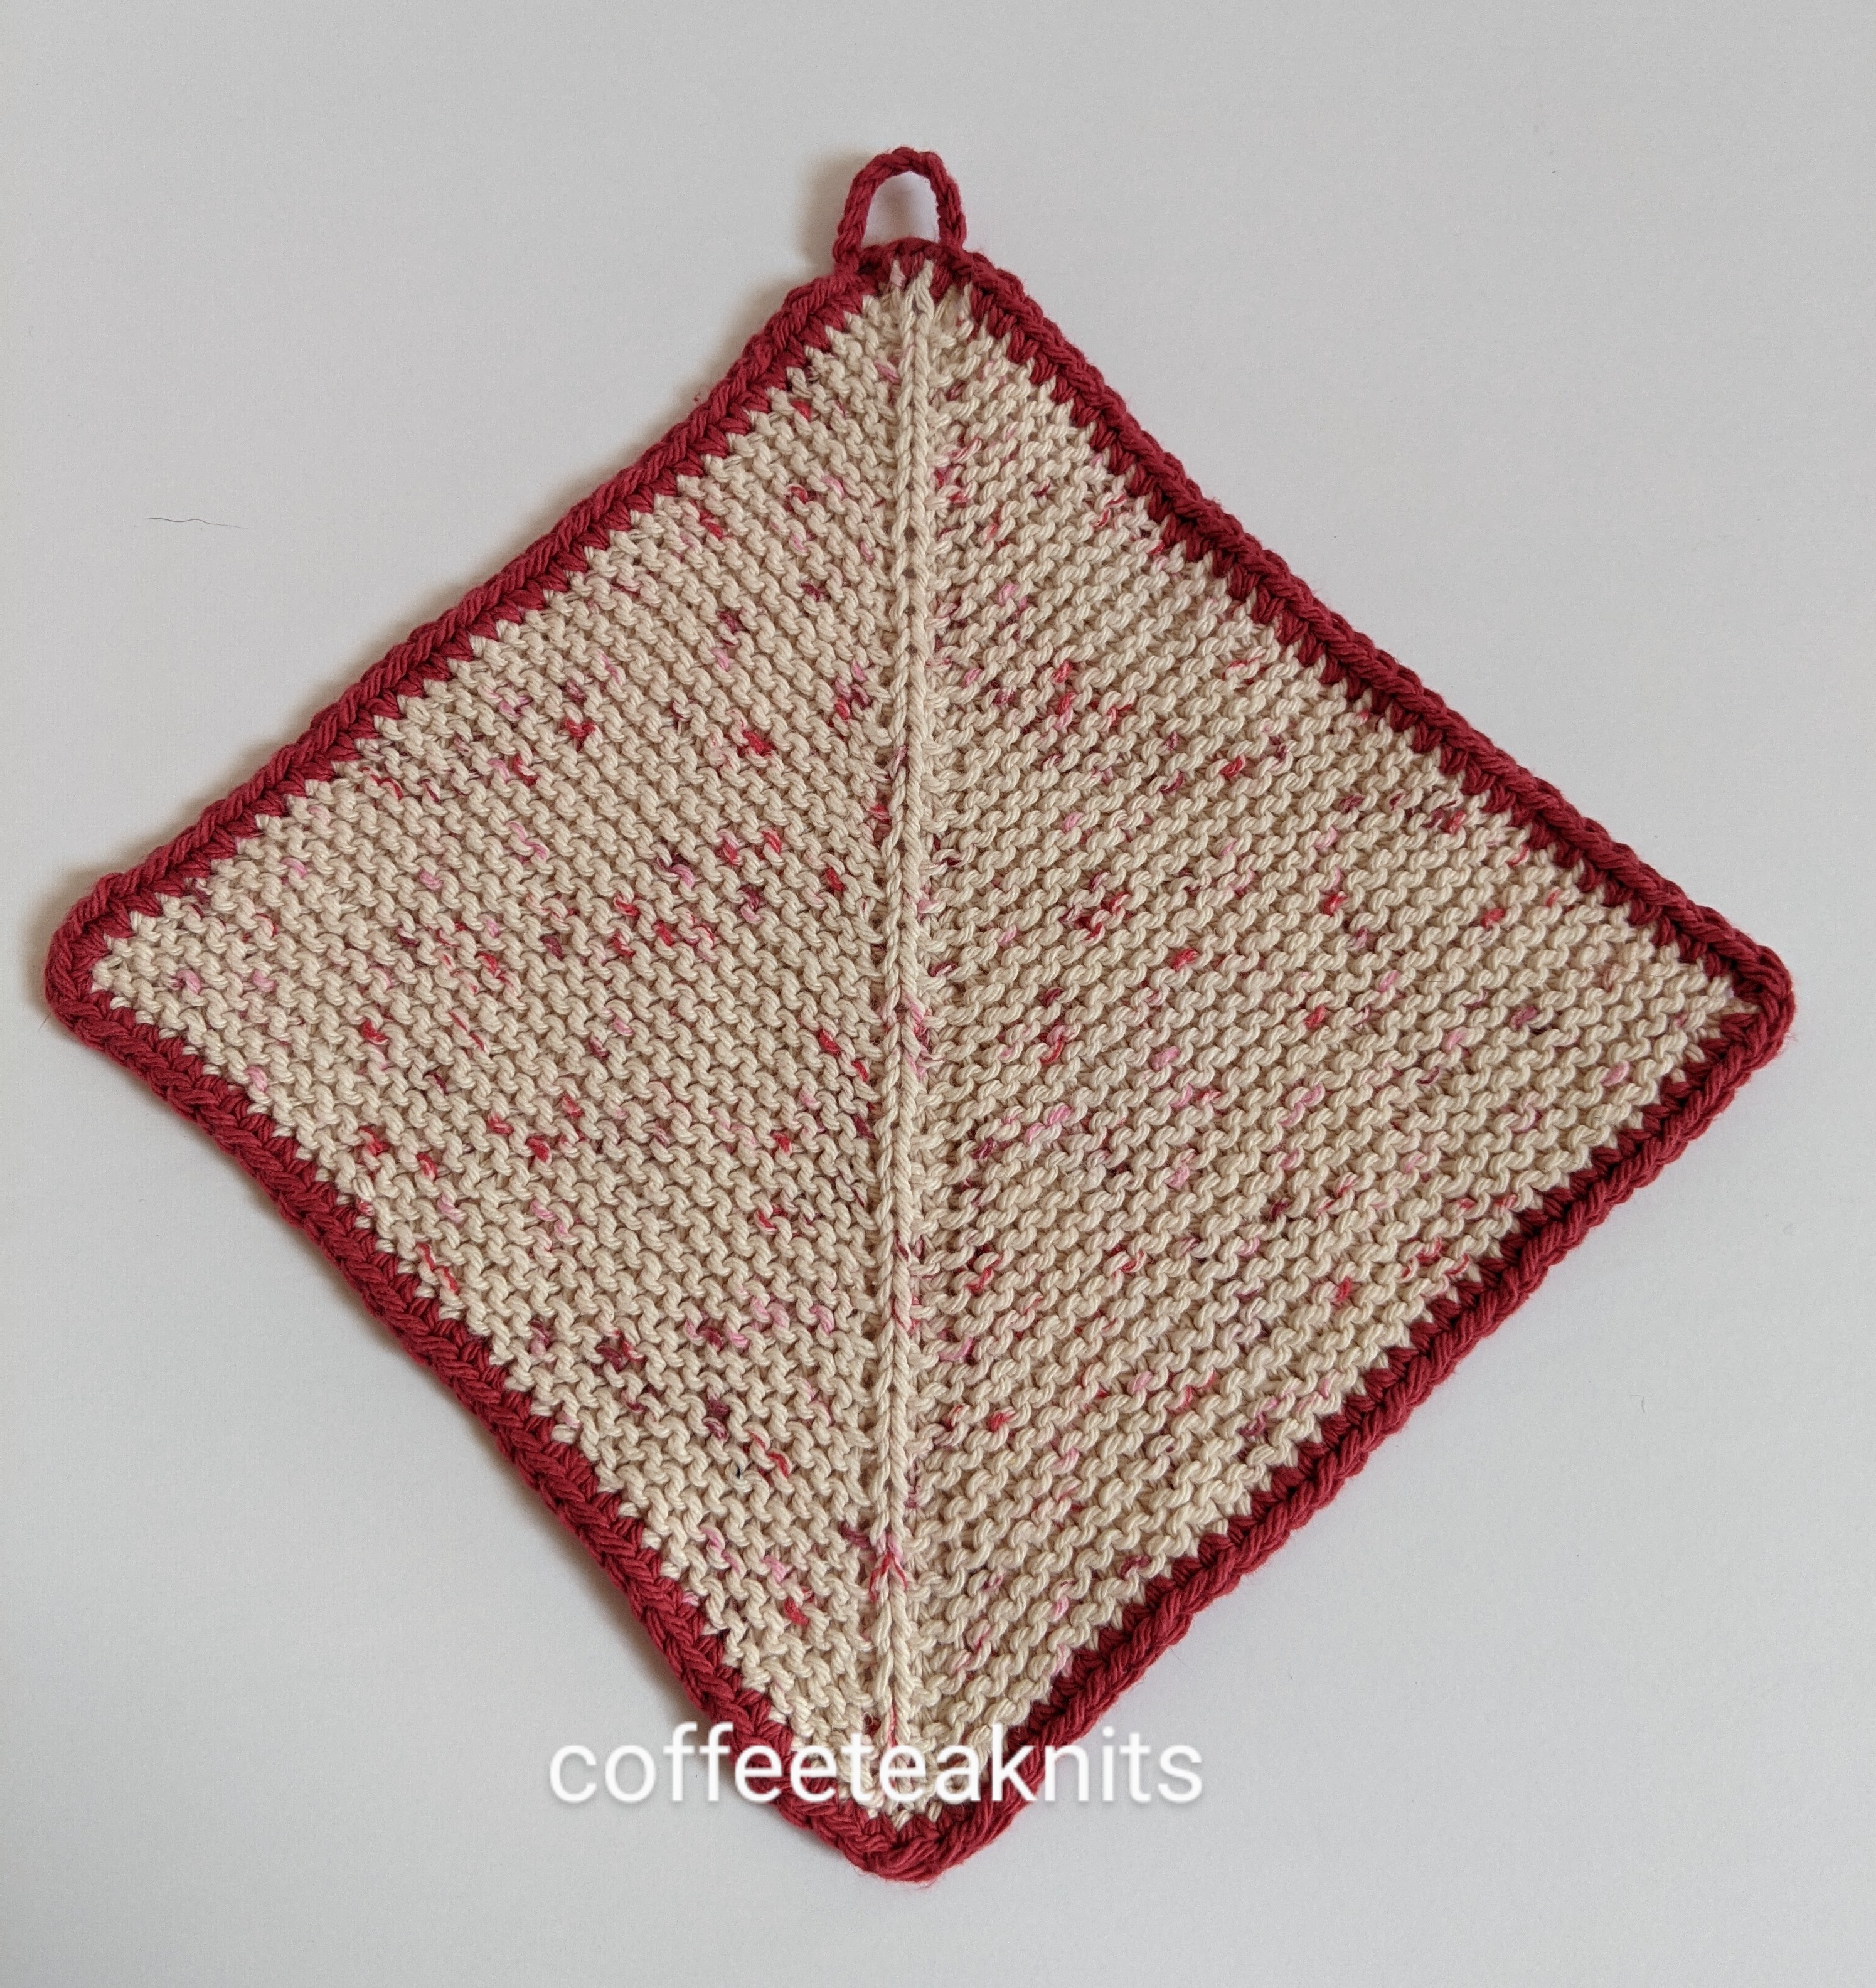
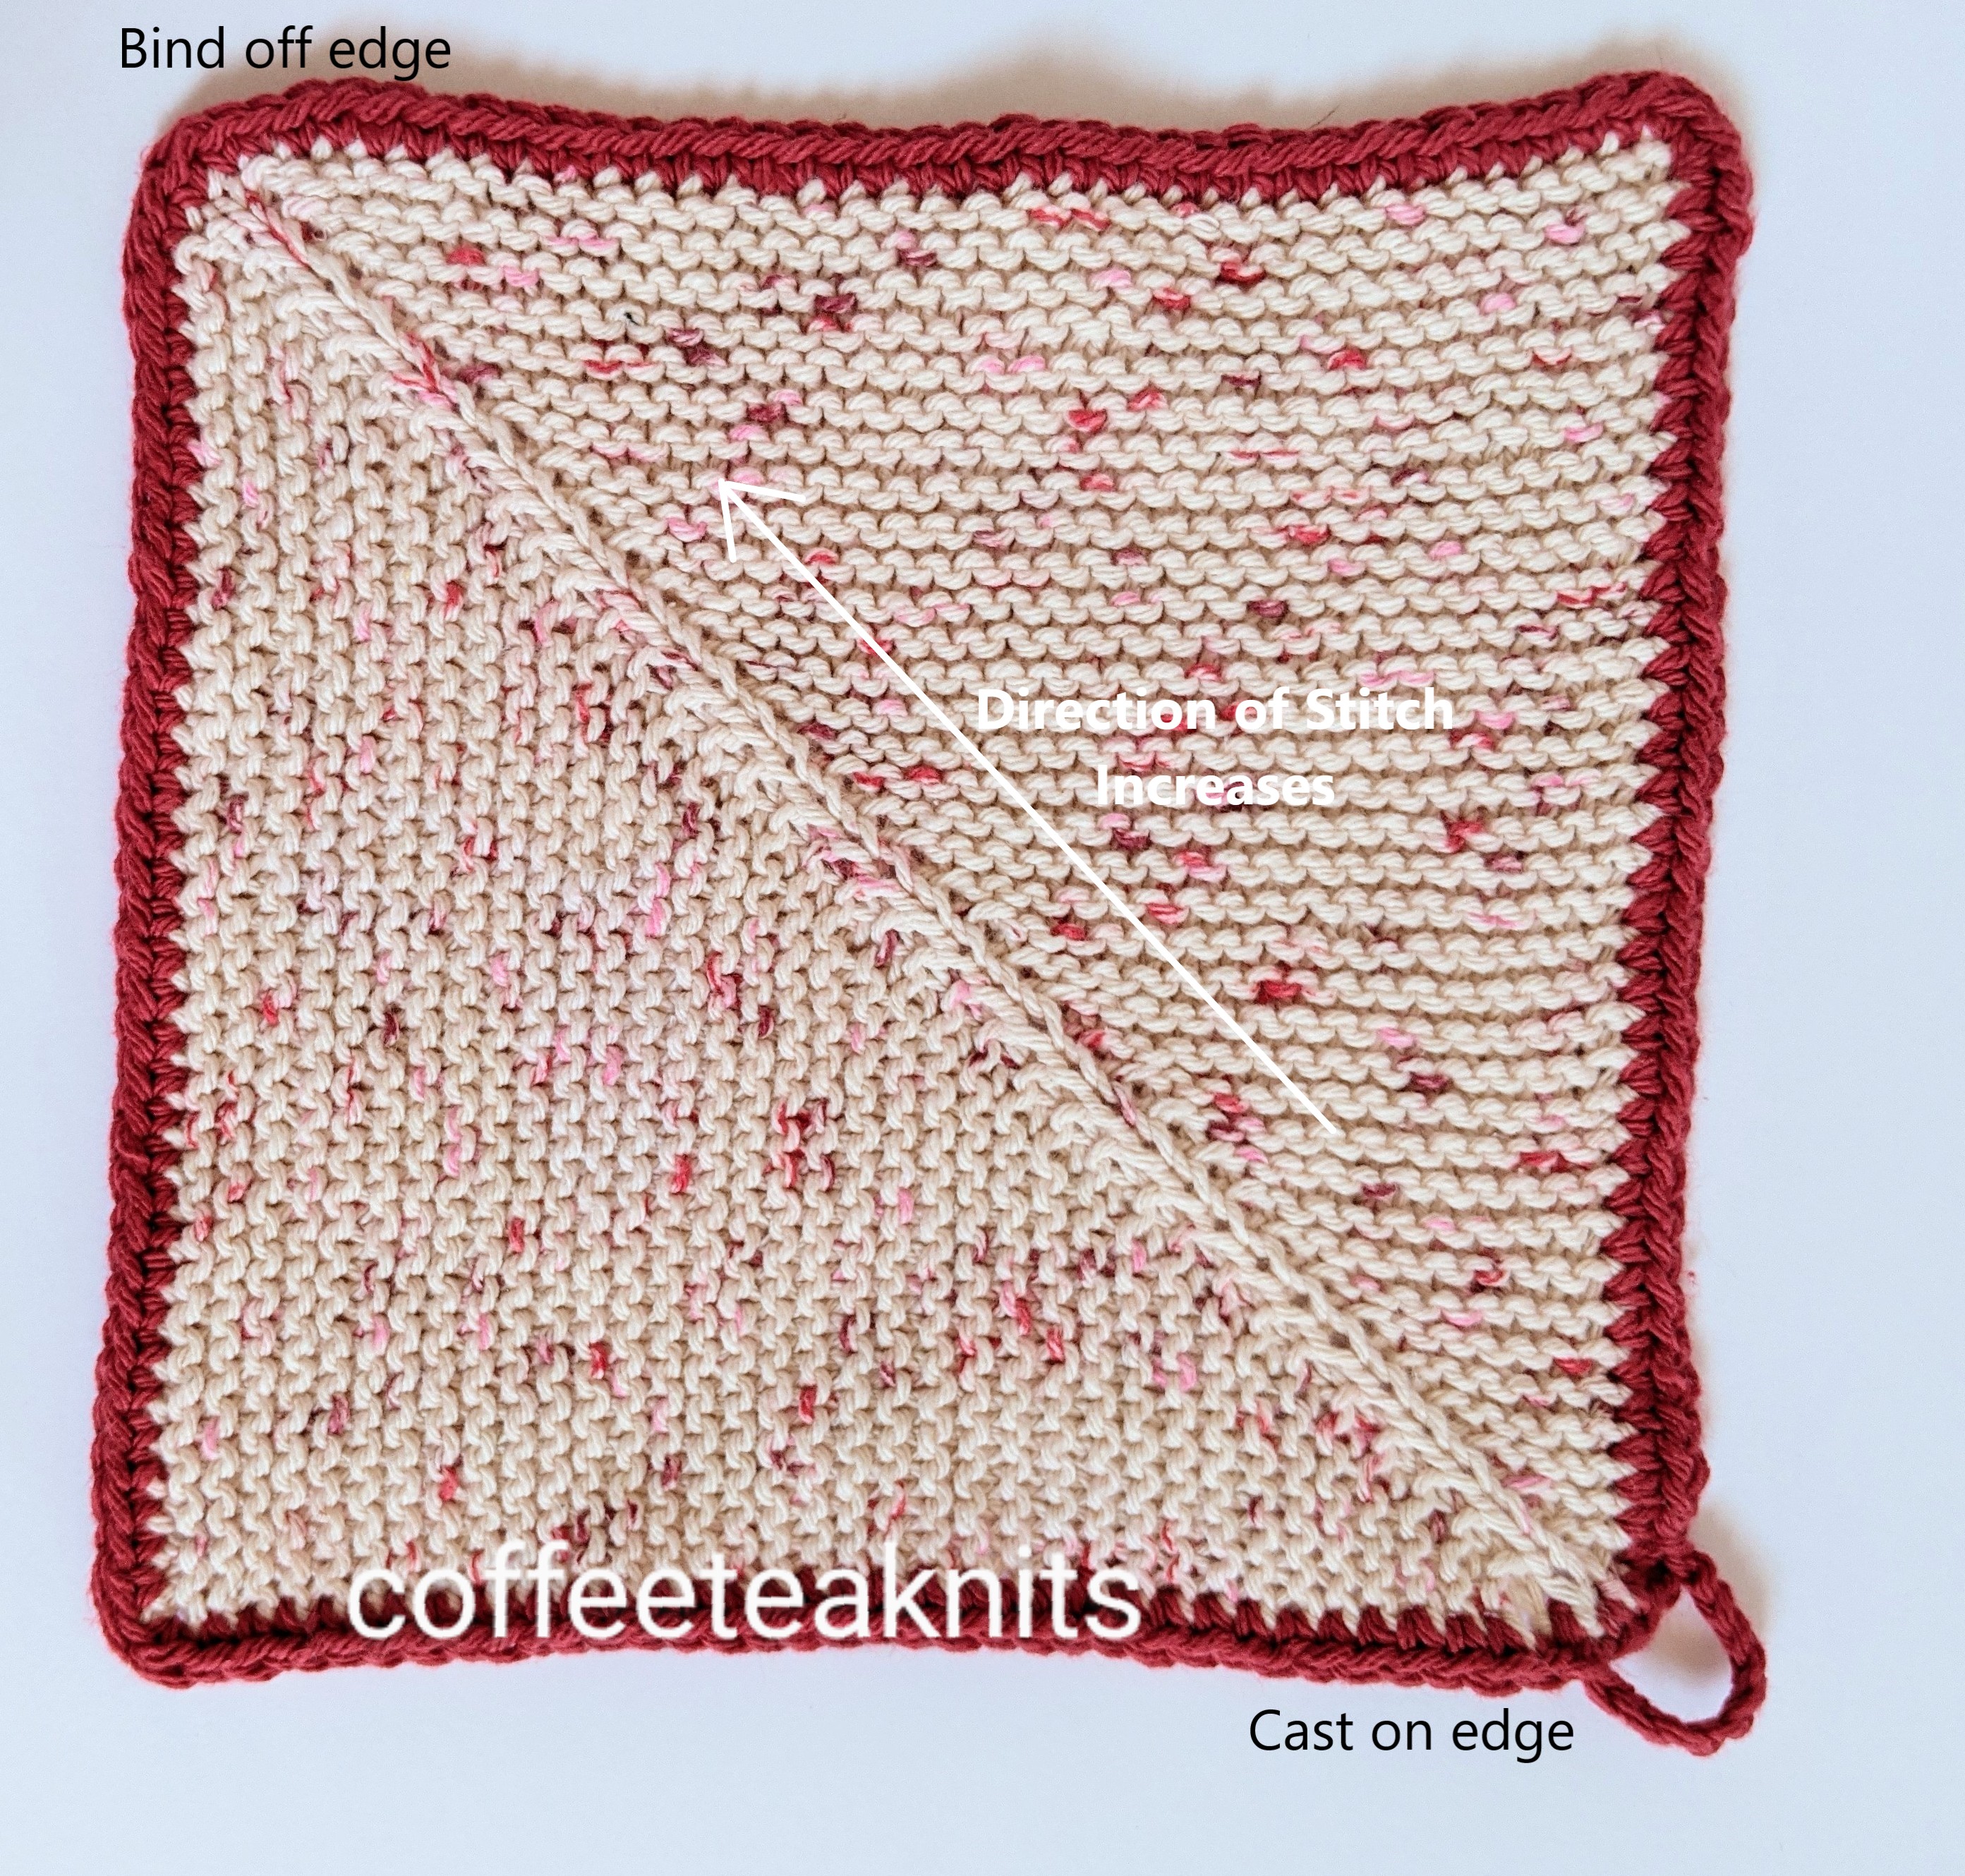
I’ve made mitered square dishcloths (July 2020 post ) by casting on a specific number of stitches and then knitting the double decreases every other row to create the mitered square. The Upside Down Dishcloth is a garter stitch mitered square dishcloth knit flat and in reverse. The advantages of knitting a reverse mitered square include fewer stitches to cast on and an avoidance of playing yarn chicken. With this reverse mitered technique dishcloths can be knit as large or as small depending on the yardage of yarn available. It’s also a great way to use up leftover over yarn from other projects. For the Upside Down Dishcloth, a few stitches were cast on and the mitered square dishcloth was knitted with double increases every other row.
Advertisements
Advertisements
Materials Needed: Yarn: PREMIER HOME® COTTON CONE YARN Colorway: Jelly Dots Yarn: Lily Sugar’n Cream in Colorways: Country Red (for the single crochet border) Knitting Needles: US #8 and US #7 Crochet hook: US size 7 or 4.5 mm crochet hook Gauge: Not needed for this project
Abbreviations:
K: Knit
P: Purl
Kfb: Knit front and back (knit one stitch first in the front and then knit the same stitch in the back before slipping it off the left needle – 1 stitch increase)
rm: remove marker
sm: slip marker
wyif S1: with yarn in front slip one stitch purlwise
RS: right side
WS: wrong side
Advertisements
The Upside Down Dishcloth (text and images for personal use only):
PLEASE SUBSCRIBE FOR THE FREE PATTERN. THANK YOU
Subscribe to continue reading
Subscribe to get access to the rest of this post and other subscriber-only content.
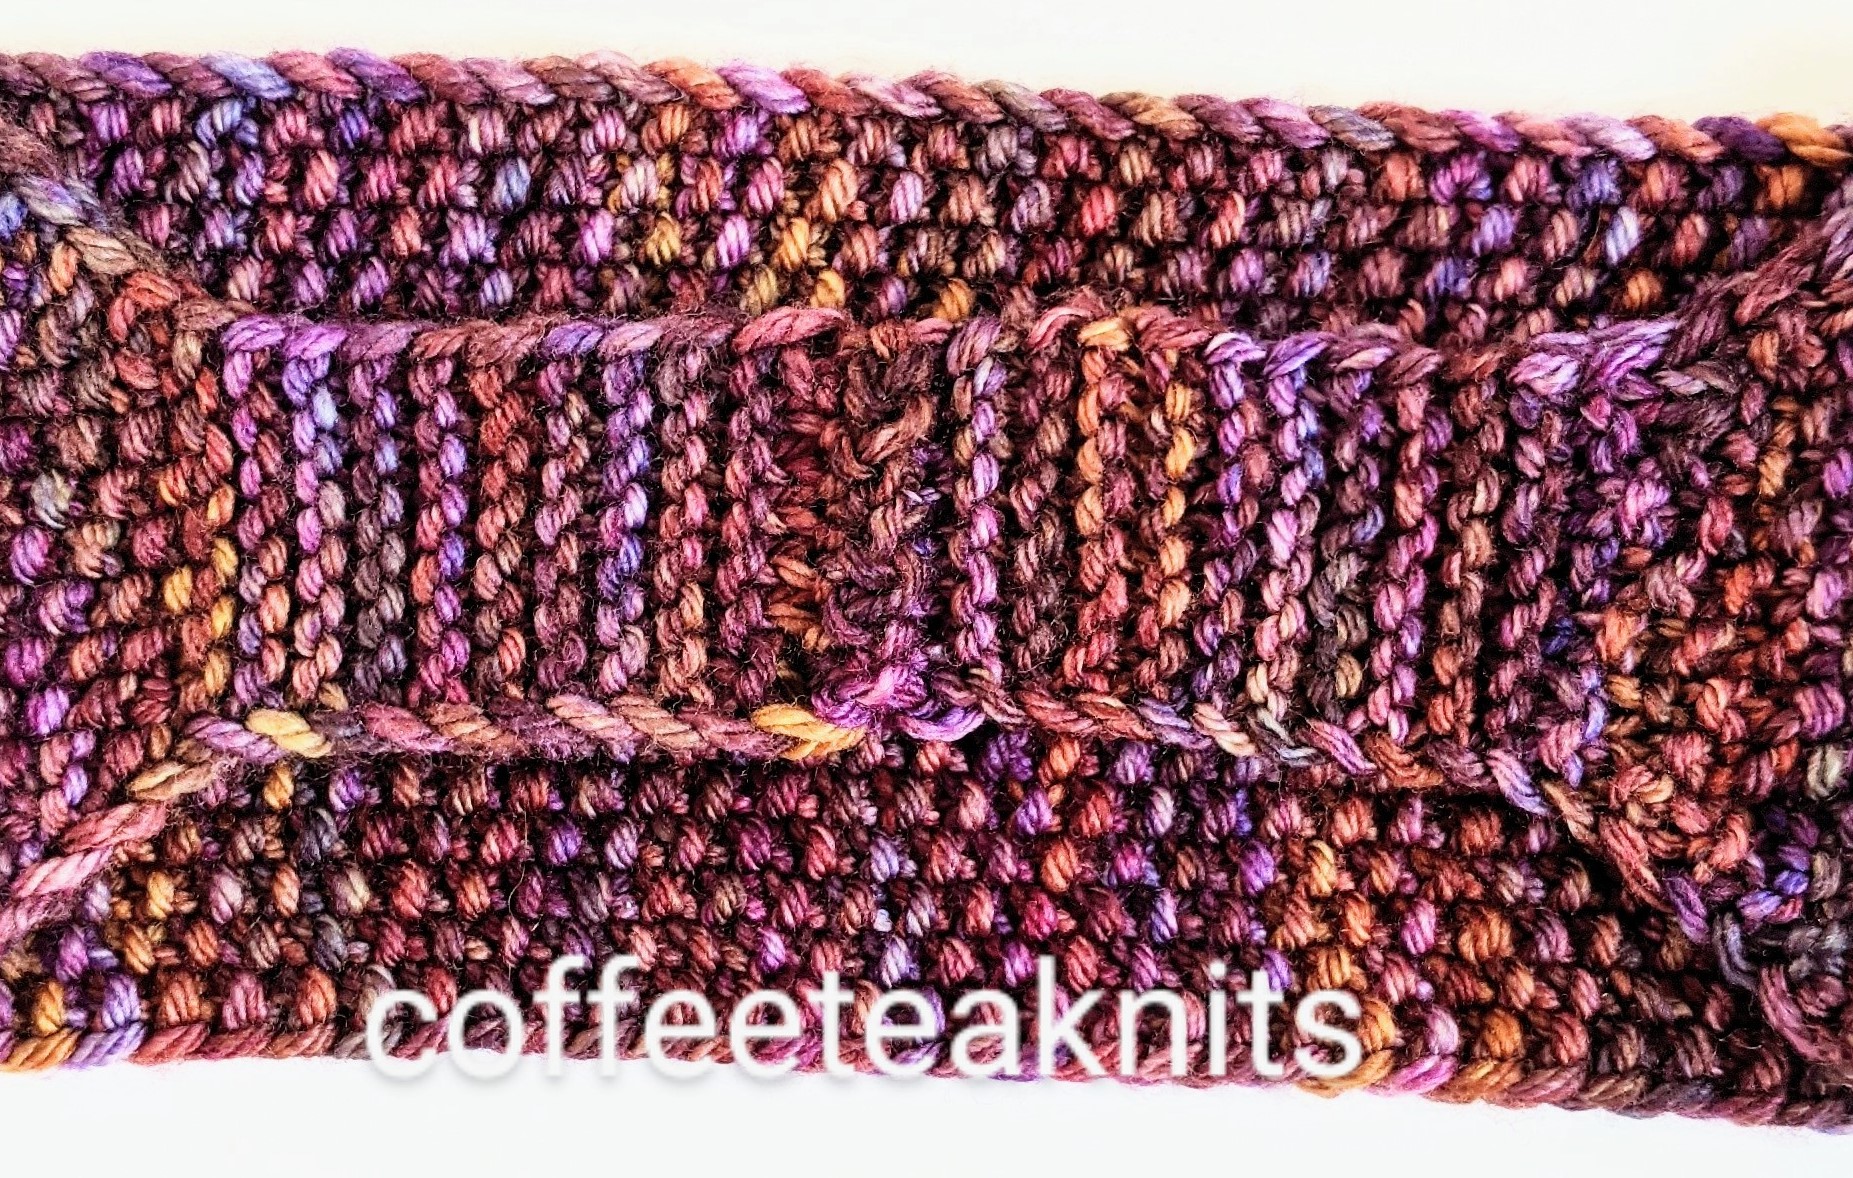
This month has been quite overwhelming in terms of snow and icy temperatures. I’ve spent most of the month staying indoors bundled up in sweaters and other knitwear for warmth and of course keeping busy with knitting, weaving or crocheting. I had some of Malabrigo Rios yarn left over from knitting the “Goes with Everything Cowl” last month. There was just enough yarn leftover (about 27 – 28 grams) to knit the Goes with Everything Earwarmer.
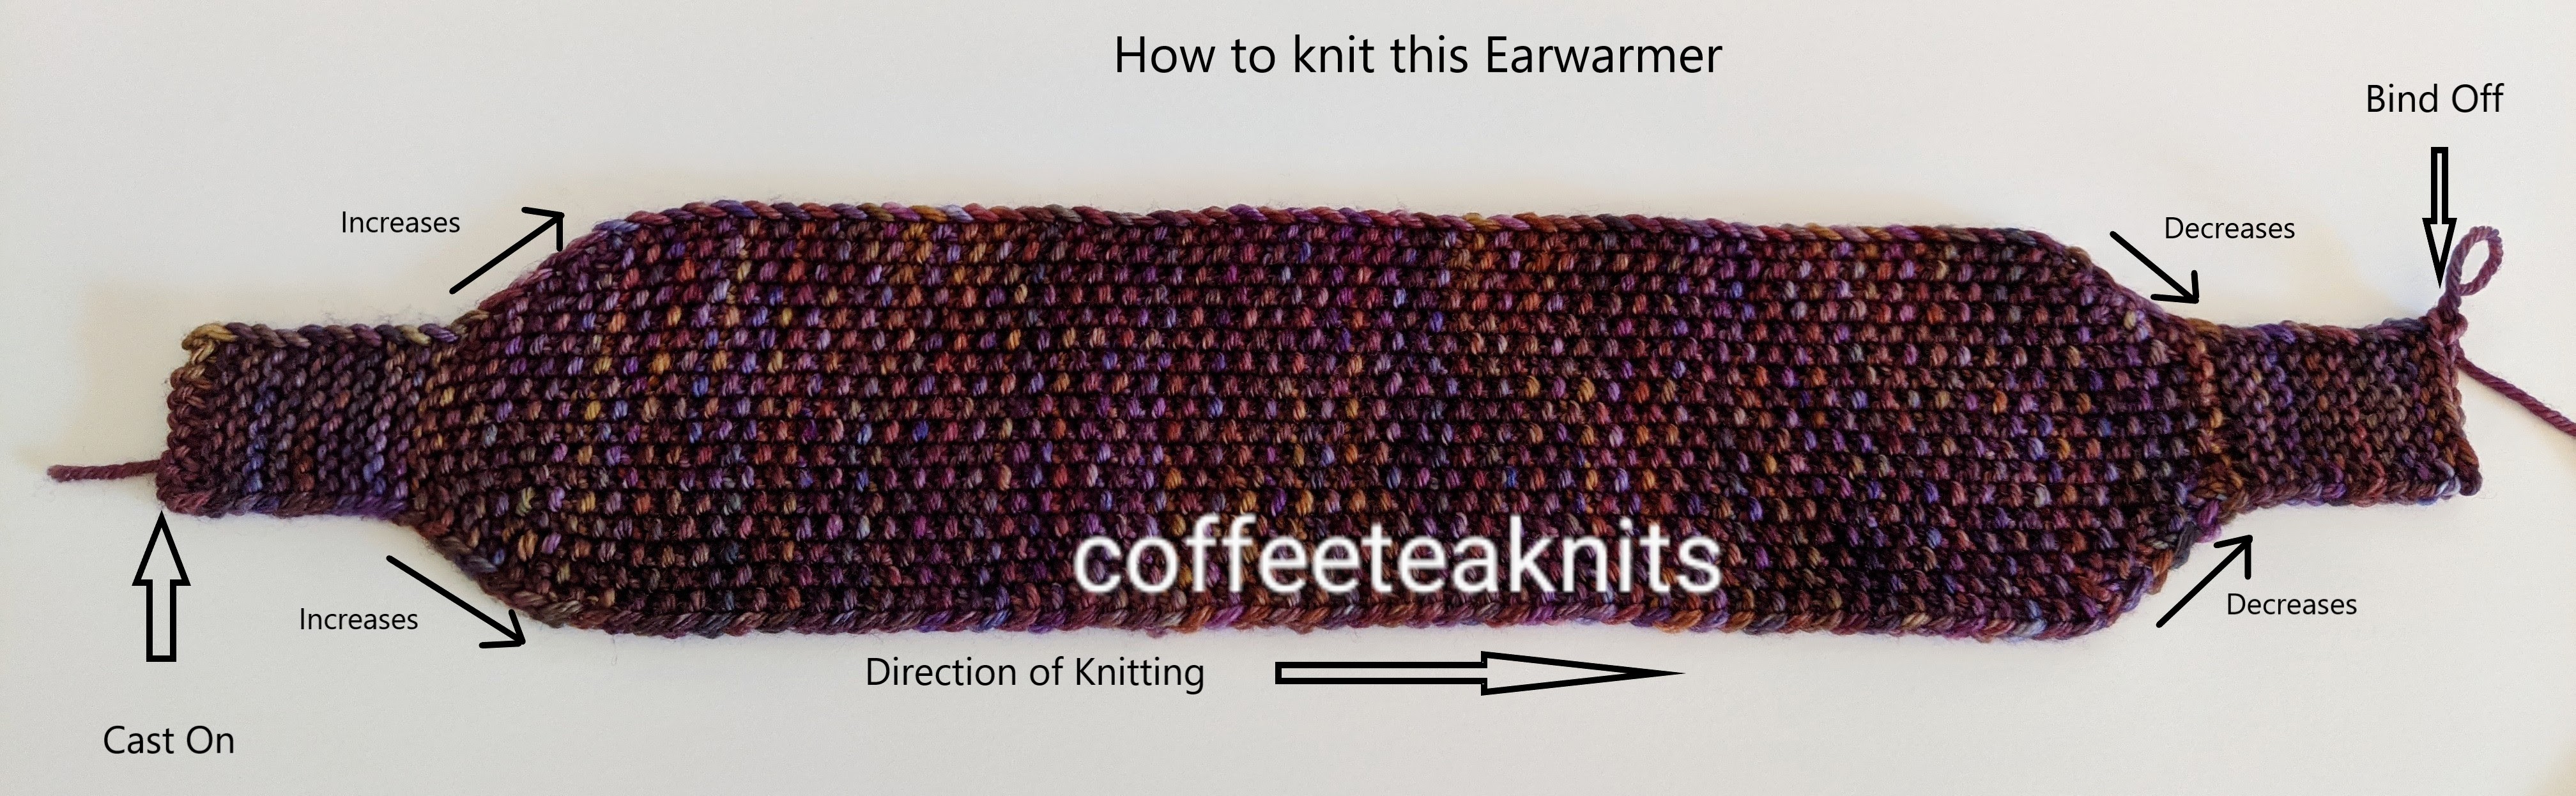
The earwarmers I’ve knit in the past have been knit in the round. I wear them but I’ve found that they tend to curl up in the back when my hair is tied up in a ponytail or a bun. To avoid the earwarmer from curling up in the back, I knit Goes with Everything Earwarmer flat from one side to the other with a series of increases and decreases.
It is first knit in garter stitch pattern for a couple of inches, then increased by 2 stitches every other row for another inch or so (customizable) in seed stitch pattern. The earwarmer is knit straight in seed stitch pattern with no increases or decreases for a specific (customizable) length, and then decreased every other row to the original number of stitches. It is knit again in garter stitch for a couple of inches and then bound off. The two garter stitch sides are joined using the zig zag crochet method.
Goes with Everything Earwarmer Pattern (text and images for personal use only):
Yarn: Malabrigo Yarn – Rios in the RIO877 (Queguay) colorway Knitting Needles: US #6 and #7 for knitting the earwarmer. US #8 for casting on and binding off. Crochet hook: US size 7 or 4.5 mm crochet hook Gauge: 16 stitches/ 4 inches (this pattern is generic so gauge not so critical) Abbreviations:
K: Knit
P: Purl
Kfb: Knit front and back (knit one stitch first in the front and then knit the same stitch in the back before slipping it off the left needle – 1 stitch increase)
K2tog: Knit the first two stitches together on the left needle (1 stitch decrease)
pm: place marker
rm: remove marker
sm: slip marker
wyif S1: with yarn in front slip 1 stitch purlwise
RS: right side
WS: wrong side
The seed stitch pattern: Row 1 (RS): *K1, P1*; repeat from *…* to end of the row Row 2 (WS): *P1, K1*; repeat from *…* to end of the row *Knit in seed stitch pattern: Knit the purl stitches and purl the knit stitches
With a size US #8 knitting needle cast on 9 stitches start knitting with US #6 knitting needle the following garter stitch pattern:
Row1 – Setup row (RS): K1, pm, K7, pm, wyif S1
Row2 (WS): K1, sm, K7, sm, wyif S1
Repeat Row 2 – 18 more times (about 2 inches in length)
Increase section (2 stitches increased every other row): With US #7 needles knit this section in seed stitch pattern
Row 1 (RS): K1, sm, Kfb, *knit in seed stitch pattern till 1 stitch before marker, Kfb, sm, wyif S1
Row 2 (WS): K1, sm, K1, *knit in seed stitch pattern till 1 stitch before marker, K1, sm, wyif S1
Repeat these two rows 5 more times for a total of 19 stitches (customize to your size by adding or subtracting these row repeats to the length that will cover your ears)
Straight knitting with no increases or decreases section (customize to your size by measuring the number of inches from one ear to the other and knit about 2 to 4 inches less for negative ease): Continue in knitting with US #7 knitting needle and seed stitch pattern
Row 1 (RS): K1, sm, *K1, P1*; repeat from *…* to 1 stitch before marker, K1, sm, wyif S1
Row 2 (WS): K1, sm, K1, *P1, K1*; repeat from *…* till marker, sm, wyif S1
Repeat these two rows till the knitted piece measures about 15 inches from cast on edge (add or subtract row repeats to your specific size)
Decrease section (2 stitches decreased every other row): With US #7 knitting needle and seed stitch pattern
Row 1 (RS): K1, sm, K2tog, *knit in seed stitch pattern till 1 stitch before marker, K2tog, sm, wyif S1
Row 2 (WS): K1, sm, K1, *knit in seed stitch pattern till 1 stitch before marker, K1, sm, wyif S1
Repeat these two rows 5 more times decreasing the number of stitches to 9 (if your stitch count was more or less than 19 stitches, add or subtract these row repeats till 9 stitches)
With US #6 knitting needle knit the following garter stitch pattern:
Row1(RS): K1, sm, K7, sm, wyif S1
Row2 (WS): K1, sm, K7, sm, wyif S1
Repeat these two rows 9 more times (about 2 inches in length). Bind off with US #8 knitting needle and hold the remaining stitch with a removable stitch marker.
Crochet join (optional):
Insert a size 7 or 4.5 mm crochet hook in the remaining stitch, chain one, and align the two sides facing RS of the knitted piece together on the RS. Use the zig zag slip stitch crochet join method to join the two sides together (several online video tutorials are available on YouTube for this crochet join method).
Alternately, the two sides can be joined with any other join method of choice.
Lately, I’ve rediscovered the simple elegance of the garter stitch. The garter stitch is a textured pattern that uses the knit stitch on both sides for flat knitting or knit stitch on one round followed by a purl stitch on the second round for circular knitting. It’s reversible and the edges don’t curl up making it a simple yet versatile stitch pattern. Garter stitch is usually the first stitch pattern we learn as a beginning knitter and then move on to more complex stitch patterns. . As we learn other more complex knit stitch patterns, we end up using the garter stitch pattern mostly for borders and edges of our knits. Yet one can create many beautiful and versatile knits when the garter stitch is combined with lace, shorts rows, or different yarn color variations. Several examples of knits with garter stitch patterns can be found on Ravelry.
Here is my version of the simple and elegant Purl Soho’s Dovetail Scarf pattern. I modified the pattern using a different yarn and a picot bind off. More project detail on this knitting project can be found here. For this project I used yarn left over from a previous sweater project.
So whether you are a beginning or an expert knitter, I invite you to rediscover the simple elegance of the garter stitch. I have and will be using this simple and elegant stitch pattern more this year to create a number of new knits.
Hello folks welcome to Coffee Tea Knits. It’s Coffee Tea or Knits with a new name and a new look. My previous blog entries are available at here. I will be moving these entries to the new site soon. Right now I have several incomplete knitting projects that I’m trying to finish by the end of this year.
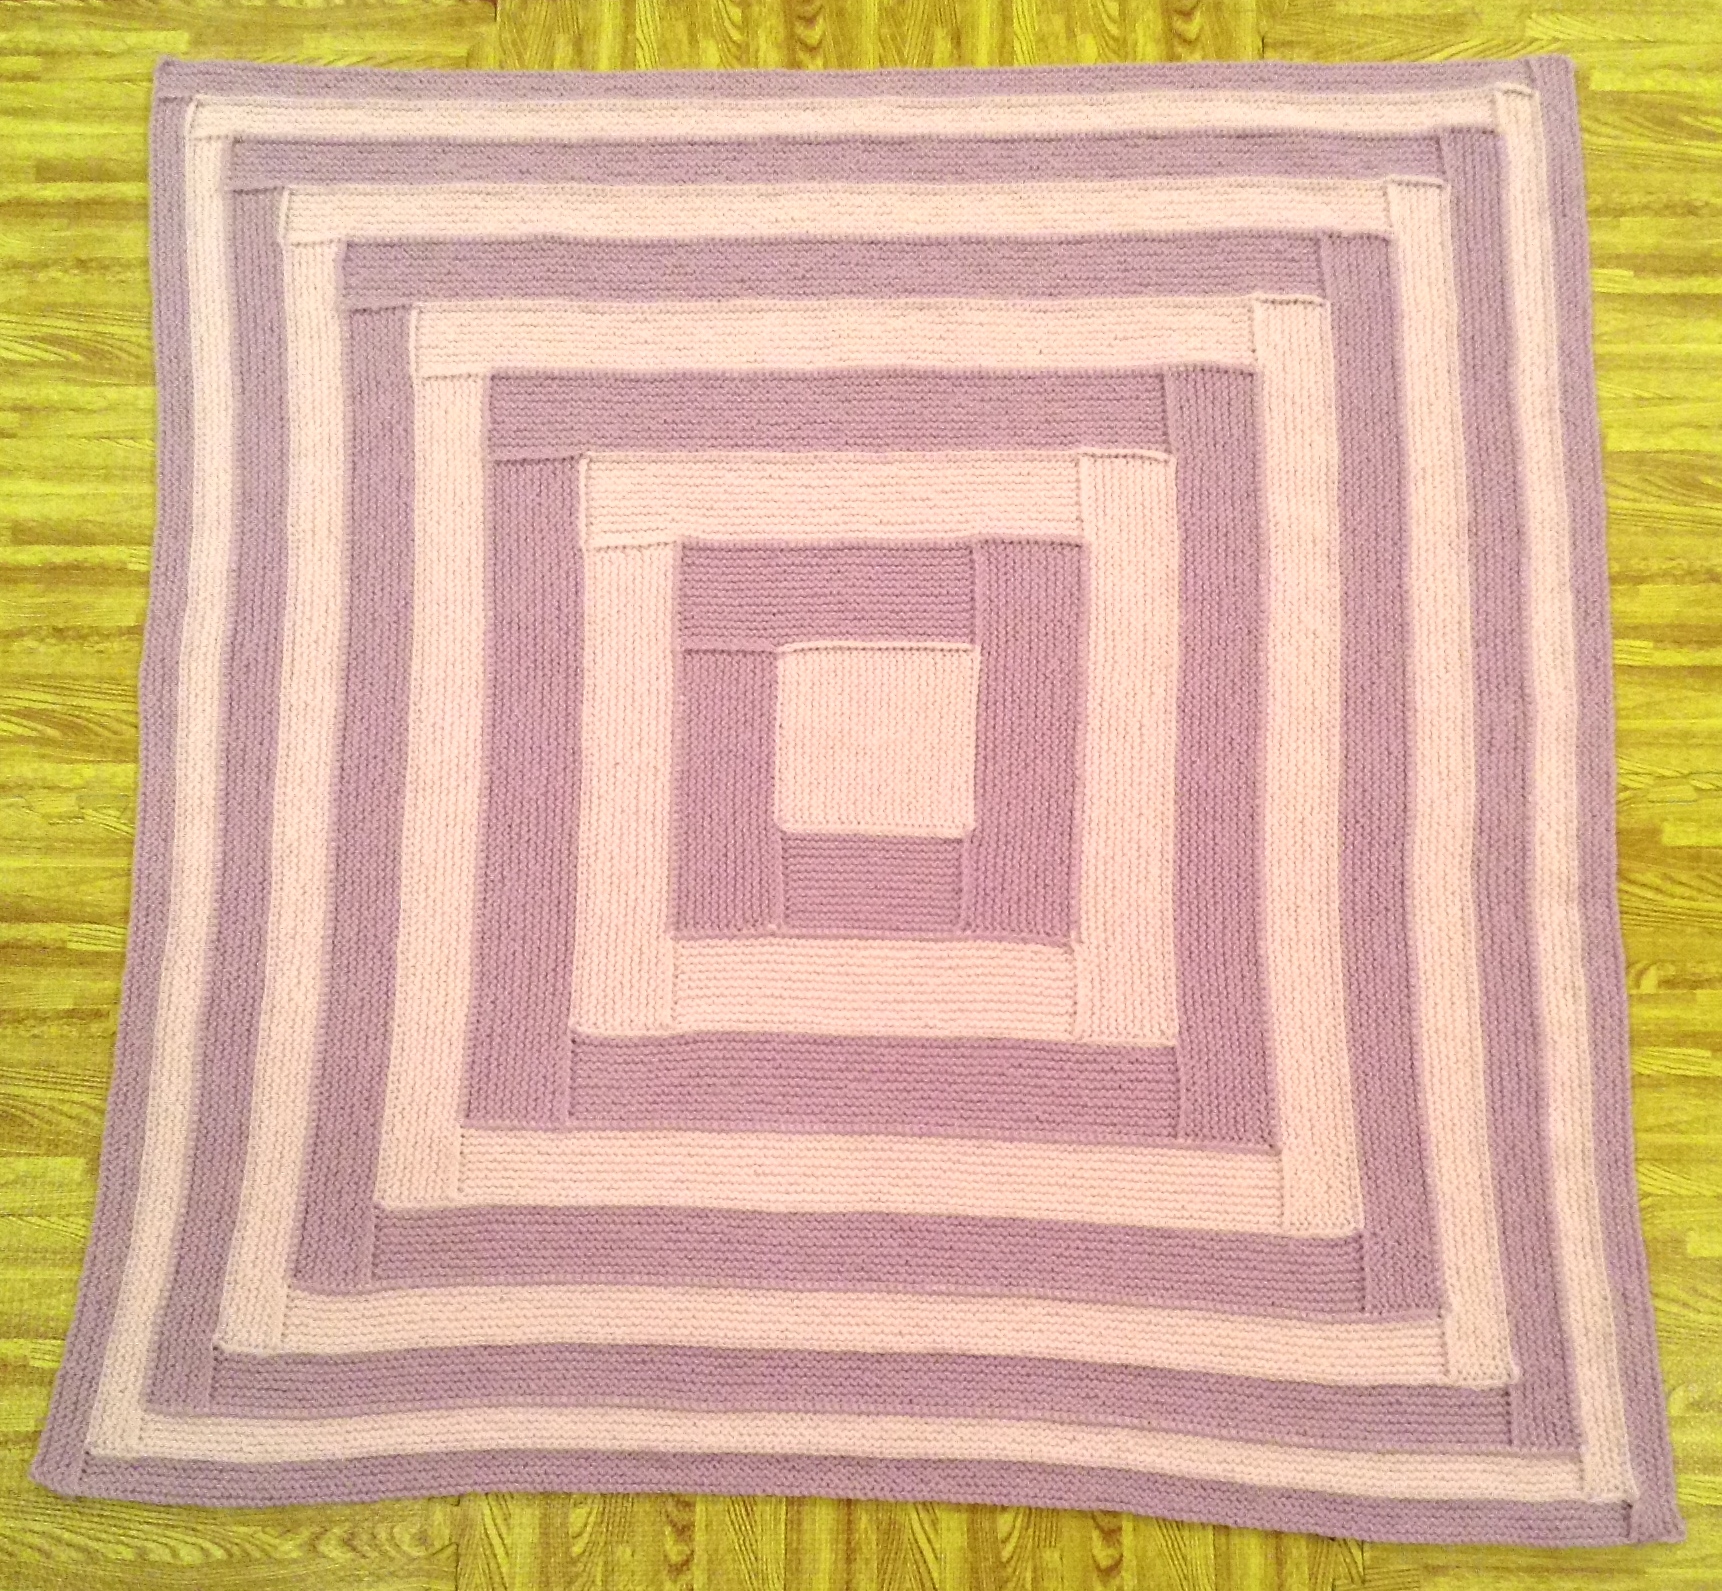
A Piece by Piece Blanket
This blanket is a modified version of the log cabin scrap blanket pattern. I knit this using garter stitch and two colors only. The center square is knit first. With the last stitch remaining on the needle after bind off, the piece is rotated to one side and stitches are picked up and knitted. This process is then continued for all sides. I kept the garter stitch pattern so I could knit while I watched TV. One side of this blanket is smooth while the other side shows the ridges of the picked up stitches. I like the pattern the ridges form. Yarn used: Lion Brand Pound of Love in pastel pink and lilac.
Product vs. Process Knitter
I was reading some knitting blogs and came across product versus process knitters. A product knitter is one who has a specific purpose for the knitted item (a blanket, sweater etc.) while a process knitter is one who knits for the technique, the pattern or the yarn and not so much to complete a knitting project. I like to complete knitting projects so I think I’m a product knitter although the more I learn about yarn and the various stitch patterns and techniques the more I find myself thinking of the process than the project. Knitting just swatches to try out new yarn or stitch patterns still bothers me. So I think small knitting projects such as dishcloths or scarves satisfy both the product and the process knitter in me. So tell me are you a product or process knitter?