Although early Spring flowers have appeared and so have the birds, winter has not yet left us. Below freezing temperatures and cold winter air still lingers. Nevertheless, I will make items with Spring weather in mind. The Patchwork Petal Scarf uses cotton yarn more suitable for pleasant weather. It’s made up of eight center out crochet moss stitch squares which are then joined using the zig zag slip stitch crochet join method. Two rounds of crochet moss stitch are used for the border edge of the joined squares. Fringes are added to the Patchwork Petal Scarf.
Advertisements
The Patchwork Petal Scarf Pattern (text and images for personal use only)
PLEASE SUBSCRIBE FOR THE FREE PATTERN. THANK YOU
Subscribe to continue reading
Subscribe to get access to the rest of this post and other subscriber-only content.
I am all for window shopping and retail (yarn) therapy.
You sometimes find the most unexpected things that just have to be purchased.
A market bag is a useful thing to take along for these shopping trips especially if you live in a place where plastic bags are not easily available.
These knitted or crocheted market bags can be for personal use as well as for gifting. They are also reusable and eco-friendly.
For me as a knitter and crocheter, making handmade market bags gives me one more reason to continue yarn therapy.
Advertisements
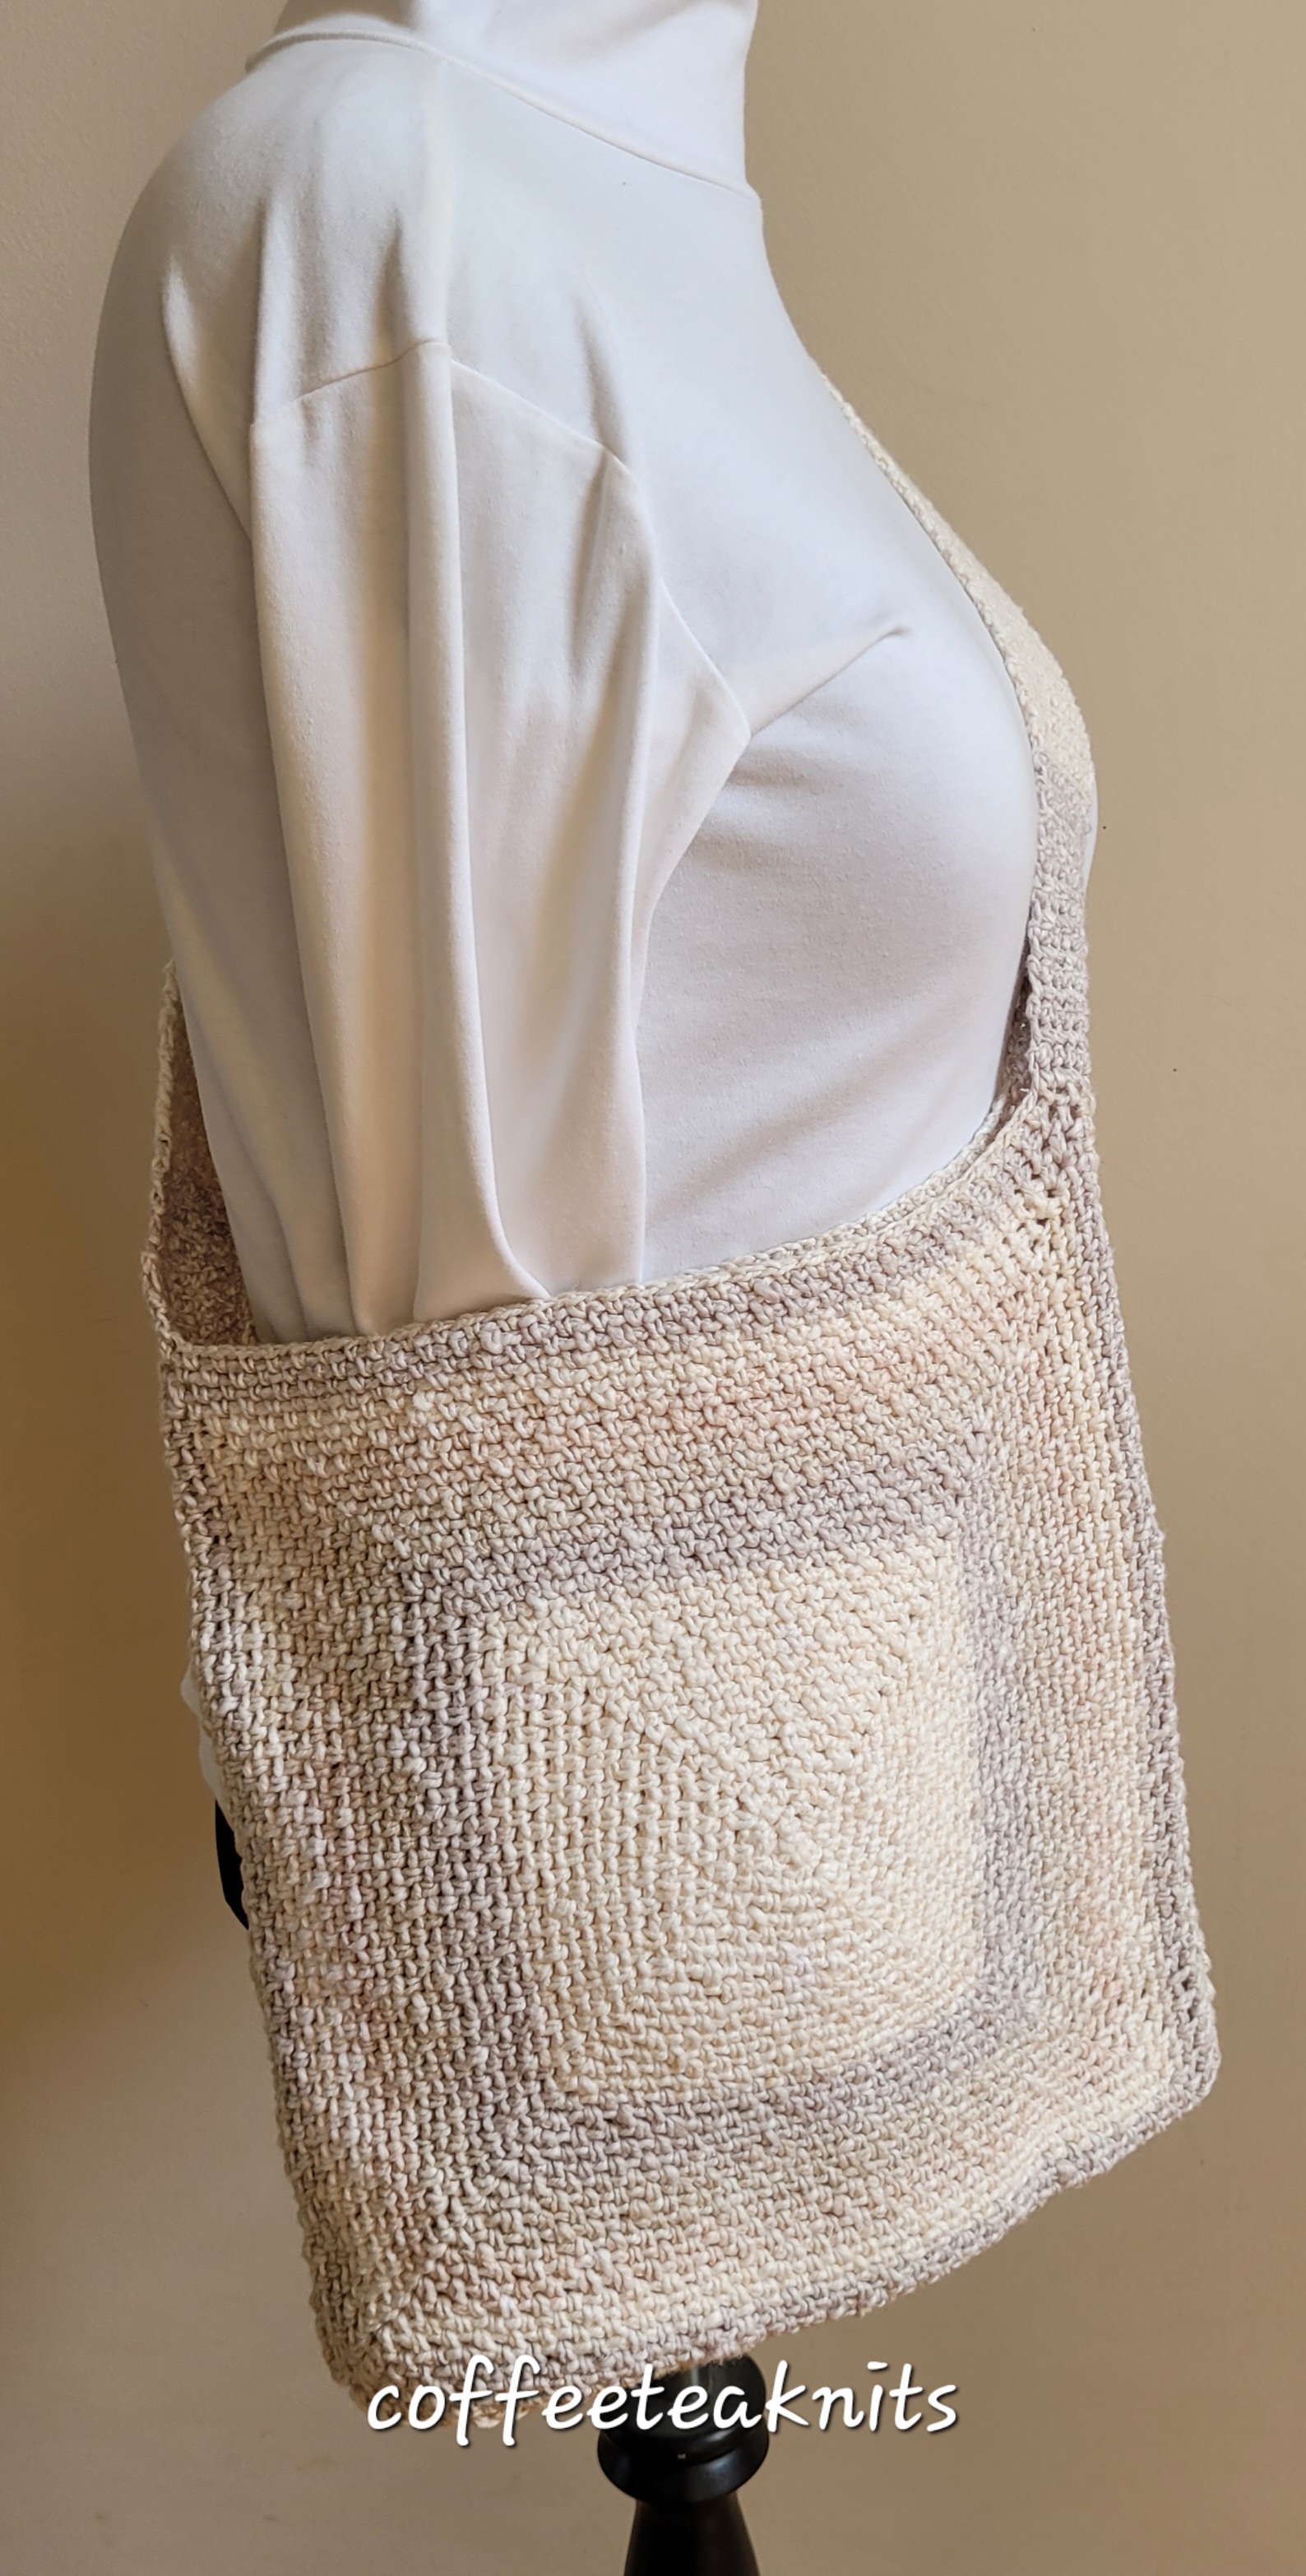
The Summertime Market Bag Pattern (text and images for personal use only)
Yarn: YarnspirationsTM Caron Cotton Ripple Cakes yarn in the French Vanilla colorway. The yarn is discontinued but may still be available at Michaels etc. For the Summertime Market Bag 1 cake (240 g) of this yarn was used. Tapestry needle to weave in ends Gauge: Not really needed since the center out crochet moss stitch squares can be customized to any size. Crochet hook: US size F-5 or 3.75 mm for the crochet moss stitch squares and US E-4 or 3.5 mm for the shoulder strap Abbreviations: sc: single crochet […]: pattern repeat
Advertisements
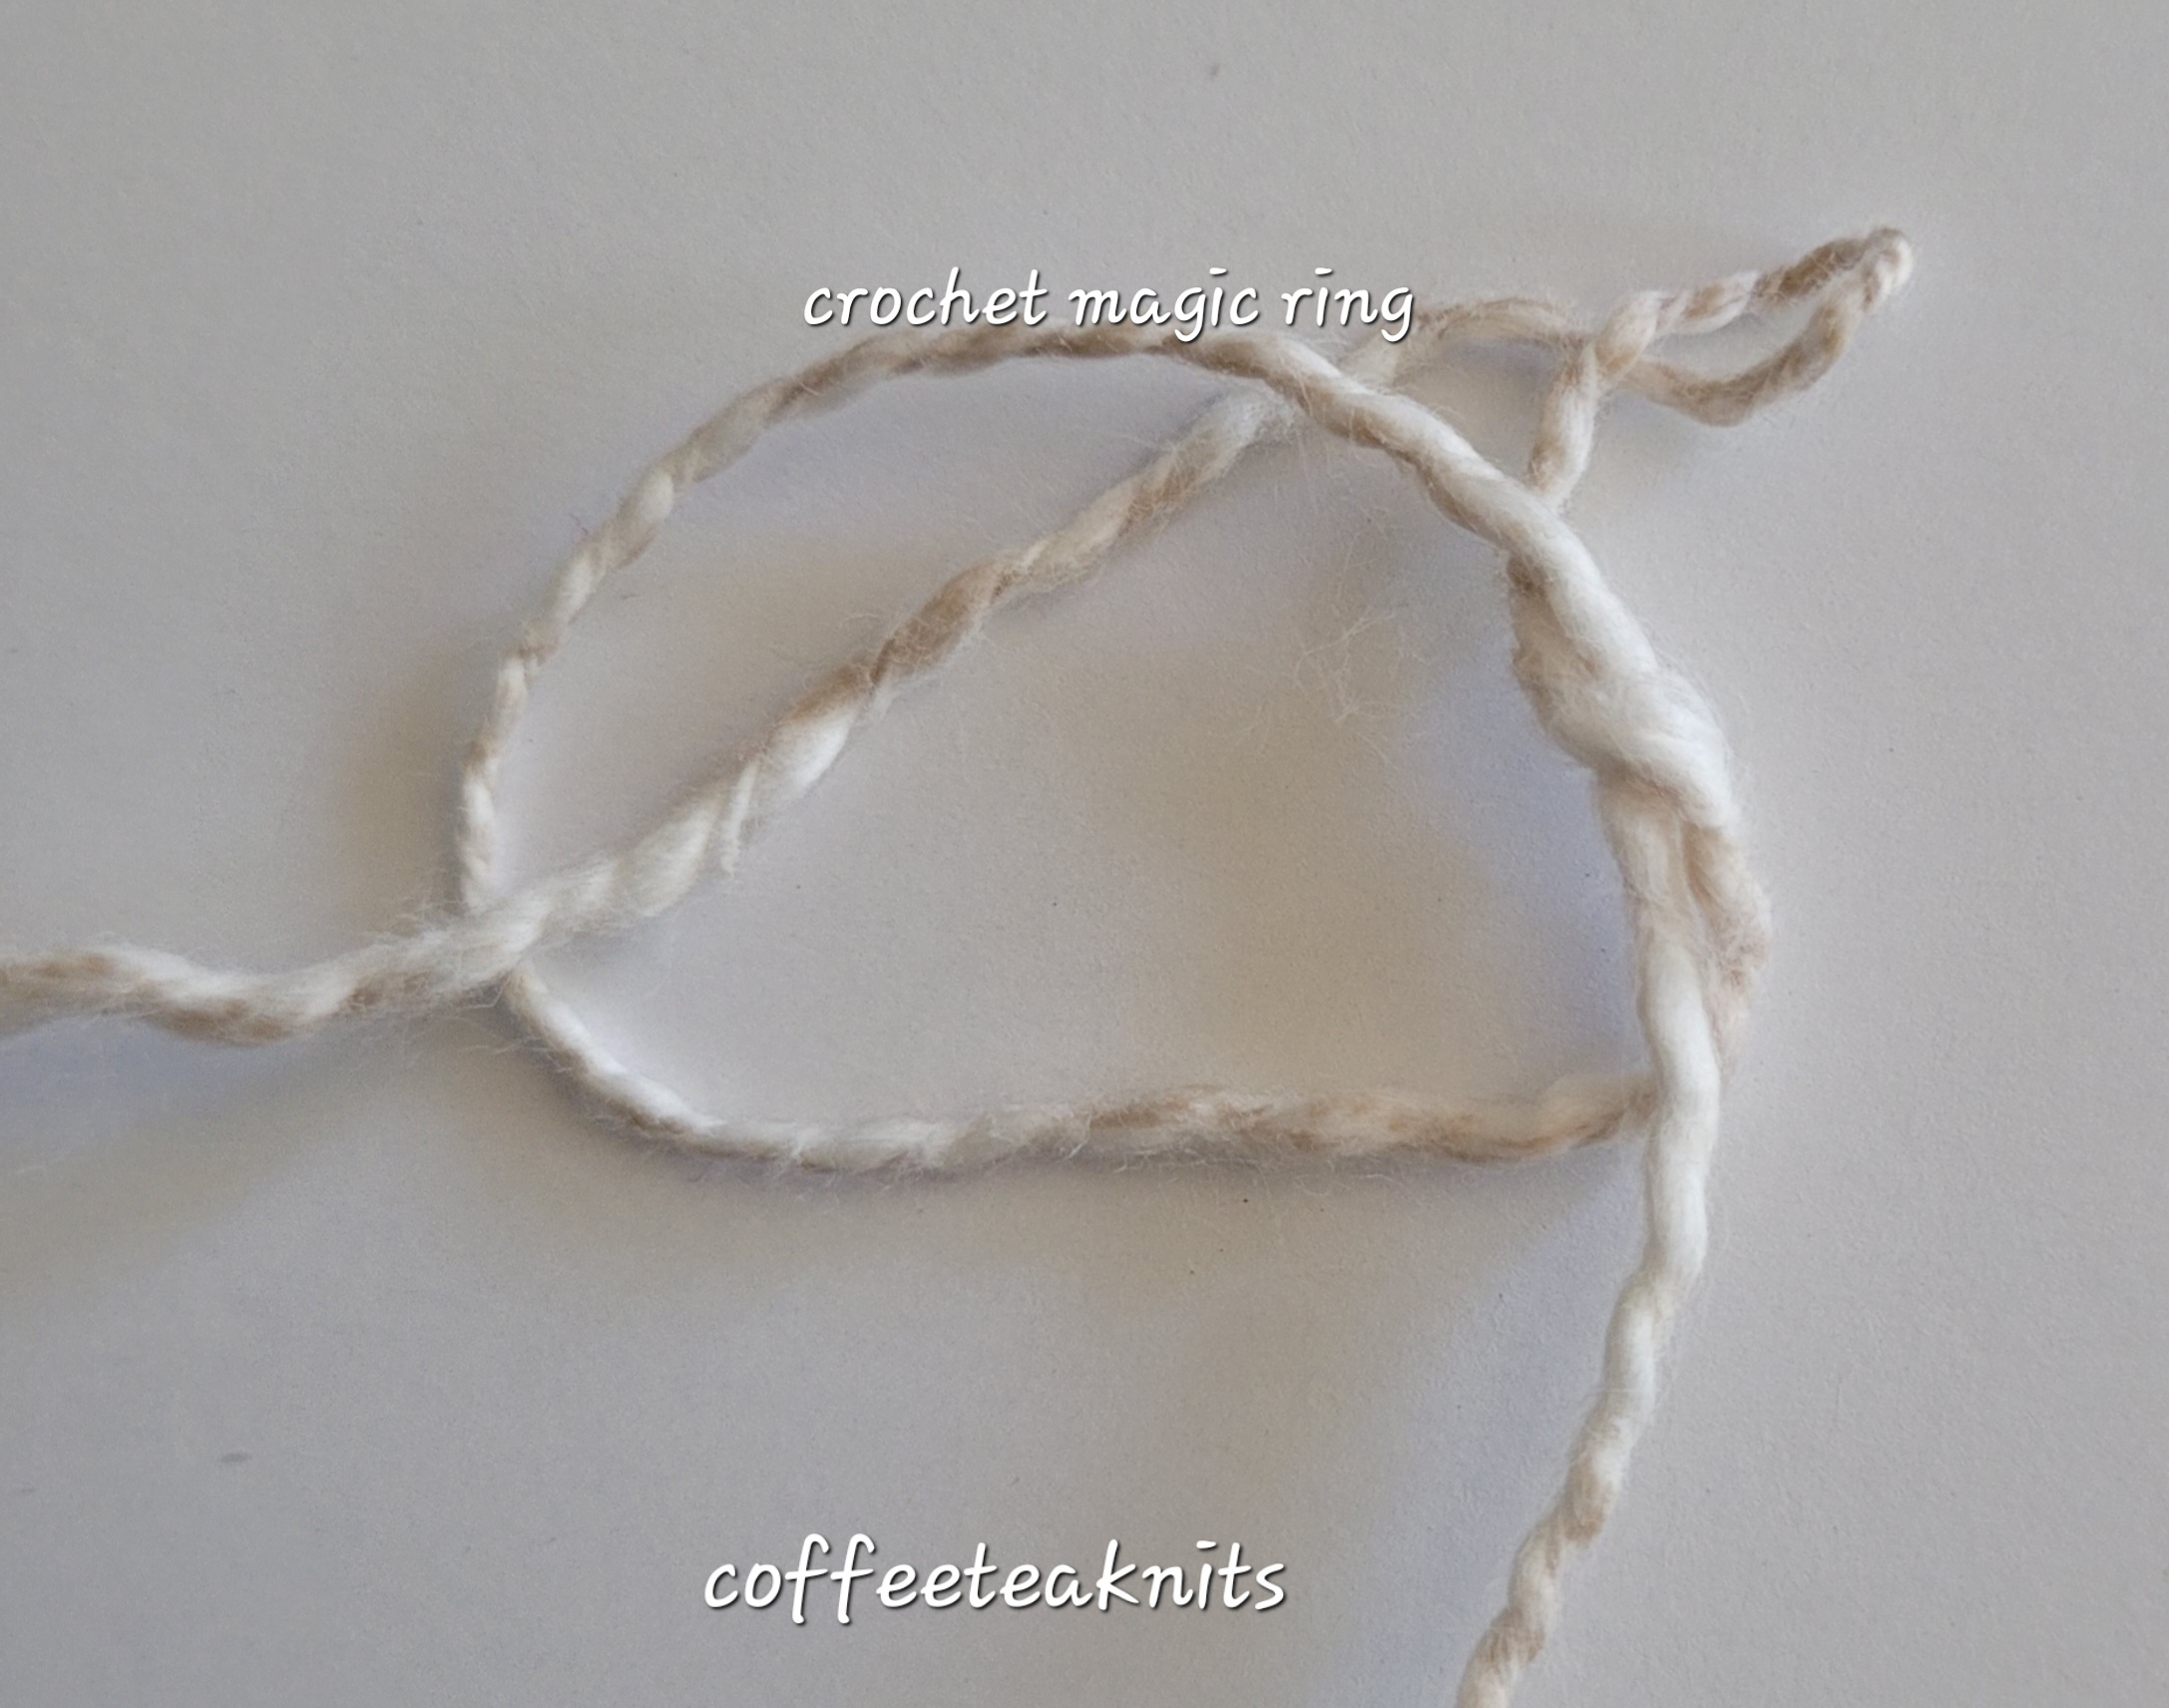
The Summertime Market Bag is crocheted in the round using the center out crochet moss stitch pattern. The crochet moss stitch square starts with a crochet magic ring.
Advertisements
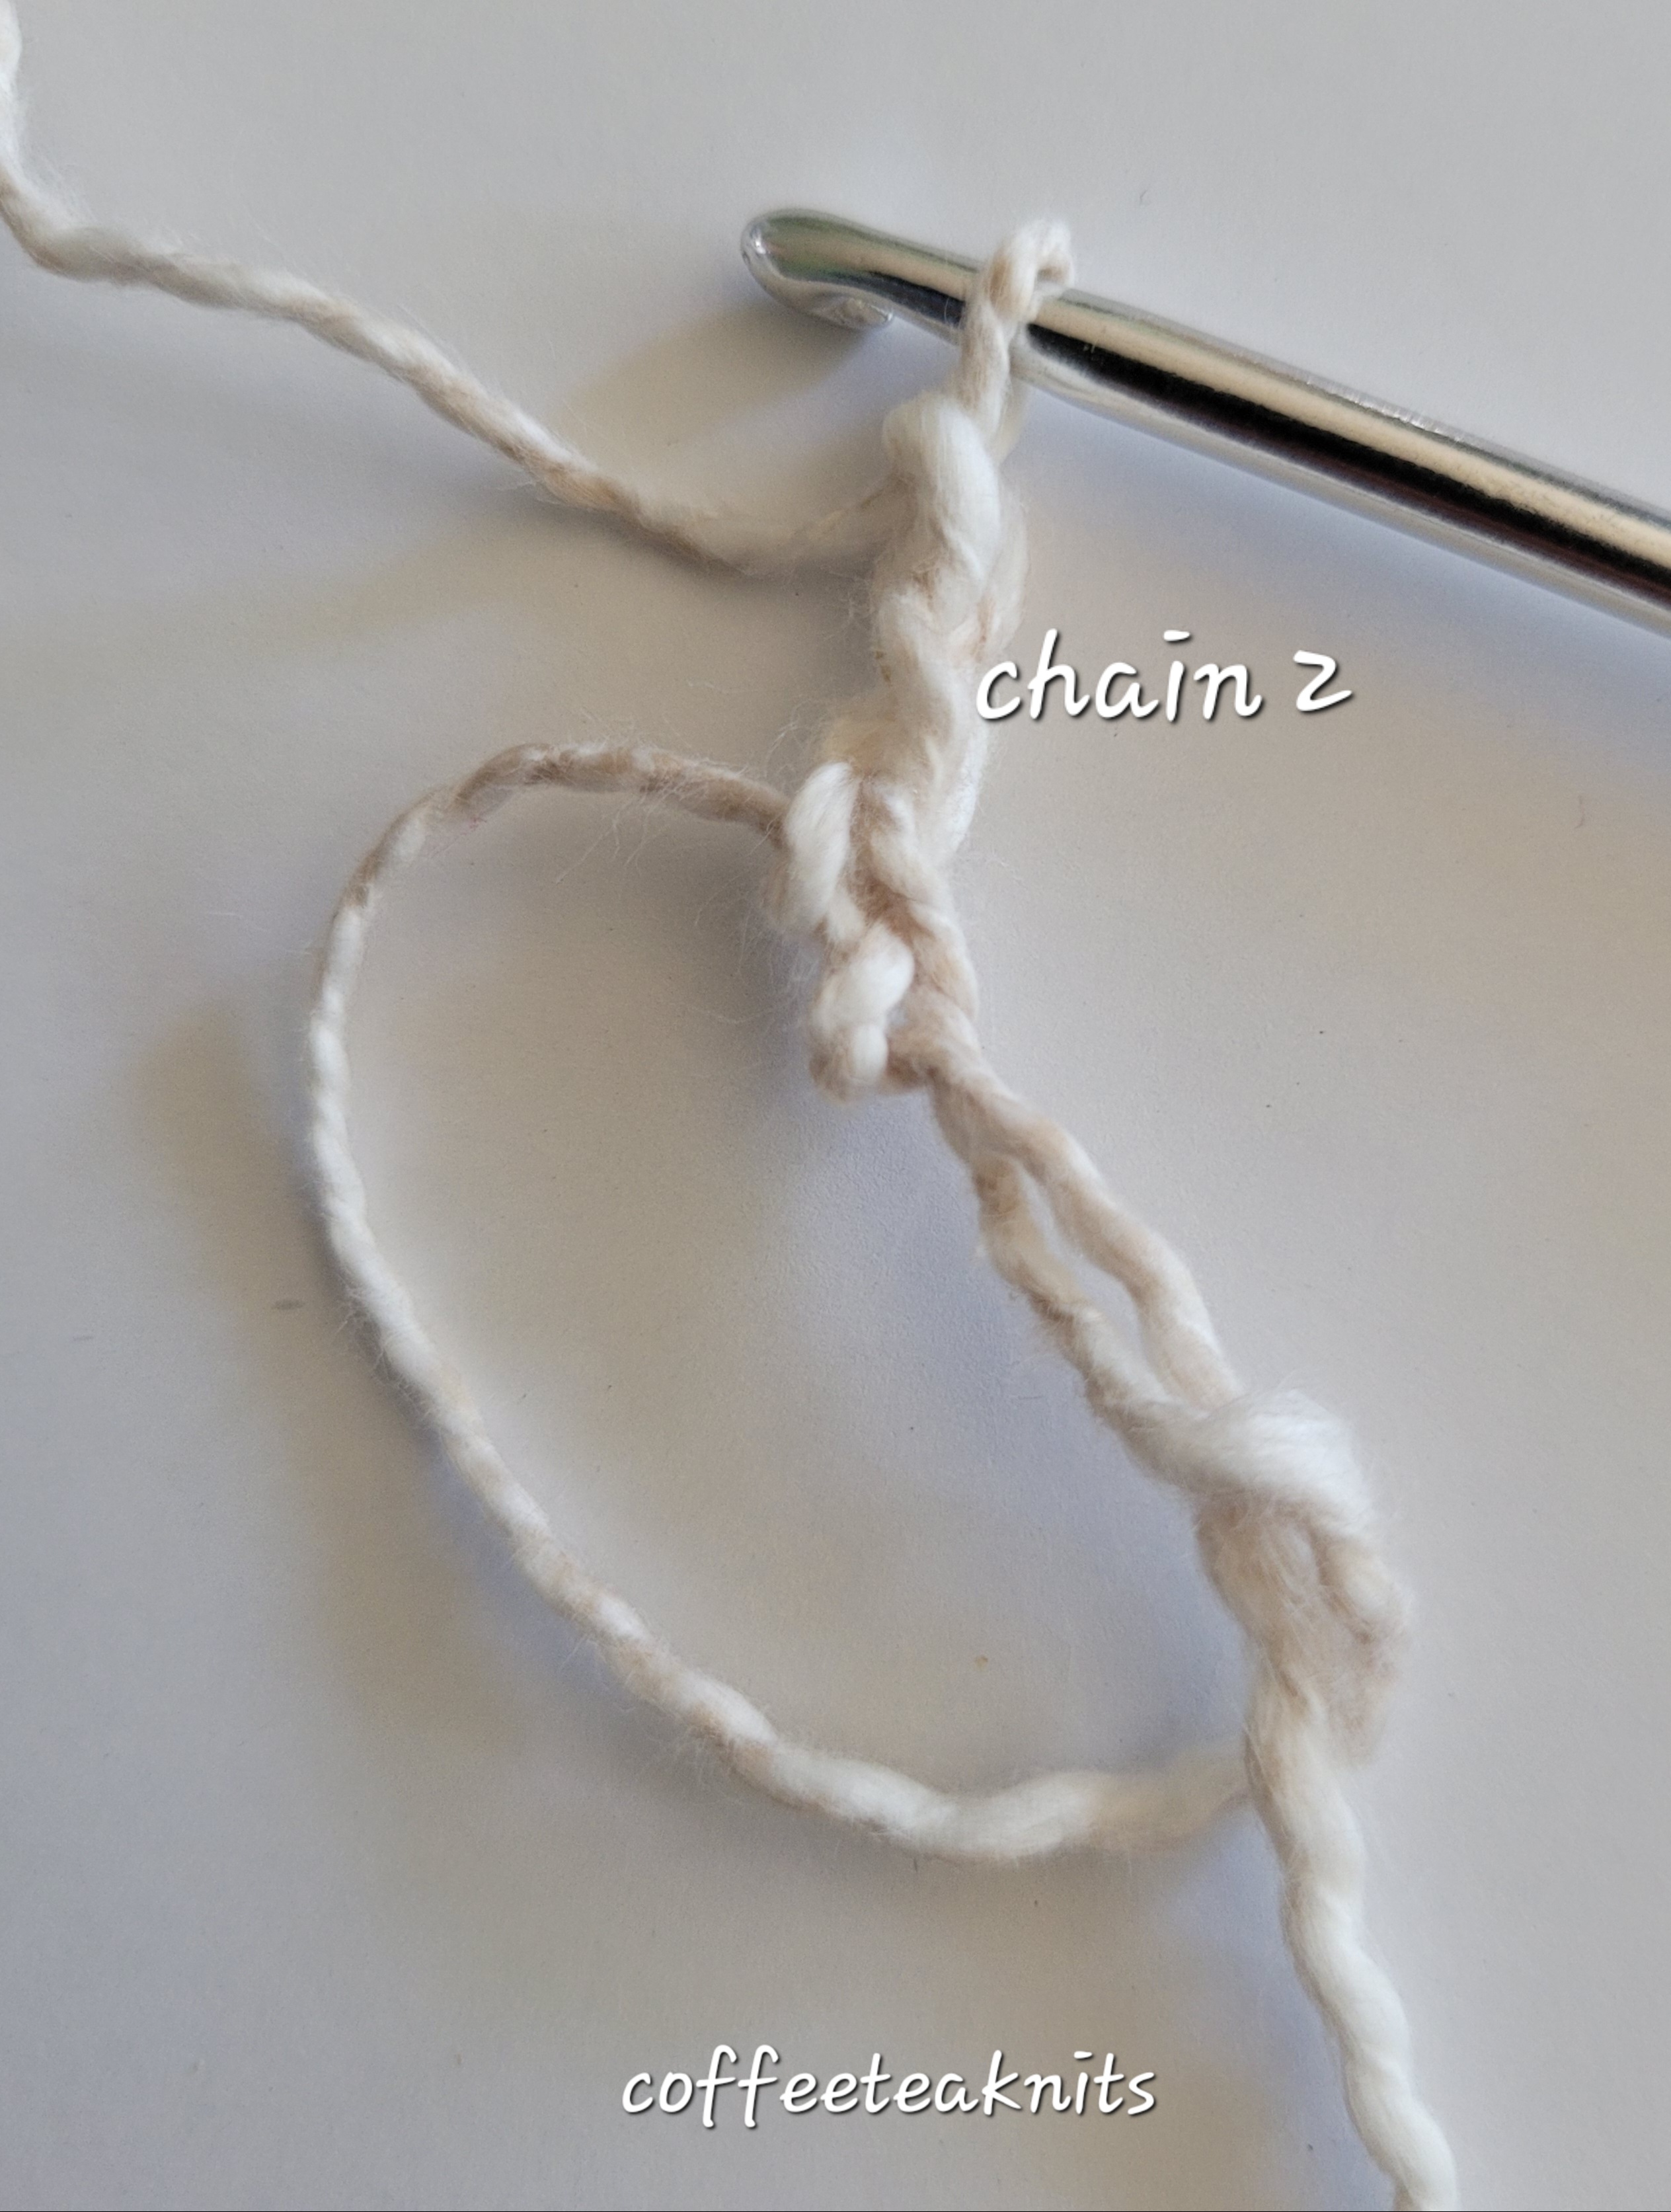
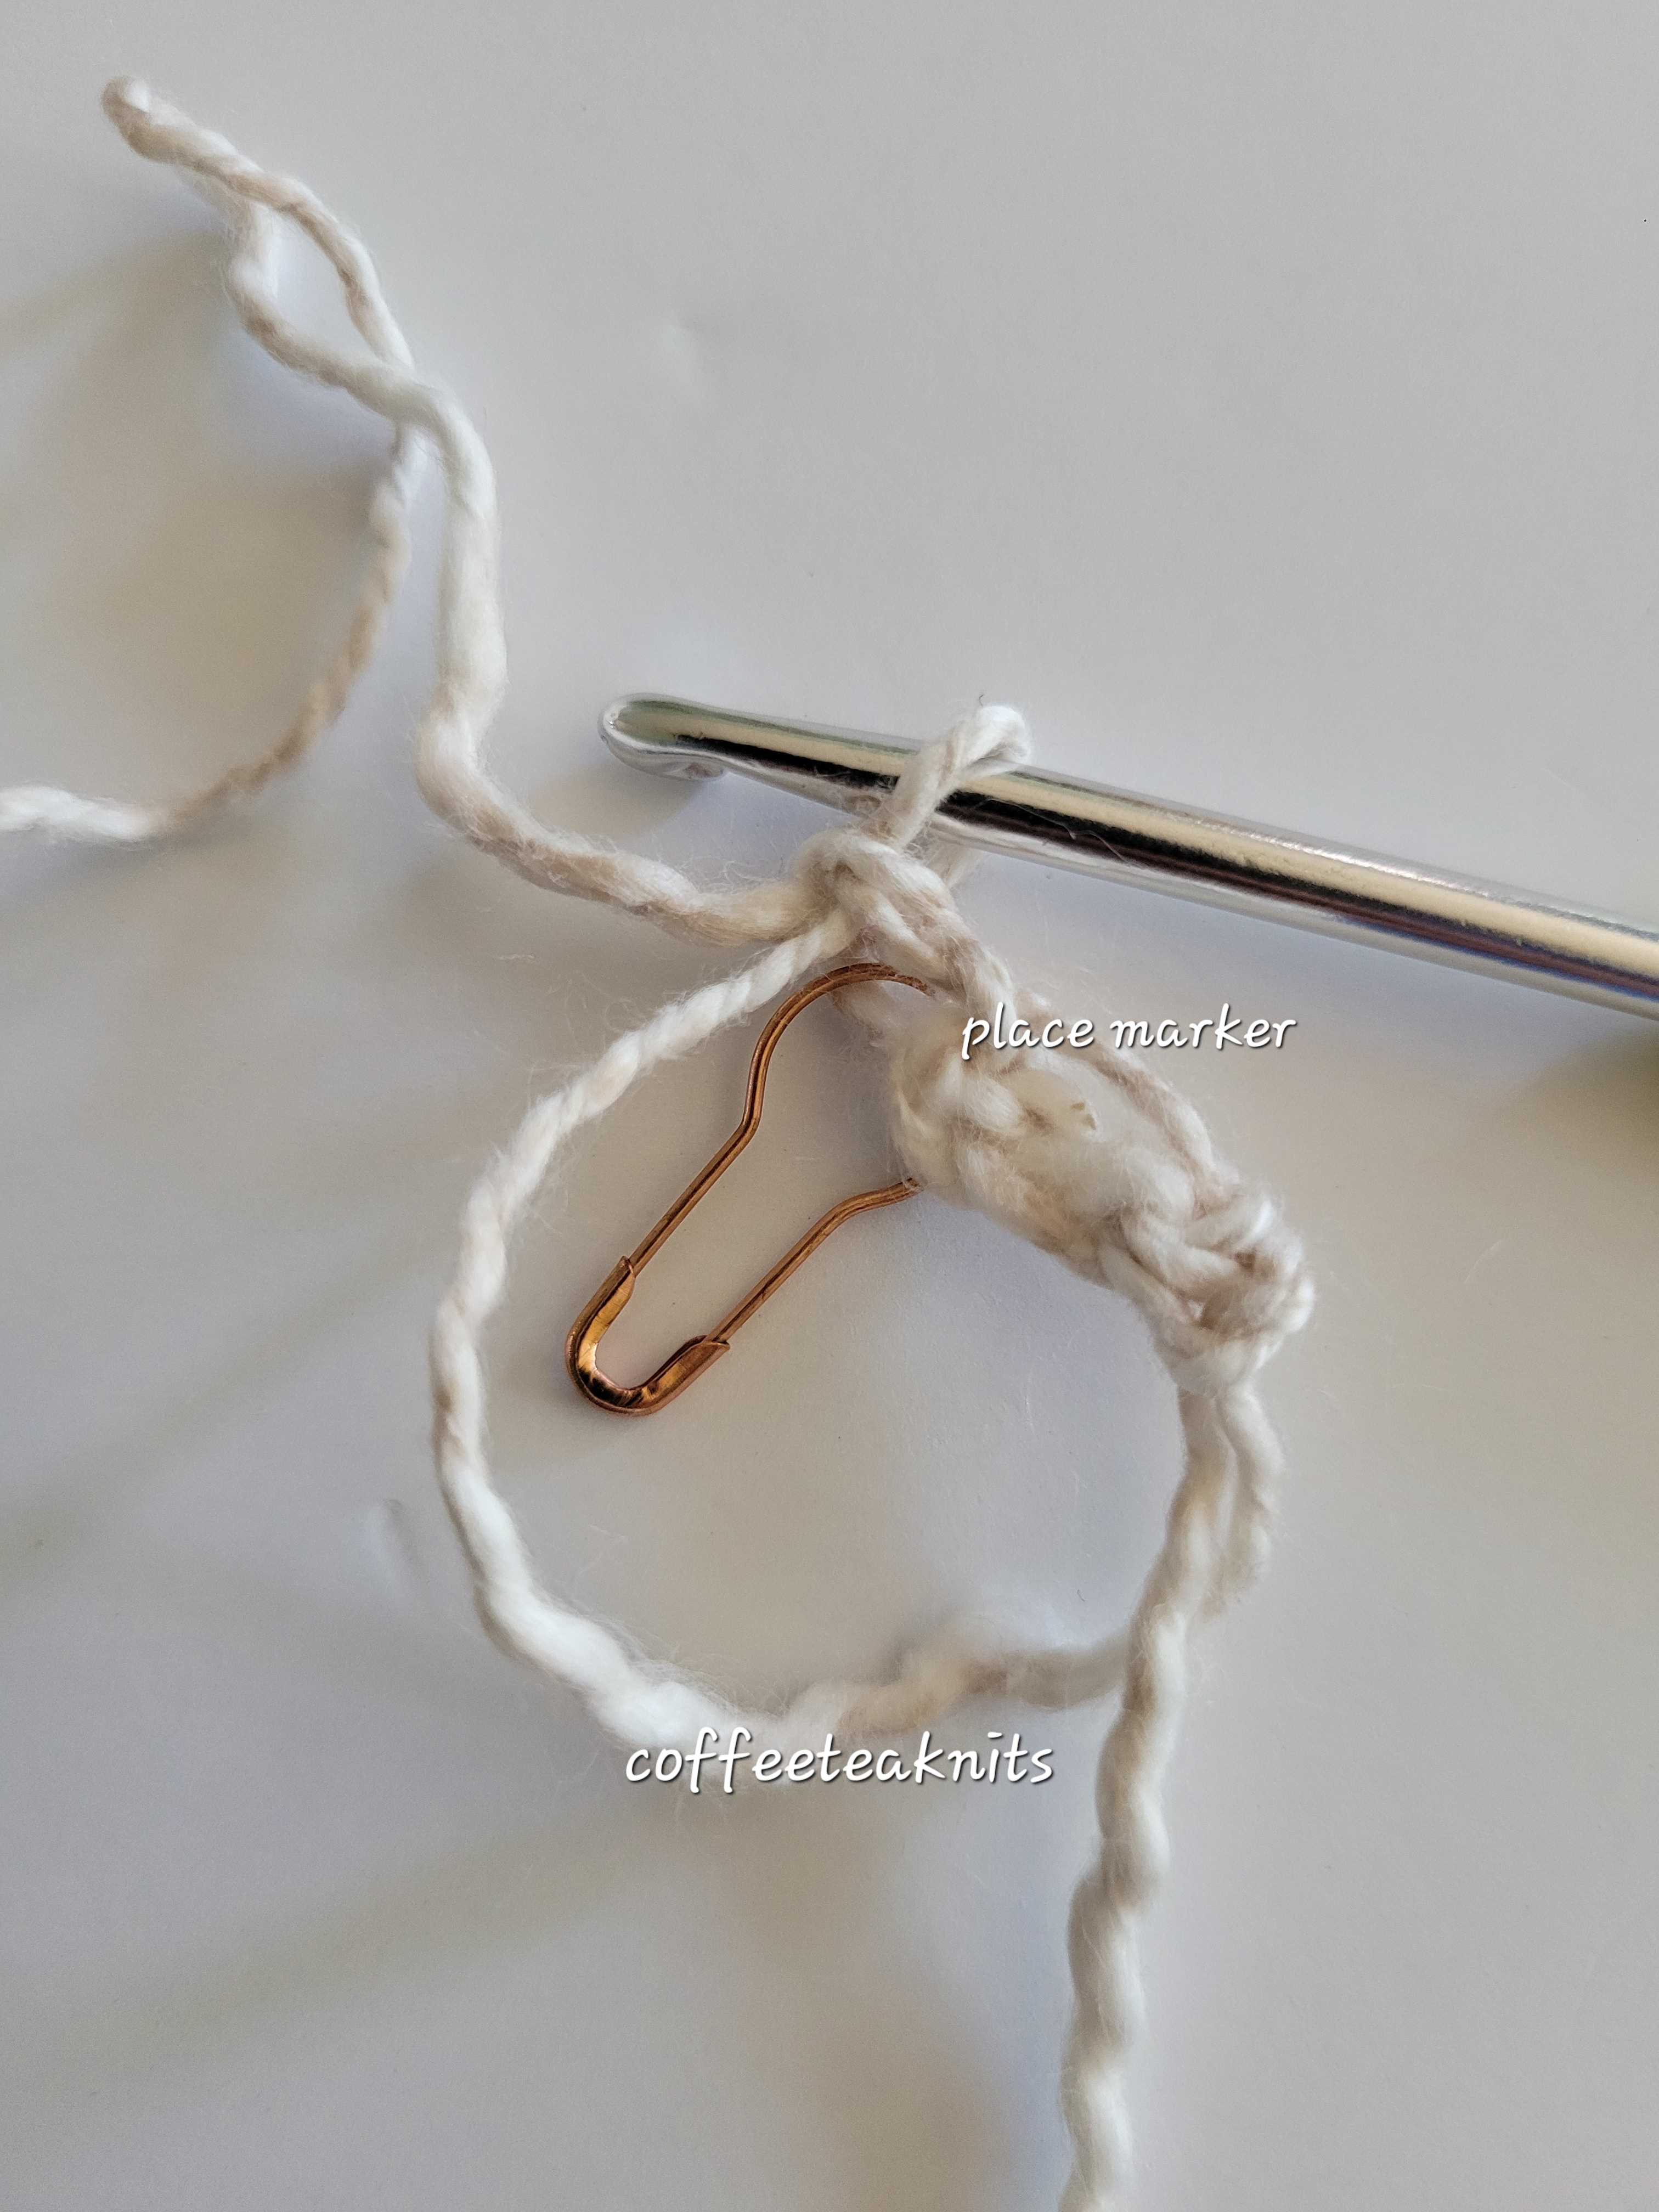
In a crochet magic ring pictured above (there are many tutorials available online on how to make a crochet magic ring) pull up a stitch with the US F-5 crochet hook, sc once into the ring, chain 2, place marker, sc into the ring, chain 2, place marker, sc into the ring, chain 2, place marker, sc into the ring, chain 2, place marker, and sc. Pull on the yarn tail to tighten the gap (pictured below).
Advertisements
Advertisements
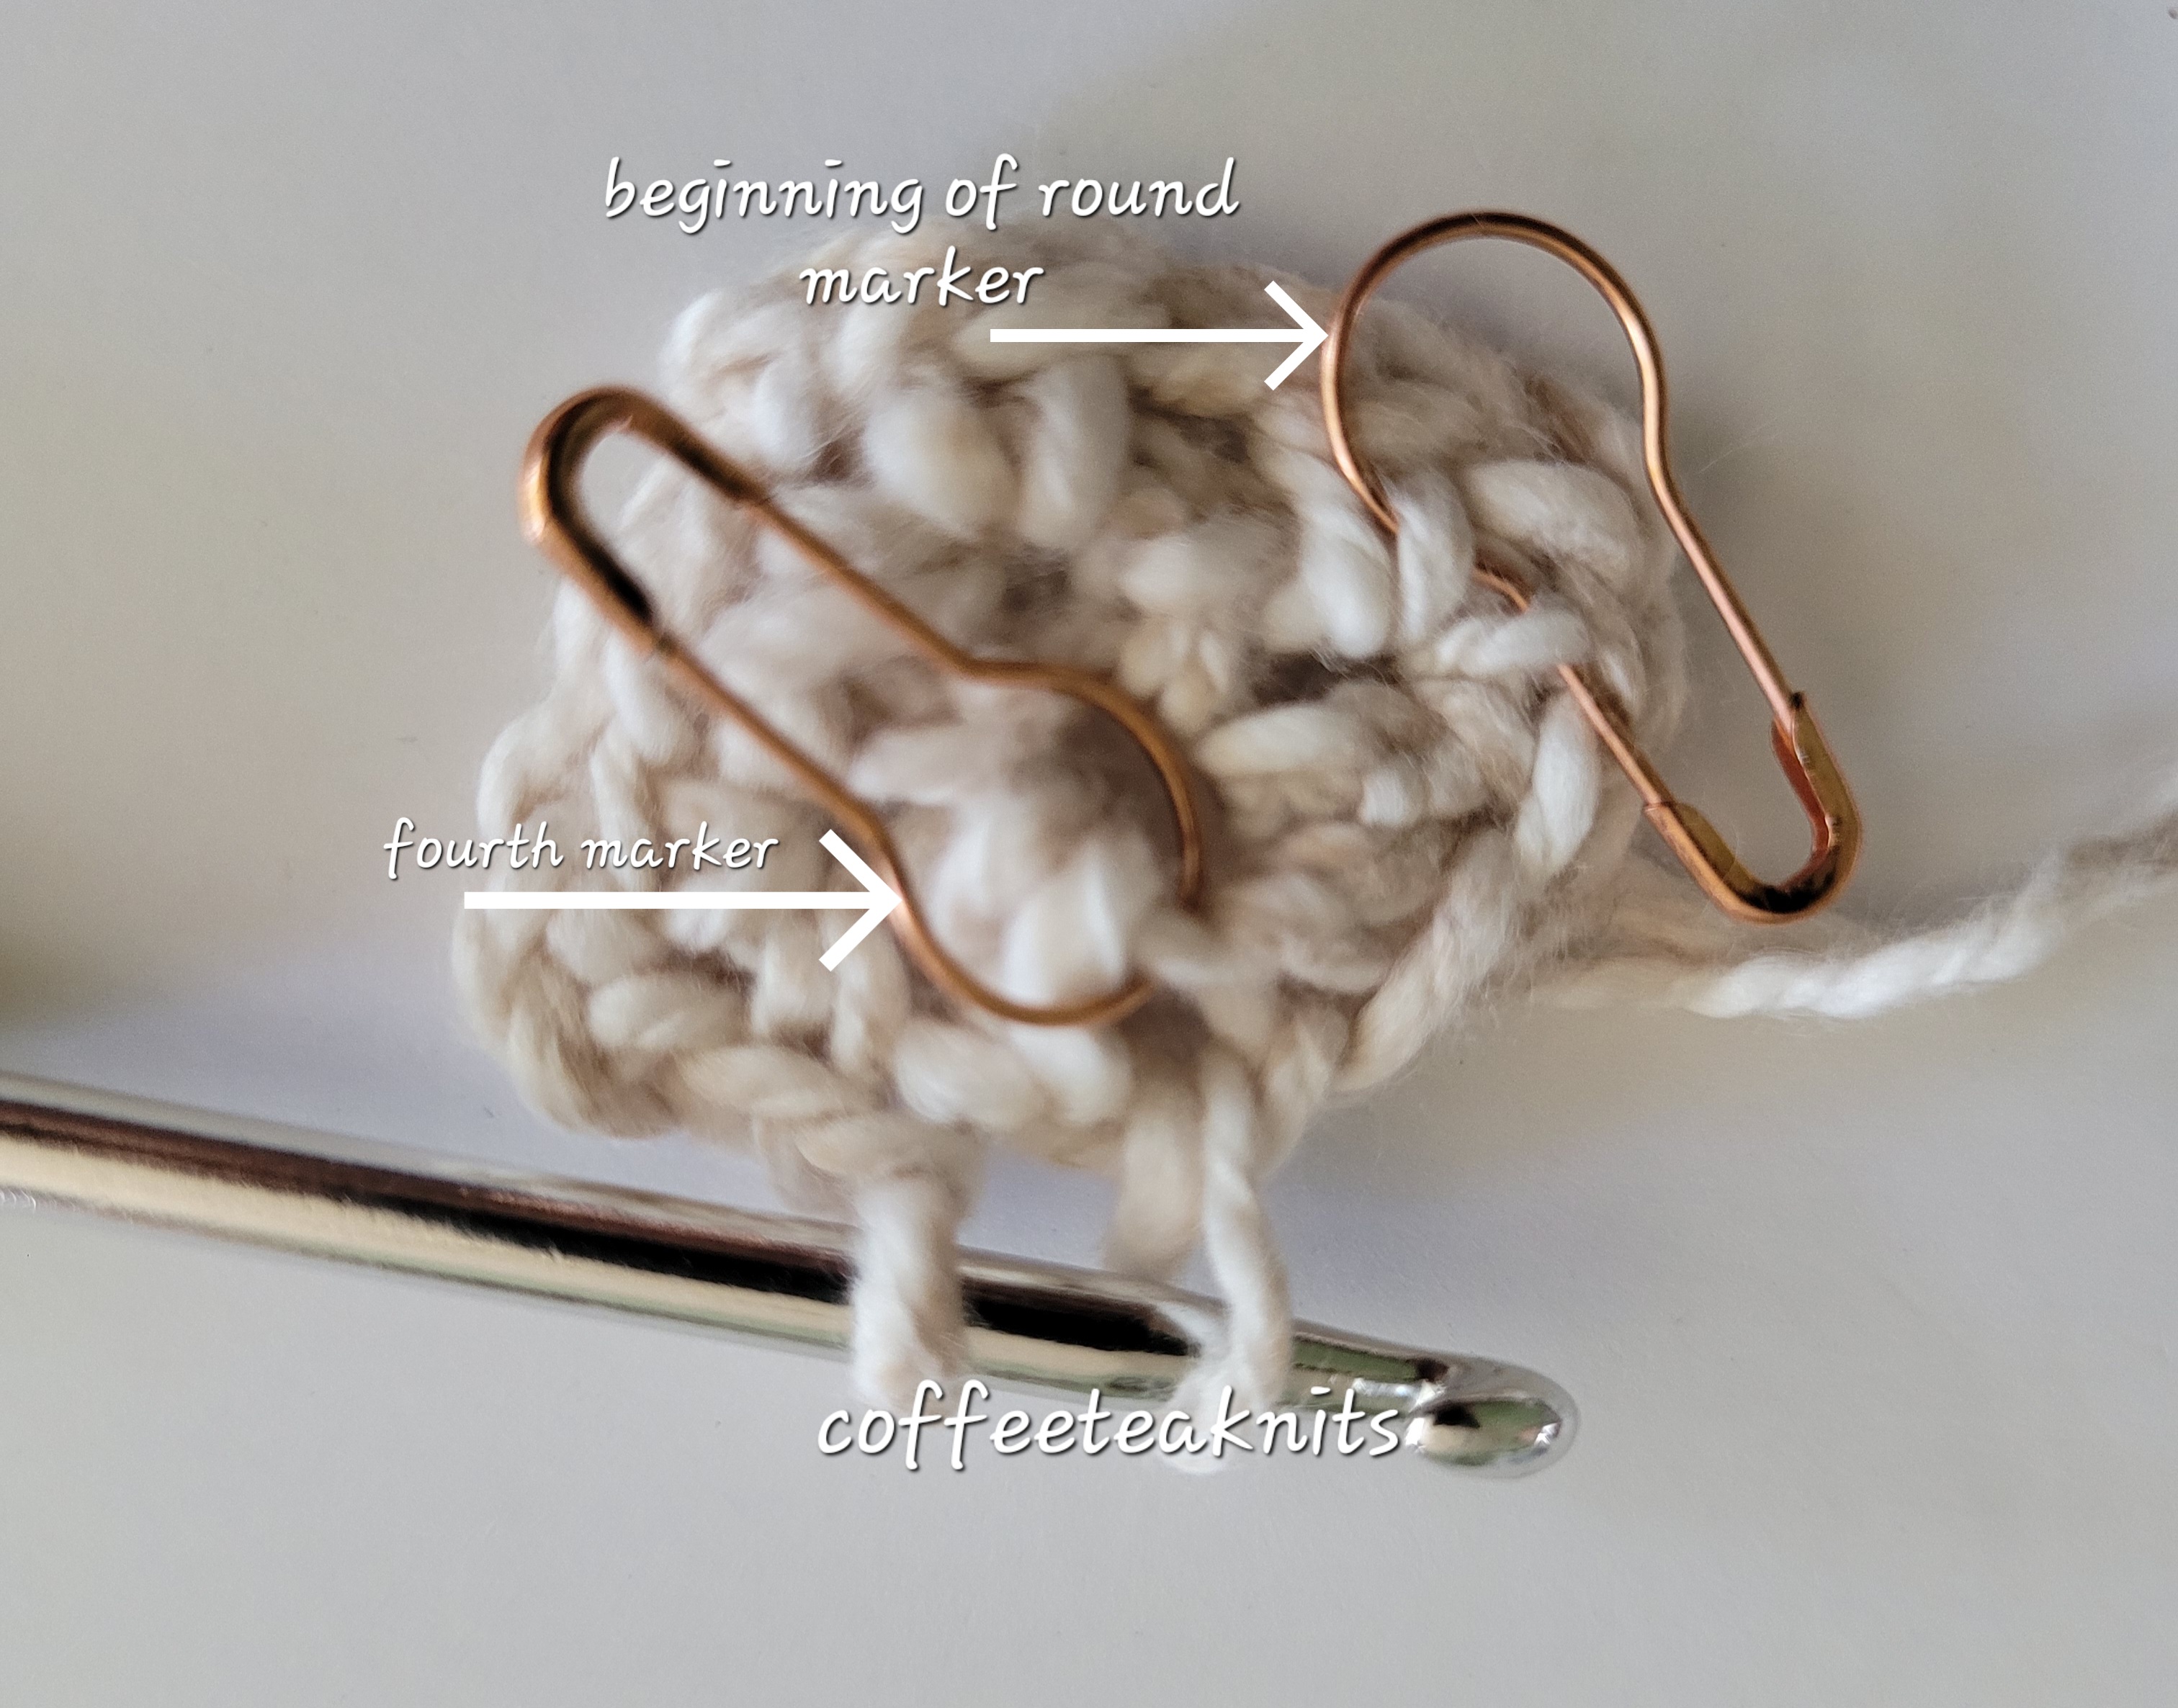
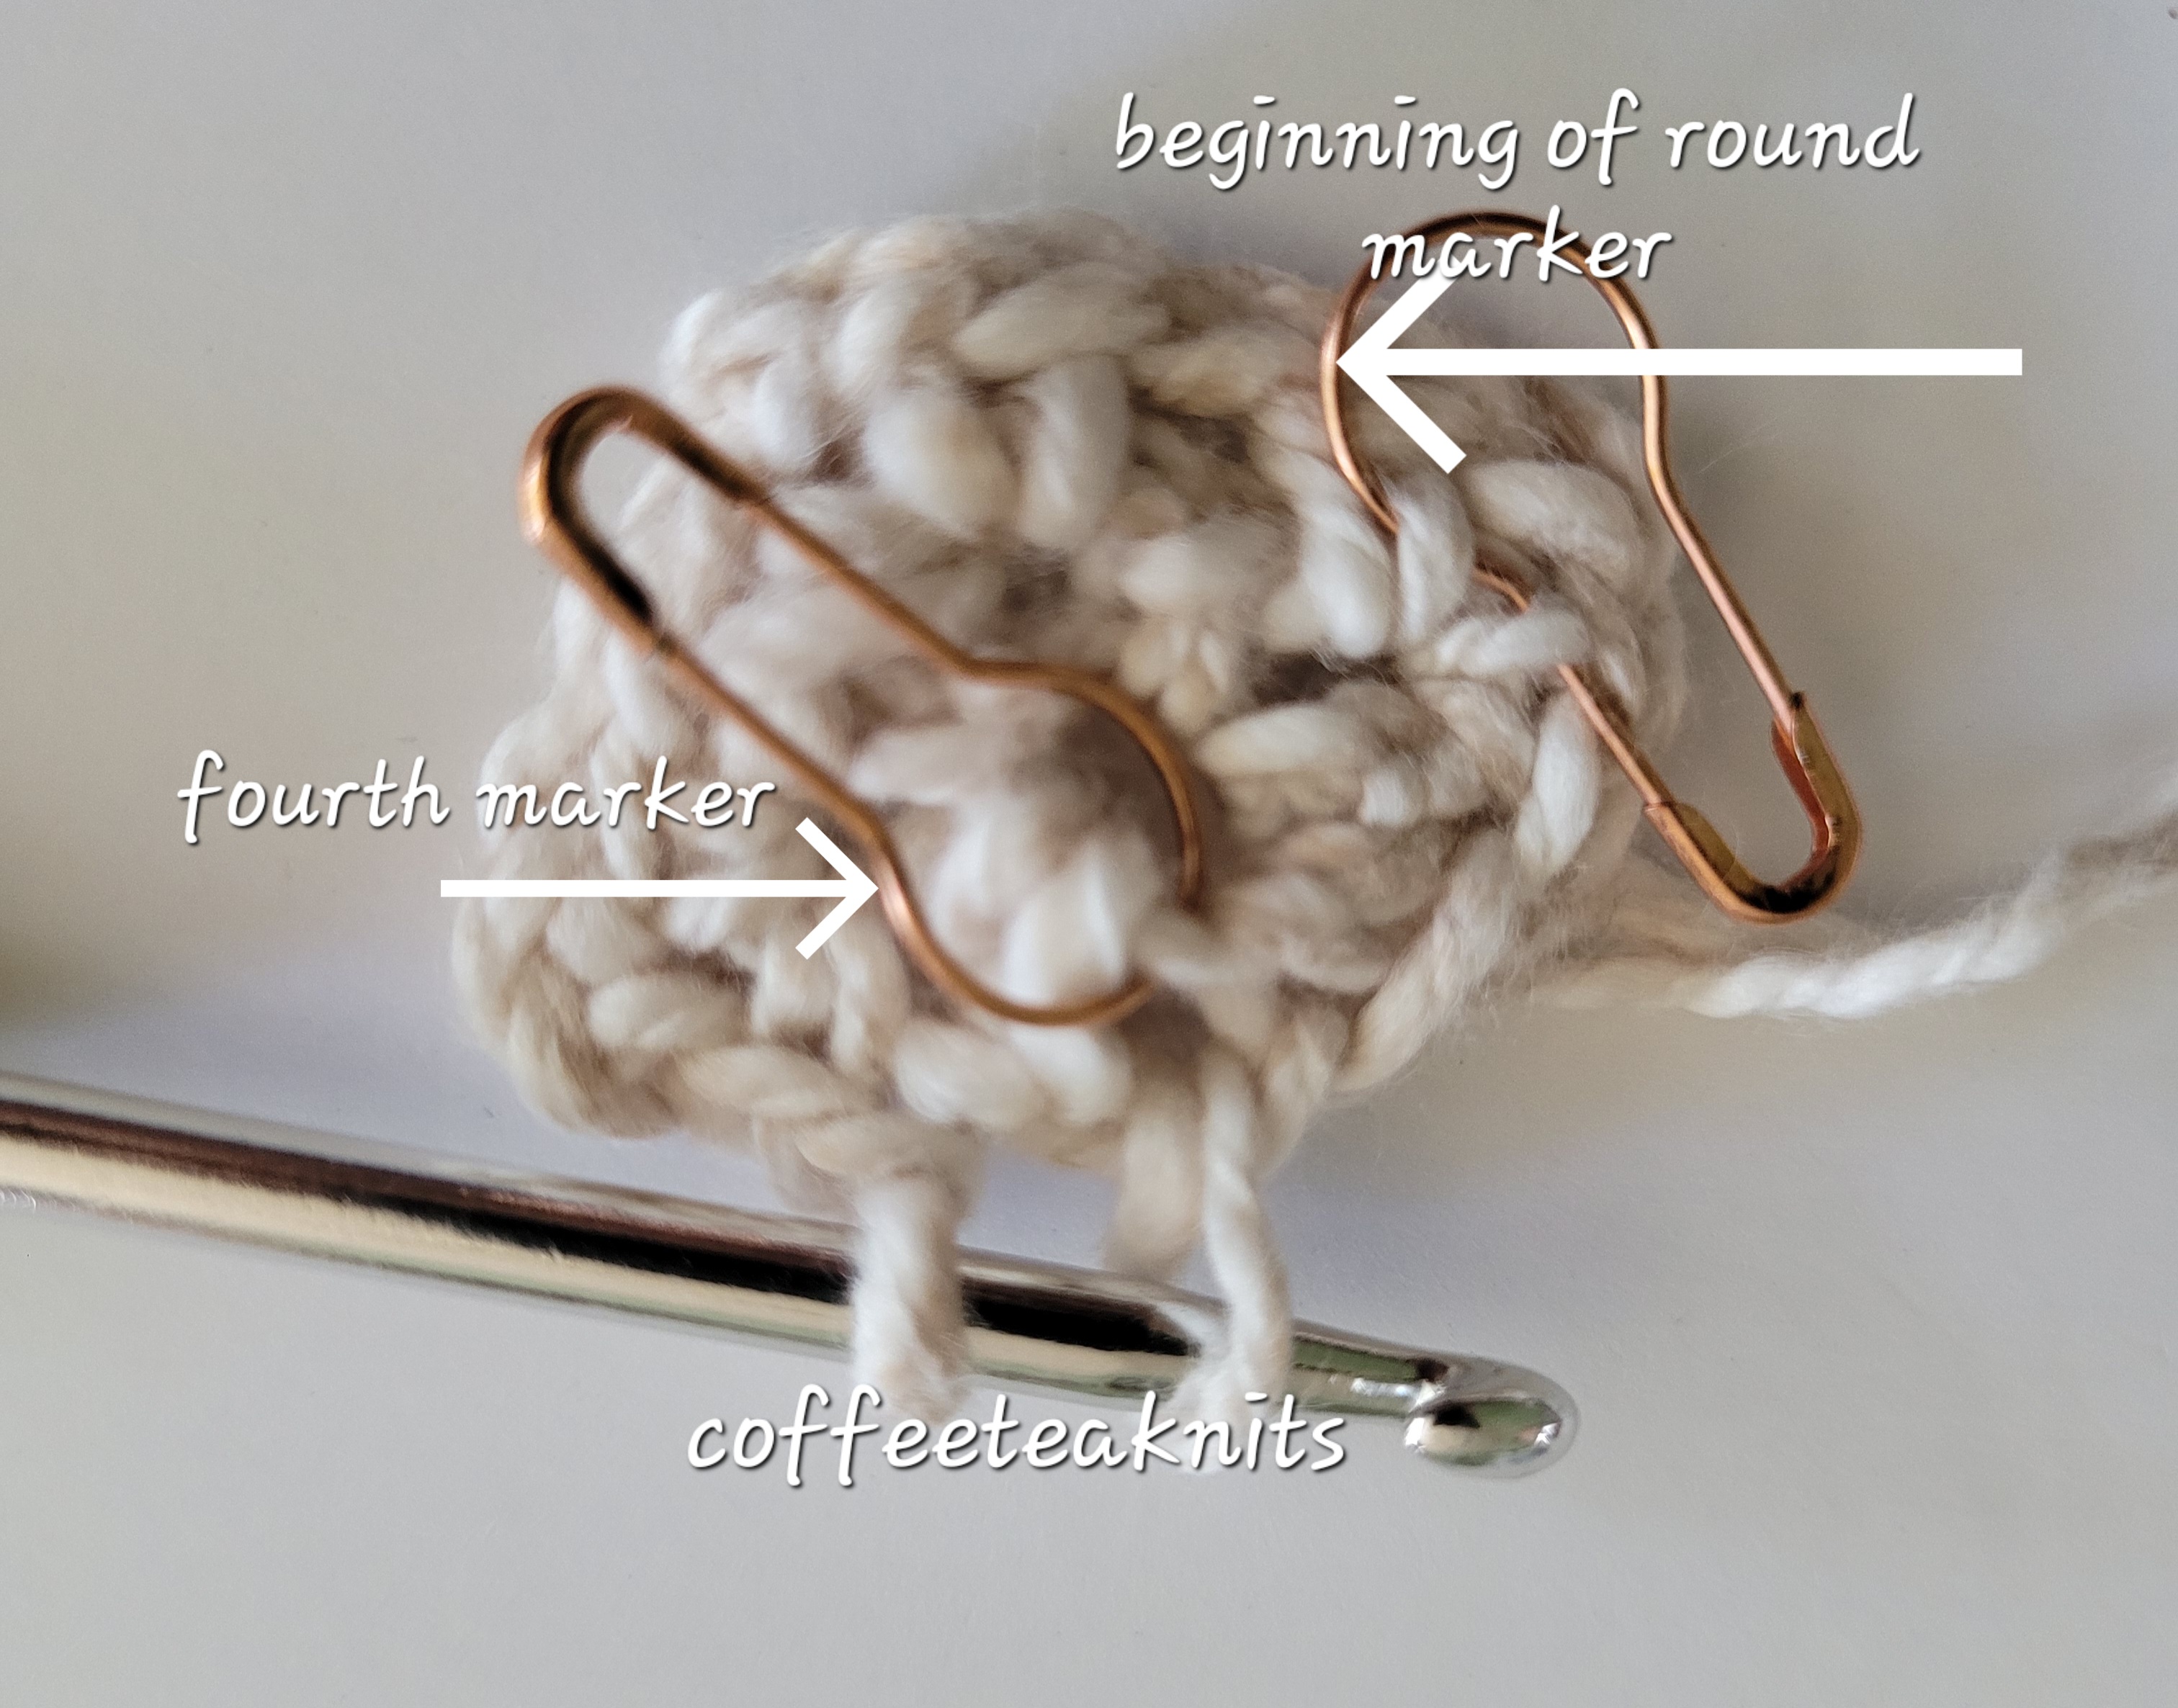
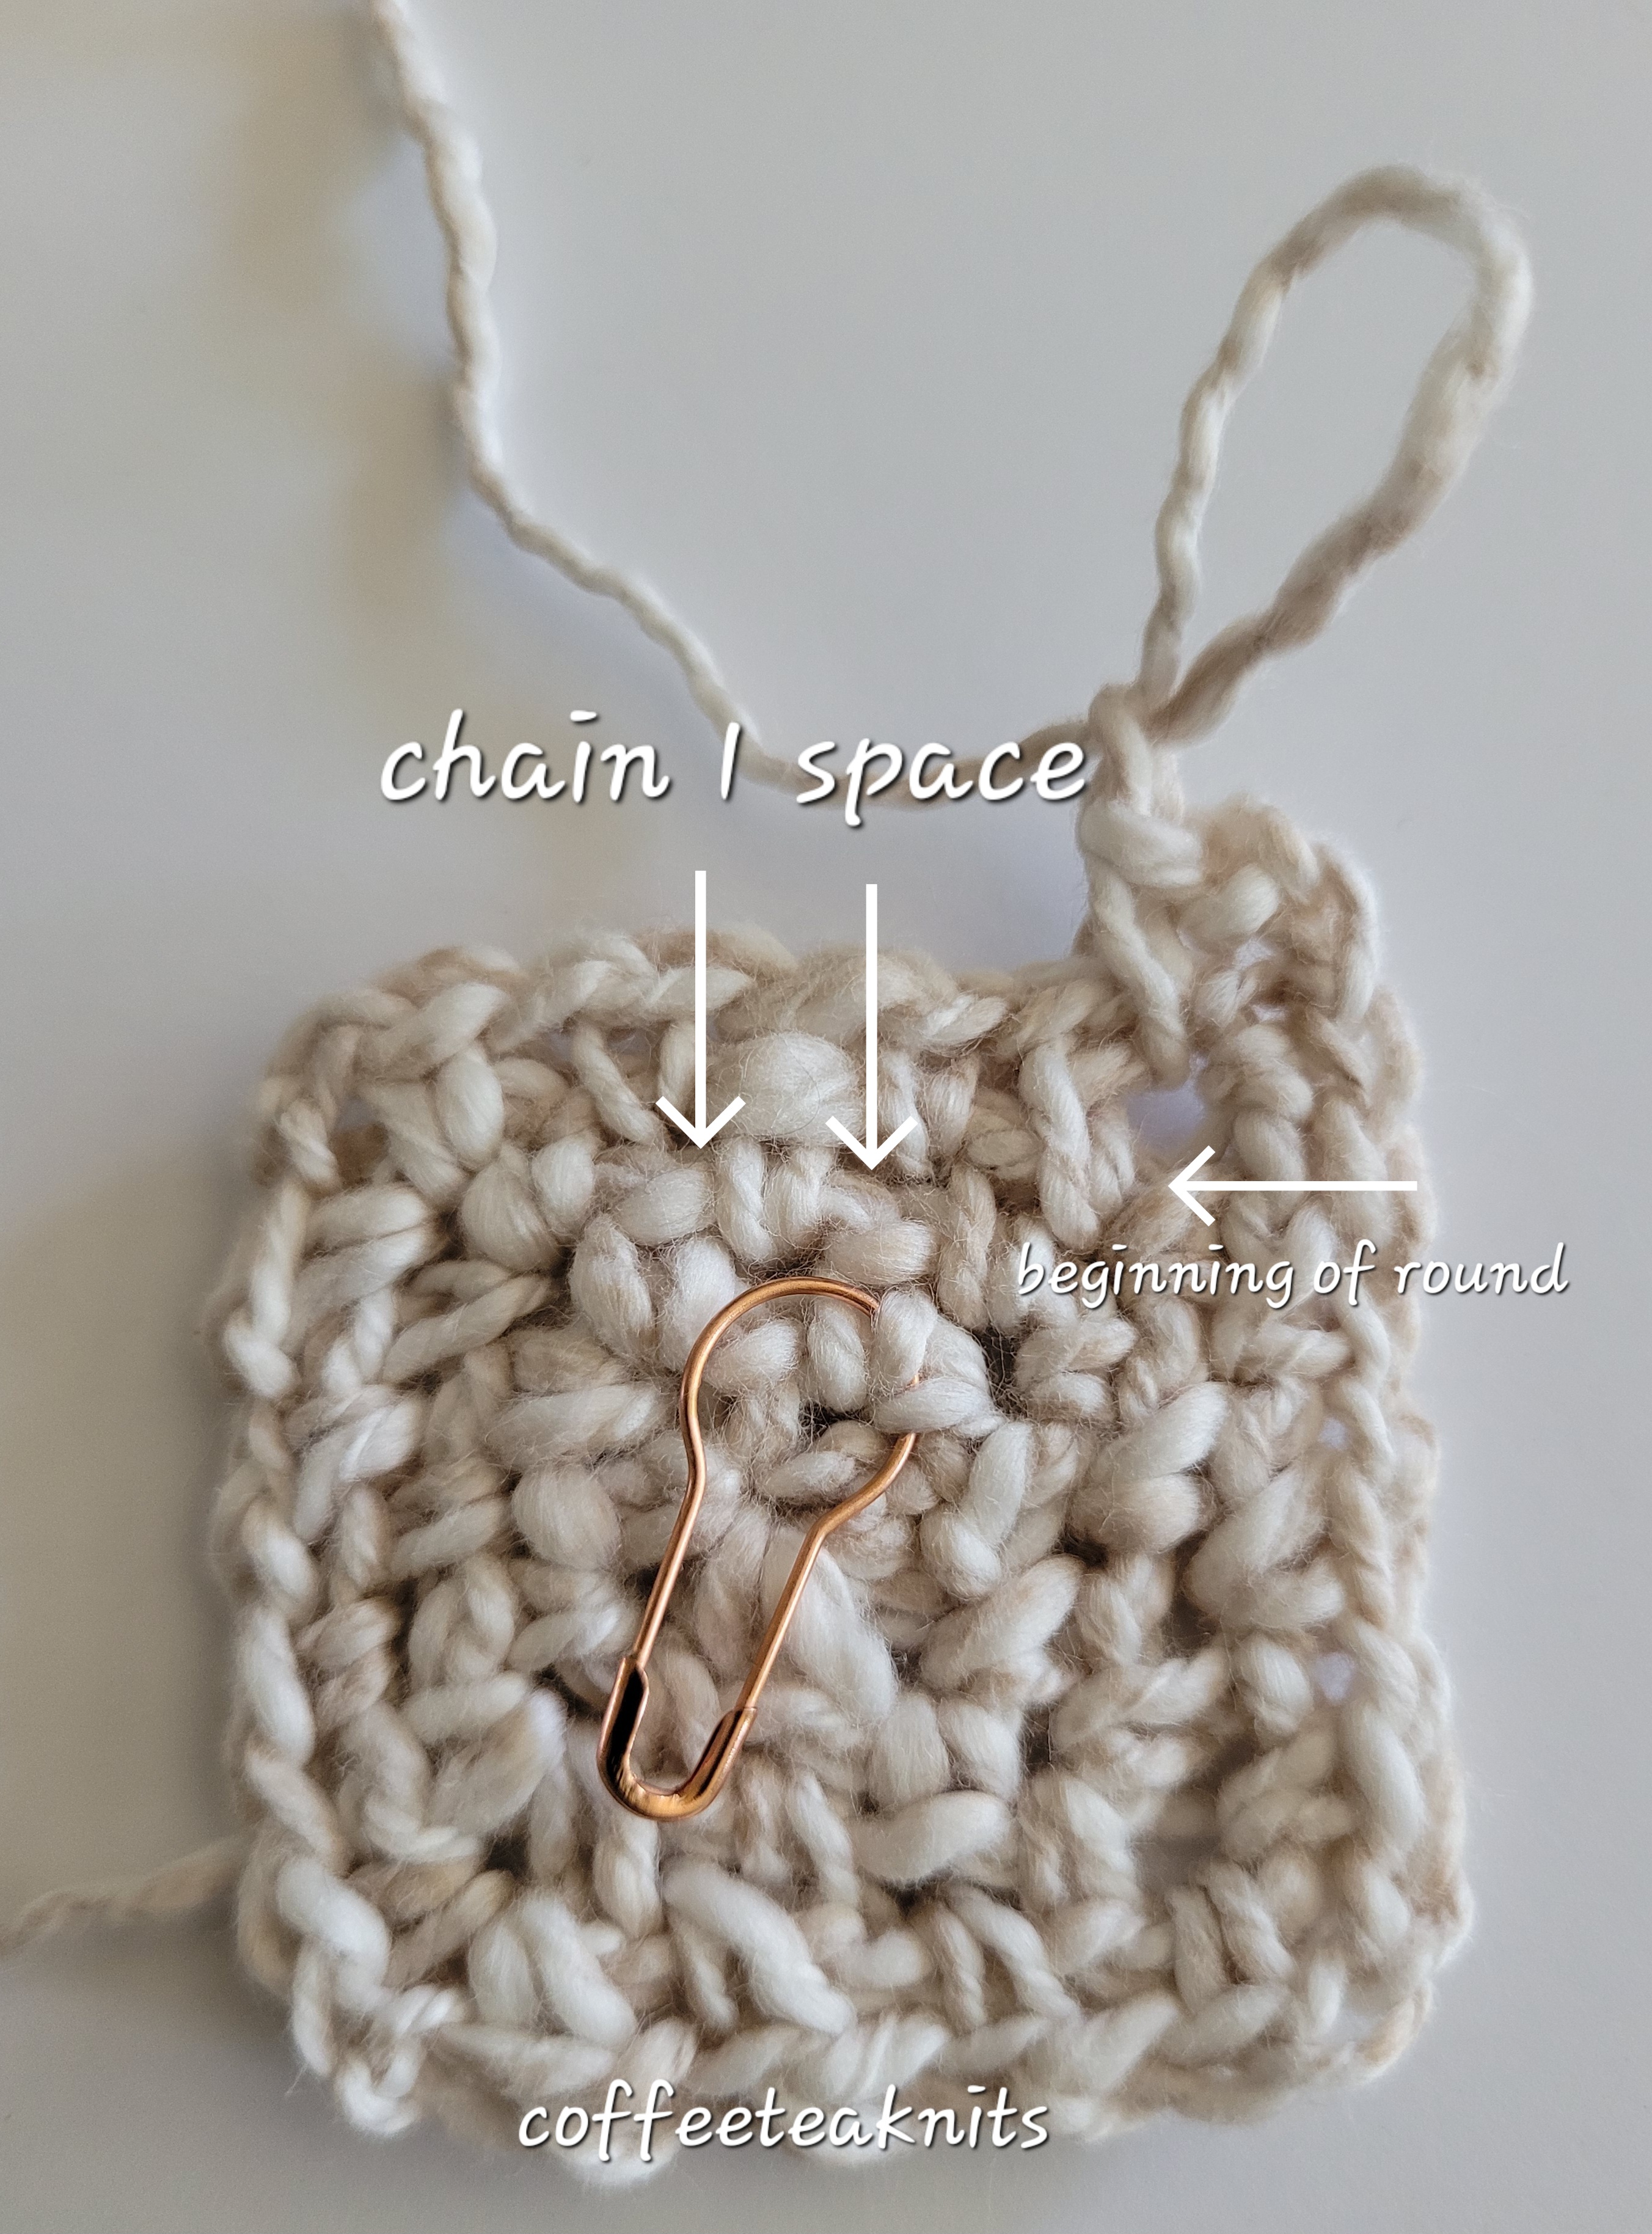
Round 1: Insert the crochet hook into the chain 2 space of the first marker and sc, chain 2, sc, chain 1 all in the same chain 2 space (see below). Remove the first marker and place it as the beginning of the round marker. [Insert hook and sc, chain 2, sc, chain 1 into the chain 2 space of the second marker. Remove second marker]. Repeat […] this for the third and fourth marker in their chain 2 space.
Advertisements
Advertisements
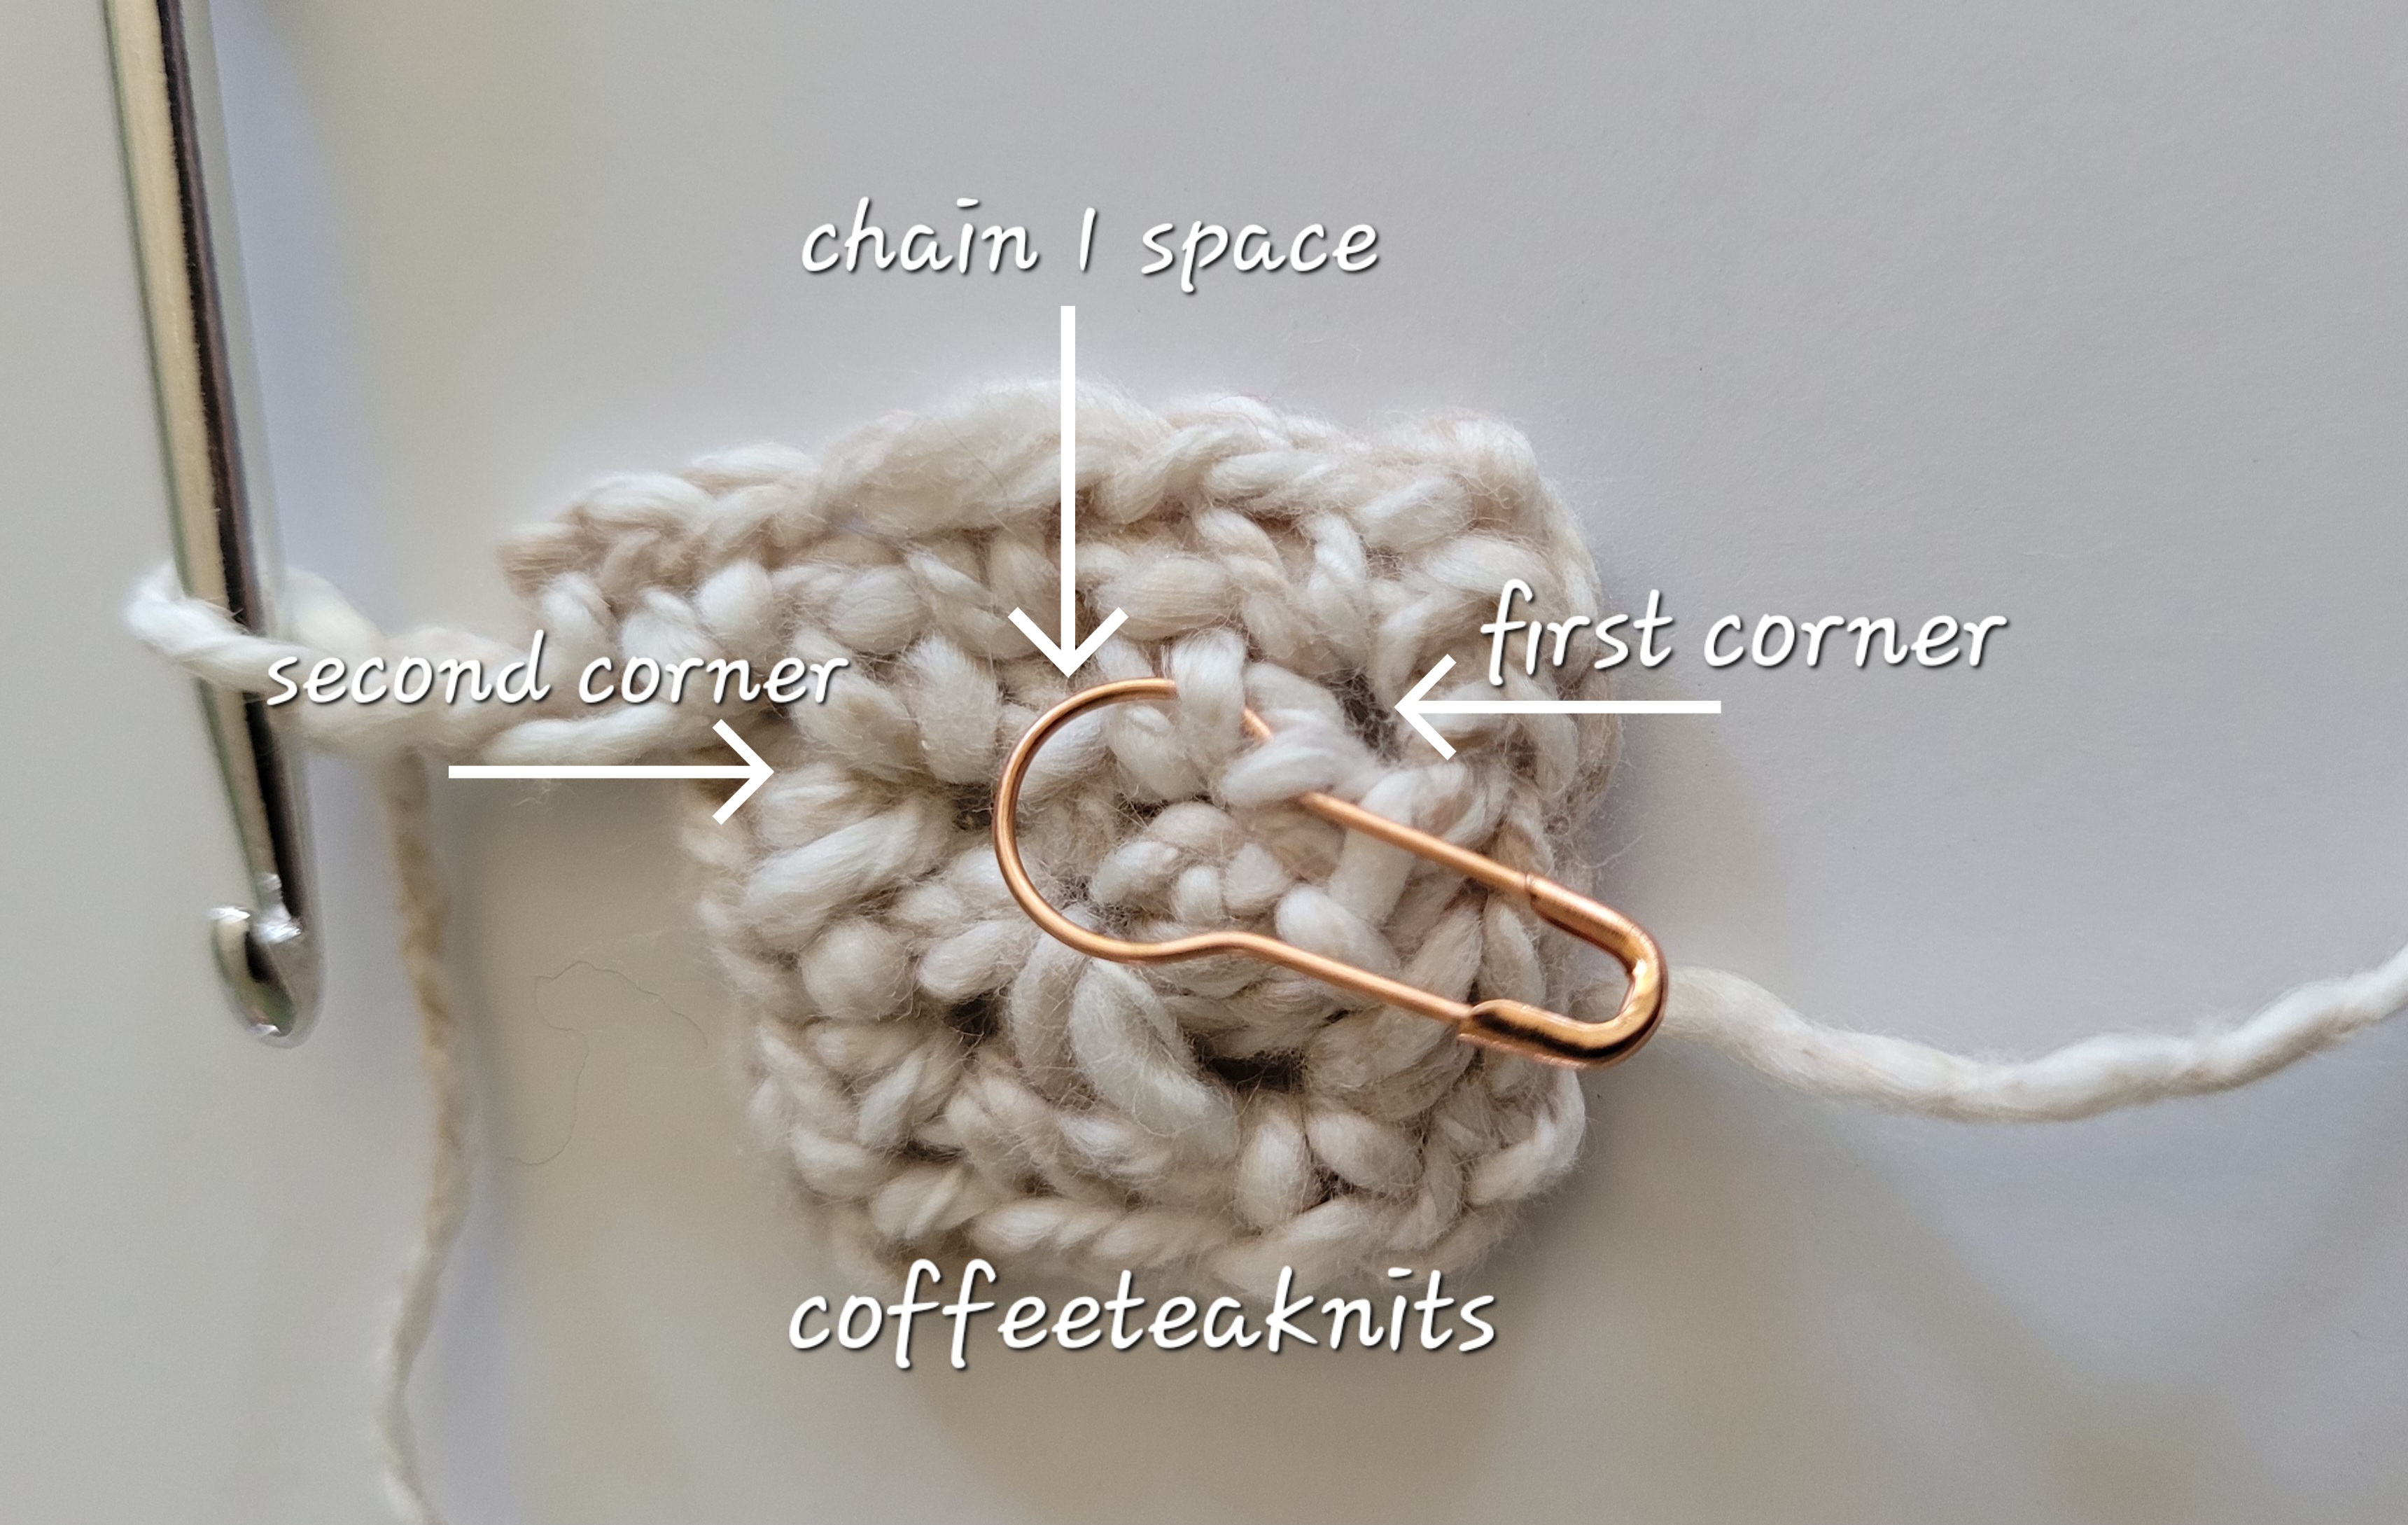
Round 2: [Sc, chain 2, sc, chain 1 all in the same chain 2 space of the first corner with the beginning of the round marker. Sc in the next chain 1 space between the first and second corner (see picture below), chain 1]. Repeat […] for the second, third and fourth corners till the beginning of the first marker.
Advertisements
Repeat the Round 2 till preferred size is reached ending with a sc in the chain 2 space at the beginning of the round. Cut the working yarn and pull through the sc stitch. There was a total of 34 round repeats for the Summertime Market Bag.
Advertisements
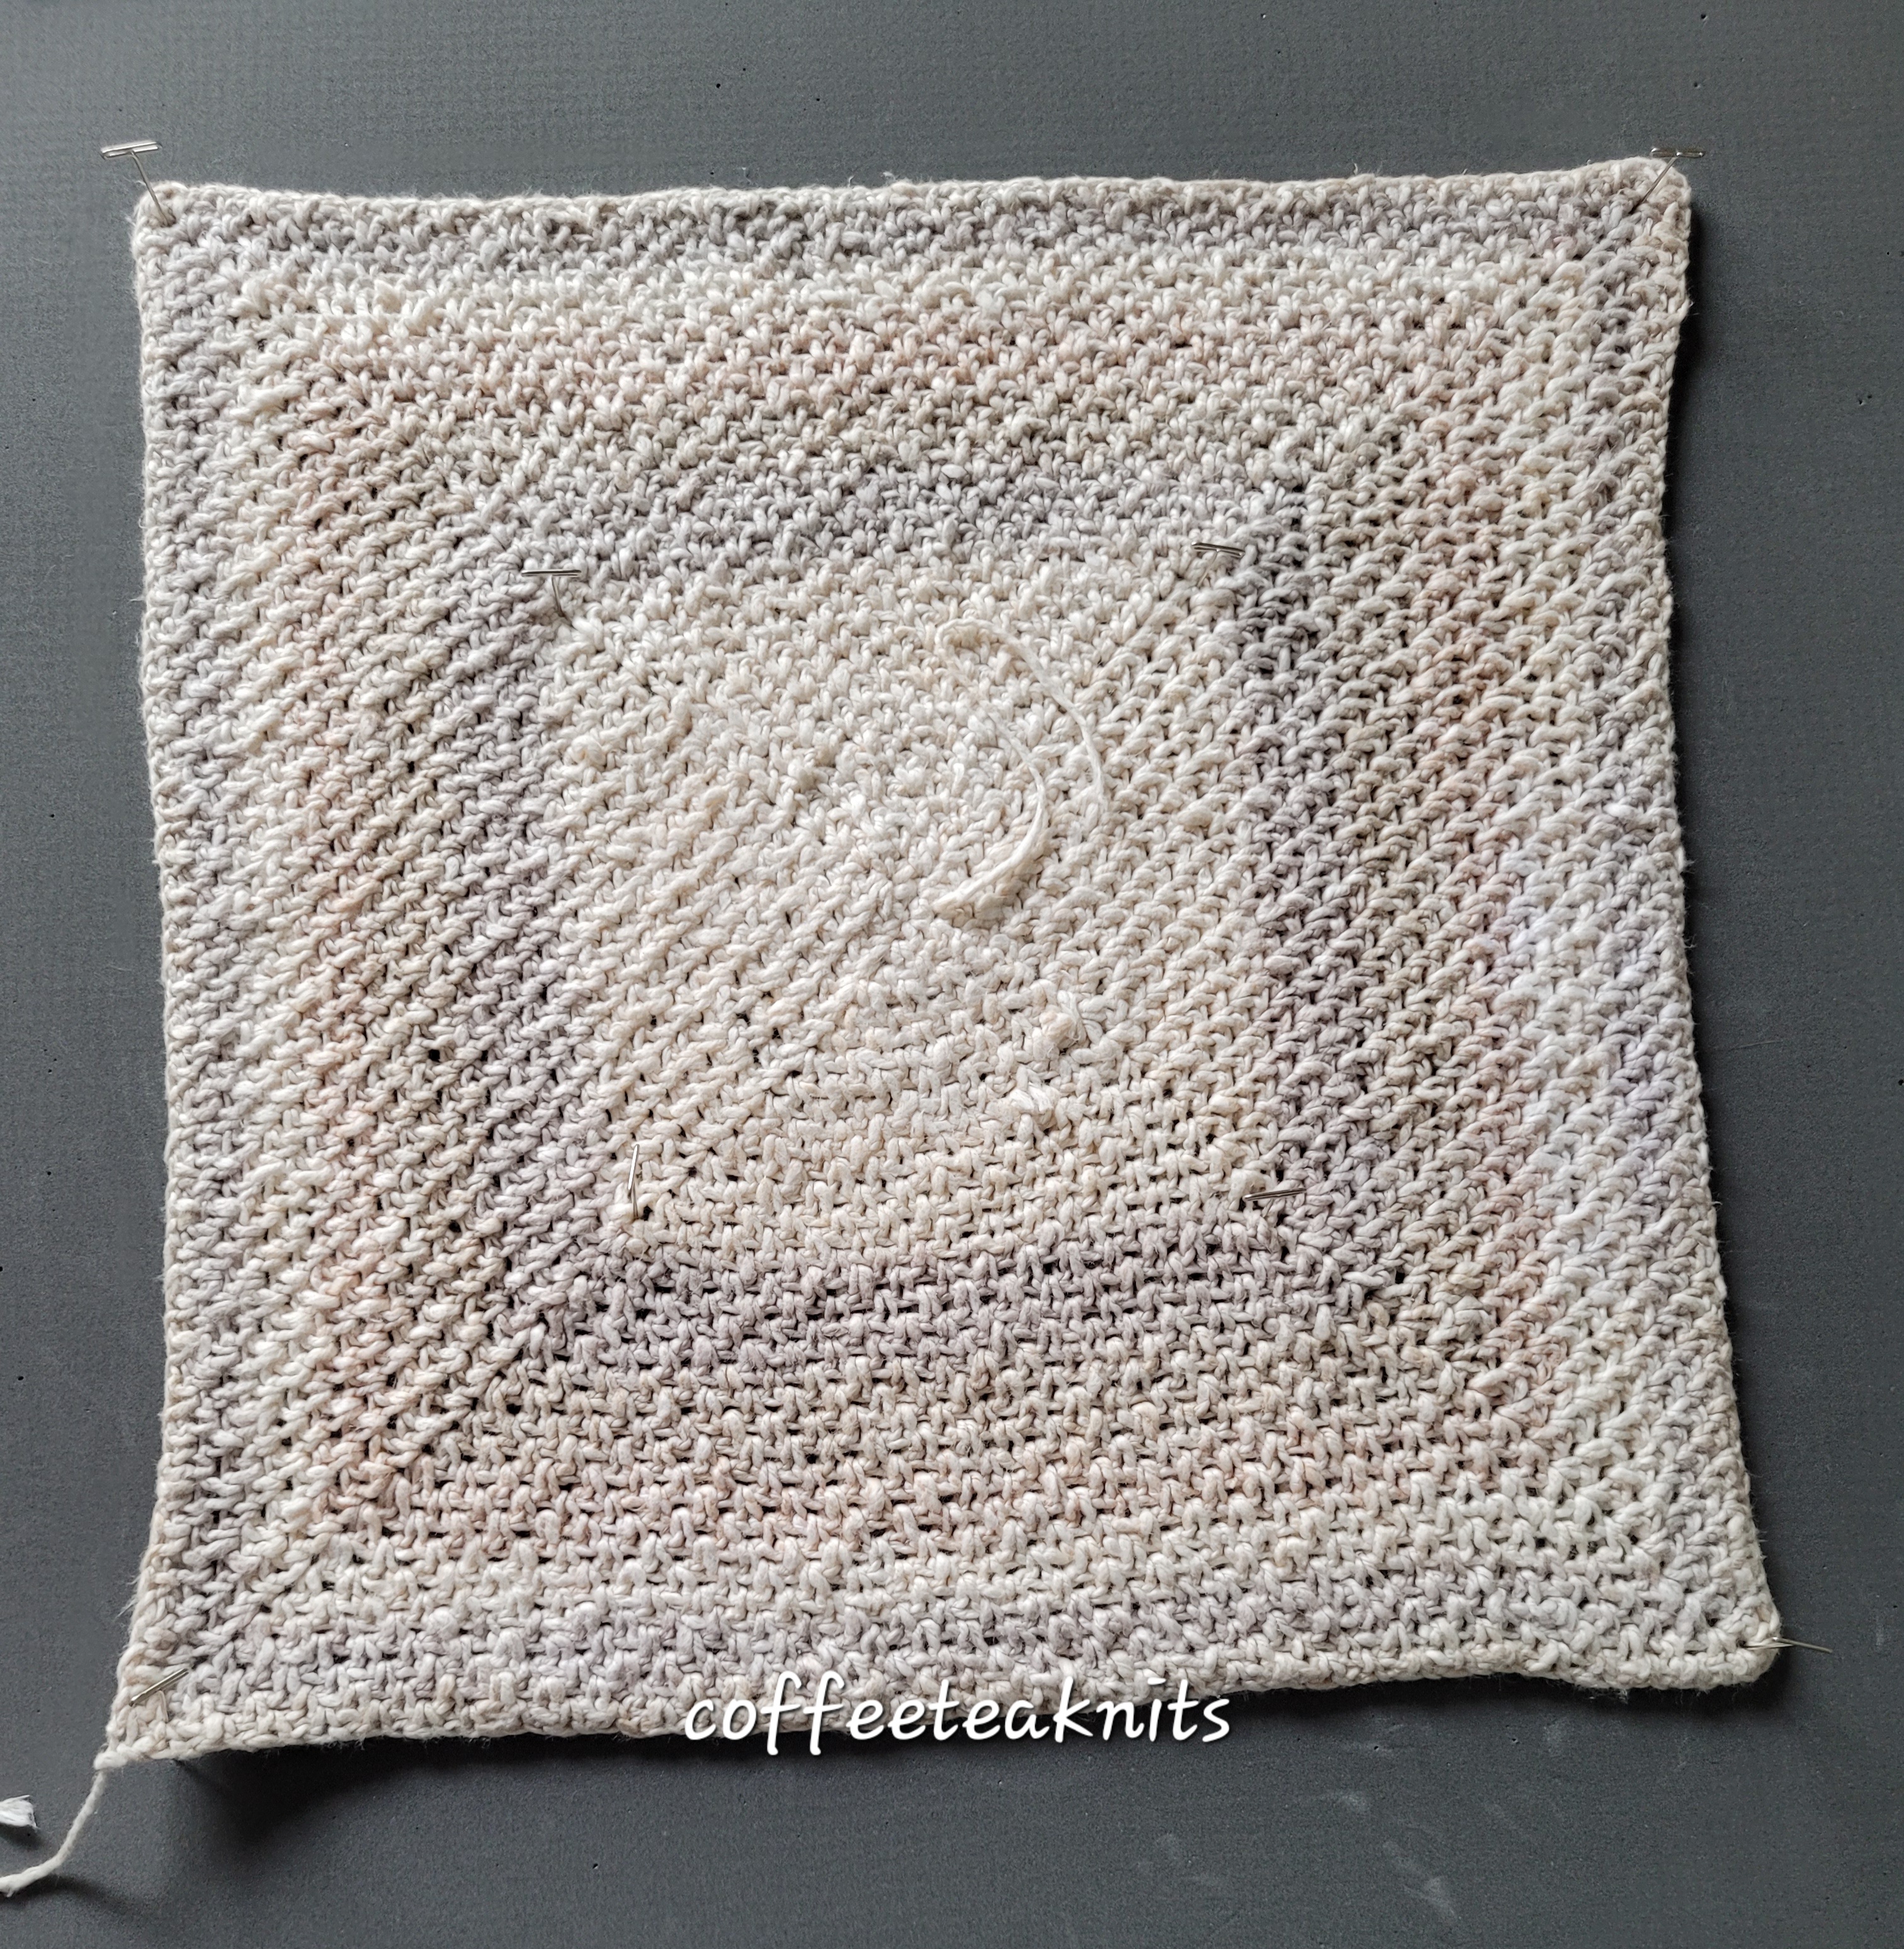
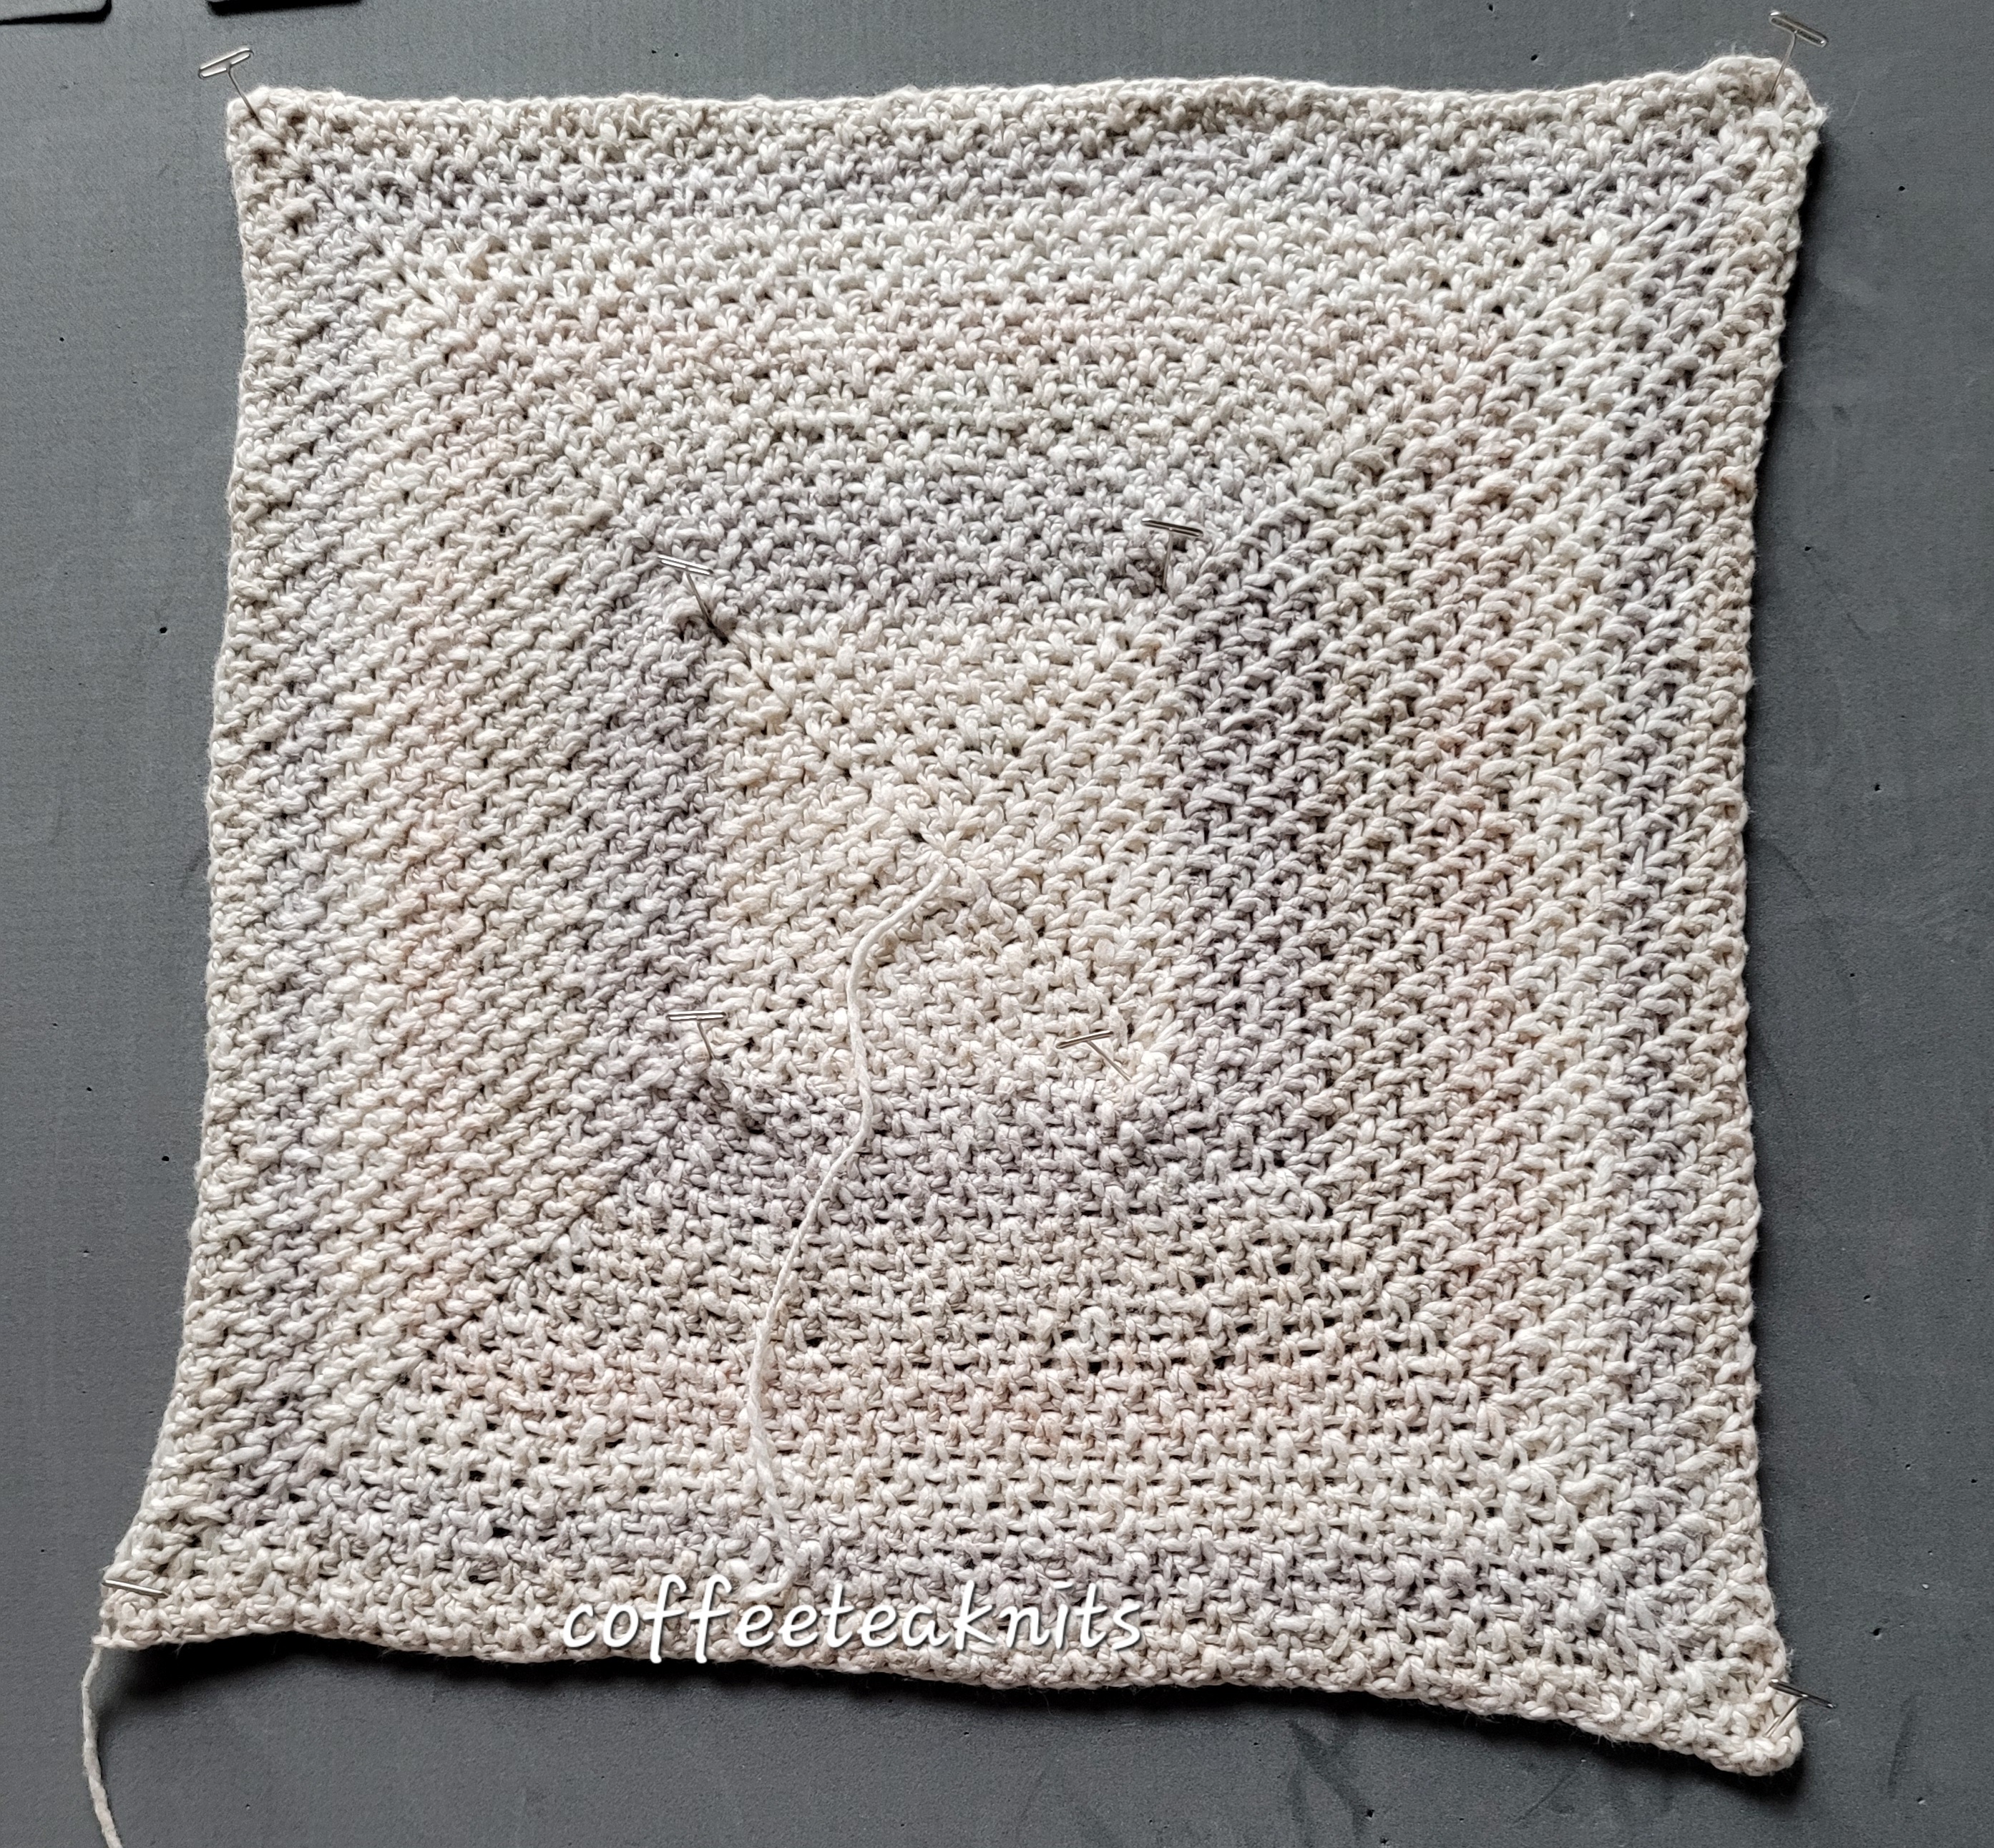
Make another crochet moss stitch square of the same size. Wash and block the two squares (wrong side pictured below)
Advertisements
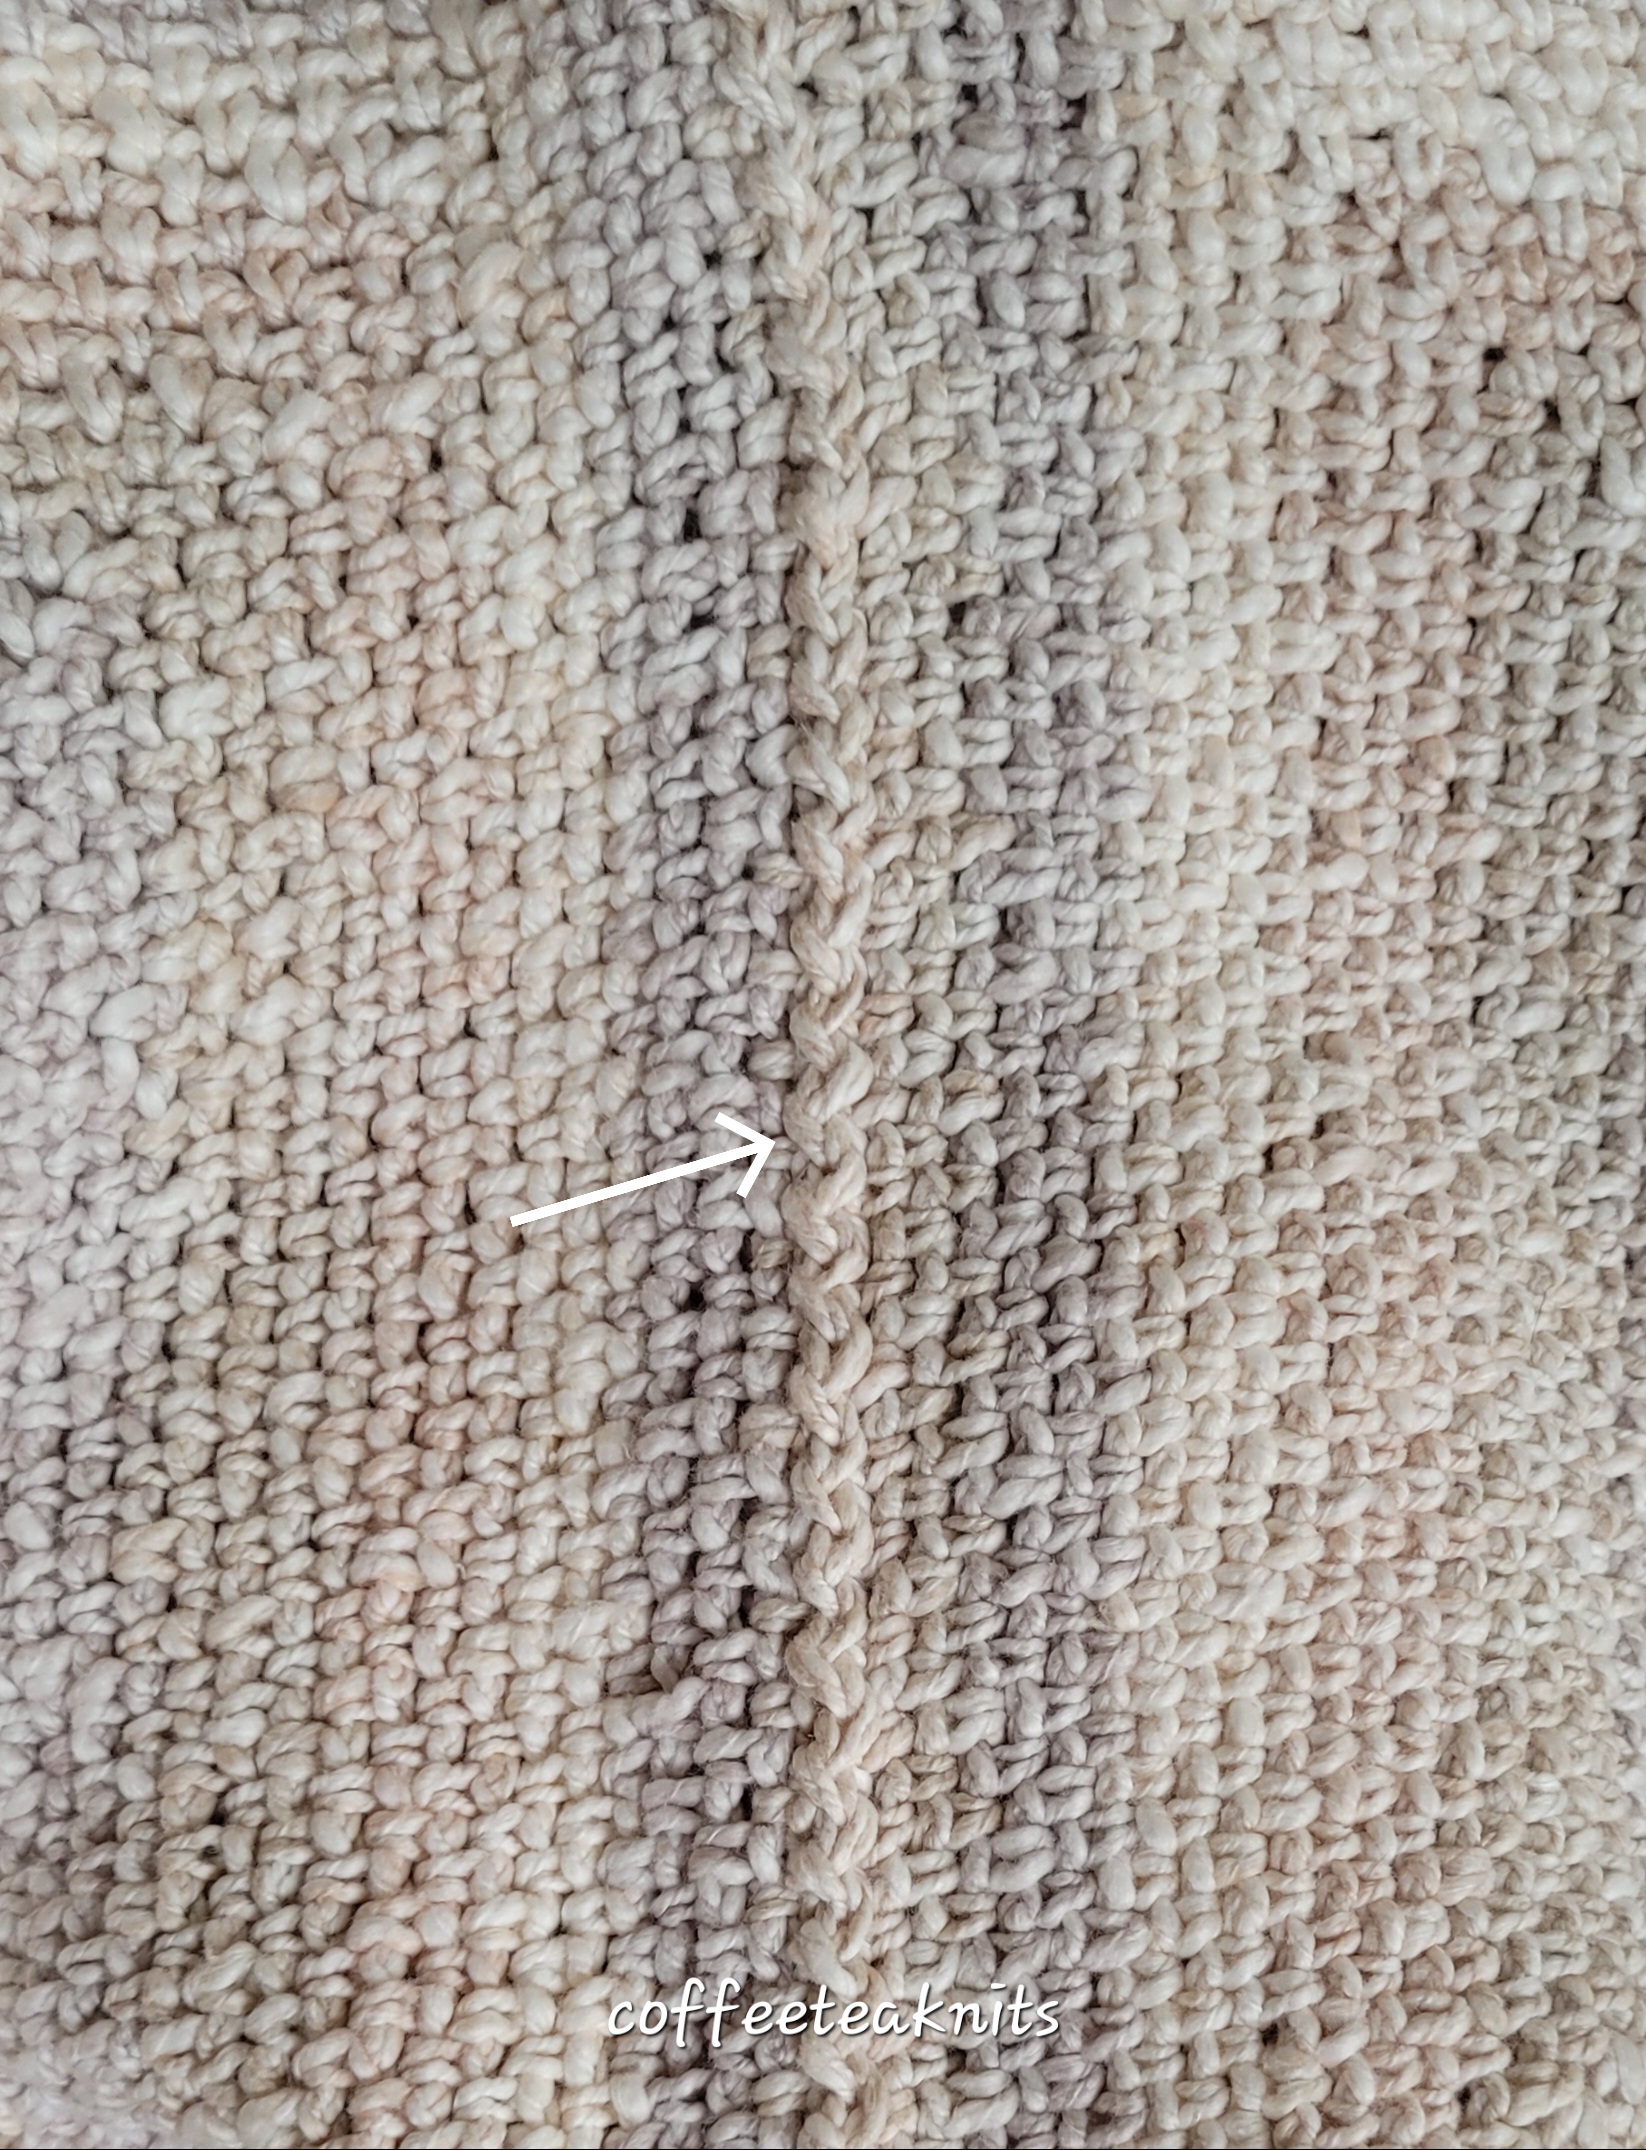
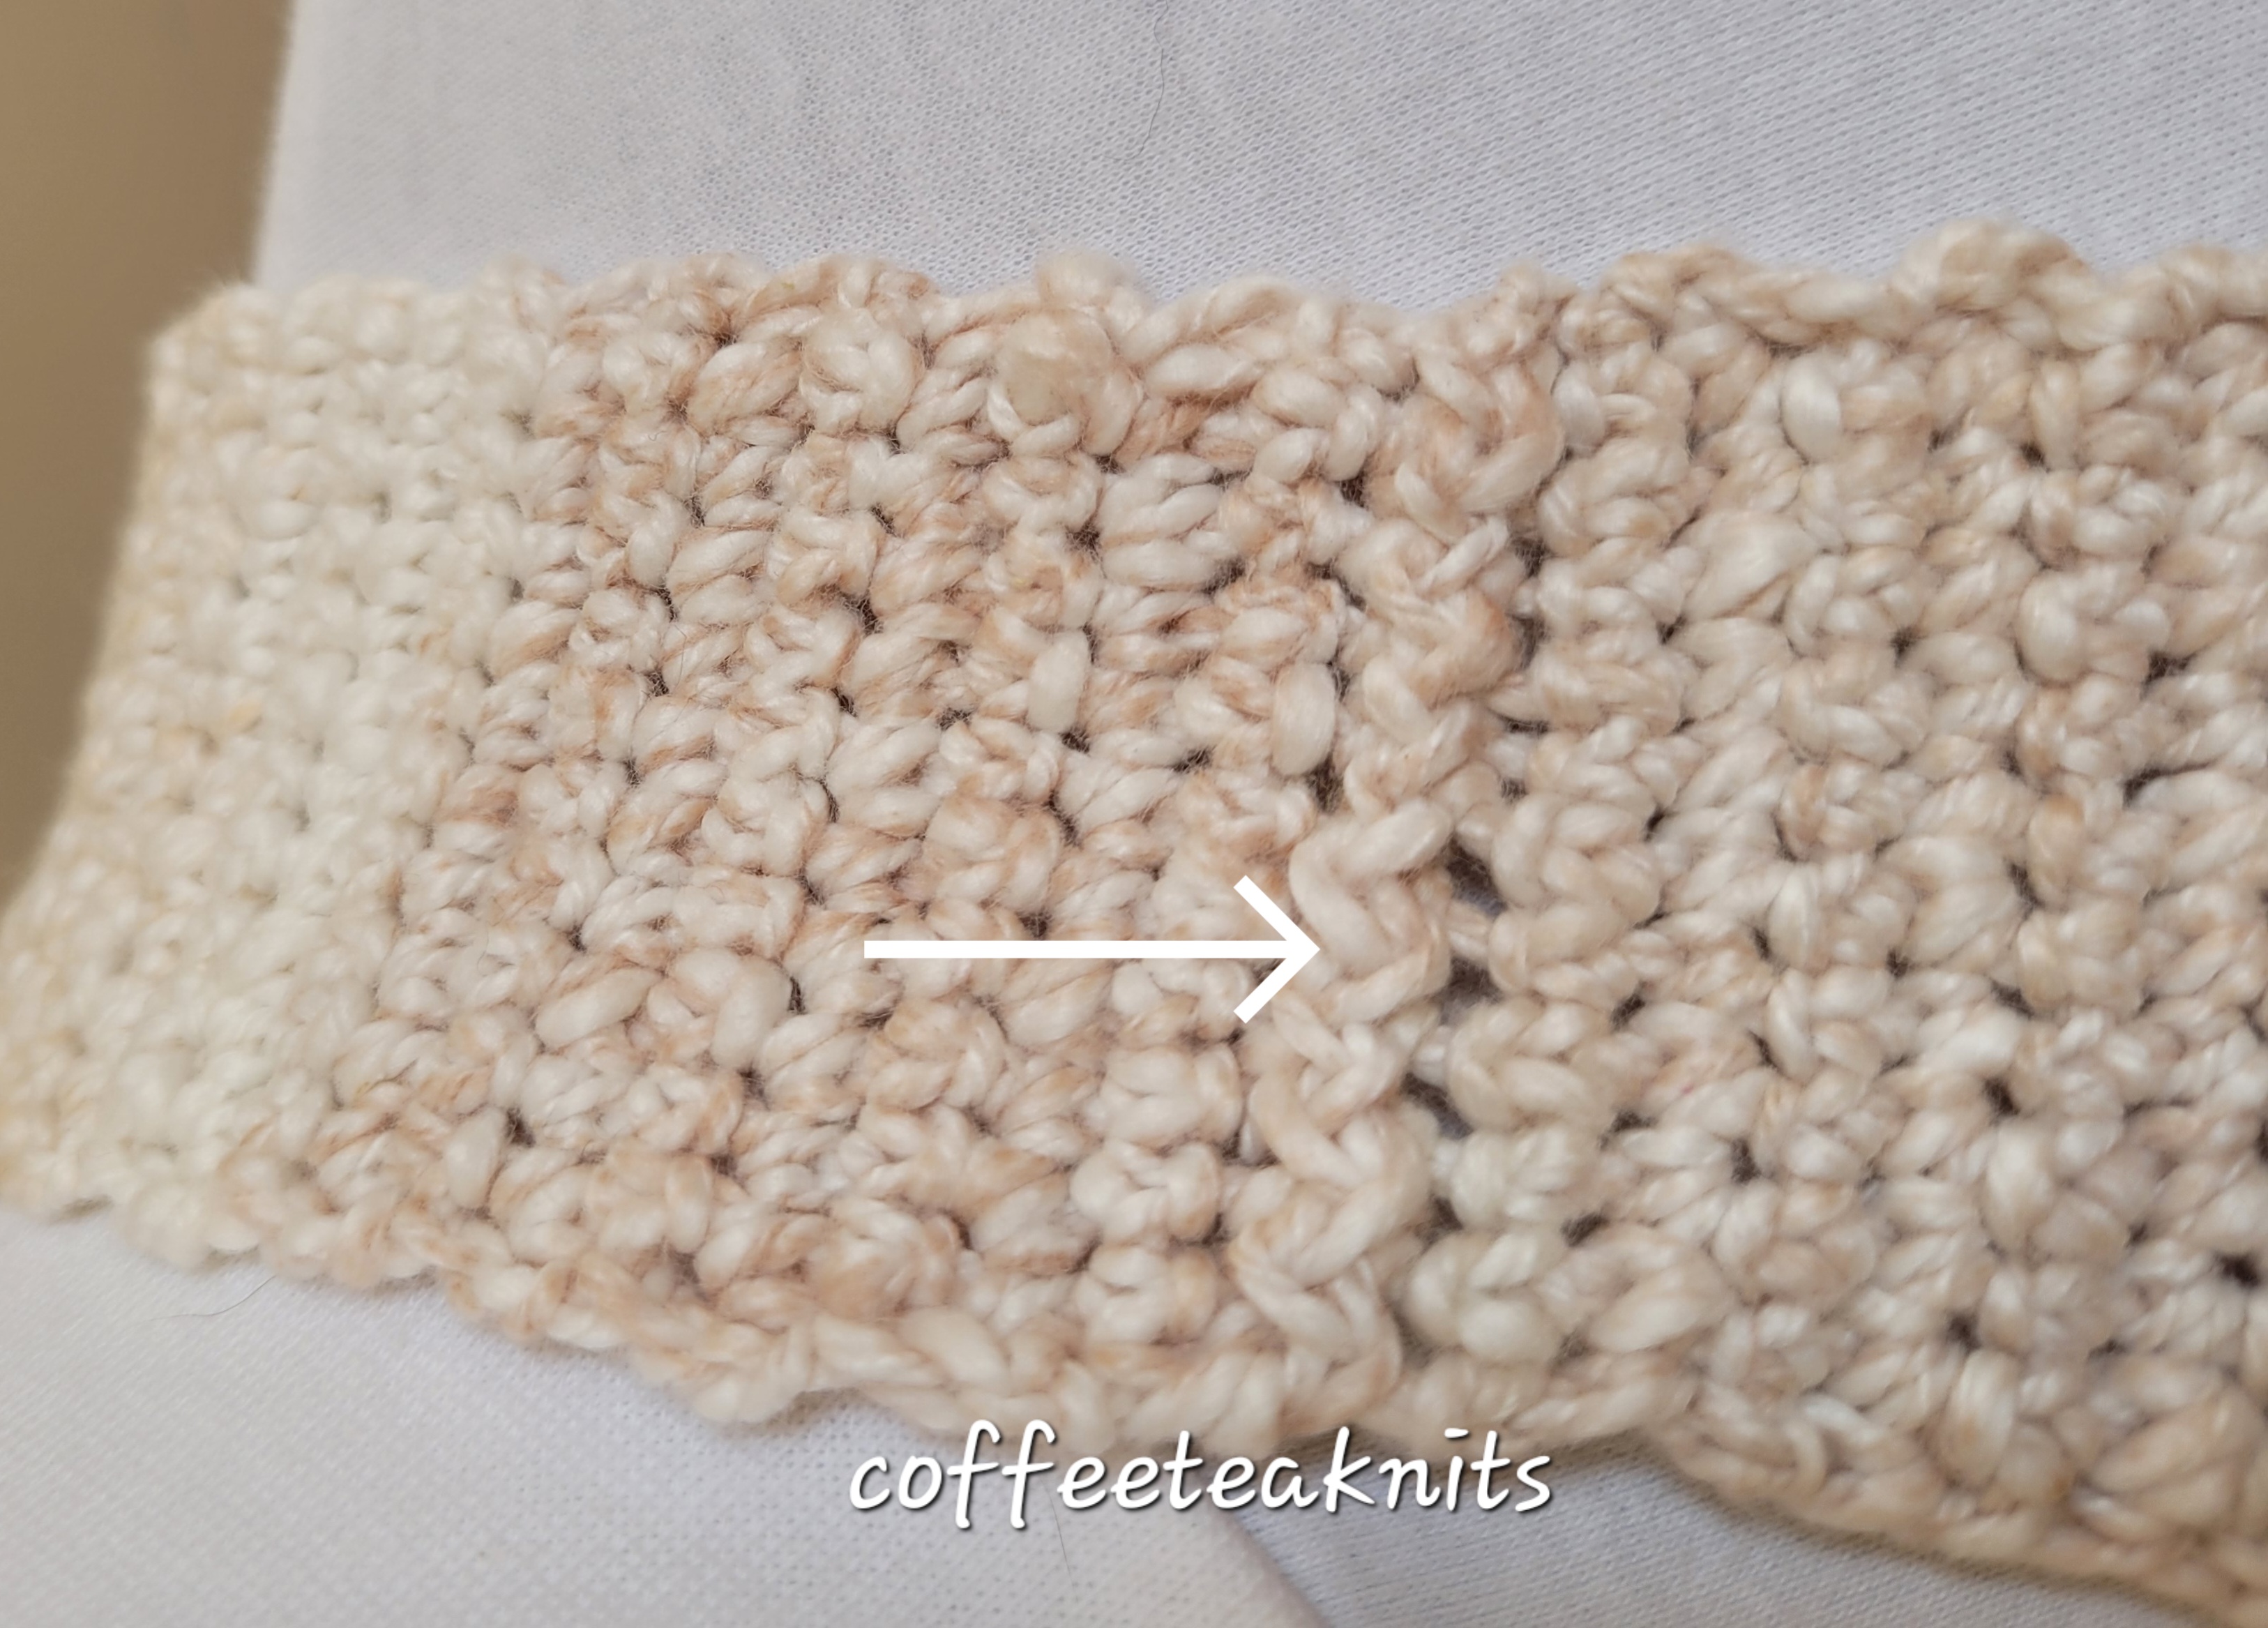
The two sides and the bottom of the two squares are then joined together using two strands of the yarn and the crochet zig zag slip stitch method.
Advertisements
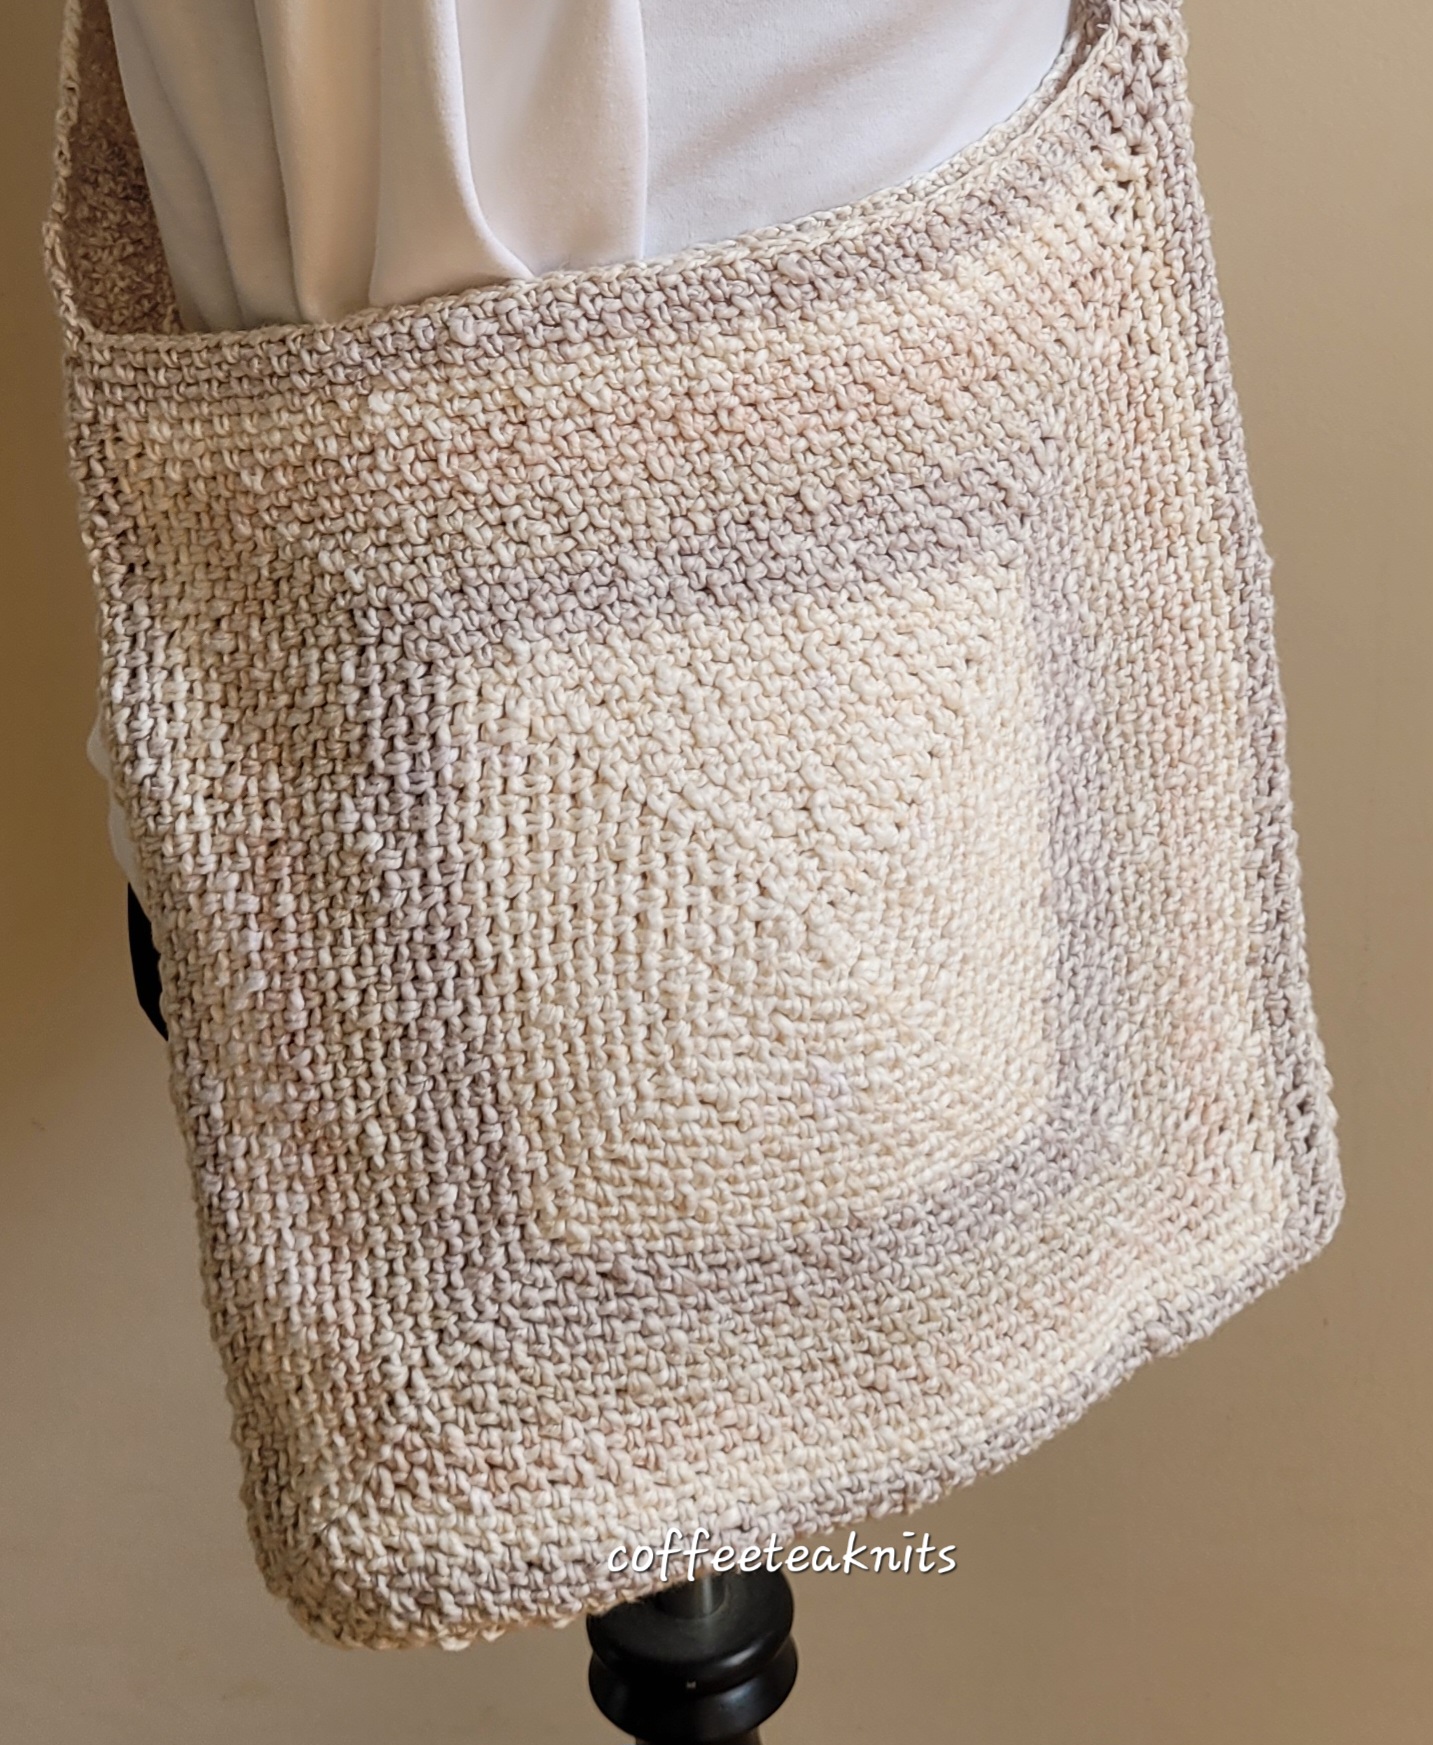
The Shoulder Strap: Insert US E-4 hook from right to left on top of one side of the joined square, pick up and single crochet 11 stitches (pictured below) for the shoulder strap for about fifteen and a half inches ending with the right side row. Cut yarn and pull through the stitch. Repeat the same on the other side of the joined square. Join the two shoulder straps using the crochet slip stitch join method.
Advertisements
Weave in the ends to complete the Summertime Market Bag.
This month has been quite overwhelming in terms of snow and icy temperatures. I’ve spent most of the month staying indoors bundled up in sweaters and other knitwear for warmth and of course keeping busy with knitting, weaving or crocheting. I had some of Malabrigo Rios yarn left over from knitting the “Goes with Everything Cowl” last month. There was just enough yarn leftover (about 27 – 28 grams) to knit the Goes with Everything Earwarmer.
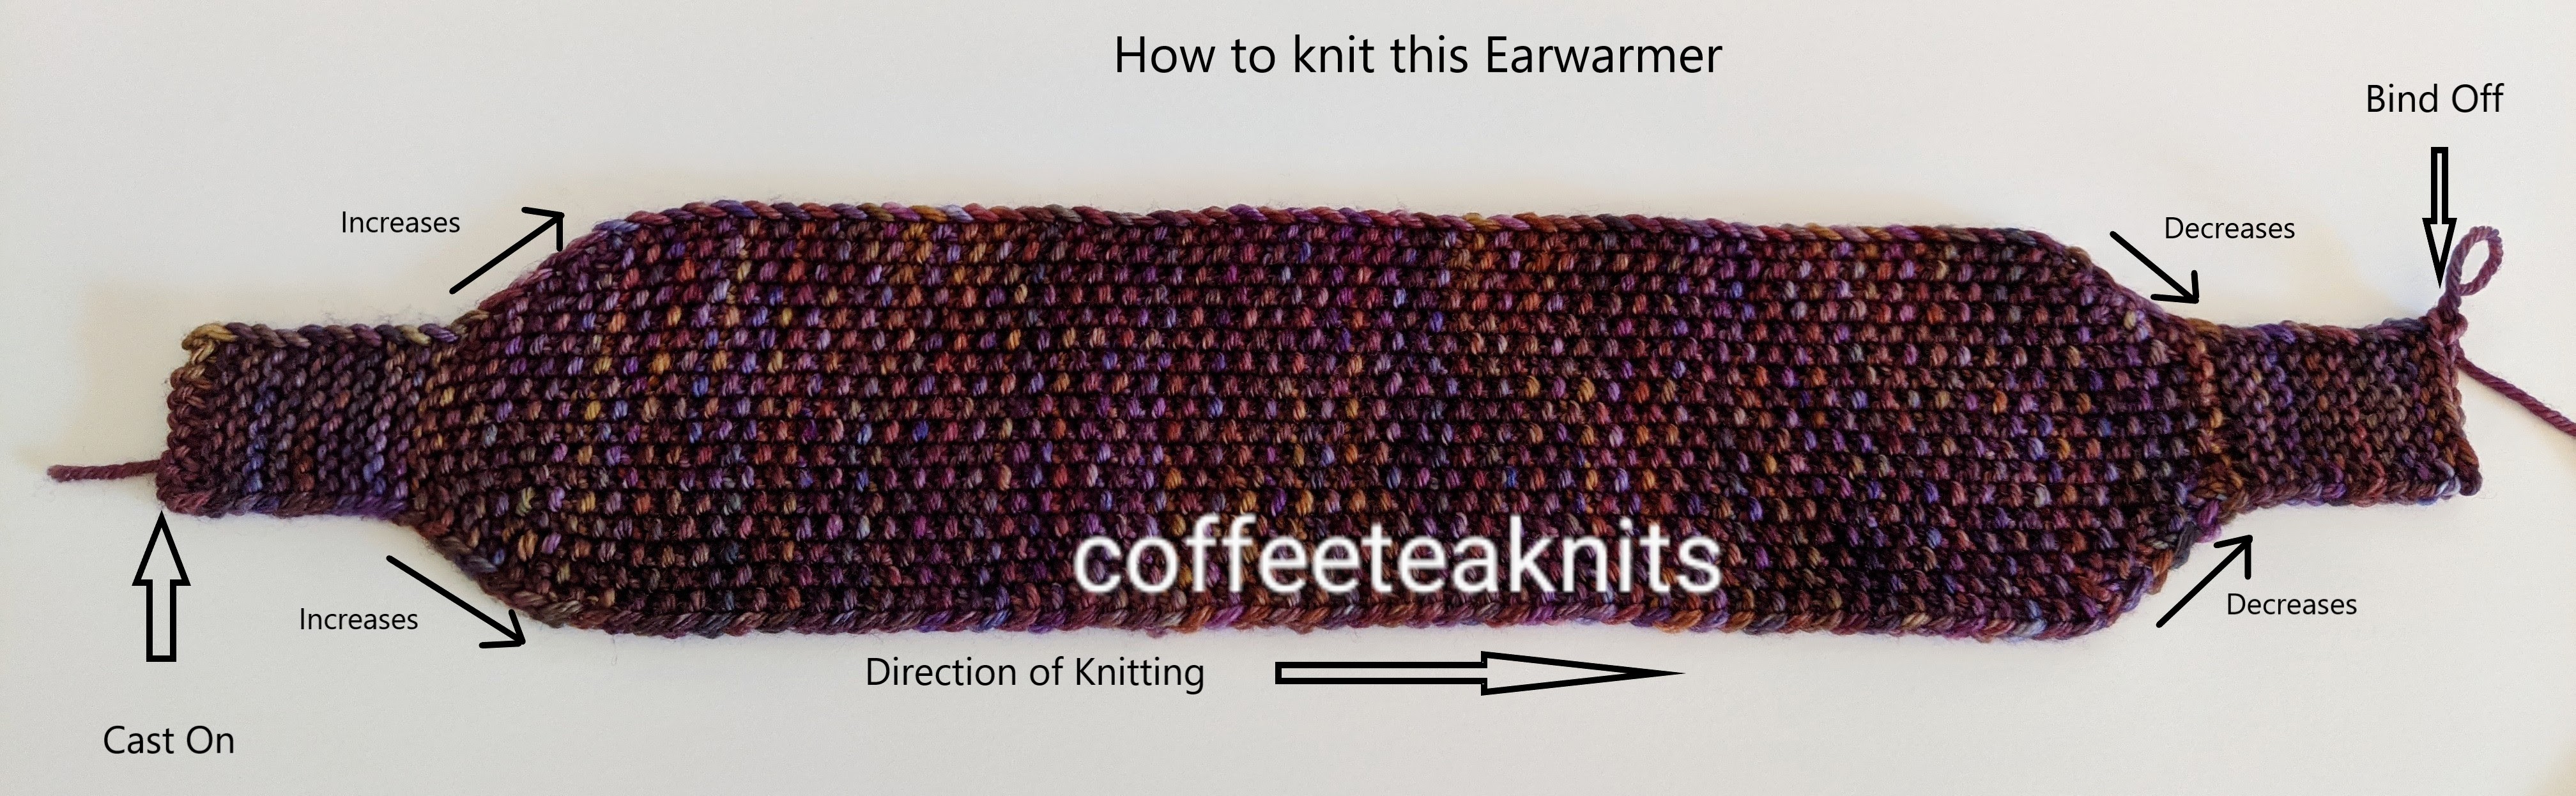
The earwarmers I’ve knit in the past have been knit in the round. I wear them but I’ve found that they tend to curl up in the back when my hair is tied up in a ponytail or a bun. To avoid the earwarmer from curling up in the back, I knit Goes with Everything Earwarmer flat from one side to the other with a series of increases and decreases.
It is first knit in garter stitch pattern for a couple of inches, then increased by 2 stitches every other row for another inch or so (customizable) in seed stitch pattern. The earwarmer is knit straight in seed stitch pattern with no increases or decreases for a specific (customizable) length, and then decreased every other row to the original number of stitches. It is knit again in garter stitch for a couple of inches and then bound off. The two garter stitch sides are joined using the zig zag crochet method.
Goes with Everything Earwarmer Pattern (text and images for personal use only):
Yarn: Malabrigo Yarn – Rios in the RIO877 (Queguay) colorway Knitting Needles: US #6 and #7 for knitting the earwarmer. US #8 for casting on and binding off. Crochet hook: US size 7 or 4.5 mm crochet hook Gauge: 16 stitches/ 4 inches (this pattern is generic so gauge not so critical) Abbreviations:
K: Knit
P: Purl
Kfb: Knit front and back (knit one stitch first in the front and then knit the same stitch in the back before slipping it off the left needle – 1 stitch increase)
K2tog: Knit the first two stitches together on the left needle (1 stitch decrease)
pm: place marker
rm: remove marker
sm: slip marker
wyif S1: with yarn in front slip 1 stitch purlwise
RS: right side
WS: wrong side
The seed stitch pattern: Row 1 (RS): *K1, P1*; repeat from *…* to end of the row Row 2 (WS): *P1, K1*; repeat from *…* to end of the row *Knit in seed stitch pattern: Knit the purl stitches and purl the knit stitches
With a size US #8 knitting needle cast on 9 stitches start knitting with US #6 knitting needle the following garter stitch pattern:
Row1 – Setup row (RS): K1, pm, K7, pm, wyif S1
Row2 (WS): K1, sm, K7, sm, wyif S1
Repeat Row 2 – 18 more times (about 2 inches in length)
Increase section (2 stitches increased every other row): With US #7 needles knit this section in seed stitch pattern
Row 1 (RS): K1, sm, Kfb, *knit in seed stitch pattern till 1 stitch before marker, Kfb, sm, wyif S1
Row 2 (WS): K1, sm, K1, *knit in seed stitch pattern till 1 stitch before marker, K1, sm, wyif S1
Repeat these two rows 5 more times for a total of 19 stitches (customize to your size by adding or subtracting these row repeats to the length that will cover your ears)
Straight knitting with no increases or decreases section (customize to your size by measuring the number of inches from one ear to the other and knit about 2 to 4 inches less for negative ease): Continue in knitting with US #7 knitting needle and seed stitch pattern
Row 1 (RS): K1, sm, *K1, P1*; repeat from *…* to 1 stitch before marker, K1, sm, wyif S1
Row 2 (WS): K1, sm, K1, *P1, K1*; repeat from *…* till marker, sm, wyif S1
Repeat these two rows till the knitted piece measures about 15 inches from cast on edge (add or subtract row repeats to your specific size)
Decrease section (2 stitches decreased every other row): With US #7 knitting needle and seed stitch pattern
Row 1 (RS): K1, sm, K2tog, *knit in seed stitch pattern till 1 stitch before marker, K2tog, sm, wyif S1
Row 2 (WS): K1, sm, K1, *knit in seed stitch pattern till 1 stitch before marker, K1, sm, wyif S1
Repeat these two rows 5 more times decreasing the number of stitches to 9 (if your stitch count was more or less than 19 stitches, add or subtract these row repeats till 9 stitches)
With US #6 knitting needle knit the following garter stitch pattern:
Row1(RS): K1, sm, K7, sm, wyif S1
Row2 (WS): K1, sm, K7, sm, wyif S1
Repeat these two rows 9 more times (about 2 inches in length). Bind off with US #8 knitting needle and hold the remaining stitch with a removable stitch marker.
Crochet join (optional):
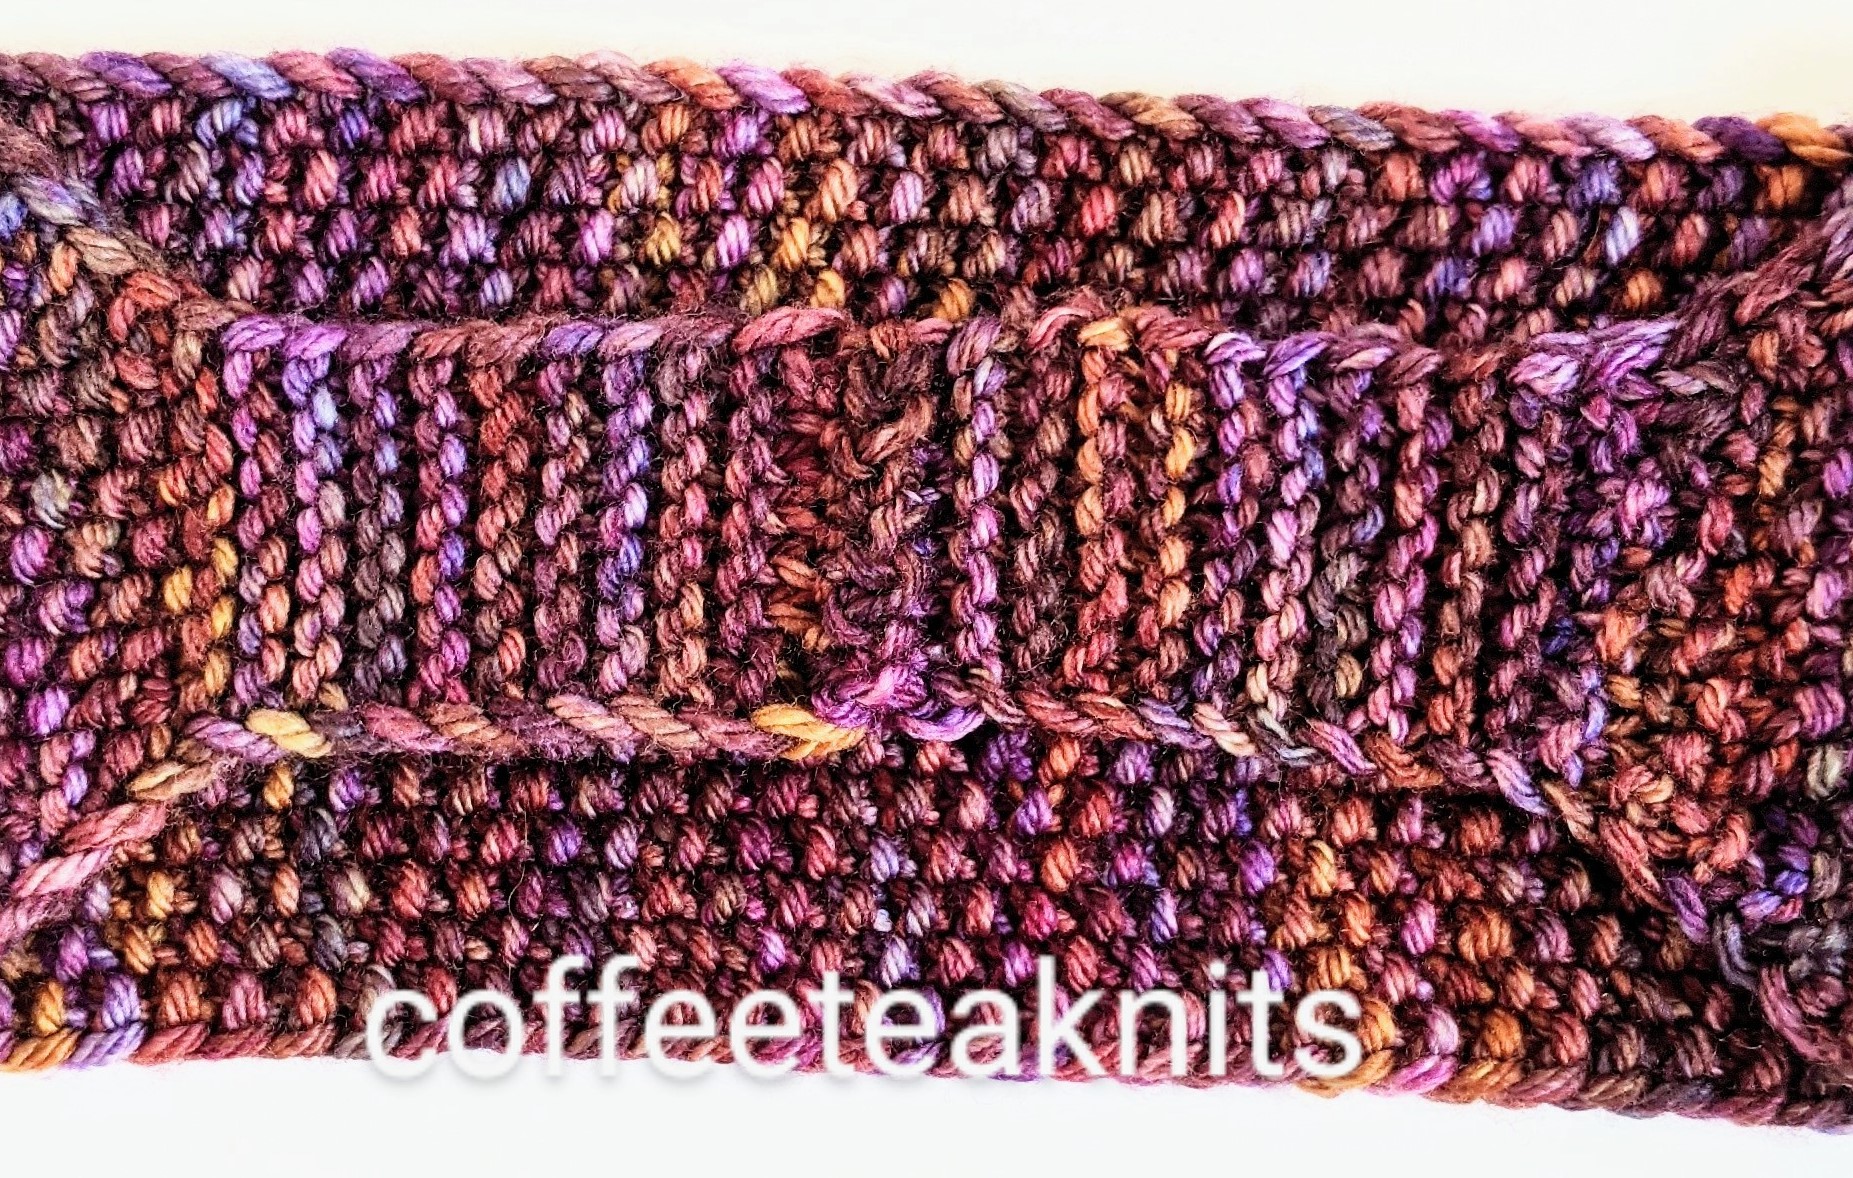
Insert a size 7 or 4.5 mm crochet hook in the remaining stitch, chain one, and align the two sides facing RS of the knitted piece together on the RS. Use the zig zag slip stitch crochet join method to join the two sides together (several online video tutorials are available on YouTube for this crochet join method).
Alternately, the two sides can be joined with any other join method of choice.