One variation of single crochet stitch pattern is the single crochet in back loop (SCBL). This stitch pattern is commonly used as a ribbed border for sweaters, blankets etc. In the February 2025 Earwarmer, the ribbing sections for the earwarmers are in the single crochet in the back loop stitch pattern.
Once the foundation row is worked for a single crochet, the crochet hook is inserted only into the back loop for all the the stitches in the next and the subsequent rows. After inserting the crochet hook in the back loop, a single crochet is worked. This differs from a regular single crochet where the crochet hook is inserted under both loops (strands) of a stitch. Using the single crochet in back loops gives the worked fabric a ribbed look.
The video and written instructions are below showing how to make a single crochet in the back loop. This technique is used for all the rows after the foundation chain row. The video and instructions below are for right-handed crocheting
How to Single Crochet in Back Loop (SCBL):
Written Instructions on How to Single Crochet in Back Loop (SCBL):
Hello folks, it’s been a while since my last pattern post. A bad case of the flu at the end of January, the passing of my adorable pet dog in mid-February, and other personal issues needed my time. I started working on the February 2025 Earwarmer crochet pattern a few days before my beloved dog passed away. I am grateful that my knitting and crocheting hobby gave me much-needed comfort. It supported me during this difficult period of grief and reflection. I am also thankful to all the readers and subscribers of this blog. I appreciate the knitting and crocheting community for their support and understanding.
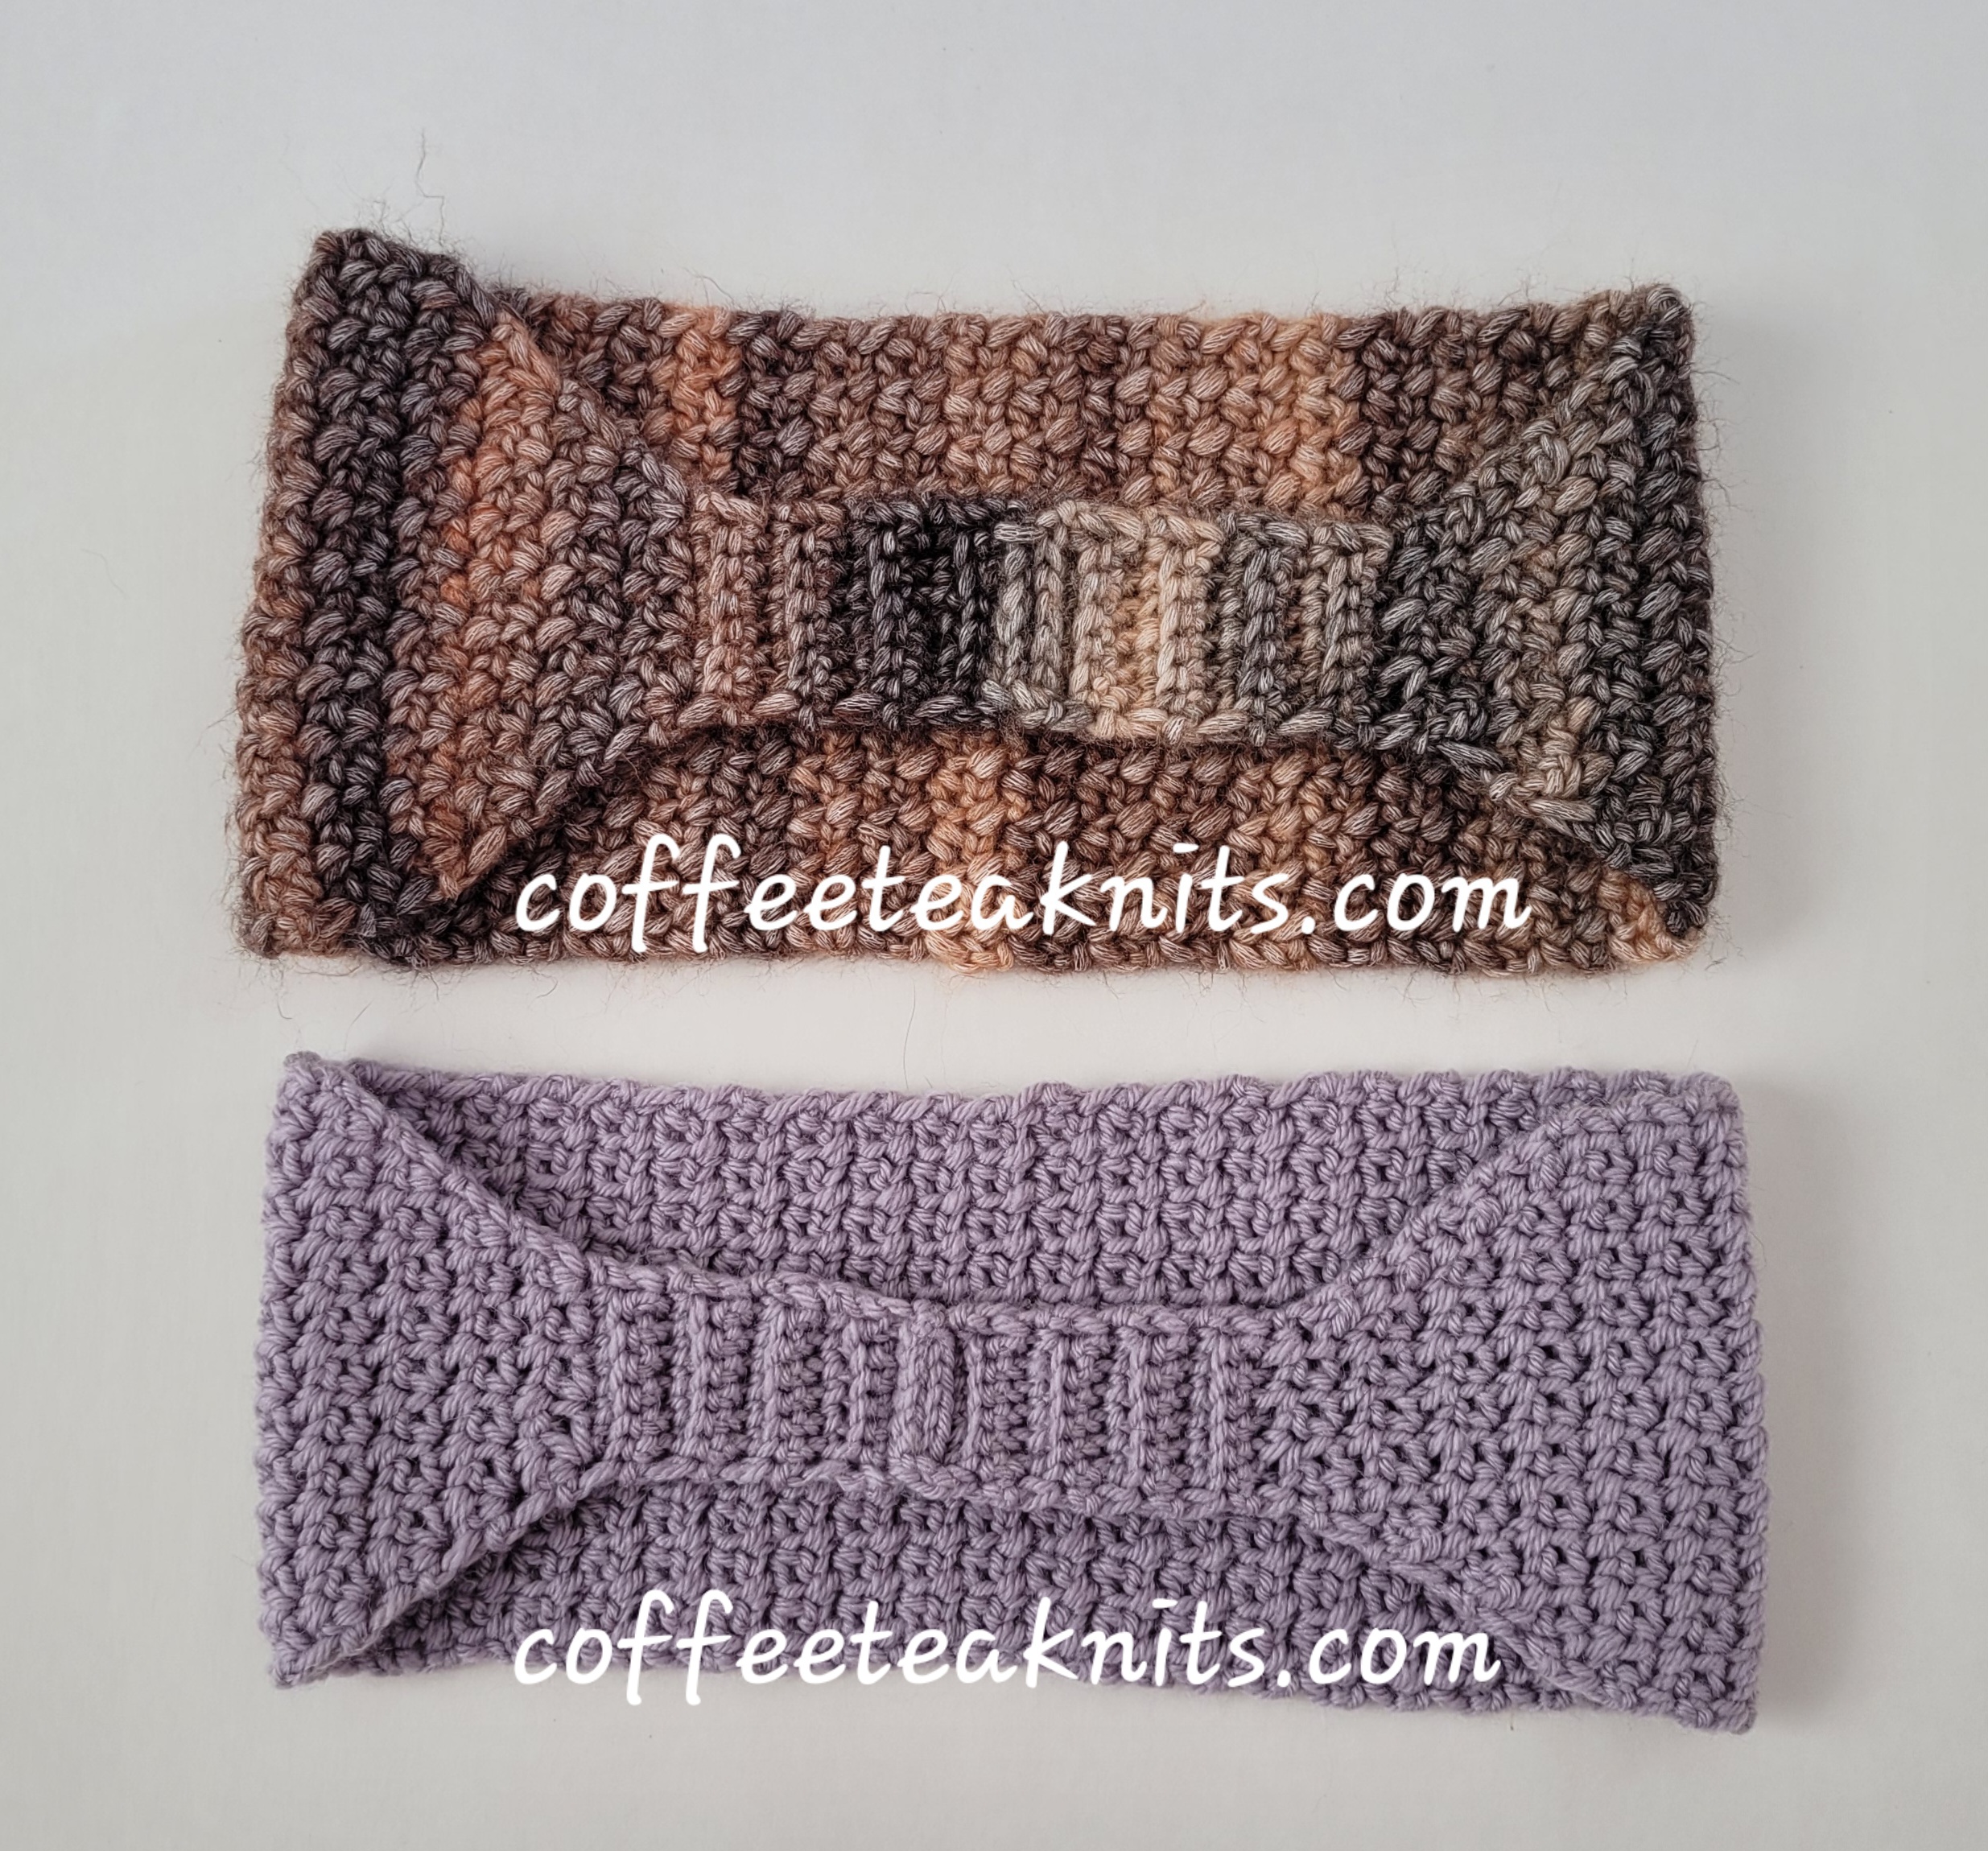
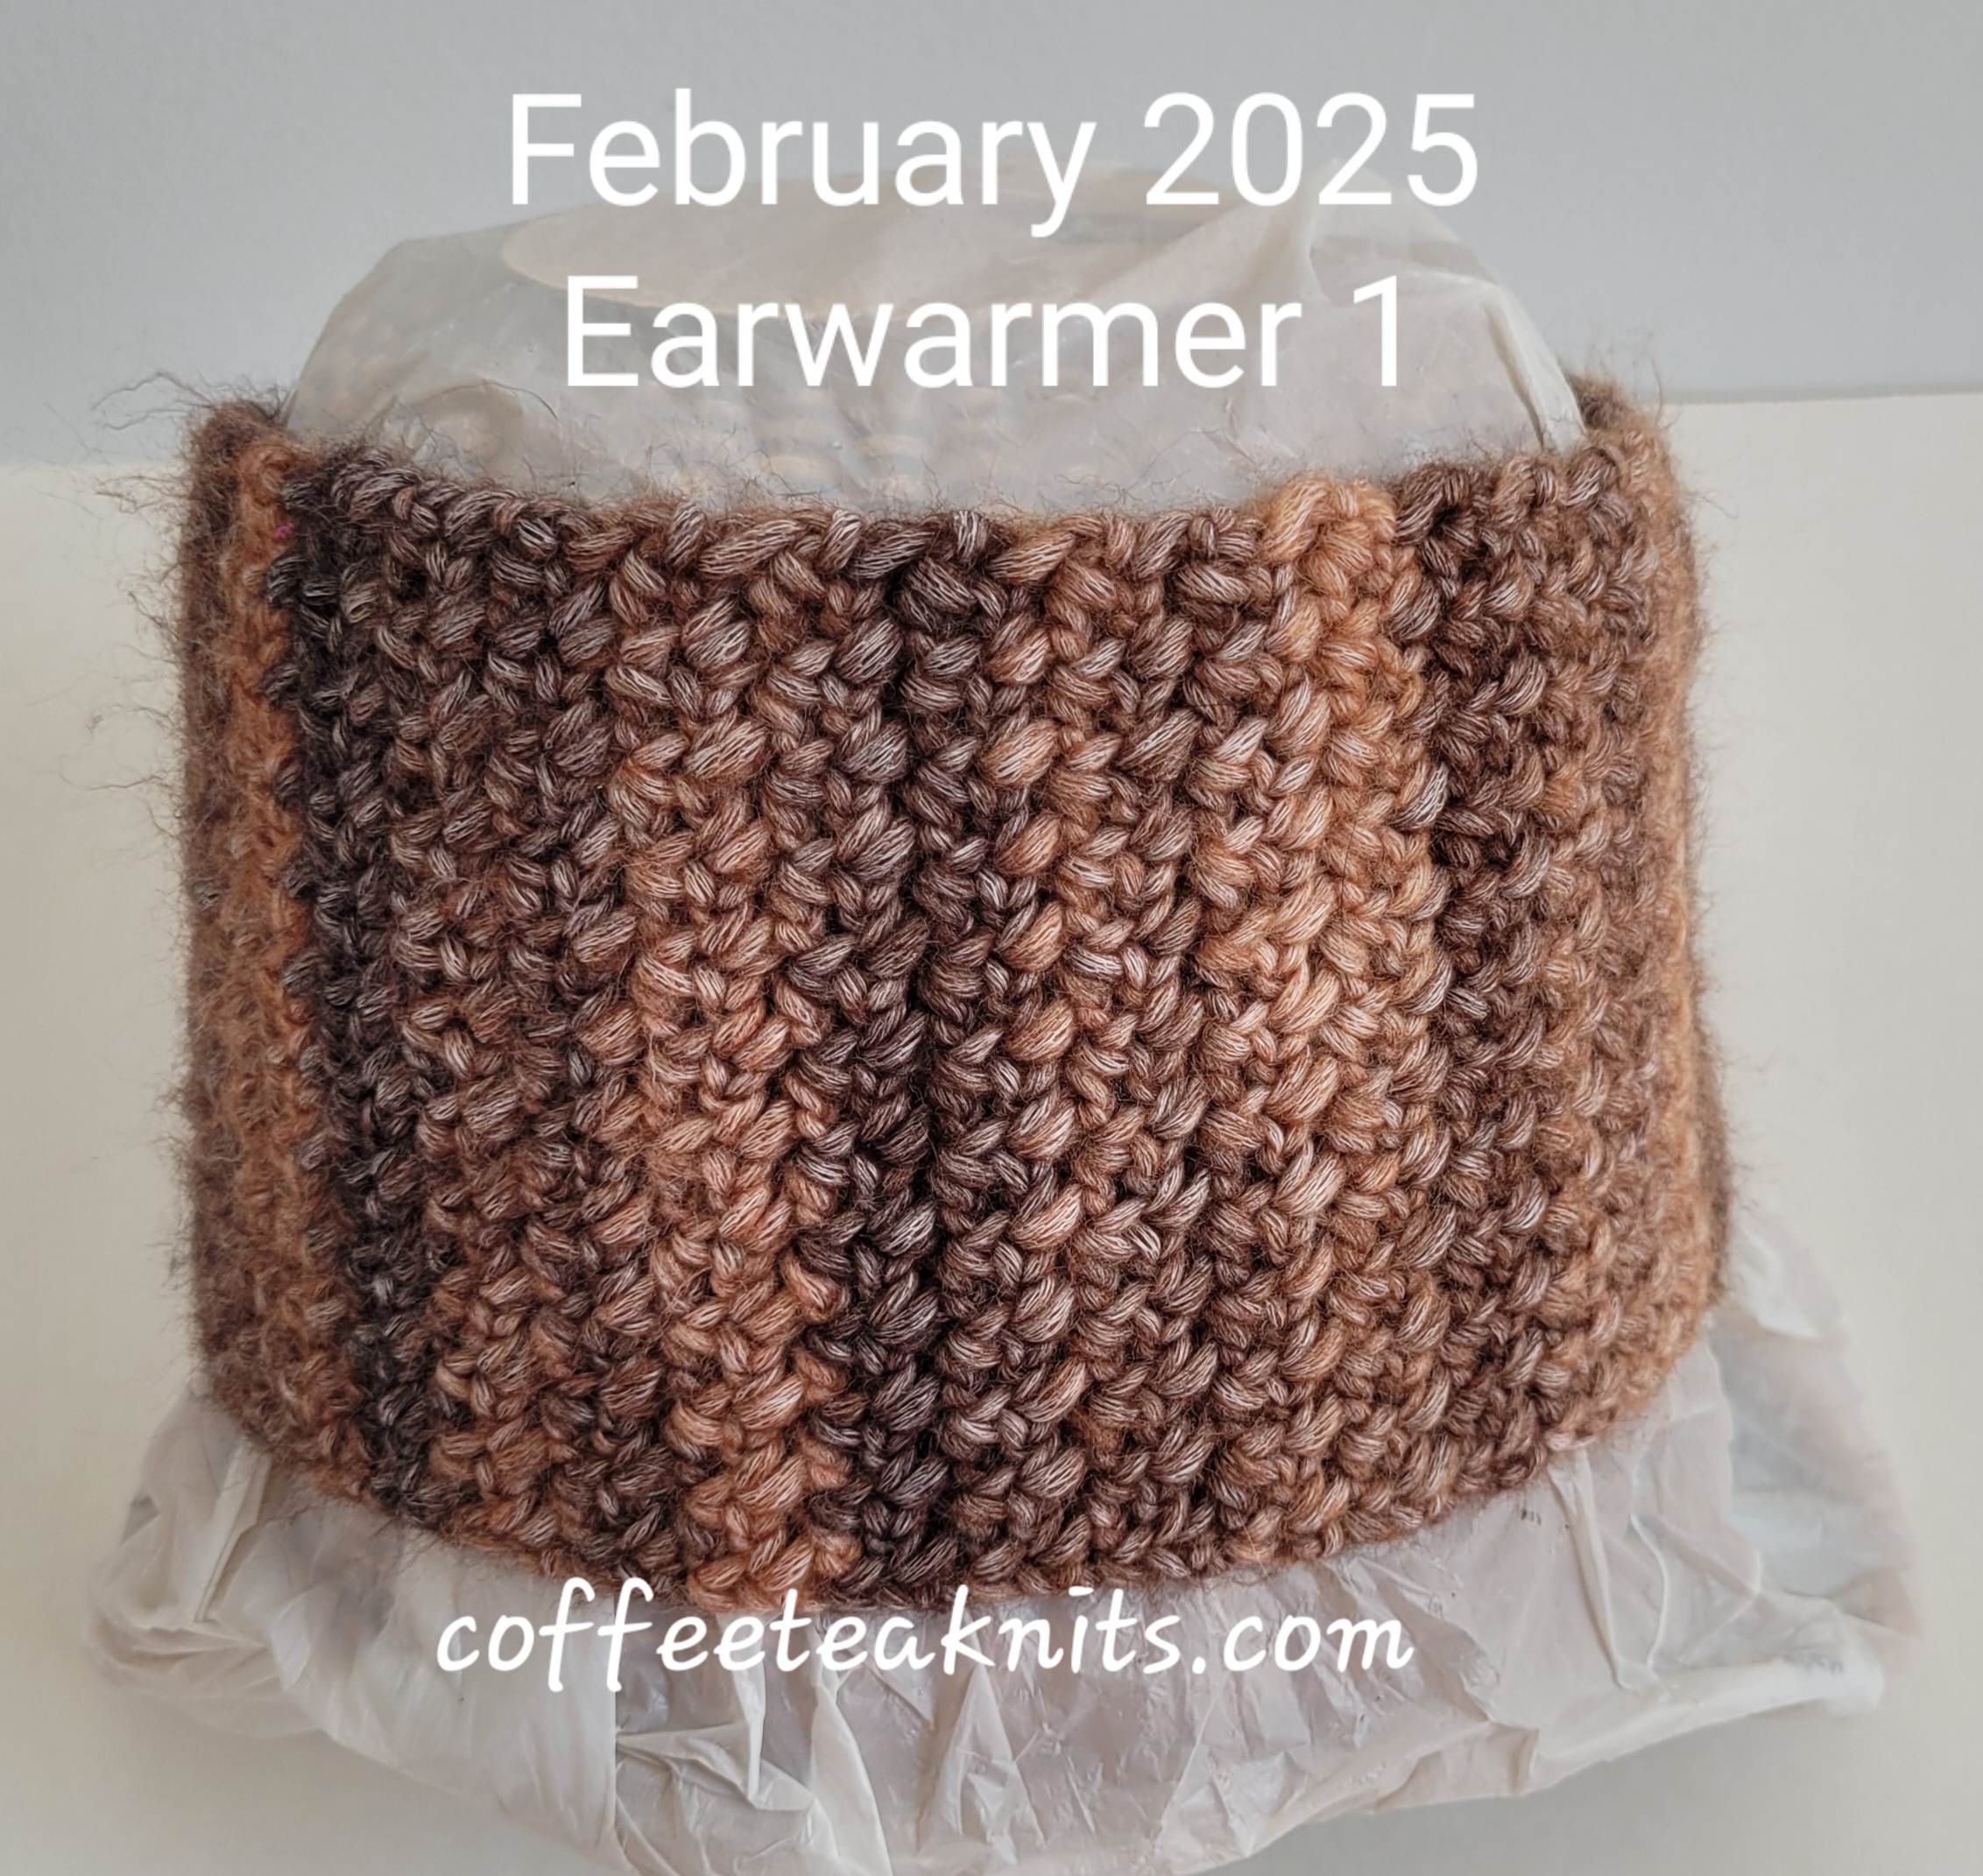
The February 2025 Earwarmer is crocheted flat and then the two ends are joined together with slip stitch crochet. The construction of this Earwarmer pattern is comparable to the “Goes with Everything Earwarmer” knitted version. It starts with a chain of eight stitches and ribbing. Then, it goes through a series of increases and length extension. It ends with a series of decreases and ribbing. The two ends are then joined together with a slip stitch crochet. A variation of the crochet moss stitch pattern is used for both earwarmers. February 2025 Earwarmer 1 is made with a cotton blend yarn and measures about 4.5 inches x 20 inches. February 2025 Earwarmer 2 is made with a merino wool blend yarn and measures about 4 inches x 19 inches.
The February 2025 Earwarmer Pattern
Materials Needed: Yarn: Earwarmer 1 – Caron Blossom Cakes® yarn in Colorway: Bark Yarn: Earwarmer 2 – Loops and Threads® Luxe Merino™ Wool Blend Colorway: Raindrops Gauge: 5.5 stitches per inch for Earwarmer 1 and 5.0 stitches per inch for Earwarmer 2 in the variation crochet moss stitch pattern Crochet hook: US size H-8 (5.00 mm) for February 2025 Earwarmer 1 and US size 7 (4.5 mm) for the February 2025 Earwarmer 2 Tapestry needle to weave in ends
Abbreviations: sc: single crochet (Tutorial Series: How to Single Crochet) scbl: single crochet in the back loop (insert crochet hook in the back strand of the stitch only) […]: pattern repeat Skill Level: Beginner friendly pattern with single crochet, single crochet in the back loop, and crochet slip stitch)
The February 2025 Earwarmer Pattern (text and images for personal use only)
The February 2025 Earwarmer pattern is made up of the following sections:
Foundation Chain
Ribbing
Increase
Length Extension
Decrease
Ribbing
Joining of the foundation row and the last (bind off) rows
Foundation Chain:
For February 2025 Earwarmer 1: Chain 8 stitches using crochet hook size H-8 (5.00 mm) For February 2025 Earwarmer 2: Chain 8 stitches using crochet hook size 7 (4.50 mm)
Foundation Chain Set up and Ribbing Section:
Row 1 (RS): Skip the first stitch, [single crochet the purl bump in the back the next stitch], repeat […] till the last stitch, sc the purl bump in the back of the last stitch (on the slip knot side), chain 1 and turn
Row 2 (WS): Skip the first stitch, sc under both strands of the next stitch, [scbl (single crochet in the back loop) in the next stitch], repeat […] till the last stitch, sc under both strands of the the last stitch, chain 1 and turn
Row 3 (RS): Repeat Row 2
Row 4 (WS): Repeat Row 2
Row 5: Repeat Row 2
Row 6: Repeat Row 2
Row 7: Repeat Row 2
Row 8: Repeat Row 2
Increase Section:
Row 9 (RS): Skip the first stitch and sc in the next stitch, chain 1 and sc again in the same stitch, chain 1, [skip a stitch, sc in the next next stitch, chain1], repeat […] till 2 stitches left, sc in the last stitch, chain 1, sc again in the same stitch, chain 1 and turn
Row 10 (WS): [Skip the first stitch, sc in the next stitch, chain 1], repeat […] till the last stitch, sc in the last stitch, chain 1 and turn – 12 stitches
Row 11 (RS): Repeat Row 9
Row 12 (WS): Repeat Row 10 – 16 stitches
Row 13 (RS): Repeat Row 9
Row 14 (WS): Repeat Row 10 – 20 stitches
Row 15 (RS): Repeat Row 9
Row 16 (WS): Repeat Row 10 – 24 stitches
Customization Option: Repeat Rows 9 and 10 to increase the number of stitches to preferred size
Length Extension Section:
Row 17 (RS): [Skip the first stitch and sc in the next stitch, chain 1], repeat […] till 2 stitches left, sc in the last stitch, chain 1, and turn
Row 18 (WS): Repeat Row 17
Repeat Rows 17 and 18 till preferred length reached. The length extension for Earwarmer 1 is about 12 inches and for Earwarmer 2 it’s almost 11.5 inches
Decrease Section:
Decrease Section Row 1 (RS): Skip the first stitch, insert crochet hook into the next stitch, yarn over and pull the loop under and through that stitch (there are 2 loops on the crochet hook), skip a stitch and insert hook in the next stitch (4th stitch from the beginning), yarn over and pull the loop under and through that stitch (three loops on the hook now), yarn over and pull loop through the three loops on the hook, chain 1, [skip a stitch, sc in the next stitch, chain 1], repeat […] till 4 stitches left, insert crochet hook into the next stitch, yarn over and pull the loop under and through that stitch (there are 2 loops on the crochet hook), skip a stitch and insert hook in the last stitch, yarn over and pull the loop under and through that stitch (three loops on the hook), yarn over and pull loop through the three loops on the hook, chain 1 and turn
Decrease Section Row 2 (WS): [Skip the first stitch and sc in the next stitch, chain 1], repeat […] till 2 stitches left, sc in the last stitch, chain 1, and turn – 20 stitches left
Customization Option: Repeat Decrease Section Rows 1 and 2 if there are more than 24 stitches
Ribbing Section:
Decrease Section Row 9 (RS): Skip the first stitch, sc under both strands of the next stitch, [scbl (single crochet in the back loop) in the next stitch], repeat […] till the last stitch, sc under both strands of the the last stitch, chain 1 and turn
Crochet Slip Stitch Join of the Last (Bind-off) and the Foundation Rows:
The earwarmer pattern is reversible so either sides can be used for joining. As in the image above, insert the crochet hook into the first stitch of the foundation row first, then insert it into the last stitch of the last (bind off) row, yarn over and pull the loop through both stitches for a slip stitch join, repeat to the last stitches of both ends and pull yarn through (see video below)
The joined foundation and last row of the earwarmers:
Weave in the ends, wash and block the February 2025 Earwarmers
Comment below if you also find knitting and crocheting therapeutic?
The Light Unexpected Find Wrap pattern is mostly based on the The Unexpected Find Wrap Pattern. The Light Unexpected Find Wrap is also a triangular shaped shawl. It is knit bottom up. The shawl features a two row repeat brioche honeycomb stitch pattern. However, nine stitches instead of seven are cast on for this shawl. It is also knit with a merino wool blend DK weight yarn (Loops and Threads® Luxe Merino™ Wool Blend). This yarn is lighter yet warm, making it suitable for this winter season. The yarn is also budget friendly and can be purchased at Michaels store.
The Light Unexpected Find Wrap Pattern (text and images for personal use only)
Pfb: Purl front and back – purl one stitch first in the front and then purl the same stitch in the back before slipping it off the left needle (Tutorial Series: Pfb (Purl front and back))
yo backward: for bind off only – knit one stitch then wrap the working yarn anticlockwise over and under the right hand knitting needle bringing the yarn to the back before knitting the next stitch
[Repeat Rows 14 and 15] until you have 175 stitches on the needle. End with the RS side row. You can continue with the row repeats till preferred length is reached.
Bind Off Row (WS): K1, yo backward, K1, pass the yo and first knit stitch on the right hand needle over the second knit stitch on the right hand needle. (Several video tutorials for other stretchy bind off are available on YouTube). I used Jeny’s Surprisingly Stretchy Bind-Off method in knit stitch pattern for binding off this wrap.
Weave in the ends, wash and block The Light Unexpected Find Wrap
The Thumb method cast-on is a commonly used long tail cast-on technique. A long tail of yarn is set aside on one side of the slip knot. The working yarn is on the other side of the slip knot. The thumb is used to form the loop that is used to make a new stitch on the knitting needle. Another example of a long tail cast-on technique is the slingshot method. In this method, the thumb and the index finger create a new stitch. The thumb method is beginner-friendly and a quick cast-on method. I use the thumb method cast-on mostly for knitting projects with few stitches (dishcloths, etc.). The written instructions and video below on how to do the thumb method cast-on are shown for right-handed knitting.
The Thumb Method Cast-On:
The Steps for the Thumb Method Cast-On:
Make a slip knot (Tutorial Series: How to Slip Knot) with a yarn tail that will be enough for the number of stitches for a specific knitting project
Insert the slip knot onto a knitting needle
Holding the yarn tail with some tension in the left fist, wrap the left thumb under and over the yarn tail to make a loop
Insert the right hand needle into the front strand of the loop on the thumb
Bring the working yarn around the top of the right needle and wrap it between the thumb and the right knitting needle
Catch and pick up the working yarn loop (a new stitch) with the right needle
Repeat Steps 3 – 6 to cast-on the required number of stitches needed for a knitting project
Since July 2020, I have created and shared 44 knitting and crochet patterns. I am grateful for the support and feedback from the knitting and crochet community, which has inspired and motivated me. I look forward to sharing more patterns in the future.
Coffee Tea Knits is returning in September with new video tutorials, blog posts, and a collection of free knitting patterns for all skill levels. Stay tuned for updates as we explore the world of yarn and needles together.