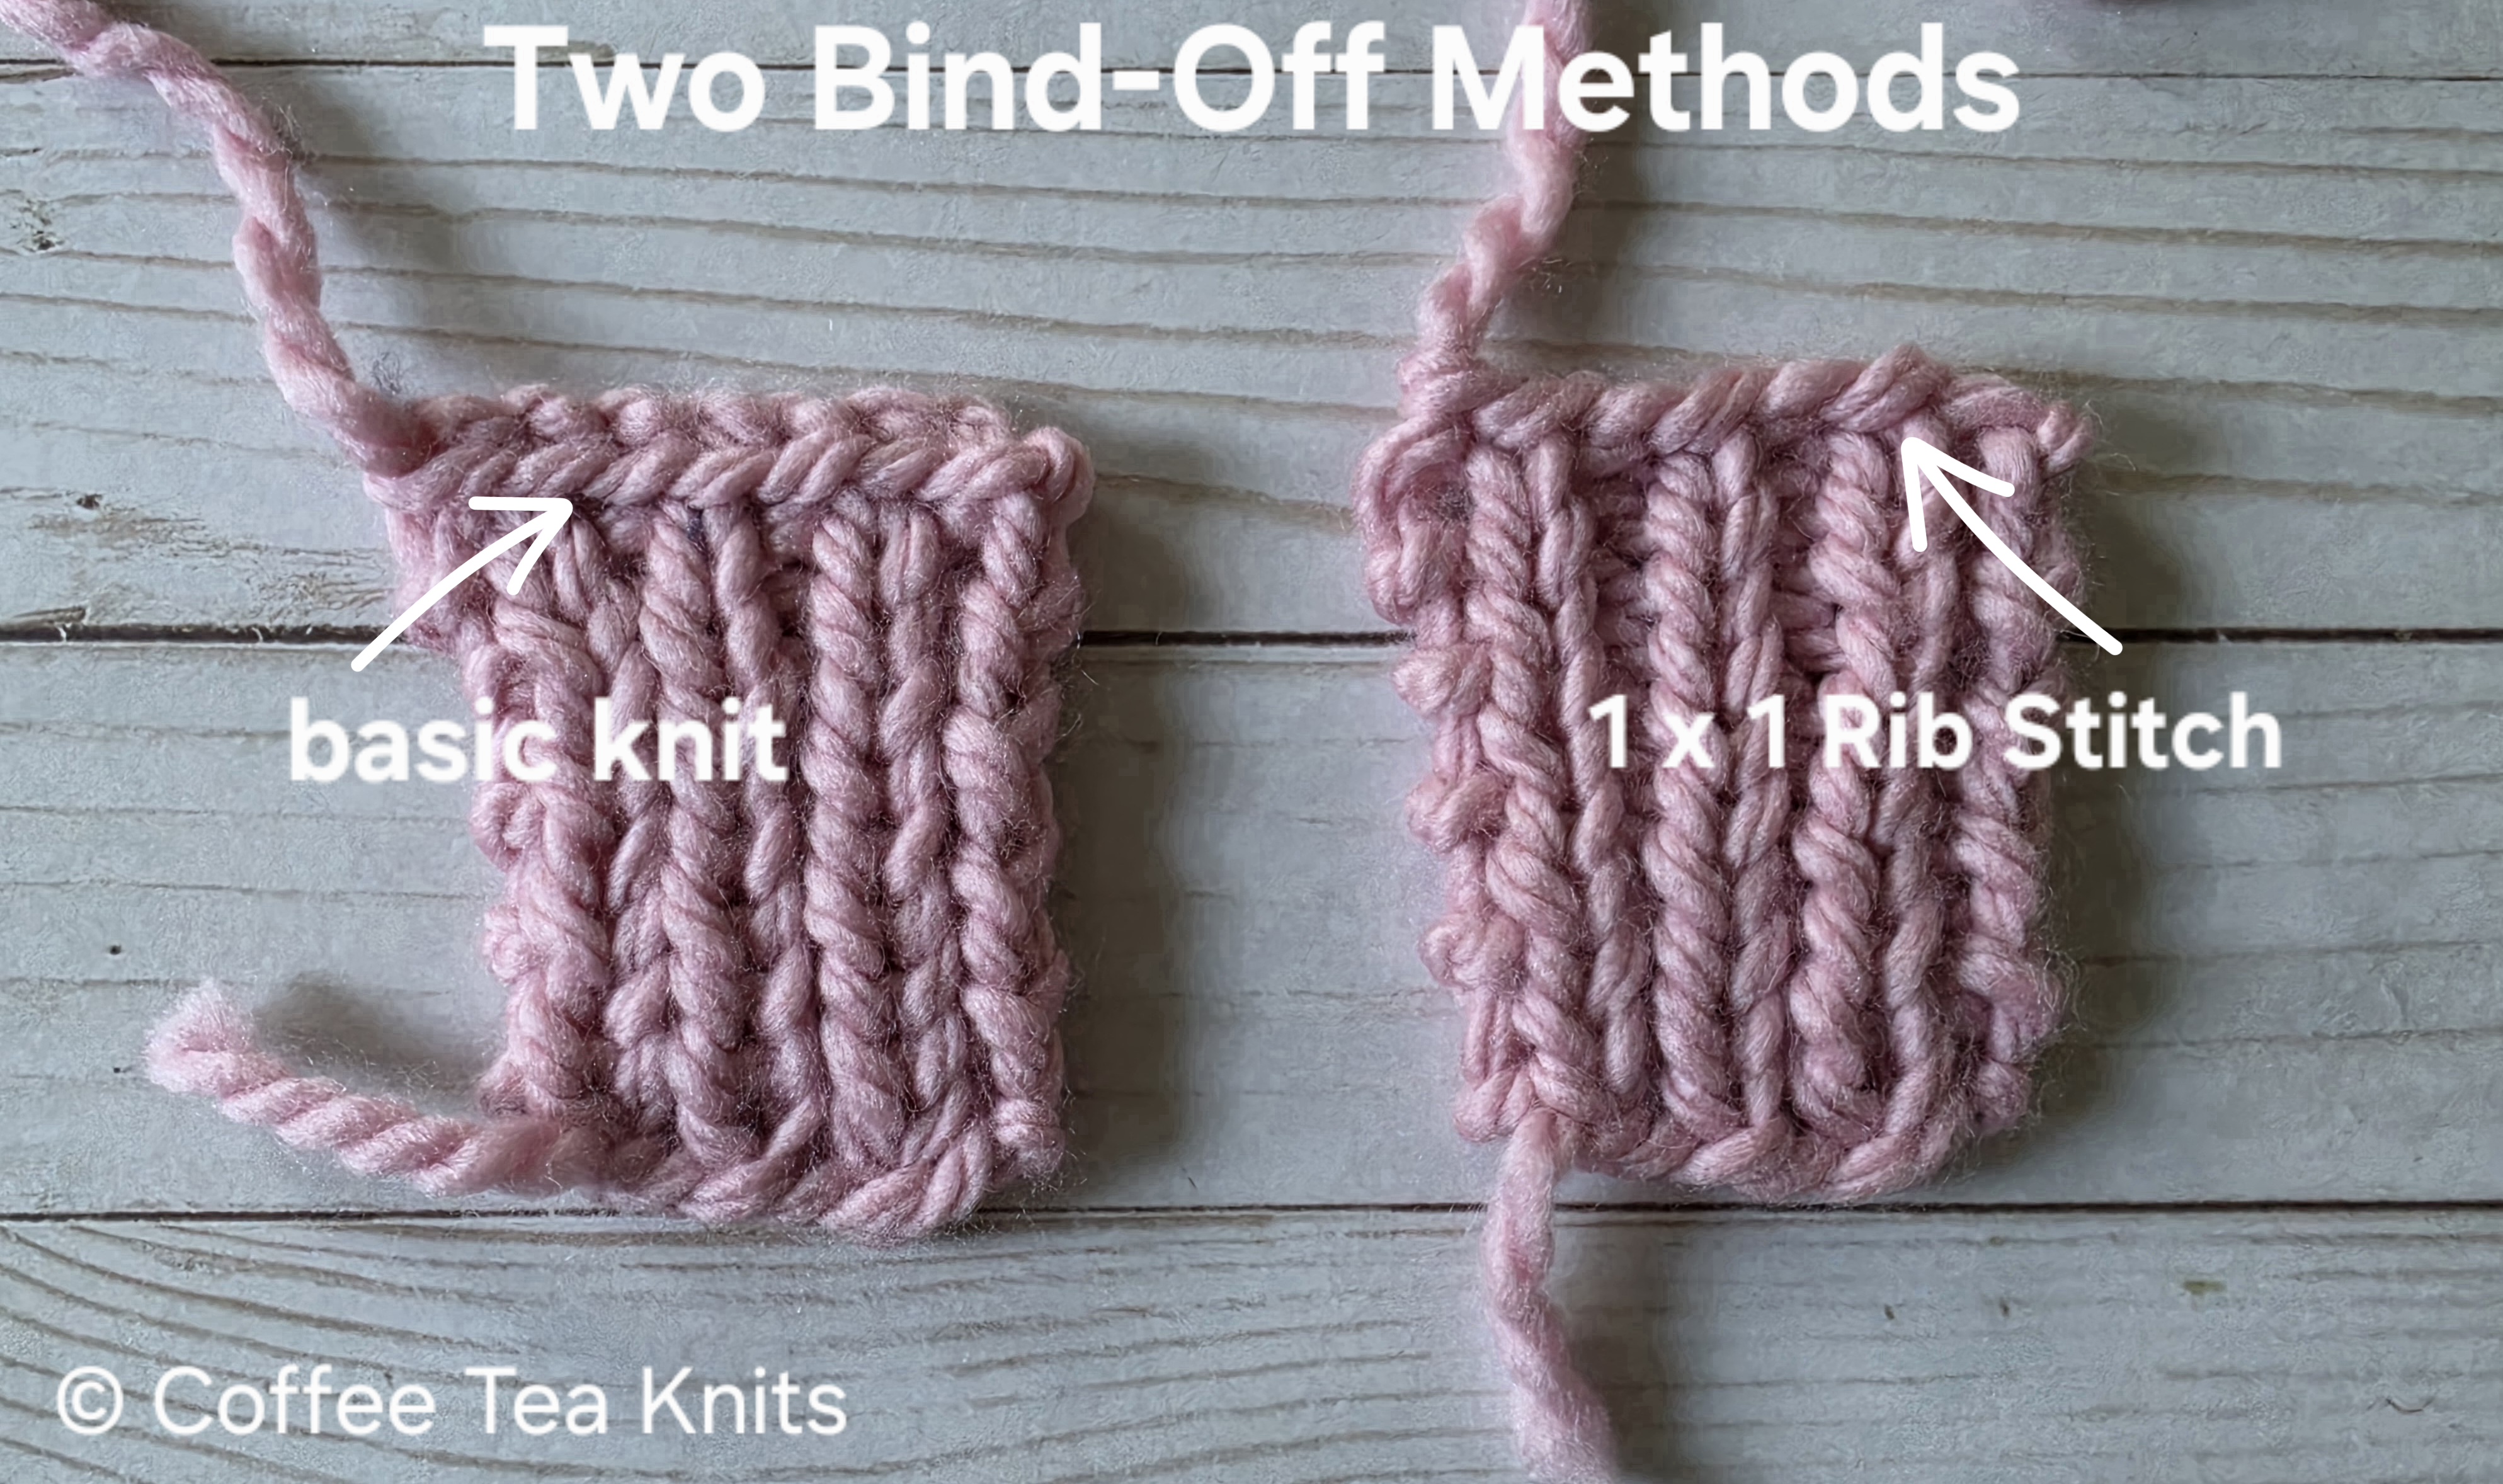
There are several ways to bind off in knitting. The bind-off row technique is after the last row of a knitting project. This technique secures the loops that are on the knitting needle so they don’t unravel at the end of a knitting project. There is the basic knit bind-off (Tutorial Series: The Basic Knit Bind Off), the crochet bind-off, the three needle bind-off, the sewn bind-off, the I-cord bind-off etc. as well as the 1 x 1 rib stitch bind-off.
The 1 x 1 Rib Stitch (Tutorial Series: 1 x 1 Rib Stitch) bind-off method looks different and is stretchier than the regular knit stitch bind-off, making it an excellent choice for maintaining the elasticity of your project. It is the preferred bind-off technique for 1 x 1 ribbing knitting patterns, as it seamlessly blends with the stitch pattern, allowing the ribbing to maintain its characteristic stretch and texture. I have used this bind-off technique in The Increasing and Decreasing Cowl pattern, where it provides a polished look while ensuring the cowl fits comfortably around the neck. This method has become a go-to in my knitting repertoire, especially for the 1 x 1 ribbing patterns in sweaters and hats.
The image below shows the two bind-off methods.
The video and written instructions below on how to knit the 1 x 1 Rib Stitch Bind-off is for right-hand knitting.
The 1 x 1 Rib Stitch Bind-Off:
Written Steps for the 1 x 1 Rib Stitch Bind-off:
- At the beginning of the bind-off row, knit (Tutorial Series: Knit and Tink) the first stitch on the left knitting needle and place the new stitch on the right knitting needle
- Purl (Tutorial Series: Purl and Un-Purl) the next stitch on the left knitting needle and place the new stitch on the right knitting needle
- There are two stitches on the right knitting needle
- Move the working yarn back of the work
- Insert the left knitting needle into the front loop of the first stitch on the right knitting needle
- Pull and lift the first stitch with the left knitting needle and pass it over the second stitch on the right knitting needle
- One stitch remains on the right knitting needle
- Knit the next stitch on the left knitting needle and place it on the right knitting needle
- There are two stitches on the right knitting needle
- Insert the left knitting needle into the front loop of the first stitch on the right knitting needle
- Pull and lift the first stitch with the left knitting needle and pass it over the second stitch on the right knitting needle
- One stitch remains on the right knitting needle
- Repeat Steps 2 to 7
- Repeat Steps 8 to 13 to the end of the bind-off row and one remaining stitch
- Cut yarn and pull through the remaining stitch on the right knitting needle
~coffeeteaknits.com
© Coffee Tea Knits, LLC. All text and images for personal use only. All Rights Reserved.

