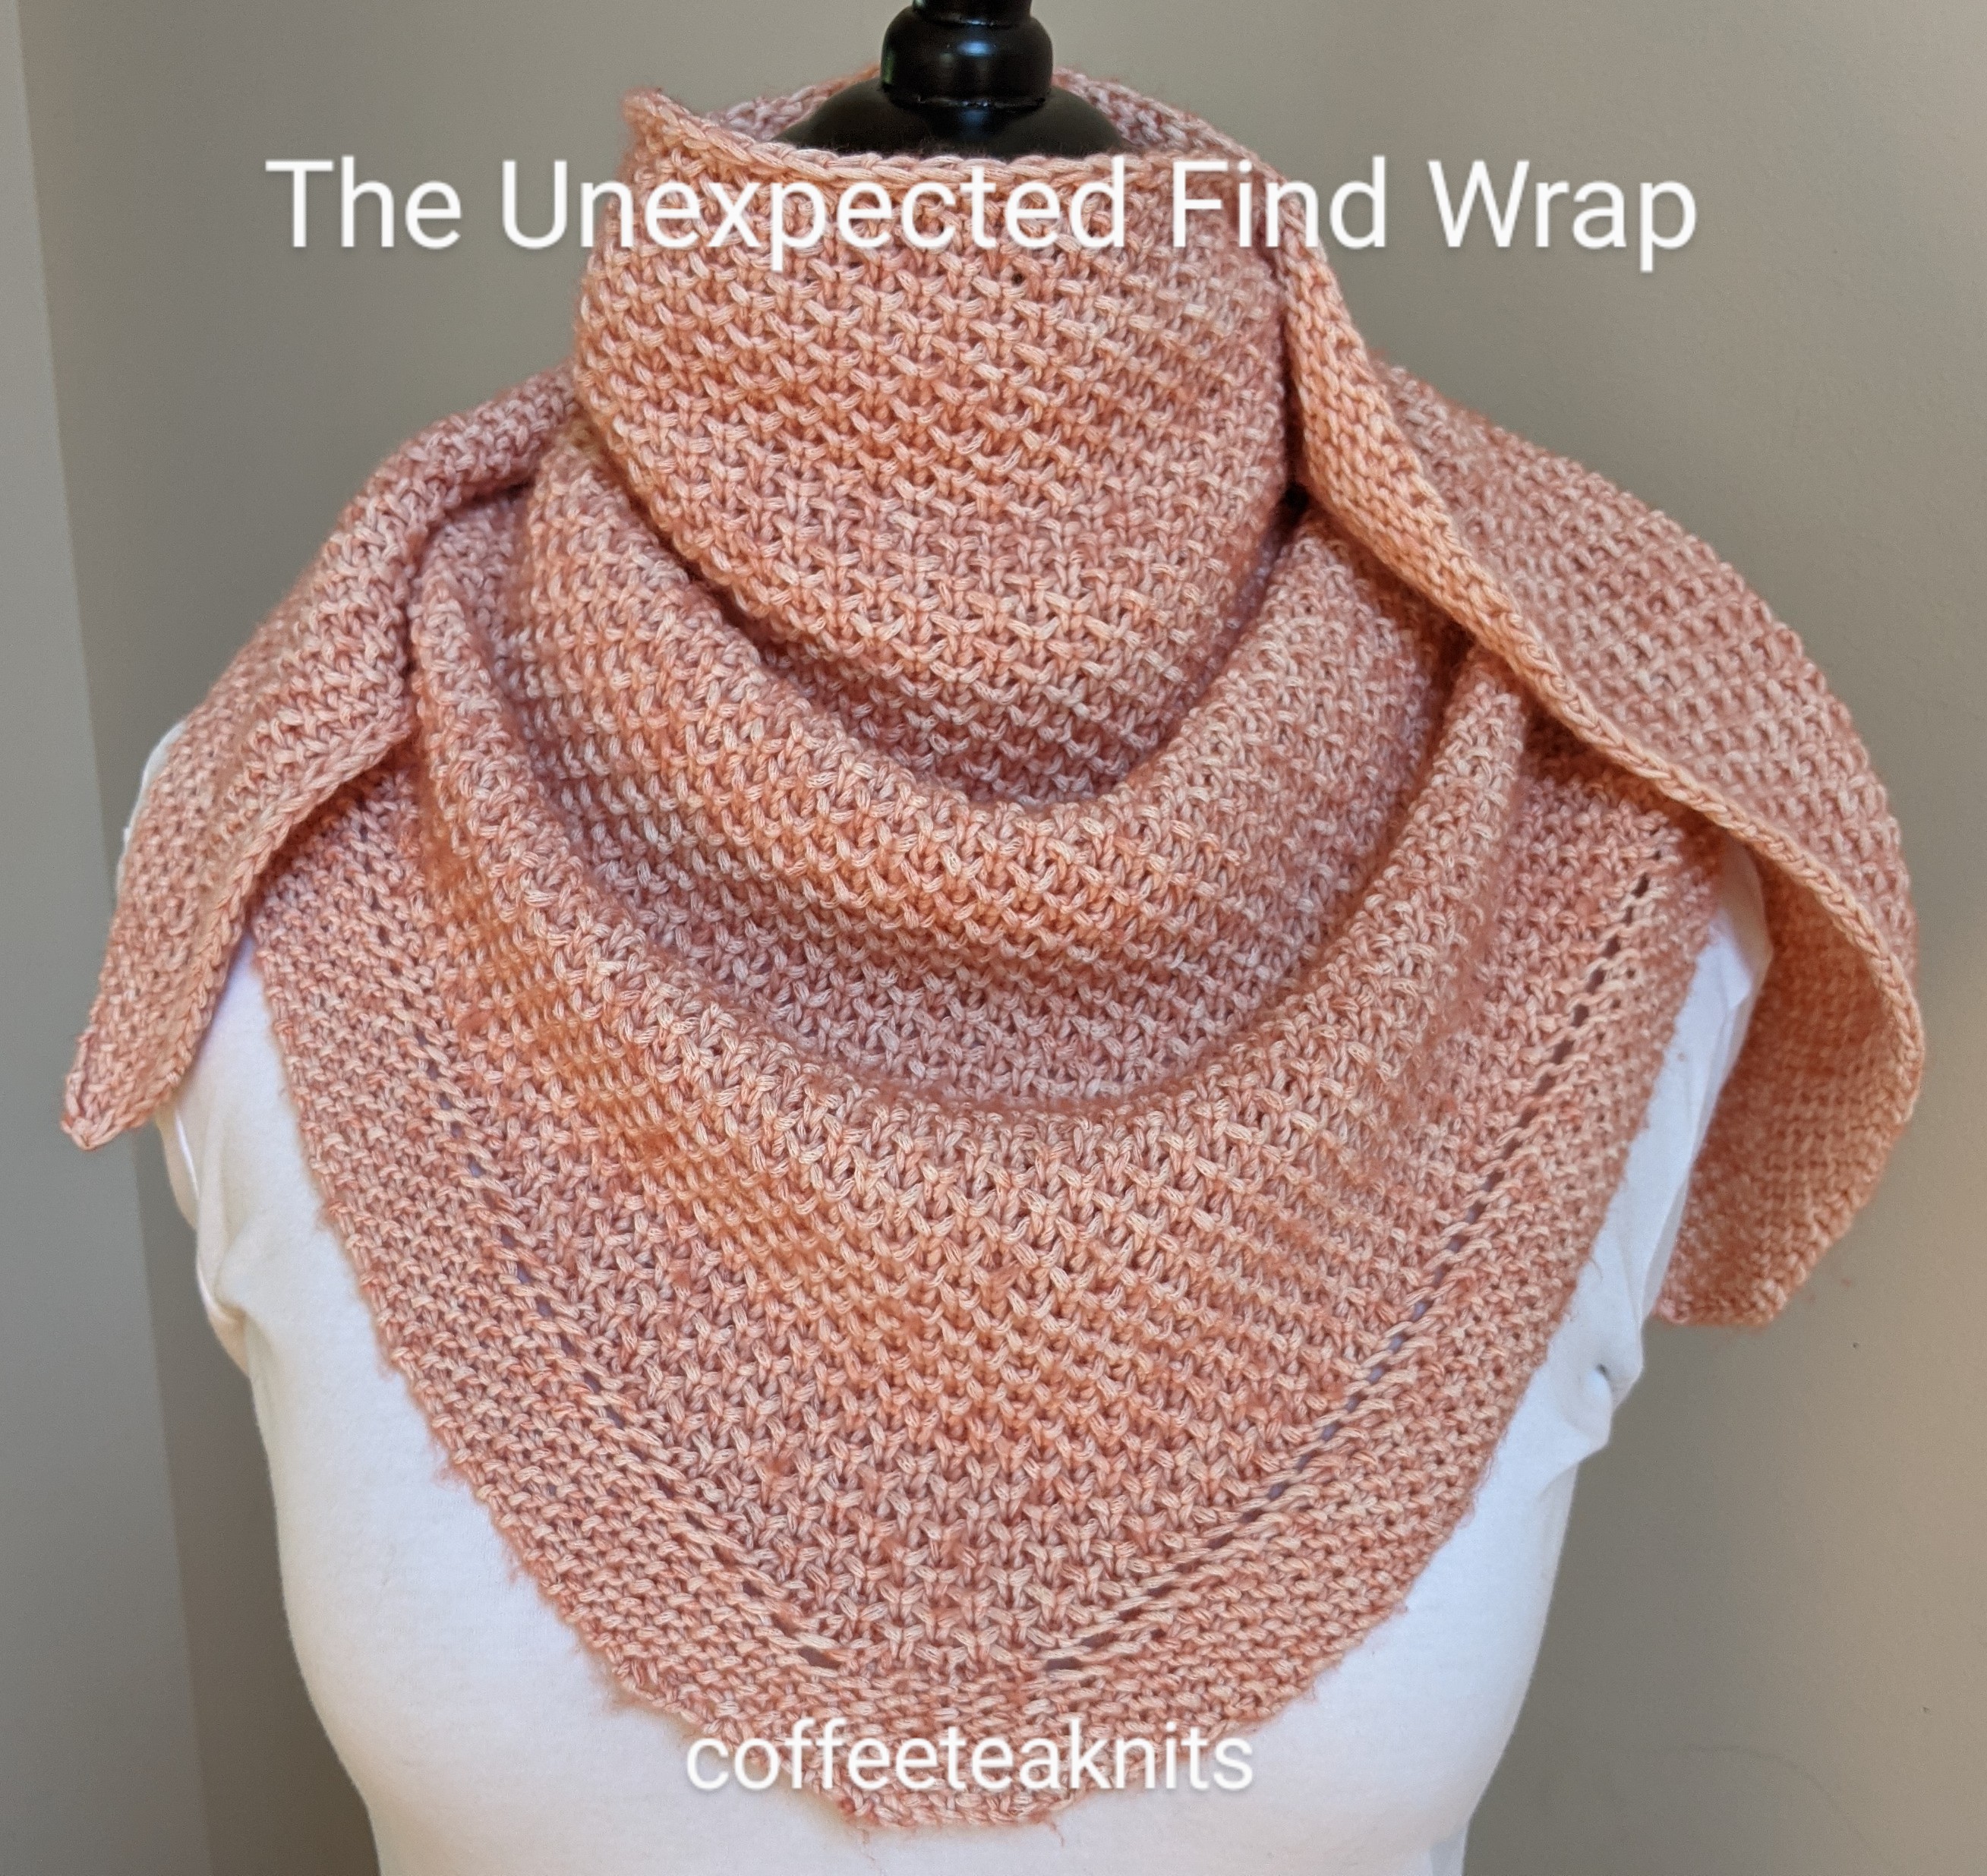
The many different shapes in which shawls or wraps are knitted can be a lesson in geometry. Shawls can be rectangular, squares, circular, triangular or several combinations and variations of these shapes. So, it was inevitable that after knitting several rectangle wraps, square blankets and dishcloths I would dabble in triangular shaped shawl design. Triangular shawls, similar to other shaped shawls, can be knit in several different ways. They can be knit sideways, top down (like the The Sheltering Tree Shawlette), or bottom up like this Unexpected Find Wrap.
Advertisements
The Unexpected Find Wrap pattern is a simple triangular shaped shawl knit bottom up with a two row repeat brioche honeycomb stitch pattern. I happened upon the yarn for this wrap at Joann Fabric and Craft Store. I wasn’t looking for this yarn but once I saw it, I just couldn’t walk away without purchasing it. After casting on a few stitches, the wrap is increased two stitches every other row till the preferred length is reached. This cotton blend wrap is great for those cool summer evenings and also for those overly air conditioned places.
Advertisements
Materials Needed: Yarn: K + C Element Yarn (50 grams each) in Colorway: Pink (Any other worsted weight cotton or cotton blend yarn can be substituted for this yarn) Knitting Needles: US #8 circular needle Gauge: 14 stitches/ 4 inches after blocking
Advertisements
The Unexpected Find Wrap Pattern (text and image for personal use only)
PLEASE SUBSCRIBE FOR THE FREE PATTERN. THANK YOU
Subscribe to continue reading
Subscribe to get access to the rest of this post and other subscriber-only content.
The Yarn Over Washcloth is knit corner to corner with a two row slip stitch pattern. Two stitches are increased every other row and then two stitches are decreased every other row. The washcloth has yarn overs all around between the stitch pattern and the border edge stitches. One stitch is cast on and through a series of increases and decreases this washcloth is worked in one piece ending with a two stitch I-cord hanging loop.
Yarn: Lily Sugar’n Cream in Colorways: Soft Ecru and Butter Cream Ombre Knitting Needles: US #7 circular needle Gauge: Not needed for this project Abbreviations:
K: Knit
P: Purl
RS: right side
WS: wrong side
Kfb: Knit front and back (knit one stitch first in the front and then knit the same stitch in the back before slipping it off the left needle) – 1 stitch increase
K2tog: Knit two stitches together on the left needle – 1 stitch decrease
ssk (left-slanting decrease): slip slip knit (slip 2 stitches to right hand needle then insert the left needle in front of the two slipped stitches and knit them together) – 1 stitch increase
rsd (right-slanting decrease): knit 1 stitch, slip one stitch knitwise, return the slipped stitch and the knitted stitch back to the left needle, pass the slipped stitch over the knitted stitch and then return the knitted stitch back to the right needle – 1 stitch decrease
sk2p (left-slanting double decrease): slip the next stitch knitwise, k2tog the next two stitches, then pass the slipped stitch over the decreased stitch – 2 stitch decrease
rsdd (right-slanting double decrease): slip one stitch knitwise and knit the next stitch. Pass the slipped stitch over the knit stitch. Return this decreased knit stitch back to the left needle and pass the second stitch on the left needle over the decreased stitch. Transfer the decreased stitch back to the right needle – 2 stitch decrease
pm: place marker
rm: remove marker
sm: slip marker
wyif S1: with yarn in front slip one stitch purlwise, wrap the working yarn around the front of the slipped stitch and move the yarn to the back
yo: yarn over – knit one stitch and then bring the working yarn over the right needle before knitting the next stitch (1 stitch increase)
The Yarn Over Washcloth (text and images for personal use)
Cast on 1 stitch with US #7 circular needle
Row 1 (RS): Kfb
Row 2 (WS): K2
Row 3: Kfb, Kfb
Row 4: K4
Row 5: Kfb, K2, Kfb
Row 6: K6
Row 7: Kfb, K4, Kfb
Row 8: K8
Row 9: Kfb, K6, Kfb
Row 10: K4, pm, K2, pm, K4
Row 11: K4, sm, yo, K2, yo, sm, K4
Row 12: K4, sm, K1, p2, K1, sm, K4
Row 13: K4, sm, yo, K1, [K1, wyif S1 then move yarn to the back] to 1 stitch before marker, K1, yo, sm, K4
Row 14: K4, sm, K1, purl till 1 stitch before marker, K1, sm, K4
Repeat rows 13 and 14 [repeat section] till 48 stitches on the needle.
Double Decreases:
Row 1 (RS): K4, sm, yo, sk2p, [K1, wyif S1 then move yarn to the back] till 3 stitches before marker, rsdd, yo, sm, K4
Row 2 (WS): K4, sm, K1, purl till 1 stitch before marker, K1, sm, K4
Repeat these two rows till 14 stitches left on the needle.
Row 1 (RS): ssk, knit to 2 stiches before end of the row removing markers, rsd
Row 2 (WS): K10
Repeat Rows 1 and 2 till 4 stitches left on the needle.
Row (RS): ssk, rsd (2 stitches left on the needle)
Make an I-cord hanging loop (about 10 to 12 rows) with the 2 stitches on the needle (several tutorials on knitting I-cord are available on YouTube) and bind off.
Attach the I-cord bind off end to the wrong side of the washcloth and weave in ends.
The Sheltering Tree Shawlette is knit with Urth Yarns that I purchased a few years back. Urth Yarns have partnered with Trees for the Future to plant trees for a positive impact as stated in their label below:
Advertisements
Advertisements
The Sheltering Tree Shawlette (text and images for personal use only)
PLEASE SUBSCRIBE FOR THE FREE PATTERN. THANK YOU
Subscribe to continue reading
Subscribe to get access to the rest of this post and other subscriber-only content.
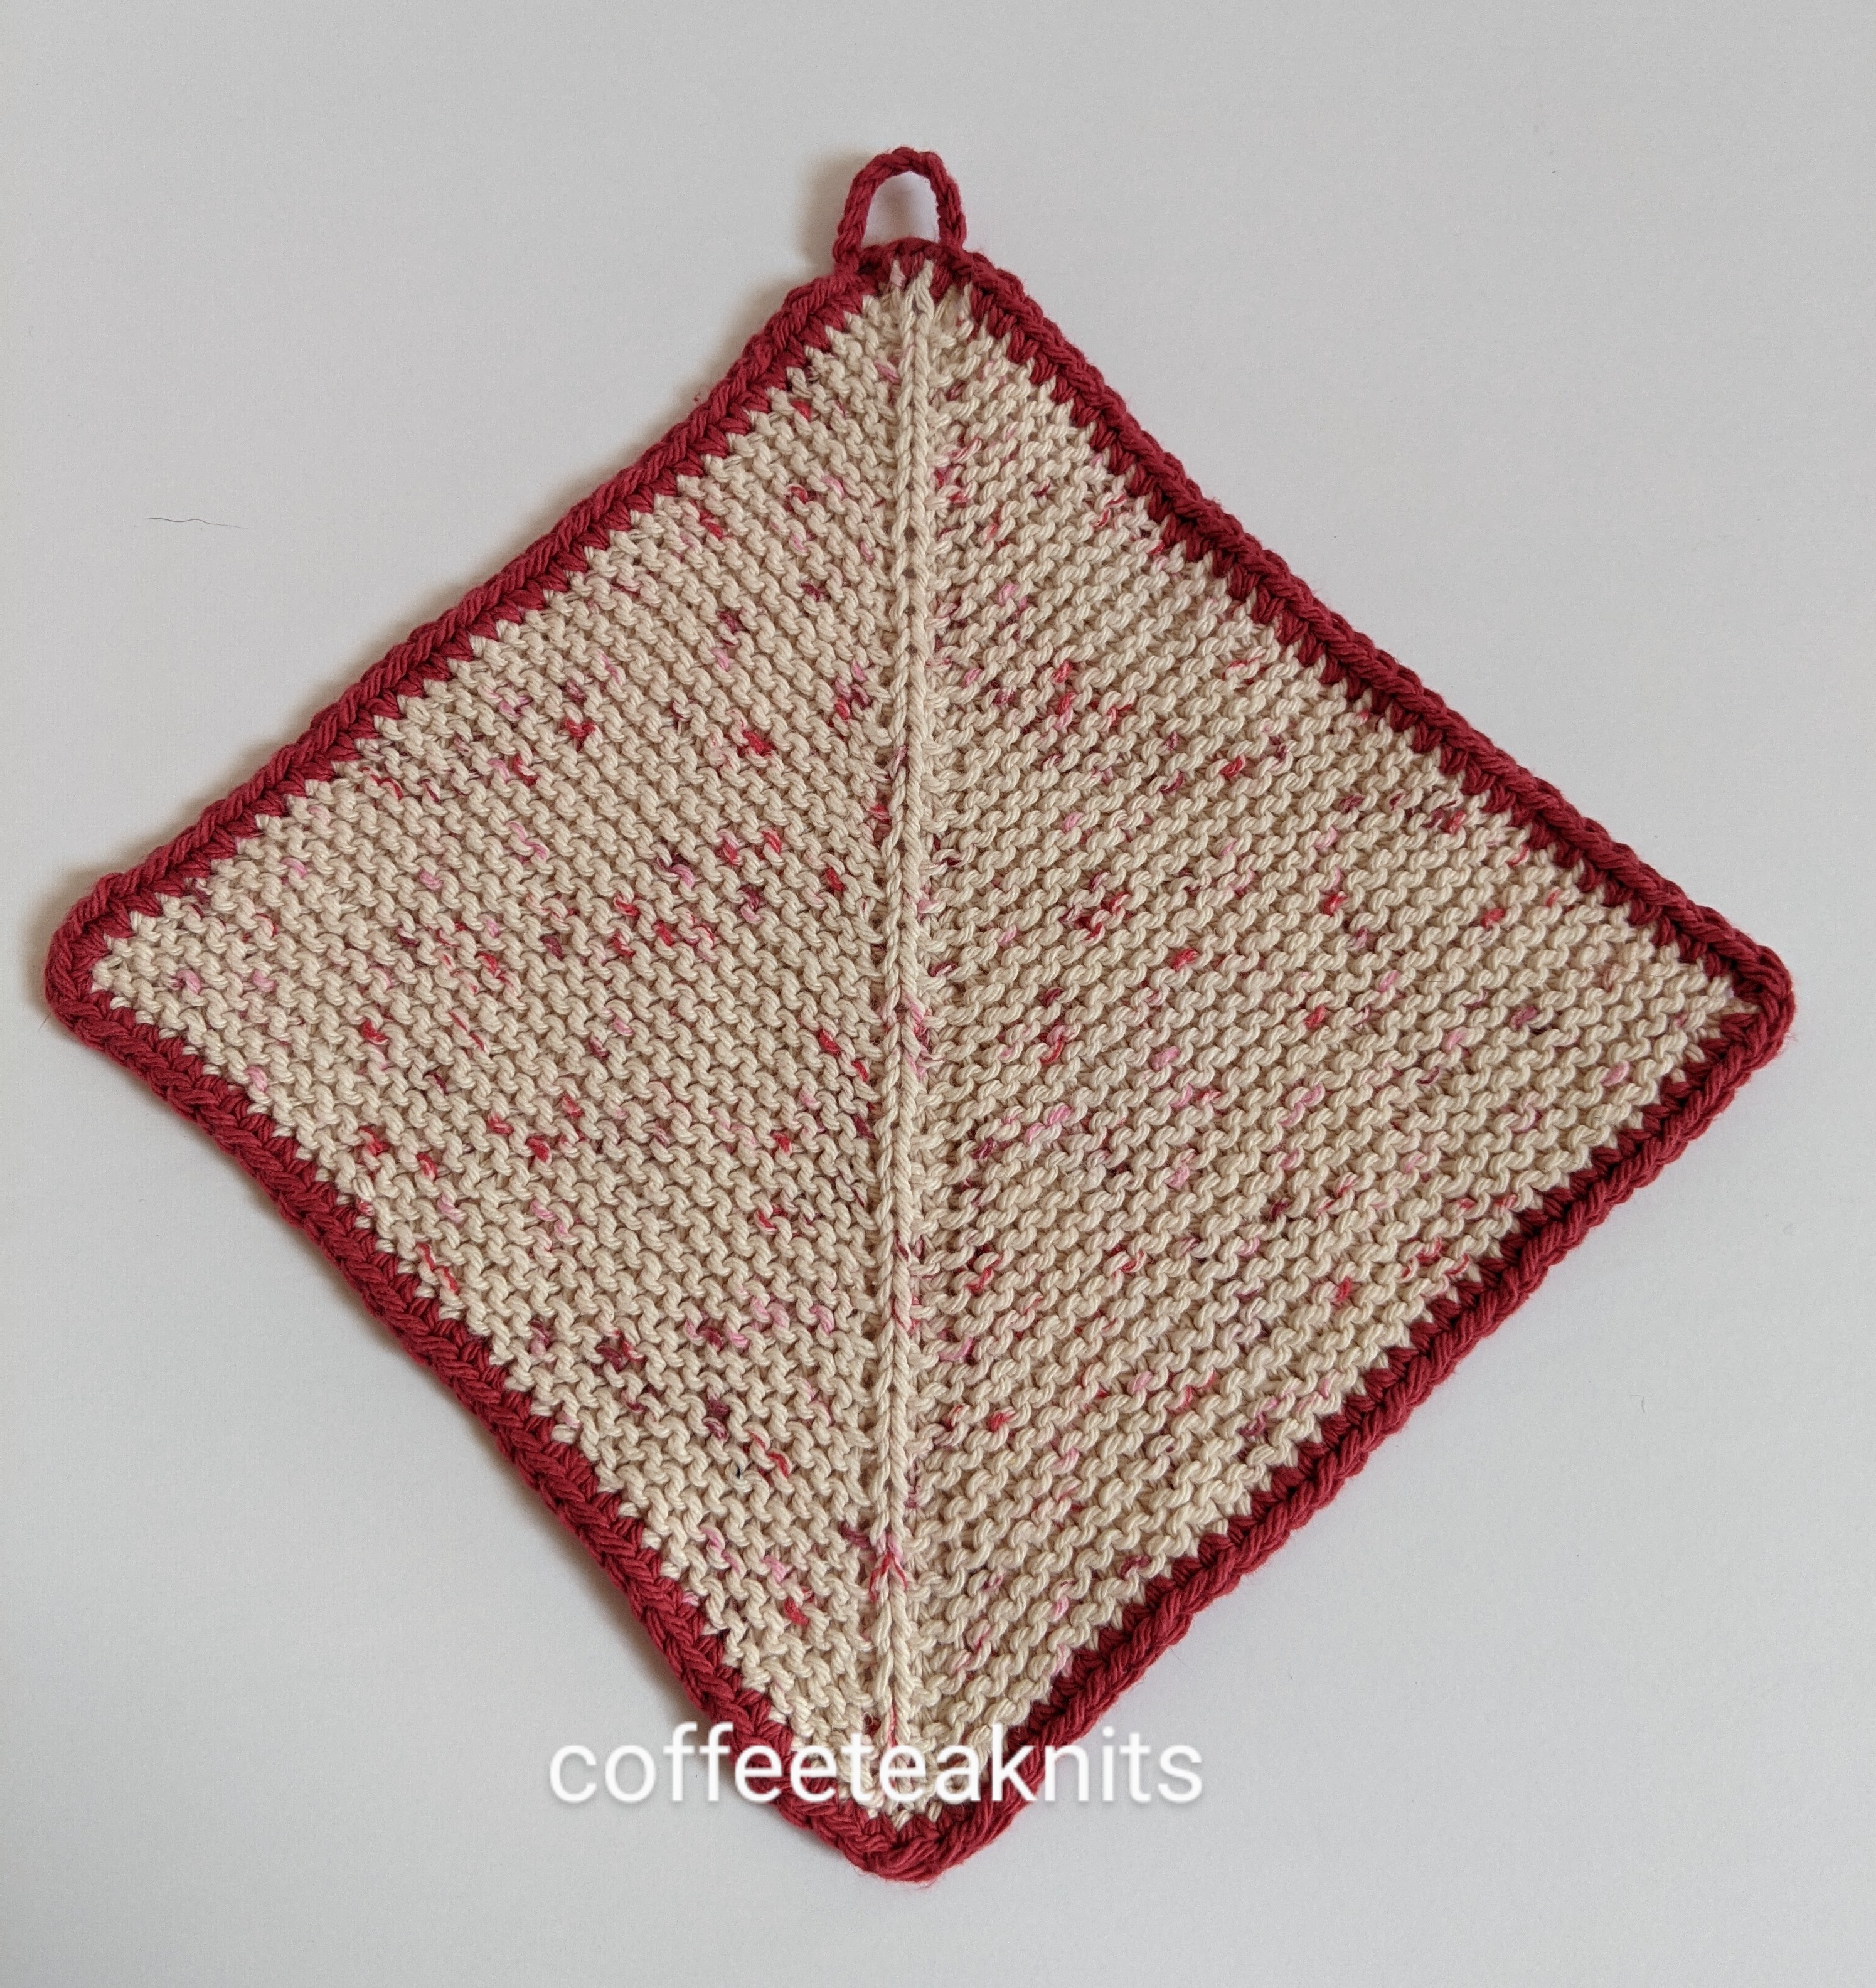
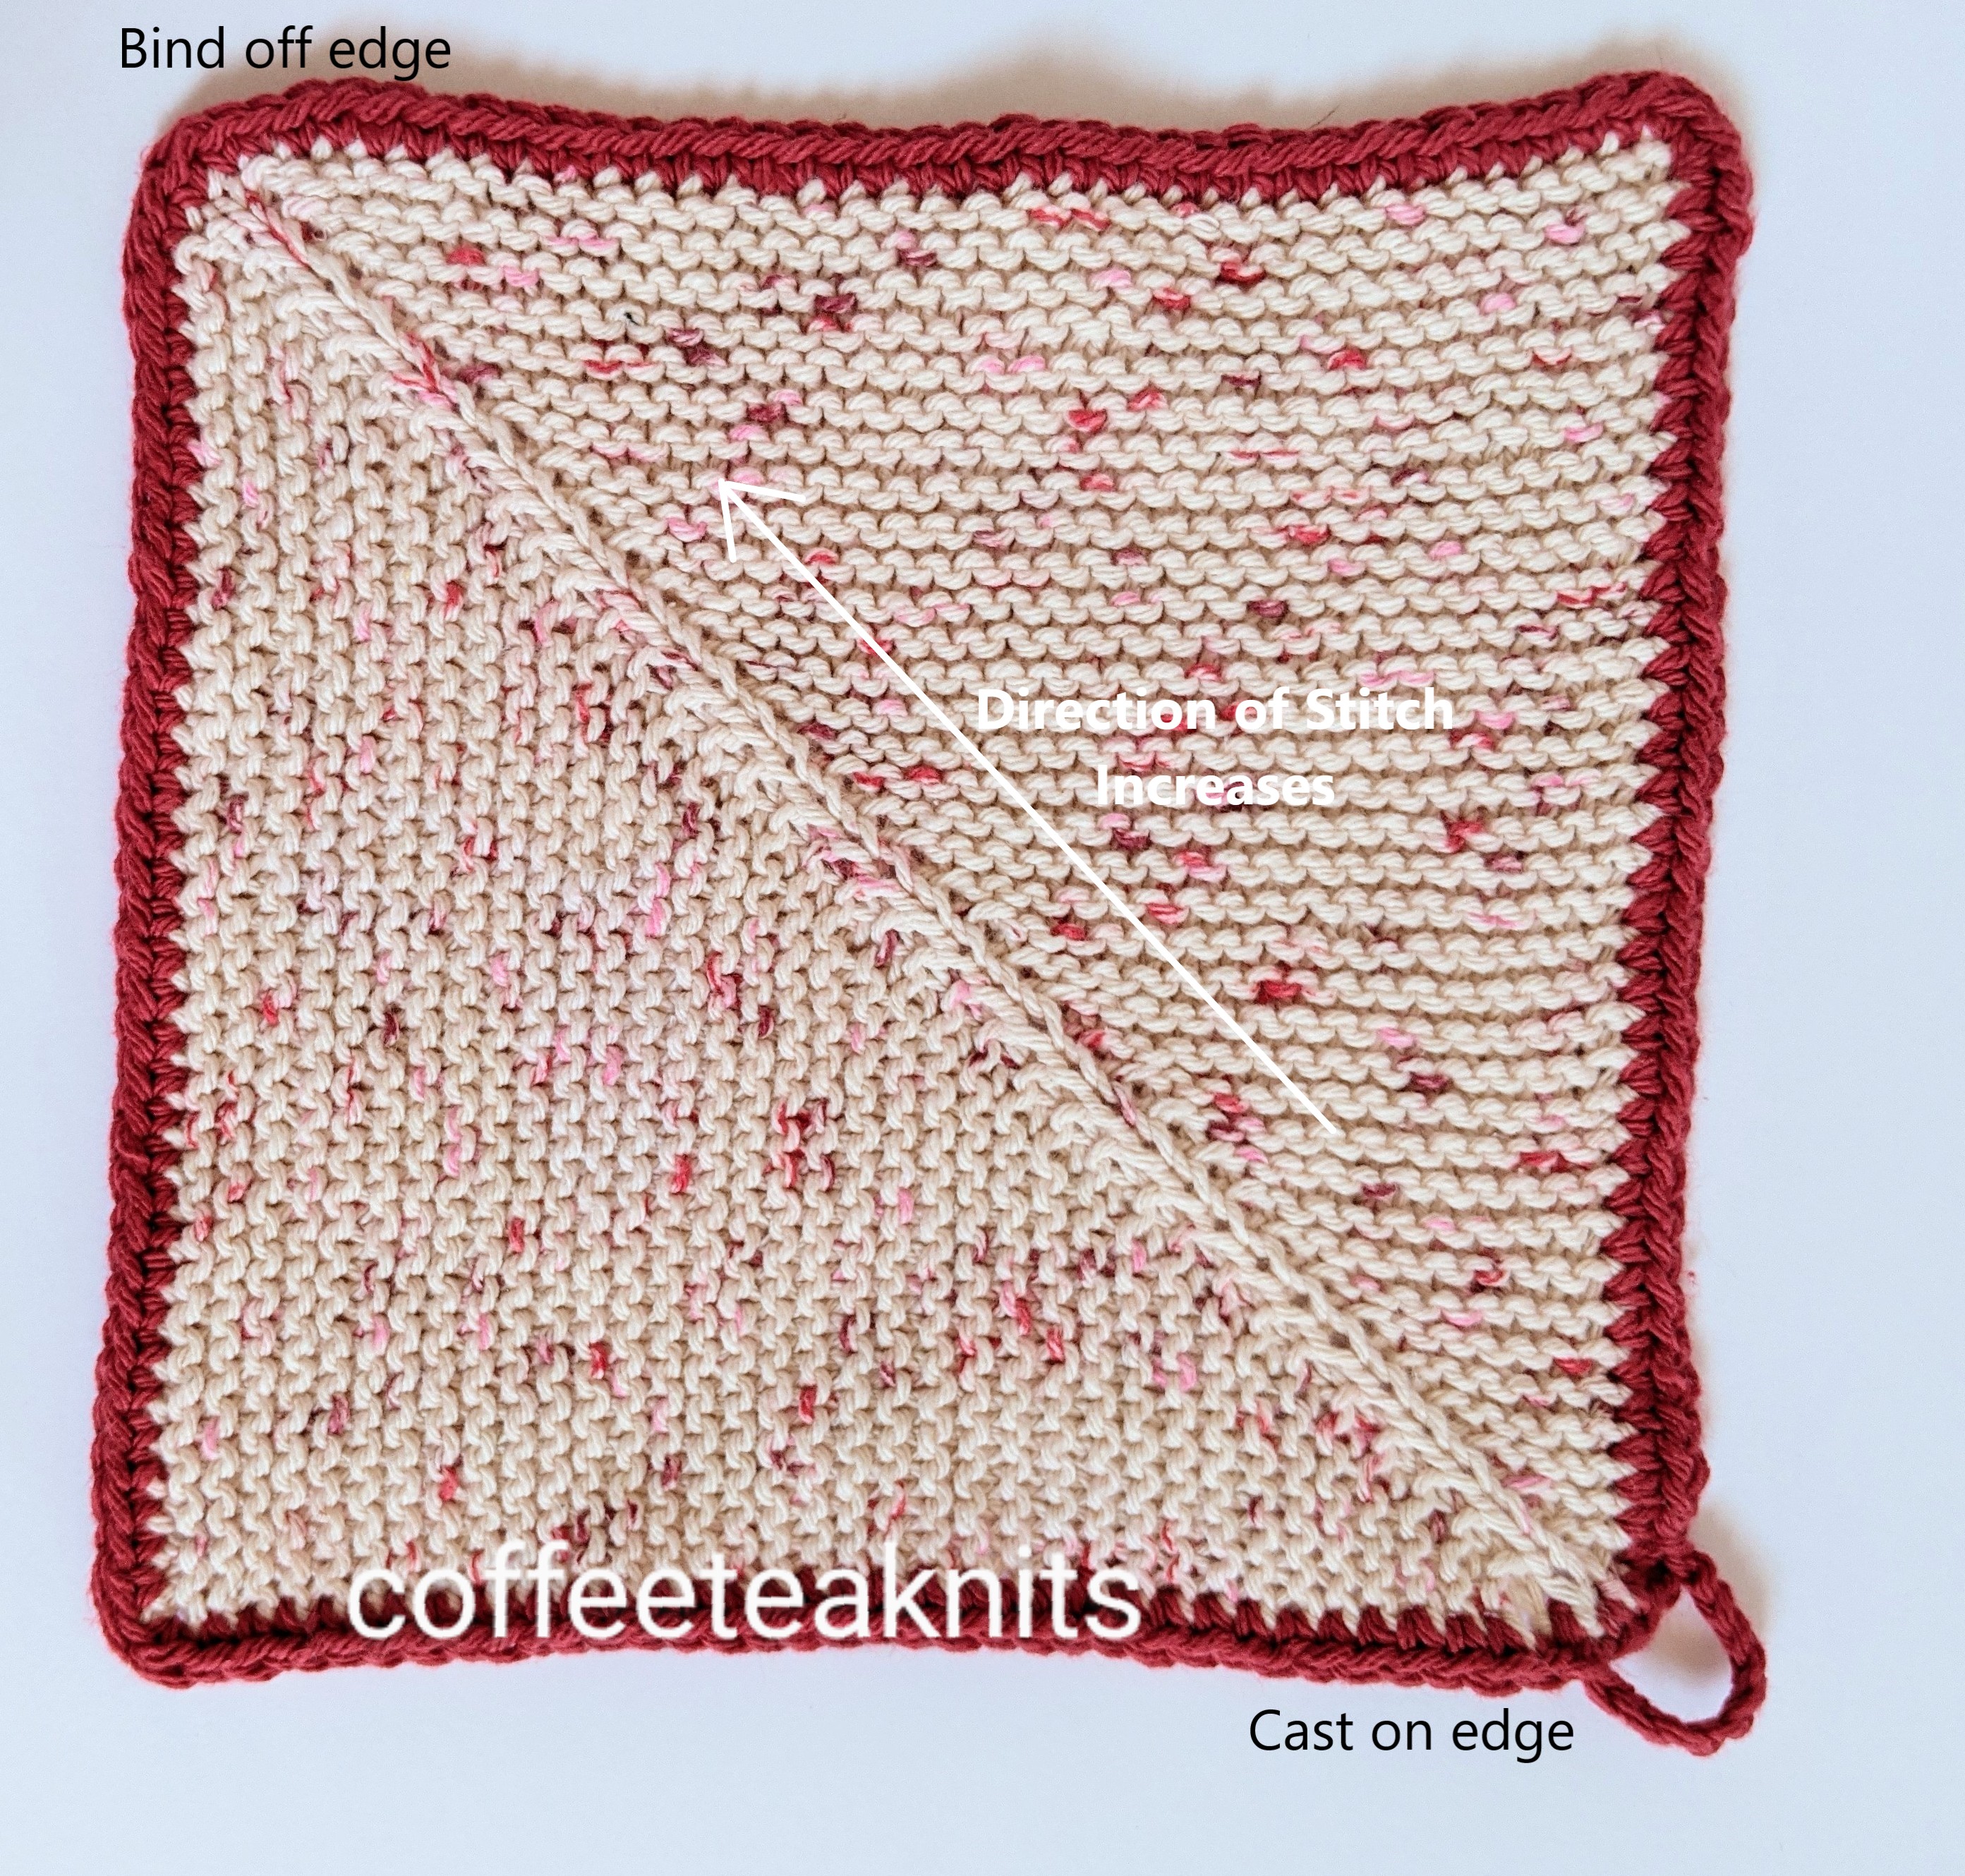
I’ve made mitered square dishcloths (July 2020 post ) by casting on a specific number of stitches and then knitting the double decreases every other row to create the mitered square. The Upside Down Dishcloth is a garter stitch mitered square dishcloth knit flat and in reverse. The advantages of knitting a reverse mitered square include fewer stitches to cast on and an avoidance of playing yarn chicken. With this reverse mitered technique dishcloths can be knit as large or as small depending on the yardage of yarn available. It’s also a great way to use up leftover over yarn from other projects. For the Upside Down Dishcloth, a few stitches were cast on and the mitered square dishcloth was knitted with double increases every other row.
Advertisements
Advertisements
Materials Needed: Yarn: PREMIER HOME® COTTON CONE YARN Colorway: Jelly Dots Yarn: Lily Sugar’n Cream in Colorways: Country Red (for the single crochet border) Knitting Needles: US #8 and US #7 Crochet hook: US size 7 or 4.5 mm crochet hook Gauge: Not needed for this project
Abbreviations:
K: Knit
P: Purl
Kfb: Knit front and back (knit one stitch first in the front and then knit the same stitch in the back before slipping it off the left needle – 1 stitch increase)
rm: remove marker
sm: slip marker
wyif S1: with yarn in front slip one stitch purlwise
RS: right side
WS: wrong side
Advertisements
The Upside Down Dishcloth (text and images for personal use only):
PLEASE SUBSCRIBE FOR THE FREE PATTERN. THANK YOU
Subscribe to continue reading
Subscribe to get access to the rest of this post and other subscriber-only content.
This month has been quite overwhelming in terms of snow and icy temperatures. I’ve spent most of the month staying indoors bundled up in sweaters and other knitwear for warmth and of course keeping busy with knitting, weaving or crocheting. I had some of Malabrigo Rios yarn left over from knitting the “Goes with Everything Cowl” last month. There was just enough yarn leftover (about 27 – 28 grams) to knit the Goes with Everything Earwarmer.
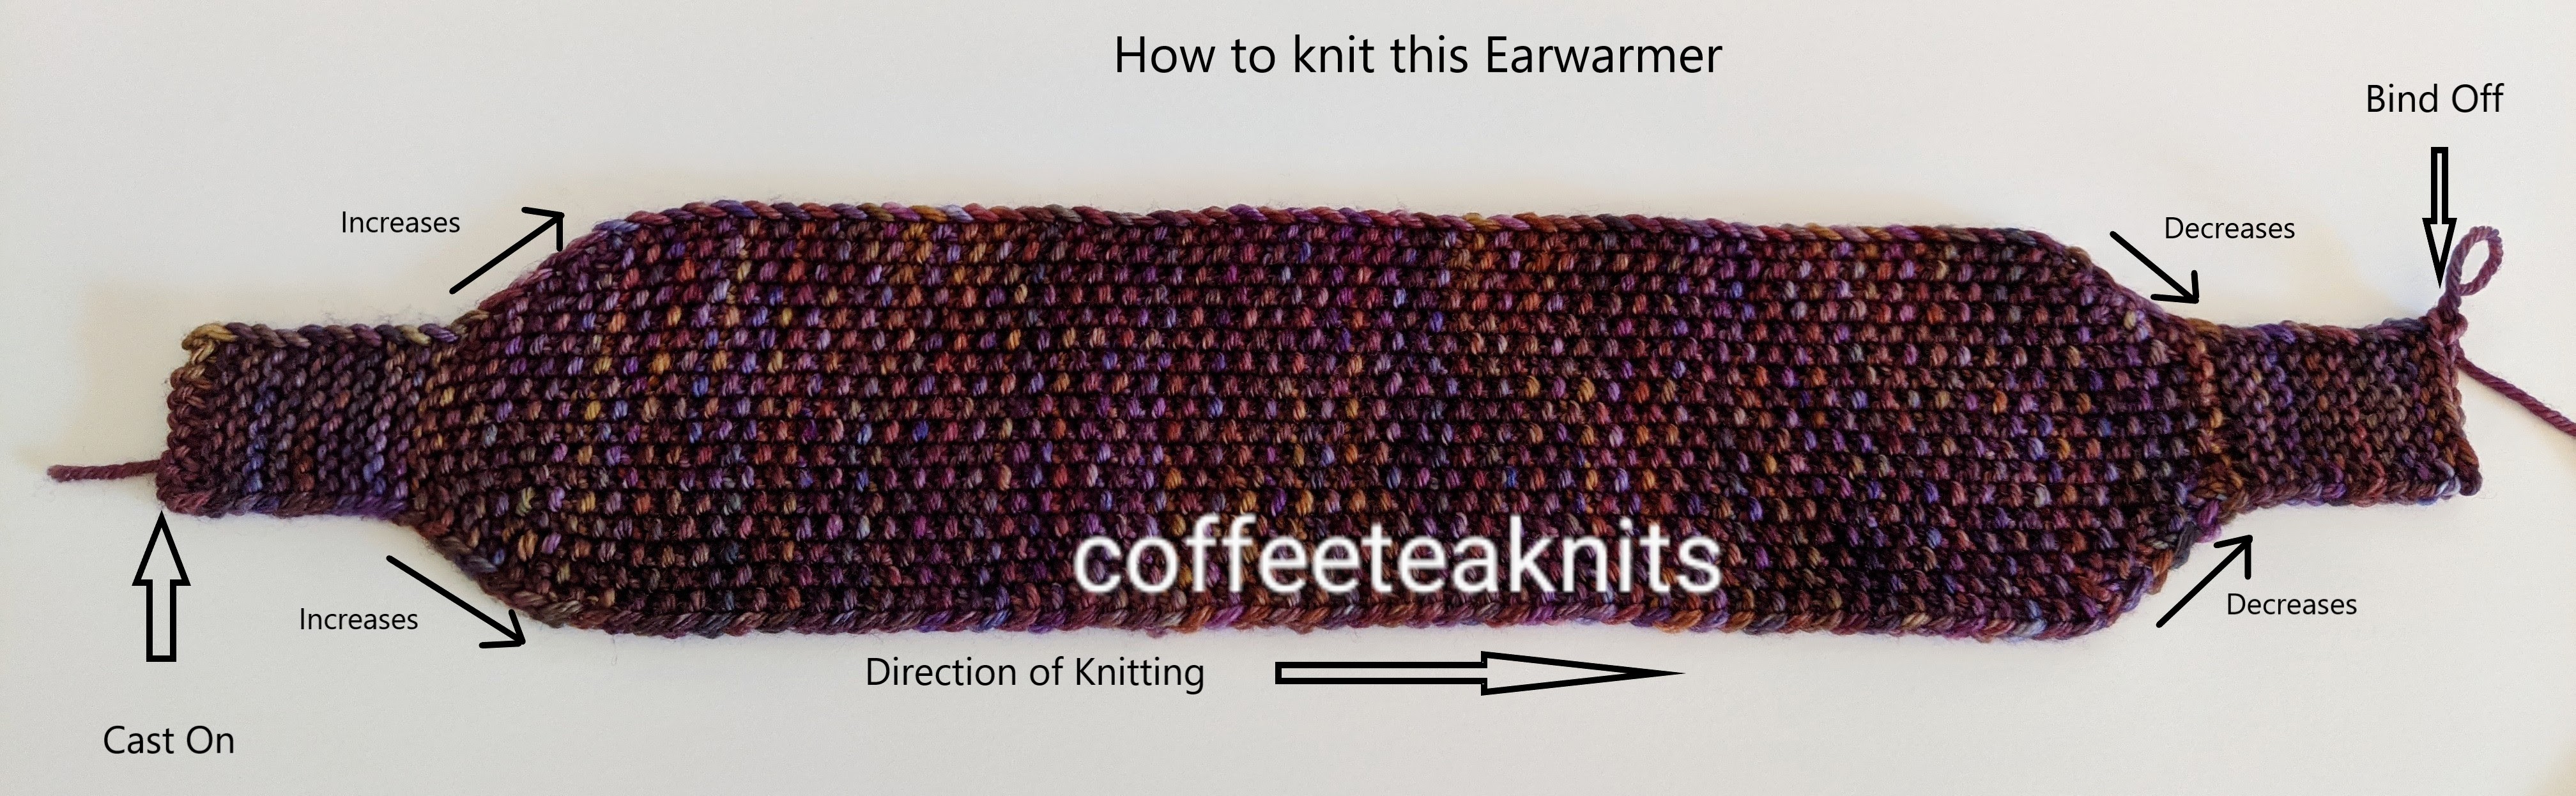
The earwarmers I’ve knit in the past have been knit in the round. I wear them but I’ve found that they tend to curl up in the back when my hair is tied up in a ponytail or a bun. To avoid the earwarmer from curling up in the back, I knit Goes with Everything Earwarmer flat from one side to the other with a series of increases and decreases.
It is first knit in garter stitch pattern for a couple of inches, then increased by 2 stitches every other row for another inch or so (customizable) in seed stitch pattern. The earwarmer is knit straight in seed stitch pattern with no increases or decreases for a specific (customizable) length, and then decreased every other row to the original number of stitches. It is knit again in garter stitch for a couple of inches and then bound off. The two garter stitch sides are joined using the zig zag crochet method.
Goes with Everything Earwarmer Pattern (text and images for personal use only):
Yarn: Malabrigo Yarn – Rios in the RIO877 (Queguay) colorway Knitting Needles: US #6 and #7 for knitting the earwarmer. US #8 for casting on and binding off. Crochet hook: US size 7 or 4.5 mm crochet hook Gauge: 16 stitches/ 4 inches (this pattern is generic so gauge not so critical) Abbreviations:
K: Knit
P: Purl
Kfb: Knit front and back (knit one stitch first in the front and then knit the same stitch in the back before slipping it off the left needle – 1 stitch increase)
K2tog: Knit the first two stitches together on the left needle (1 stitch decrease)
pm: place marker
rm: remove marker
sm: slip marker
wyif S1: with yarn in front slip 1 stitch purlwise
RS: right side
WS: wrong side
The seed stitch pattern: Row 1 (RS): *K1, P1*; repeat from *…* to end of the row Row 2 (WS): *P1, K1*; repeat from *…* to end of the row *Knit in seed stitch pattern: Knit the purl stitches and purl the knit stitches
With a size US #8 knitting needle cast on 9 stitches start knitting with US #6 knitting needle the following garter stitch pattern:
Row1 – Setup row (RS): K1, pm, K7, pm, wyif S1
Row2 (WS): K1, sm, K7, sm, wyif S1
Repeat Row 2 – 18 more times (about 2 inches in length)
Increase section (2 stitches increased every other row): With US #7 needles knit this section in seed stitch pattern
Row 1 (RS): K1, sm, Kfb, *knit in seed stitch pattern till 1 stitch before marker, Kfb, sm, wyif S1
Row 2 (WS): K1, sm, K1, *knit in seed stitch pattern till 1 stitch before marker, K1, sm, wyif S1
Repeat these two rows 5 more times for a total of 19 stitches (customize to your size by adding or subtracting these row repeats to the length that will cover your ears)
Straight knitting with no increases or decreases section (customize to your size by measuring the number of inches from one ear to the other and knit about 2 to 4 inches less for negative ease): Continue in knitting with US #7 knitting needle and seed stitch pattern
Row 1 (RS): K1, sm, *K1, P1*; repeat from *…* to 1 stitch before marker, K1, sm, wyif S1
Row 2 (WS): K1, sm, K1, *P1, K1*; repeat from *…* till marker, sm, wyif S1
Repeat these two rows till the knitted piece measures about 15 inches from cast on edge (add or subtract row repeats to your specific size)
Decrease section (2 stitches decreased every other row): With US #7 knitting needle and seed stitch pattern
Row 1 (RS): K1, sm, K2tog, *knit in seed stitch pattern till 1 stitch before marker, K2tog, sm, wyif S1
Row 2 (WS): K1, sm, K1, *knit in seed stitch pattern till 1 stitch before marker, K1, sm, wyif S1
Repeat these two rows 5 more times decreasing the number of stitches to 9 (if your stitch count was more or less than 19 stitches, add or subtract these row repeats till 9 stitches)
With US #6 knitting needle knit the following garter stitch pattern:
Row1(RS): K1, sm, K7, sm, wyif S1
Row2 (WS): K1, sm, K7, sm, wyif S1
Repeat these two rows 9 more times (about 2 inches in length). Bind off with US #8 knitting needle and hold the remaining stitch with a removable stitch marker.
Crochet join (optional):
Insert a size 7 or 4.5 mm crochet hook in the remaining stitch, chain one, and align the two sides facing RS of the knitted piece together on the RS. Use the zig zag slip stitch crochet join method to join the two sides together (several online video tutorials are available on YouTube for this crochet join method).
Alternately, the two sides can be joined with any other join method of choice.
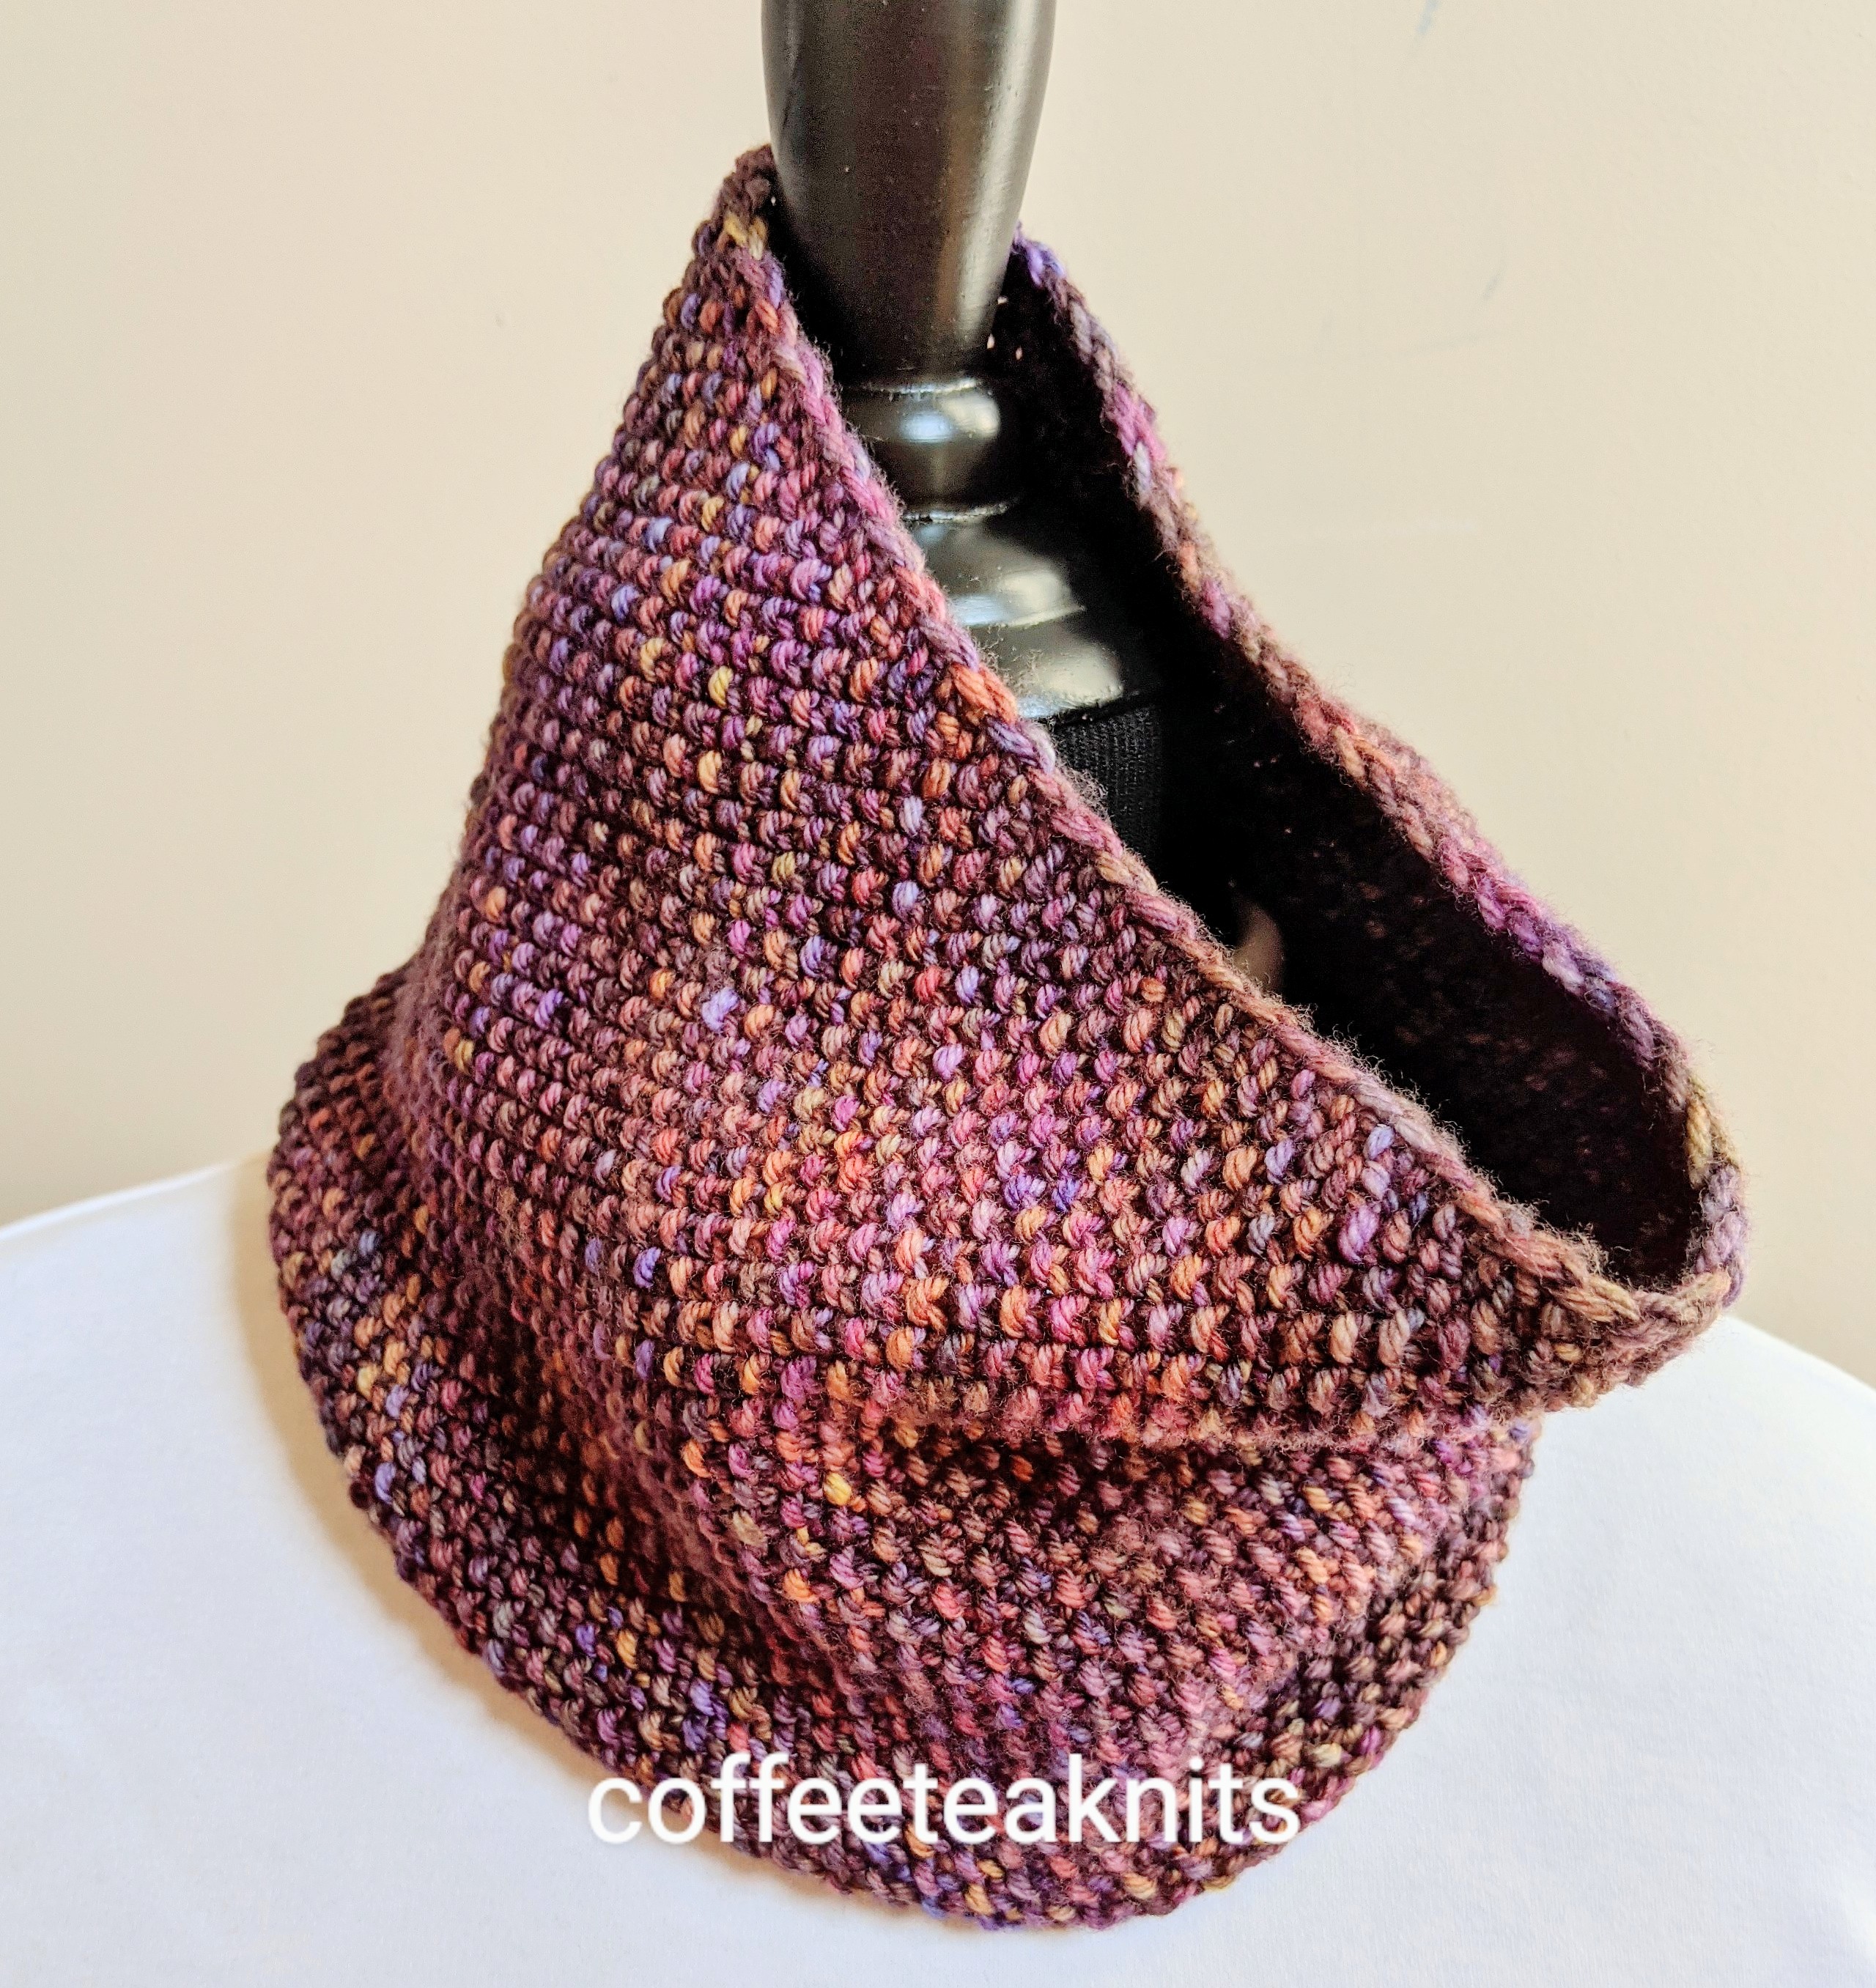
Hello fellow knitters and crocheters, welcome to my first blog post of 2021. It’s common to write about one’s knitting and crocheting goals for the year, but I will skip all that. Instead, I will write about how I knit the Goes with Everything Cowl. I chose this name for the cowl because the yarn colorway seems to go with everything I have in my wardrobe. I purchased this yarn (one skein) a couple of years ago on a wonderful summer vacation trip. This cowl was a quick and simple knit and I’m satisfied with how it turned out. I’ll be wearing it quite a bit during this frigidly cold winter.
The cowl is knitted flat in a rectangle from one corner to another. The two shorter sides of the rectangle are then joined to make a warm and comfortable circular cowl. You begin with casting on one stitch and increase two stitches every other row till the desired width is reached. The cowl is then worked on for the desired length with no net increase. Lastly the cowl is decreased two stitches every other row till one stitch is left on the needle. The shorter sides of the knitted rectangle are then joined together using the zigzag crochet join method.
Advertisements
Materials Needed: Yarn: Malabrigo Yarn – Rios in the RIO877 (Queguay) colorway Knitting Needles: US #7 Crochet hook: US size 7 or 4.5 mm crochet hook Gauge: 16 stitches/ 4 inches (this pattern is generic so gauge not so critical)
Abbreviations:
K: Knit
P: Purl
Kfb: Knit front and back (knit one stitch first in the front and then knit the same stitch in the back before slipping it off the left needle – 1 stitch increase)
K2tog: Knit the first two stitches together on the left needle (1 stitch decrease)
pm: place marker
rm: remove marker
sm: slip marker
wyif: with yarn in front
RS: right side
WS: wrong side
Advertisements
Goes with Everything Cowl Pattern (text and images for personal use only):
PLEASE SUBSCRIBE FOR THE FREE PATTERN. THANK YOU
Subscribe to continue reading
Subscribe to get access to the rest of this post and other subscriber-only content.
2020 has been quite a year hasn’t it? It will not be forgotten any time soon. The coronavirus pandemic with the stay at home order, minimal social gatherings, travel restrictions, ongoing family and personal health issues, hurricane, hailstorm, power outage, milestones and events not celebrated etc. pretty much describes 2020 for me.
And yet I am grateful for all the positive things that did happen this year. Births happened, weddings happened, culinary adventures happened, bread baking happened, gardening happened, neighborly and community kindness happened, knitting and crafting happened, and the courage to design and publish knitting patterns happened
Free patterns available on my July 2020 to November 2020 posts
Corner to corner knitting is another technique that can be used to knit square dishcloths, blankets etc. I like this technique because it’s worked flat and starts with a cast on of just 1 stitch. That 1 stitch through a series of increases and decreases ends in a square dishcloth or a blanket. The dishcloth pattern below is my version of the corner to corner knitting technique using the seed stitch pattern.
Advertisements
The Corner to Corner Dishcloth Pattern (text and images for personal use only):
Yarn: Lily Sugar’n Cream in Colorways: Potpourri Ombre and Country Red Knitting Needles: US #7 Crochet hook: US size 7 or 4.5 mm crochet hook Gauge: Not needed for this project
Advertisements
Abbreviations:
K: Knit
P: Purl
Kfb: Knit front and back (knit one stitch first in the front and then knit the same stitch in the back before slipping it off the left needle – 1 stitch increase)
K2tog: Knit the first two stitches together on the left needle (1 stitch decrease)
ssk: slip slip knit (slip 2 stitches to right hand needle then insert the left needle in front of the two slipped stitches and knit them together)
pm: place marker
rm: remove marker
sm: slip marker
wyif: with yarn in front
RS: right side
WS: wrong side
Advertisements
The Corner to Corner Dishcloth Pattern (text and images for personal use only):
The seed stitch pattern: Row 1 (RS): *K1, P1*; repeat from *…* to end of the row Row 2 (WS): *P1, K1*; repeat from *…* to end of the row *Knit in seed stitch pattern: Knit the purl stitches and purl the knit stitches
Advertisements
With a size US #7 knitting needle cast on 1 stitch with the Potpourri Ombre colorway.
Increase Rows:
Row 1 (RS): Kfb and turn to the WS row
Row 2 (WS): K2
Row 3 (RS): Kfb, Kfb
Row 4 (WS): K1, pm, K2, pm, wyif S1
Row 5 (RS): K1, sm, Kfb, Kfb, sm, wyif S1. Place a removable stitch marker for the RS row.
Last year, I purchased a single skein of the Lion Brand ZZ Twist yarn in the Periwinkle colorway. I wanted to see how this yarn spun with a “Z ” twist would knit up. I knit this Increases and Decreases Cowl (free pattern below) using a blanket rib knit stitch pattern. This stitch pattern is a two round pattern where all the stitches are doubled in the first round, and then decreased to the original number of stitches in the second round.
Advertisements
Materials Needed: Yarn: Lion Brand ZZ Twist yarn in the Periwinkle colorway Circular Knitting Needles: US #8 and US #9 Knitting Needle: US #10 for cast on Gauge: 16 stitches / 4 inches in blanket rib stitch pattern with US #8 needles
Advertisements
Abbreviations:
K: Knit
P: Purl
Kfb: Knit front and back (knit one stitch first in the front and then knit the same stitch in the back before slipping it off the left needle – 1 stitch increase) – Tutorial Series: Kfb (Knit front and back)
I knitted this Striped Spiral Hotpad/Trivet in the round with a series of decreases in a spiral towards the center. The trivet is knitted in the garter stitch pattern with 2 strands of yarn held together. The stripes in the trivet are made by alternating the two different yarn colorways for each garter ridge. I used yarn I already had in my stash from previous leftover projects so all the colorways may or may not be currently available. You can use any other yarn colorway to knit this trivet.
Advertisements
The Striped Spiral Hotpad/Trivet Pattern (text and photo for personal use only):
Yarn: Patons Classic Wool Worsted (Colorways: C1- Cognac Heather; C2 – Natural Mix) Circular Knitting Needles: US #8 and US #10 Crochet hook: I/9 or 5.5 mm crochet hook Gauge: 16 stitches / 4 inches in garter stitch pattern (although not really necessary)
Advertisements
Abbreviations:
K: Knit
P: Purl
K2tog: Knit the first two stitches on the left needle together
sm: slip marker
BOR: beginning of round
C1: Yarn colorway – Cognac Heather
C2: Yarn colorway – Natural Mix
Advertisements
With a circular US #10 needle, cast on 120 stitches using the long tail cast on and 2 strands of yarn C1 held together
Transfer 20 stitches onto a size US #8 (5.00 mm) 16-inch circular knitting needle and place a stitch marker. Do this for the remaining stitches
Advertisements
Slip a BOR marker and join the round making sure the stitches are not twisted and knit the following:
Round 1: With 2 strands of yarn C1 held together – [Knit till 2 stitches before marker, K2tog, sm,] 5 times, knit till 2 stitch before BOR marker, K2tog, slip BOR marker
Round 2: With 2 strands of yarn C1 held together – [Purl till 1 stitch before marker, K1, sm] 5 times, purl till 1 stitch before BOR marker, K1, slip BOR marker
Advertisements
Round 3: With 2 strands of yarn C2 held together – [Knit till 2 stitches before marker, K2tog, sm] 5 times, knit till 2 stitch before BOR marker, K2tog, slip BOR marker
Round 4: With 2 strands of yarn C2 held together – [Purl till 1 stitch before marker, K1, sm] 5 times, purl till 1 stitch before BOR marker, K1, slip BOR marker
Advertisements
Repeat rounds 1 to 4 till 12 stitches remain on the needles ending with yarn C2
With 2 strands of yarn C1 held together – [K2tog] (6 times) removing all markers (6 stitches remain)
Cut yarn and with a darning needle thread tail through the 6 stitches, pull tight and fasten off
Advertisements
Starting at the beginning of the cast on, single crochet with hook size I/9 all around the trivet with 2 strands of yarn C2 held together